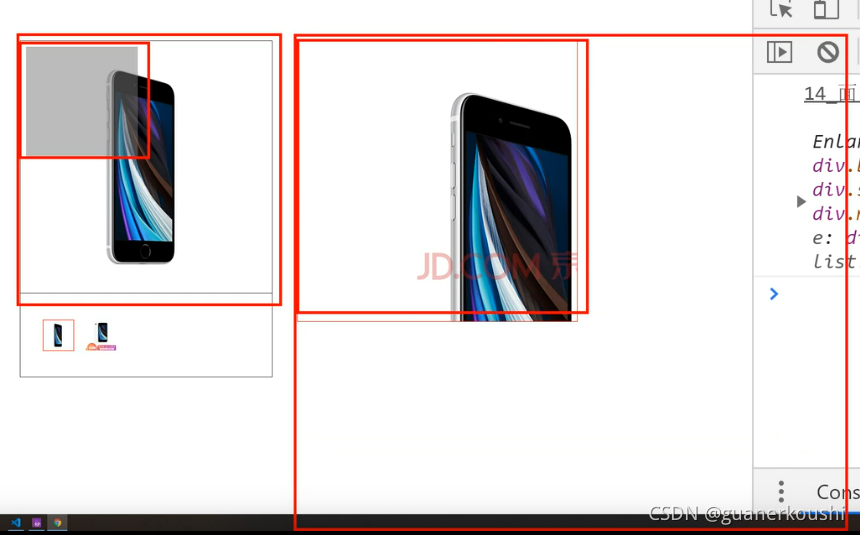
面向对象的放大镜
准备构造函数
1. show 盒子 属性: 移入移出事件
2. mask 盒子 属性: 显示隐藏 / 移动
3. enlarge 盒子 属性: 显示隐藏 / 背景图片移动
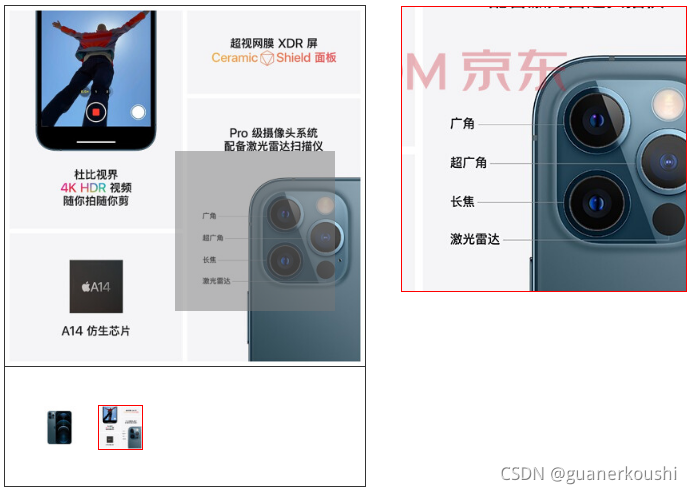
4. list 盒子 属性: 切换图片
5. 一对方法
<style>
*{
margin: 0;
padding: 0;
}
.box{
width: 450px;
height: 600px;
border: 1px solid #333;
margin: 100px;
position: relative;
}
.box > .show{
width: 450px;
height: 450px;
border-bottom: 1px solid #333;
position: relative;
cursor: none;
}
.box > .show .mask{
width: 200px;
height: 200px;
background-color: rgba(120, 120, 120, .5);
position: absolute;
left: 10px;
top: 10px;
display: none;
pointer-events: none;
}
.box > .show .mask.active{
display: block;
}
img{
width: 100%;
height: 100%;
display: block;
}
.box > .enlarge{
width: 500px;
height: 500px;
border: 1px solid red;
position: absolute;
left: 110%;
top: 0;
background: url(./imgs/big.jpg) no-repeat;
background-size: 800px 800px;
background-position: 0 0;
display: none;
}
.box > .enlarge.active{
display: block;
}
.box > .list{
width: 100%;
height: 149px;
box-sizing: border-box;
padding: 47px 40px;
}
.list > p{
width: 54px;
height: 54px;
float: left;
margin-right: 20px;
border: 1px solid transparent;
cursor: pointer;
}
.list > p.active{
border: 1px solid red;
}
</style>
<body>
<div class="box">
<div class="show">
<img src="./imgs/show.jpg" alt="">
<div class="mask"></div>
</div>
<div class="enlarge"></div>
<div class="list">
<p class="active">
<img src="./imgs/small.jpg"
data-show="./imgs/show.jpg"
data-big="./imgs/big.jpg"
alt="">
</p>
<p>
<img src="./imgs/small1.jpg"
data-show="./imgs/show1.jpg"
data-big="./imgs/big1.jpg"
alt="">
</p>
</div>
</div>
</body>
<script src="./enlarge.js"></script>
<script>
new Enlarge('.box')
</script>
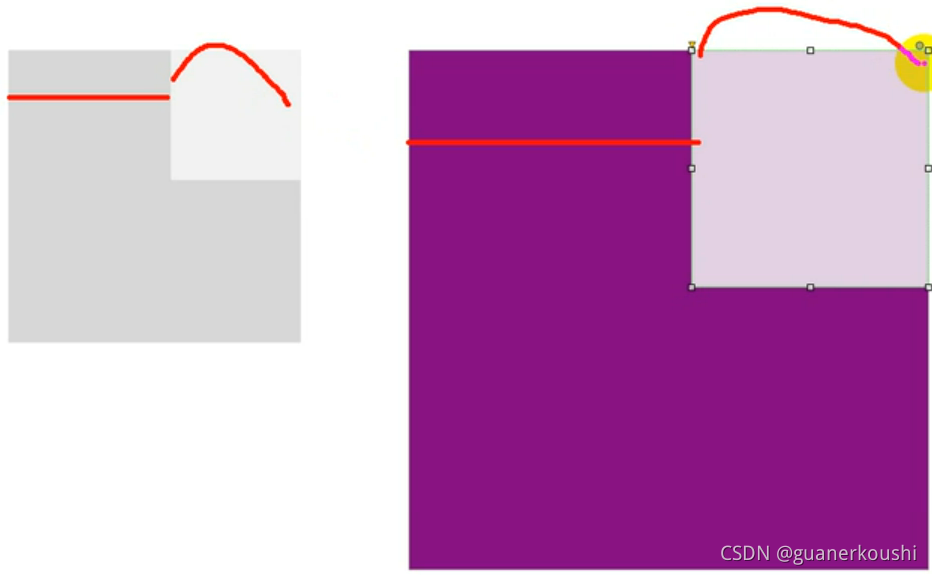
调整盒子示意图
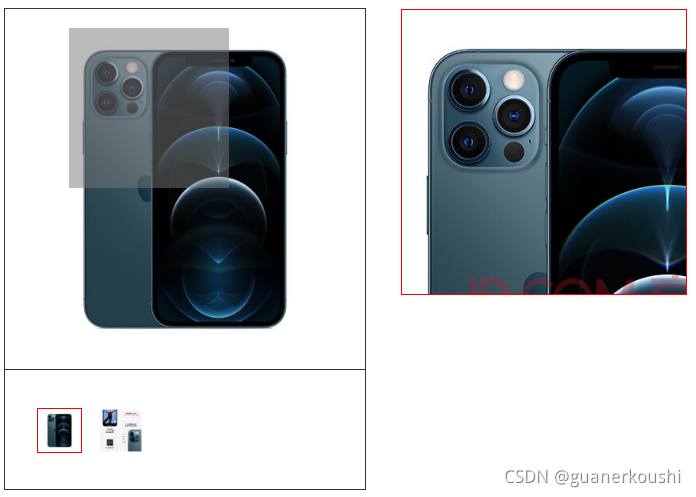
右边背景图跟着动示意图
function Enlarge(ele){
this.ele = document.querySelector(ele)
this.show = this.ele.querySelector('.show')
this.mask = this.ele.querySelector('.mask')
this.enlarge = this.ele.querySelector('.enlarge')
this.list = this.ele.querySelector('.list')
this.init()
}
Enlarge.prototype.init = function(){
this.getProp()
this.overOut()
this.setScale()
this.move()
this.bindEvent()
}
Enlarge.prototype.overOut = function(){
this.show.addEventListener('mouseover', () => {
this.mask.classList.add('active')
this.enlarge.classList.add('active')
})
this.show.addEventListener('mouseout', () => {
this.mask.classList.remove('active')
this.enlarge.classList.remove('active')
})
}
Enlarge.prototype.getProp = function(){
this.mask_width = parseInt(window.getComputedStyle(this.mask).width)
this.mask_height = parseInt(window.getComputedStyle(this.mask).height)
this.show_width = this.show.offsetWidth
this.show_height = this.show.offsetHeight
const bg = window.getComputedStyle(this.enlarge).backgroundSize.split(' ')
this.bg_width = parseInt(bg[0])
this.bg_height = parseInt(bg[1])
}
Enlarge.prototype.setScale = function(){
this.enlarge_width = this.mask_width / this.show_width * this.bg_width
this.enlarge_height = this.mask_height / this.show_height * this.bg_height
this.enlarge.style.width = this.enlarge_width + 'px'
this.enlarge.style.height = this.enlarge_height + 'px'
}
Enlarge.prototype.move = function(){
this.show.addEventListener('mousemove', (e) => {
e = e || window.event
let x = e.offsetX - 100
let y = e.offsetY - 100
if(x <= 0) x = 0
if(y <= 0) y = 0
if(x >= this.show_width - this.mask_width) x = this.show_width - this.mask_width
if(y >= this.show_height - this.mask_height) y = this.show_height - this.mask_height
this.mask.style.left = x + 'px'
this.mask.style.top = y + 'px'
const moveX = this.enlarge_width * x / this.mask_width
const moveY = this.enlarge_height * y / this.mask_height
this.enlarge.style.backgroundPosition = `-${ moveX }px -${ moveY }px`
})
}
Enlarge.prototype.bindEvent = function(){
this.list.addEventListener('click', e => {
e = e || window.event
const target = e.target || e.srcElement
if(target.nodeName === 'IMG'){
for(let i = 0; i < this.list.children.length; i++){
this.list.children[i].classList.remove('active')
}
target.parentElement.classList.add('active')
const showImg = target.dataset.show
const enlargeImg = target.dataset.big
console.log(showImg, enlargeImg)
this.show.firstElementChild.src = showImg
this.enlarge.style.backgroundImage = `url(${enlargeImg})`
}
})
}


 222
222


 被折叠的 条评论
为什么被折叠?
被折叠的 条评论
为什么被折叠?
 到【灌水乐园】发言


