一、iframe标签
用于在一个网页里面打开另一个网页
<iframe src="https://www.taobao.com" frameborder="0" width="500" height="600"></iframe>
- src :指定显示的网页地址
- width 宽度
- height 高度
- scrolling 是否显示滚动条 yes\no
- frameborder 是否显示边框 1\0
显示某宝网站

和a标签一起运用,在页面窗口内打开其他网页
 <a href="https://www.taobao.com" target="chuangk">打开淘宝</a>
         <iframe  frameborder="0" width="500" height="600" scrolling="yes" name="chuangk"></iframe>

二、CSS概念、写法、引入方式
1、概念
CSS(Cascading Style Sheets)层叠样式表 决定网页的样式
学习CSS最重要的事情是学习和掌握CSS样式属性名和对应的属性值,并且灵活运用
2、基本写法和语法
选择器、样式属性名、样式属性值
选择器{
    样式属性名:样式属性值;
    样式属性名:样式属性值;
}
选择器:用来匹配对应的标签,目的就是让CSS可以知道去修饰哪些内容
3、引入方式
第一种:写在html里面的style标签之间,style一般放在head标签里面
<html>
     <head>
          <meta  charset="utf-8" >
          <title>Hello World</title>
          <style>
               h1{
                    color:blue
               }
               h3{
                    color:red
               }
          </style>
     </head>
     <body>
        <h1>你好</h1>
        <h2>我不好</h2>
        <h3>你为什么不好呢?</h3>
        <h1>没有为什么</h1>
     </body>
</html>

第二种:写在外部的CSS文件里面,然后通过link标签引入这个样式文件
    <link rel="stylesheet" href="style.css">
    <h4>好吧</h4>


第三种:写在标签的style属性里面
<标签名 style=“样式属性名:样式属性值 样式属性名2:样式属性值2”;>内容</标签名>
<h5 style="color:red">不好吧</h5>

4、常用选择器
- 标签选择器 标签名
- 通配选择器 * 所有标签元素
  *{
       background-color:black;
   }
- class选择器 .class值
  .ok{
       color:blue
   }
  <h5 class="ok">不好吧</h5>
- ID选择器
  #ok{
       color:blue
   }
  <h5 id="ok">不好吧</h5>
- 后代选择器
选择器1 选择器2 { 样式描述 }
<html>
     <head>
          <meta  charset="utf-8" >
          <title>Hello World</title>
          <style>
                    h1{
                         color:red
                    }
                    h1{
                         color:blue
                    }

                    div h1{
                         color:black
                    }
          </style>
     </head>
     <body>
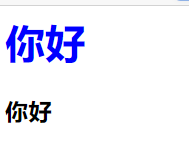
        <h1>你好</h1>
        <div>
             <h3>你好</h3>
        </div>
     </body>
</html

如果某个样式已经被前面选择题定义了,后面再次被定义会发生什么?
例子
<!deoctype.html>
<html>
     <head>
          <meta  charset="utf-8" >
          <title>Hello World</title>
          <style>
                    h1{
                         color:red
                    }
                    h1{
                         color:blue
                    }
          </style>
     </head>
     <body>
        <h1>你好</h1>
     </body>
</html>

子代选择器 选择器1>选择器2
<!deoctype.html>
<html>
     <head>
          <meta  charset="utf-8" >
          <title>Hello World</title>
          <style>
                    div h1{
                         color:darkred
                    }
                    .box>h1{
                         color:yellow
                    }
          </style>
     </head>
     <body>
        <h1>你好</h1>
        <div class="box">
          <h1>你好</h1>
          <div class="dd">
               <h3>我好</h3>
          </div>
          <h1>你好</h1>
        </div>
     </body>
</html>
同级的选择器会被后面的覆盖
不同级的选择器优先级如何?
- 通配选择器 权重:0
- 标签选择器 权重:1
- class选择器 权重:10
- id选择器 权重:100
- 内联样式(上述第三种引入方式) 权重:1000
- !important 权重:无穷大
 h1{
       color: pink !important;
 }
三、常用样式属性
border 边框
值: 宽度xpx 类型solid/dotted/dashed 颜色 颜色的单词 / #+色号 / RGB(a,b,c)
多边定义:border : width; type color
单边定义:border-left / right / top / bottom : width type color
- 块元素:默认的宽度是它所在父元素的宽度,默认独占一行
  <style>
               .box{
                    border: 8px dotted red;
                    width: 200px;
                    height: 100px;
               }

  </style>
     </head>
     <body>
          <div class="box">
               <h2>大家好</h2>
          </div>
     </body>

-
行内元素: 行内元素,宽高无效
-
行内块元素:会和行内元素,行内块元素在一行,并且宽高是有效的
   <style>
               input{
                    width:100px;
                    height: 100px;
                    border:2px solid red
               }

          </style>
     </head>
     <body>
          <input type="text">
     </body>

字体
font-size 字体大小 一般pc端,最小字体是12px
     <style>
               h1{
                    font-size: 20px;
               }
          </style>
     </head>
     <body>
          <h1>呵呵</h1>
     </body>
font-family 字体类型
     <style>
               h1{
                    font-size: 20px;
               		font-family:"宋体";
               }
          </style>
     </head>
     <body>
          <h1>呵呵</h1>
     </body>
font-weight 控制字体加粗 normal(不加粗) \ bold(加粗)\ 数字
font-style 控制字体倾斜 italic(倾斜) \ normal(不倾斜)
文本
text-align 设置文本水平对齐方式 center \ left \ right \ justify(两端对齐)
text-decoration 设置删除线 line-through \ none
text-transform 大小写转化 uppercase(大写) \ lowercase(小写) \ capitalize(将第一个字母变成大写)
letter-spacing 字间距 : 数字px;
line-height 行高 : 数字px;
white-space 控制换行 nowrap \ normal(不换行)
overflow : hidden; 超出的部分隐藏
text-overflow : ellipsis 显示省略号
列表
list-style:none 去除列表前面的点
list-style-type 规定点的类型
list-style-image 规定点的类型变成图片
list-style-position 规定点的位置是里面还是外面 inside \ outside
背景
background-color 设置背景颜色
background-image : url(地址) 设置背景为图片
background-repeat : no-repeat(没有平铺) repeat-x(横向平铺) repeat-y(纵向平铺)
background-size: 数字 \ 百分号 \ cover \ contain
background-position 背景图靠近边框的位置
表格
border-collapse 表格风格效果 collapse(合并) separate(展开)
vertical-align: 单元格内容垂直方向 top bottom middle
轮廓、显示、隐藏
outline 边框周边加入其他元素 width \ style \ color
box-shadow 边框阴影 (横向偏移 纵向偏移 阴影模糊距离 阴影的大小 颜色 内部 \ 外部)
display none(消失) \ inline(行内元素) \ inline-block \ block(块元素)
visibility hidden(也是消失,但是位置还会保留) visible(显示)
opacity 透明度 0-1
a 的链接样式
- link 鼠标没有点击的时候
- hover 鼠标移动到上面的时候 所有的标签都有hover
- active 鼠标点击的时候
- visited 鼠标点击,浏览过后
四、浮动
如何将块元素放在同一行,且宽高有效
1、变成行内块元素 line-block (很大的兼容性问题)
<!deoctype.html>
<html>
     <head>
          <meta  charset="utf-8" >
          <title>Hello World</title>
          <style>
               .box{
                    width:800px;
                    height:600px;
                    background-color: #ddd;
                    font-size: 0px;
               }
               .a{
                    width: 200px;
                    height: 600px;
                    background-color: blue;
                    display: inline-block;
               }
               .b{
                    width: 400px;
                    height: 600px;
                    background-color: green;
                    display: inline-block;
               }
               .c
               {
                    width: 200px;
                    height: 600px;
                    background-color: black;
                    display: inline-block;
               }
          </style>
     </head>
     <body>
     <div class="box">
          <div class="a"></div>
          <div class="b"></div>
          <div class="c"></div>

     </div>
     </body>
</html>

2、浮动原理
float:left \ right \ none
<!deoctype.html>
<html>
     <head>
          <meta  charset="utf-8" >
          <title>Hello World</title>
          <style>
                .content{
                    width: 150px;
                    height: 150px;
                    line-height: 50px;
                    font-size: 40px;
                    text-align: center;
                    float: left;
               }
               .a{
                    background-color: blue;

               }
               .b{
                    background-color: green;

               }
               .c{
                    background-color: pink;
               }
          </style>
     </head>
     <body>
     <div >
          <div class="a content">1</div>
          <div class="b content">2</div>
          <div class="c content">3</div>

     </div>
     </body>
</html>

浮动的元素,其实在网页里面没有位置
解决这个问题:
第一种办法: 给父元素加上一个属性:overflow:hidden
第二种办法:浮动的父元素后面加上一个空的标签,这个空标签有一个属性:clear:both


 1996
1996


 被折叠的 条评论
为什么被折叠?


