


 本文详细指导如何在Red Hat Enterprise Linux 7.5上安装Apache、MariaDB和PHP,包括配置步骤、安全设置、数据库初始化和PHP应用测试,旨在创建一个用于数据测试的定制平台。
本指南搭建基于
rhel 7.5
的
Apache
,
MariaDB
和
PHP
,并创建自定义数据测试系统。
1. Linux
版本说明
Red Hat Enterprise Linux Server release 7.5 (Maipo)
使用对应的
Linux
系统
iso
文件中的包完成
Apache
,
MariaDB
和
PHP
的安装。
2.
环境准备
2.1.
关闭防火墙
# systemctl stop firewalld
2.2.
设置
selinux
为宽容模式
# setenforce 0
2.3.
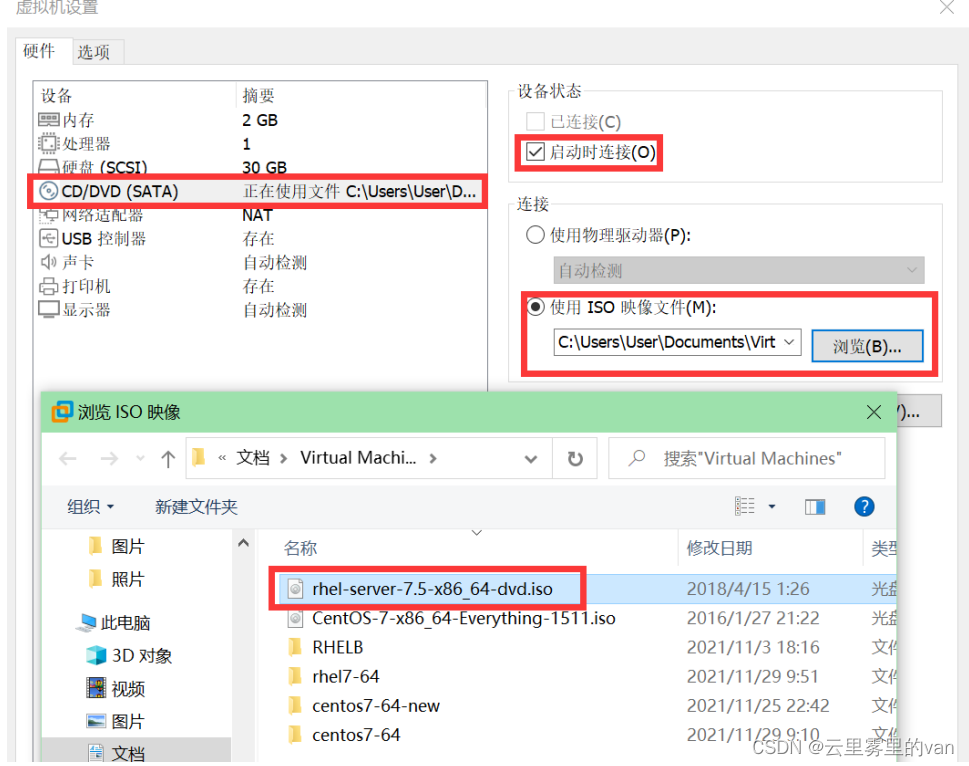
配置本地光盘为
yum
源
2.3.1.
连接
iso
文件到
CD/DVD
设备
2.3.2. 挂载 CD/DVD 设备
# mount /dev/cdrom /media/cdrom2.3.3. 生成 dvd.repo 文件

3.
安装
Apache
1.
使用
yum
命令安装
httpd
软件包
# yum -y install httpd
2.
启动
httpd
服务,并配置开机启动
# systemctl start httpd
# systemctl enable httpd
3.
关闭防火墙,并配置开机不启动
# systemctl stop firewalld
# systemctl disable firewalld
4.
查看
httpd
服务运行状态和链接状态
# systemctl status httpd
# ss -antup | grep 80
5.
测试
httpd
服务
# 在 /var/www/html 目录下写入主页文件
[root@localhost ~]# echo "Hello World" > /var/www/html/index.html
 [root@localhost ~]# curl localhost Hello World
4.
安装
MariaDB
服务器和客户端
4.1.
通过
yum
命令安装
MariaDB
服务器和客户端软件
# yum -y install mariadb-server mariadb
4.2.
启动
mariadb
服务
[root@localhost ~]# systemctl start mariadb
[root@localhost ~]# systemctl status mariadb
● mariadb.service - MariaDB database server
Loaded: loaded (/usr/lib/systemd/system/mariadb.service; enabled; vendor preset: disabled) Active: active (running) since Sun 2021-11-28 16:29:14 PST; 6h ago Main PID: 1408 (mysqld_safe)
CGroup: /system.slice/mariadb.service ├─1408 /bin/sh /usr/bin/mysqld_safe --basedir=/usr └─1678 /usr/libexec/mysqld --basedir=/usr --datadir=/var/lib/mysql --
plugin-dir=/usr/lib64/mysql/plugin --log-error... Nov 28 16:29:09 localhost.localdomain systemd[1]: Starting MariaDB database server... Nov 28 16:29:10 localhost.localdomain mariadb-prepare-db-dir[1295]: Database MariaDB is probably initialized in /var/lib/m...one. Nov 28 16:29:10 localhost.localdomain mysqld_safe[1408]: 211128 16:29:10 mysqld_safe Logging to '/var/log/mariadb/mariadb.log'. Nov 28 16:29:10 localhost.localdomain mysqld_safe[1408]: 211128 16:29:10 mysqld_safe Starting mysqld daemon with database...mysql Nov 28 16:29:14 localhost.localdomain systemd[1]: Started MariaDB database server. Hint: Some lines were ellipsized, use -l to show in full.
4.3.
配置
mariadb
服务开机启动
# systemctl enable mariadb
4.4.
初始化数据库安全
通过
mysql_secure_installation
安全脚本,可以快速配置数据库安全:为
root
用户设置密码;禁止
root
用户远程登录;删除匿名账号;删除
test
数据库;
[root@localhost ~]# mysql_secure_installation
NOTE: RUNNING ALL PARTS OF THIS SCRIPT IS RECOMMENDED FOR ALL MariaDB SERVERS IN PRODUCTION USE! PLEASE READ EACH STEP CAREFULLY!
In order to log into MariaDB to secure it, we'll need the current password for the root user. If you've just installed MariaDB, and you haven't set the root password yet, the password will be blank, so you should just press enter here.
Enter current password for root (enter for none): # 输入 root 当前密码,没有密码,直 接按回车

OK, successfully used password, moving on...
Setting the root password ensures that nobody can log into the MariaDB
root user without the proper authorisation.
Set root password? [Y/n] y # 是否设置 root 密码 --> 选择Y,密码设置为123456
New password:
Re-enter new password:
Password updated successfully!
Reloading privilege tables..
... Success!
By default, a MariaDB installation has an anonymous user, allowing anyone to log into MariaDB without having to have a user account created for them. This is intended only for testing, and to make the installation go a bit smoother. You should remove them before moving into a production environment.
Remove anonymous users? [Y/n] y # 是否删除匿名账号 --> 输入 n ... Success!
Normally, root should only be allowed to connect from 'localhost'. This ensures that someone cannot guess at the root password from the network.
Disallow root login remotely? [Y/n] y # 是否允许 root 远程登录 --> 输入 n ... Success!
By default, MariaDB comes with a database named 'test' that anyone can access. This is also intended only for testing, and should be removed before moving into a production environment.
Remove test database and access to it? [Y/n] y # 是否删除 test 数据库,及其访问权限 --> 输入 n - Dropping test database... ... Success! - Removing privileges on test database... ... Success!
Reloading the privilege tables will ensure that all changes made so far will take effect immediately. Reload privilege tables now? [Y/n] y # 是否立即加载权限表 --> 输入 Y ... Success!
Cleaning up...
All done! If you've completed all of the above steps, your MariaDB installation should now be secure. Thanks for using MariaDB!
5.
安装
php
使用
yum
命令安装
php
和
php-mysql
,
php-mysql
可以让
PHP
连接数据库。
# yum install -y php php-mysql
6.
重启
httpd
服务
# systemctl restart httpd
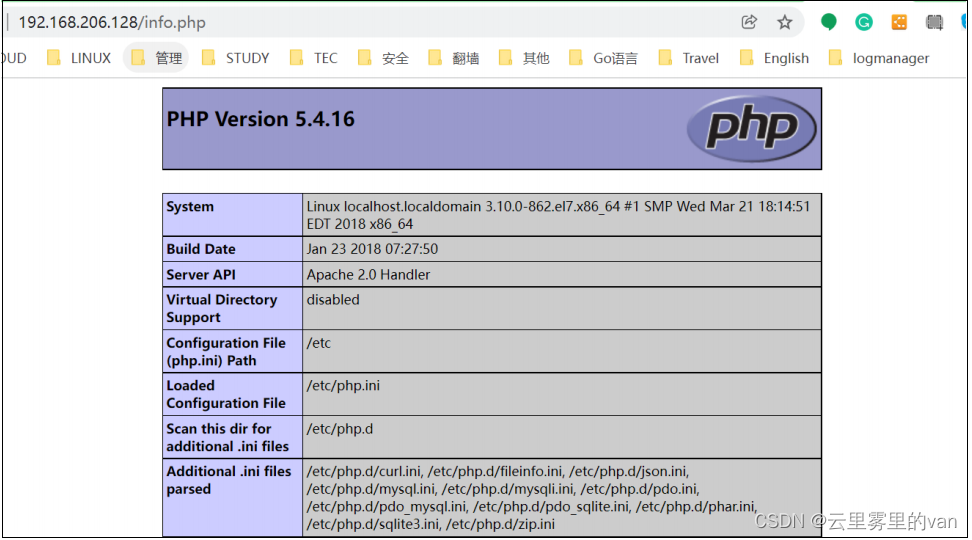
7.
创建
php
信息页面测试
1.
在
/var/www/html
目录下创建
info.php
文件,内容如下:
<?php
phpinfo();
 ?>
2.
查看
Linux
虚拟机
ip
地址
# ip a
2.
到
Windows
宿主机,使用浏览器访问
info.php
页面
地址示例:
http://192.168.206.128/info.php
8.
使用
php
连接数据库
8.1.
通过文件导入数据库测试数据
#mysql -u root -p123456 < student.sql
8.2.
将
php
脚本文件上传到
/var/www/html/
目录
使用
MobaXterm
将
student_info.php
文件上传到
/var/www/html
目录中:

8.3. 通过 Windows 浏览器访问 student_info.php 页面


 977
977

 被折叠的 条评论
为什么被折叠?
被折叠的 条评论
为什么被折叠?
 到【灌水乐园】发言


