概述
用Qt构建GUI程序非常简单,起码MFC简单,但是之前都是使用IDE完成编译、链接、运行,并没有好好了解IDE中各个文件的如何构成一个Qt工具。
Ui文件的作用
使用Qt编写程序,就不得不提UI文件(当然,也可以使用纯代码编写,主要是为了过PC_lint,因为其会检查出内存泄露,控件没有释放,但是其实对于Qt来说,是没有内存泄露,因为Ui文件中一旦父对象释放,子对象也会释放)。
利用UI文件就可以很快速搞定一个图形界面了,仅仅是界面了。
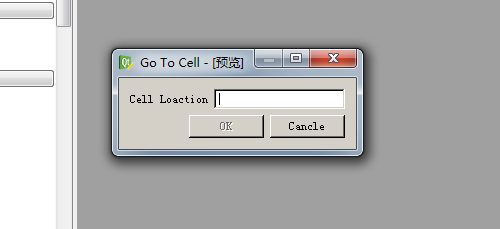
UI其实就是一个XML文件:如下图
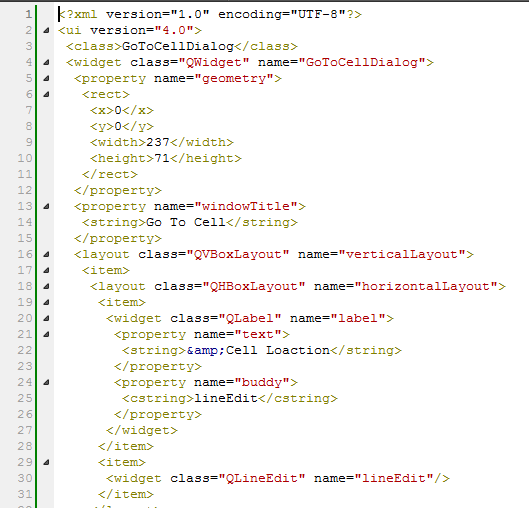
其实可以按照它的格式,直接在这个XML文件中修改。但是,因为使用这种形式编写Qt程序:见下面代码。
#ifndef GOTOCELLDIALOG_H
#define GOTOCELLDIALOG_H
#include <QDialog>
#include "ui_gotocelldialog.h"
class GoToCellDialog : public QDialog, public Ui::GoToCellDialog
{
    Q_OBJECT
public:
    GoToCellDialog(QWidget *parent = 0);

private slots:
    void on_lineEdit_textChanged();
};
#endif // GOTOCELLDIALOG_H
其中ui_gotocelldialog.h就是什么头文件,里面的内容是什么?
ui_gotocelldialog.h就是gotocelldialog.ui文件生成的,在Qt中Qmake工具中会智能识别ui文件。

其实用uic工具也是手动生成该文件,见下图:
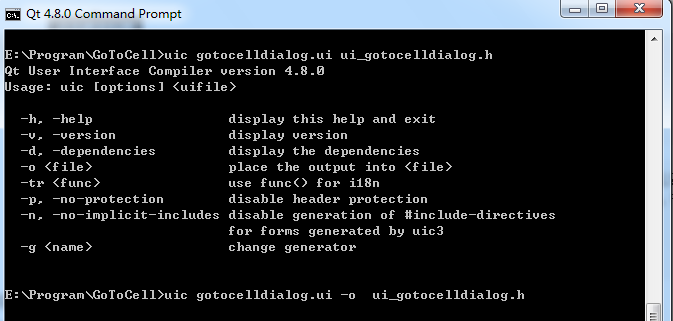
**这里注意是使用Qt自带的命令行,不是系统自带的。**

生成的.h文件如下:
#ifndef UI_GOTOCELLDIALOG_H
#define UI_GOTOCELLDIALOG_H
#include <QtCore/QVariant>
#include <QtGui/QAction>
#include <QtGui/QApplication>
#include <QtGui/QButtonGroup>
#include <QtGui/QHBoxLayout>
#include <QtGui/QHeaderView>
#include <QtGui/QLabel>
#include <QtGui/QLineEdit>
#include <QtGui/QPushButton>
#include <QtGui/QSpacerItem>
#include <QtGui/QVBoxLayout>
#include <QtGui/QWidget>
QT_BEGIN_NAMESPACE
class Ui_GoToCellDialog
{
public:
QVBoxLayout *verticalLayout;
QHBoxLayout *horizontalLayout;
QLabel *label;
QLineEdit *lineEdit;
QHBoxLayout *horizontalLayout_2;
QSpacerItem *horizontalSpacer;
QPushButton *OKButton;
QPushButton *cancleButton;
void setupUi(QWidget *GoToCellDialog)
{
if (GoToCellDialog->objectName().isEmpty())
GoToCellDialog->setObjectName(QString::fromUtf8("GoToCellDialog"));
GoToCellDialog->resize(237, 71);
verticalLayout = new QVBoxLayout(GoToCellDialog);
verticalLayout->setObjectName(QString::fromUtf8("verticalLayout"));
horizontalLayout = new QHBoxLayout();
horizontalLayout->setObjectName(QString::fromUtf8("horizontalLayout"));
label = new QLabel(GoToCellDialog);
label->setObjectName(QString::fromUtf8("label"));
horizontalLayout->addWidget(label);
lineEdit = new QLineEdit(GoToCellDialog);
lineEdit->setObjectName(QString::fromUtf8("lineEdit"));
horizontalLayout->addWidget(lineEdit);
verticalLayout->addLayout(horizontalLayout);
horizontalLayout_2 = new QHBoxLayout();
horizontalLayout_2->setObjectName(QString::fromUtf8("horizontalLayout_2"));
horizontalSpacer = new QSpacerItem(40, 20, QSizePolicy::Expanding, QSizePolicy::Minimum);
horizontalLayout_2->addItem(horizontalSpacer);
OKButton = new QPushButton(GoToCellDialog);
OKButton->setObjectName(QString::fromUtf8("OKButton"));
OKButton->setEnabled(false);
horizontalLayout_2->addWidget(OKButton);
cancleButton = new QPushButton(GoToCellDialog);
cancleButton->setObjectName(QString::fromUtf8("cancleButton"));
horizontalLayout_2->addWidget(cancleButton);
verticalLayout->addLayout(horizontalLayout_2);
#ifndef QT_NO_SHORTCUT
label->setBuddy(lineEdit);
#endif
retranslateUi(GoToCellDialog);
QMetaObject::connectSlotsByName(GoToCellDialog);
}
void retranslateUi(QWidget *GoToCellDialog)
{
GoToCellDialog->setWindowTitle(QApplication::translate("GoToCellDialog", "Go To Cell", 0, QApplication::UnicodeUTF8));
label->setText(QApplication::translate("GoToCellDialog", "&Cell Loaction", 0, QApplication::UnicodeUTF8));
OKButton->setText(QApplication::translate("GoToCellDialog", "OK", 0, QApplication::UnicodeUTF8));
cancleButton->setText(QApplication::translate("GoToCellDialog", "Cancle", 0, QApplication::UnicodeUTF8));
}
};
namespace Ui {
class GoToCellDialog: public Ui_GoToCellDialog {};
}
QT_END_NAMESPACE
#endif
总结
学习了UI文件的内容,以及作用,特别是 setupUi 函数,以及用命令行的形式编译Qt程序。


 4467
4467

 被折叠的 条评论
为什么被折叠?
被折叠的 条评论
为什么被折叠?
 到【灌水乐园】发言


