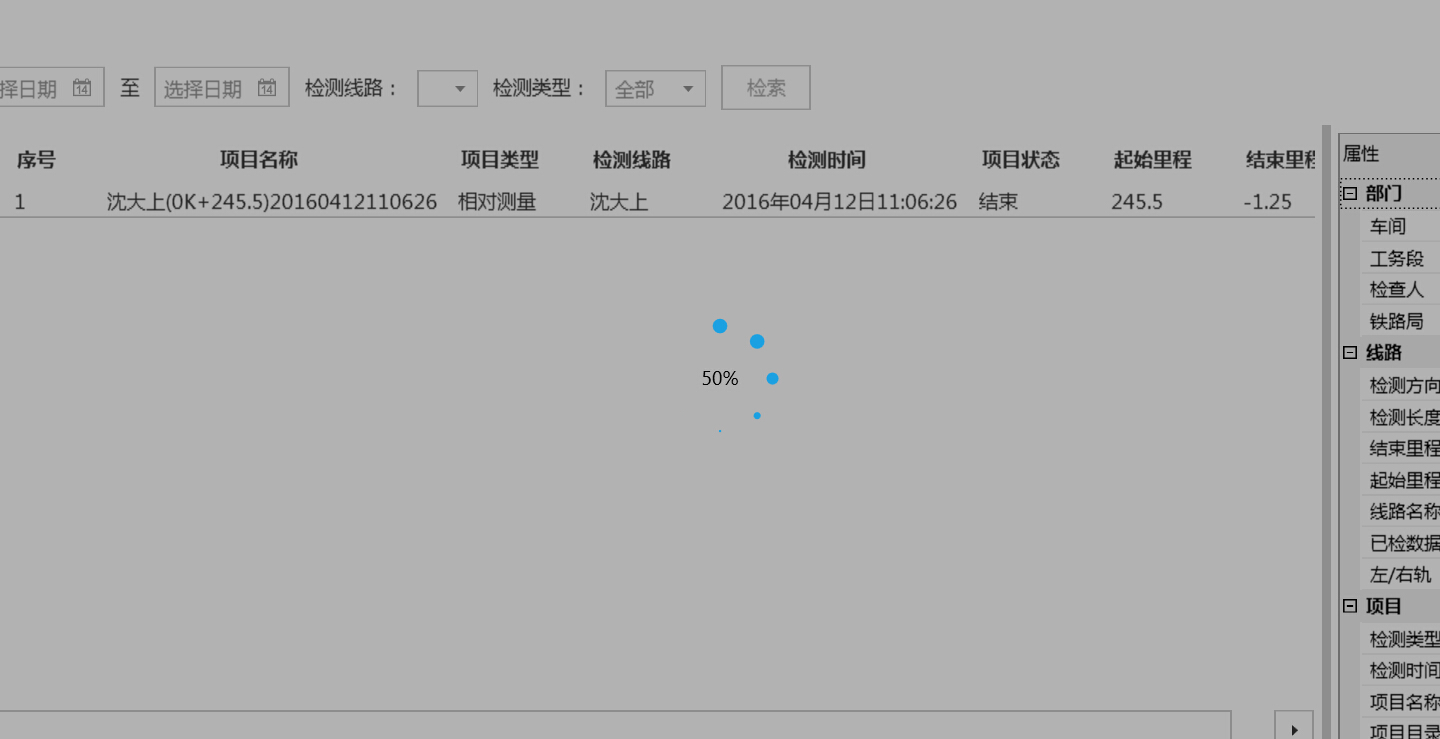
先图为敬
前台代码
<Window x:Class="Zero_Gjy.UserControls.MProgressBar"
             xmlns="http://schemas.microsoft.com/winfx/2006/xaml/presentation"
             xmlns:x="http://schemas.microsoft.com/winfx/2006/xaml"
             xmlns:mc="http://schemas.openxmlformats.org/markup-compatibility/2006"
             xmlns:d="http://schemas.microsoft.com/expression/blend/2008"
             xmlns:mui="http://firstfloorsoftware.com/ModernUI"
             mc:Ignorable="d"
             d:DesignHeight="300" d:DesignWidth="300"
              Background="{x:Null}"
            WindowStyle="None"
        AllowsTransparency="True"
        IsHitTestVisible="True"
        WindowStartupLocation="CenterOwner"
        >
    <Grid Style="{StaticResource ContentRoot}">
        <TextBlock Name="tb_progress" HorizontalAlignment="Center" VerticalAlignment="Center"></TextBlock>
        <mui:ModernProgressRing IsActive="True" Width="80" Height="80" Style="{Binding SelectedItem.Tag, ElementName=CmbRingStyle}" />
    </Grid>
</Window>
代码中的“mui:ModernProgressRing” 是ModernUI中的一个控件,同学们也可以自己来实现同样的效果,或者使用ProgressBar来替代,这里就不赘述了。
后台代码
using FirstFloor.ModernUI.Windows.Controls;
using System;
using System.Collections.Generic;
using System.ComponentModel;
using System.Linq;
using System.Text;
using System.Threading.Tasks;
using System.Windows;
using System.Windows.Controls;
using System.Windows.Data;
using System.Windows.Documents;
using System.Windows.Input;
using System.Windows.Media;
using System.Windows.Media.Imaging;
using System.Windows.Navigation;
using System.Windows.Shapes;
using Zero_Gjy.Helper;

namespace Zero_Gjy.UserControls
{
    /// <summary>
    /// Interaction logic for MProgressBar.xaml
    /// </summary>
    public partial class MProgressBar : Window, INotifyPropertyChanged
    {
        double progress;
        string progreesStr;

        public event PropertyChangedEventHandler PropertyChanged;

        public double Progress
        {
            get
            {
                return progress;
            }

            set
            {
                progress = value;
                ProgreesStr = (int)(value/Max * 100) + "%";
            }
        }

        public string ProgreesStr
        {
            get
            {
                return progreesStr;
            }

            set
            {
                progreesStr = value;
                if(PropertyChanged != null)
                {
                    this.PropertyChanged.Invoke(this, new PropertyChangedEventArgs("ProgreesStr"));
                }
            }
        }

        public MProgressBar()
        {
            InitializeComponent();
            this.tb_progress.SetBinding(TextBlock.TextProperty, new Binding("ProgreesStr") { Source = this });
        }
        public int Max = 100;
        public void Show(Window parent,int max)
        {
            Max = max;
            this.Progress = 0;
            this.Owner = parent;
            this.Owner.Opacity = 0.7;
            this.Owner.IsEnabled = false;
            this.Show();
        }
        public void UpdateProgress(int progress)
        {
            this.Progress = progress;
        }
        public void CloseWindow()
        {
            this.Close();
            this.Owner.Opacity = 1;
            this.Owner.IsEnabled = true;
        }
    }
}
后台代码将进度值和前台的TextBlock绑定,实现进度的更新,特别要注意的是这几句
this.Owner = parent;//父窗口
            this.Owner.Opacity = 0.7;//置灰
            this.Owner.IsEnabled = false;//禁用
            this.Show();//子窗口模式显示
有的同学或许会说直接用ShowDialog()就行了,我试过之后发现父窗口无法实时更新进度,进程都在等待Dialog。。。
响应。


 116
116


 被折叠的 条评论
为什么被折叠?


