


Cesium高级教程-后处理体积云-实现简单的体积云效果
博客参考
实现简单的体积云,我们先参考这篇博客 体积云渲染实战:ray marching,体积云与体积云光照 ,这是一篇基于opengl的体积云实现,为什么选择此示例参考呢?因为该示例一是相对简单,并且流程比较完善,二是涉及到的引擎代码比较少,不像其他示例有很多c#或者c++代码,参考起来难度很大。
你可以先看看文章,然后自己思考有没有难点,如果觉得没有,可以自己先实现一遍,看能不能做出来,因为学习其实最重要的是过程,而不是结果。如果照着文章就能把效果实现出来,您会信心倍增,成就感满满。
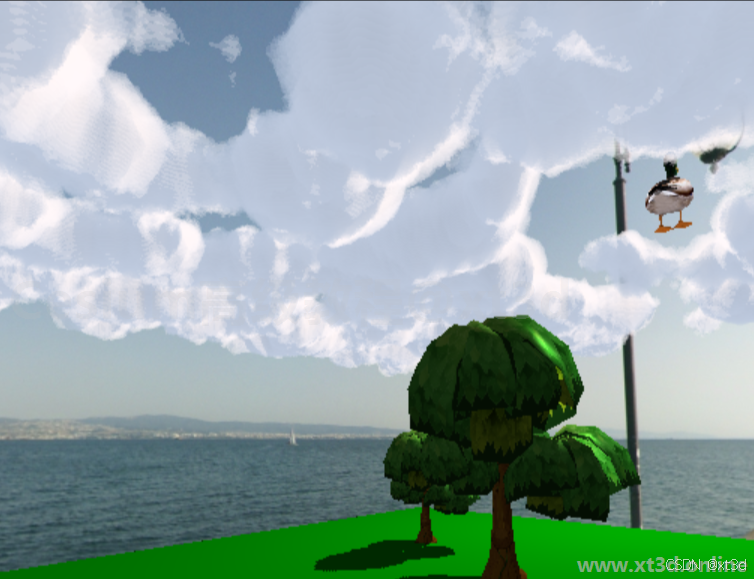
本节最后的效果
实现过程
一、 光线步进创建Box
需要注意他的盒子中心应该就是世界坐标系的中心点,所以他直接使用相关坐标进行计算,而我们的盒子中心并不在世界坐标的中心,所以不能直接算,需要像上一节那样建立一个局部坐标系当做世界坐标系。
#define bottom 13   // 云层底部
#define top 20      // 云层顶部
#define width 5     // 云层 xz 坐标范围 [-width, width]

// 获取体积云颜色
vec4 getCloud(vec3 worldPos, vec3 cameraPos) {
    vec3 direction = normalize(worldPos - cameraPos);   // 视线射线方向
    vec3 step = direction * 0.25;   // 步长
    vec4 colorSum = vec4(0);        // 积累的颜色
    vec3 point = cameraPos;         // 从相机出发开始测试

    // ray marching
    for(int i=0; i<100; i++) {
        point += step;
        if(bottom>point.y || point.y>top || -width>point.x || point.x>width || -width>point.z || point.z>width) {
            continue;
        }

        float density = 0.1;
        vec4 color = vec4(0.9, 0.8, 0.7, 1.0) * density;    // 当前点的颜色
        colorSum = colorSum + color * (1.0 - colorSum.a);   // 与累积的颜色混合
    }
    return colorSum;
}
这里可以参考上一节的代码
let shader=`
      uniform sampler2D colorTexture;
      uniform sampler2D depthTexture;
      in vec2 v_textureCoordinates;
      uniform mat4 inverse;
      vec4 rayBoxDst(vec3 boundsMin, vec3 boundsMax,  vec3 rayOrigin, vec3 invRaydir)
      {
          vec3 t0 = (boundsMin - rayOrigin) * invRaydir;
          vec3 t1 = (boundsMax - rayOrigin) * invRaydir;
          vec3 tmin = min(t0, t1);
          vec3 tmax = max(t0, t1);
          float dstA = max(max(tmin.x, tmin.y), tmin.z); //进入点
          float dstB = min(tmax.x, min(tmax.y, tmax.z)); //出去点
          float dstToBox = max(0., dstA);
          ...
          return vec4(dstToBox, dstInsideBox,dstA,dstB);
      }
      void main(){
          out_FragColor = texture(colorTexture, v_textureCoordinates);
          vec4 rawDepthColor = texture(czm_globeDepthTexture, v_textureCoordinates);
          float depth = czm_unpackDepth(rawDepthColor);
          if (depth == 0.0) {
            depth = 1.0;
          }
          vec4 eyeCoordinate4 = czm_windowToEyeCoordinates(gl_FragCoord.xy, depth);
          vec3 eyeCoordinate3 = eyeCoordinate4.xyz/eyeCoordinate4.w;
          vec4 worldCoordinate4 = czm_inverseView * vec4(eyeCoordinate3,1.) ;
          vec3 worldCoordinate = worldCoordinate4.xyz / worldCoordinate4.w;
          vec4 worldPos= inverse * vec4(worldCoordinate,1.);
          vec4 cameraPos= inverse * vec4(czm_viewerPositionWC,1.);
          vec3 vDirection=worldPos.xyz-cameraPos.xyz;//方向
          vec3 rayDir = normalize( vDirection );
          vec3 dim= vec3(20.,20.,20.);//盒子长宽高
          vec3 box_min = vec3(0.) - dim / 2.;
          vec3 box_max = vec3(0.) + dim / 2.;

          vec4 bounds =rayBoxDst(box_min,box_max,cameraPos.xyz,1.0 / rayDir);
          ...; //盒子外
          out_FragColor=vec4(0.,0.,1.,1.);
        }
`;
二、提高光线步进的性能
为了提高光线步进的性能,需要将射线的起点设置到与盒子最近的点,从该点开始前进,这就省去了相机到盒子这段的距离
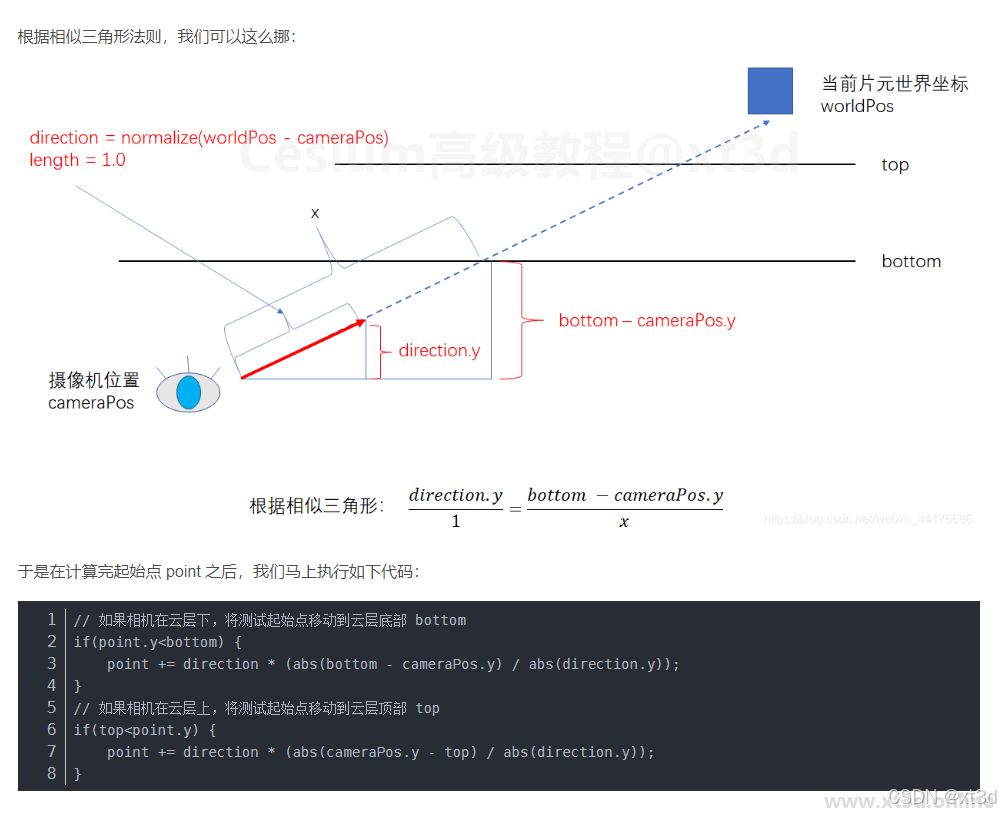
这里我们还可以更加优化,因为我们的vec4 rayBoxDst(vec3 boundsMin, vec3 boundsMax, vec3 rayOrigin, vec3 invRaydir) 方法其实能够获取到射线与盒子的距离,以及射线在光线中的行驶距离,分别为dstToBox, dstInsideBox,我们通过dstToBox和射线方向,就可以将光线步进的起点设置到与盒子最近的点,通过dstInsideBox可以知道在盒子内的步进距离。
修改shader如下
 let shader=`
       uniform sampler2D colorTexture;
       uniform sampler2D depthTexture;
       in vec2 v_textureCoordinates;
       uniform mat4 inverse;


       vec4 rayBoxDst(vec3 boundsMin, vec3 boundsMax,  vec3 rayOrigin, vec3 invRaydir)
       {
           vec3 t0 = (boundsMin - rayOrigin) * invRaydir;
           vec3 t1 = (boundsMax - rayOrigin) * invRaydir;
           vec3 tmin = min(t0, t1);
           vec3 tmax = max(t0, t1);

           float dstA = max(max(tmin.x, tmin.y), tmin.z); //进入点
           float dstB = min(tmax.x, min(tmax.y, tmax.z)); //出去点

           float dstToBox = max(0., dstA);
           ...
           return vec4(dstToBox, dstInsideBox,dstA,dstB);
       }

       void main(){
           out_FragColor = texture(colorTexture, v_textureCoordinates);
           vec4 rawDepthColor = texture(czm_globeDepthTexture, v_textureCoordinates);
           float depth = czm_unpackDepth(rawDepthColor);
           if (depth == 0.0) {
             depth = 1.0;
           }
           vec4 eyeCoordinate4 = czm_windowToEyeCoordinates(gl_FragCoord.xy, depth);
           vec3 eyeCoordinate3 = eyeCoordinate4.xyz/eyeCoordinate4.w;
           vec4 worldCoordinate4 = czm_inverseView * vec4(eyeCoordinate3,1.) ;
           vec3 worldCoordinate = worldCoordinate4.xyz / worldCoordinate4.w;

           ...


           vec3 vDirection=worldPos.xyz-cameraPos.xyz;//方向
           vec3 rayDir = normalize( vDirection );

           vec3 dim= vec3(20.,20.,20.);//盒子长宽高
           vec3 box_min = vec3(0.) - dim / 2.;
           vec3 box_max = vec3(0.) + dim / 2.;
            vec4 bounds =rayBoxDst(box_min,box_max,cameraPos.xyz,1.0 / rayDir);
           bounds.x = max( bounds.x, 0.0 );
           ... //盒子外
           ...; //射线起点

           float distance=bounds.y;//盒子内的步进总距离
           float stepDis=1.5;//每次步进的距离
           int totalStep=int(distance/stepDis);
           vec4 colorSum = vec4(0);        // 积累的颜色
           for ( int t =0; t < totalStep ; t++) {
                float density = .1;                // 当前点云密度
                vec4 color = vec4(0.9, 0.8, 0.7, 1.0) * density;    // 当前点的颜色
                colorSum = colorSum + color * (1.0 - colorSum.a);   // 与累积的颜色混合
                p += rayDir * stepDis;
 	       }

           out_FragColor=colorSum;
         }
 `;
此时运行代码,会看到一个中间到边缘渐变的盒子,因为边缘步进次数少,而中间步进次数多,颜色累加次数就多。
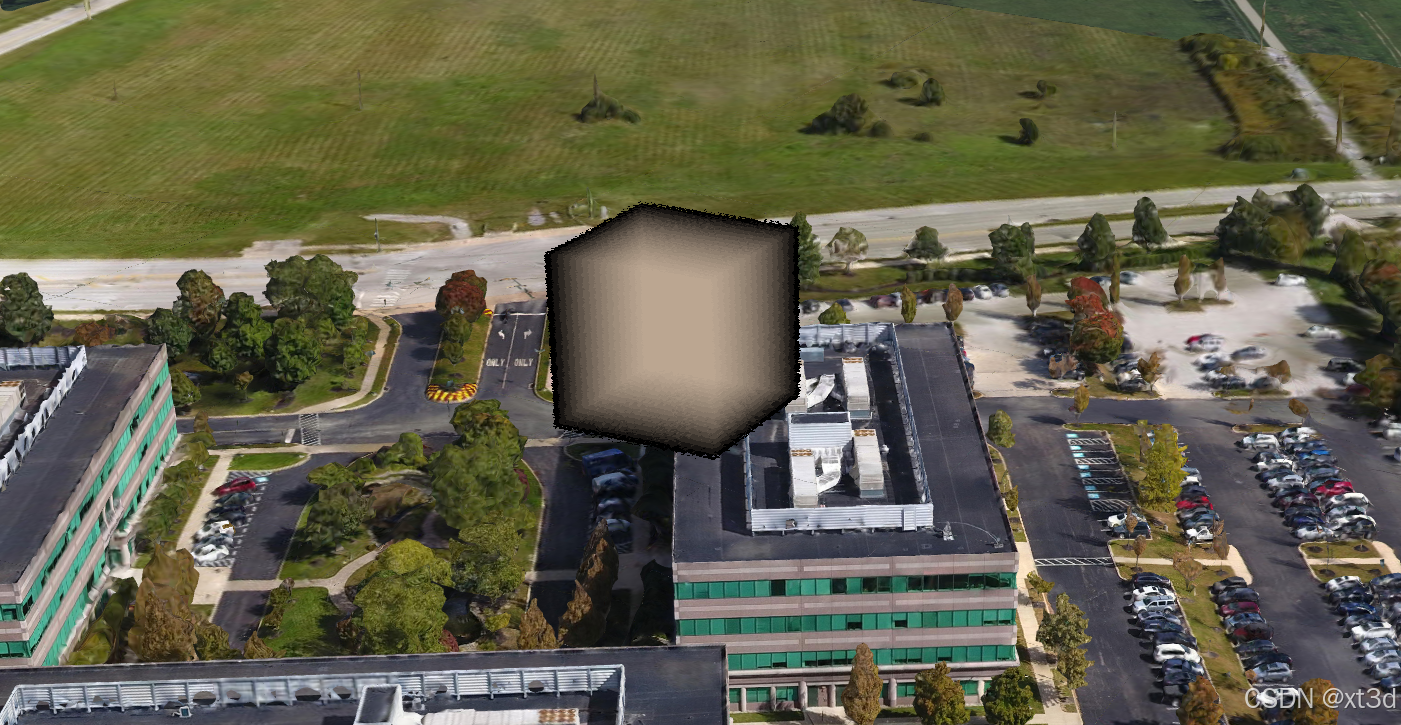
示例效果可到 xt3d 官网 运行查看
三、采样噪声数据
接下来从噪声图中采样云的形状,将噪声图传入着色器,是通过Cesium.Texture类,相信您对此已经没问题。
 Cesium.Resource.createIfNeeded("./noise.png")
 .fetchImage().then(res => {
     let texture = new Cesium.Texture({
     context: viewer.scene.context,
     source: res,

     sampler: new Cesium.Sampler({
       wrapS: Cesium.TextureWrap.REPEAT,
       wrapT: Cesium.TextureWrap.REPEAT,
       minificationFilter: Cesium.TextureMinificationFilter.LINEAR,
       magnificationFilter: Cesium.TextureMagnificationFilter.LINEAR,
     })
   })
 })
修改着色器
 let shader=`
       uniform sampler2D colorTexture;
       uniform sampler2D depthTexture;
       in vec2 v_textureCoordinates;
       uniform mat4 inverse;
       uniform sampler2D noiseMap;

        ...

       // 计算 云密度
       float getDensity(vec3 pos) {
         // 采样噪声图
         vec2 coord = pos.xy * 0.00025;
         float noise = texture (noiseMap, coord).x;
         // 截断
         // if(noise<0.4) {
         //     noise = 0.;
         // }
         return noise;
       }

       void main(){
           ...
           vec3 dim= vec3(1000.,1000.,100.);//盒子长宽高
           vec3 box_min = vec3(0.) - dim / 2.;
           vec3 box_max = vec3(0.) + dim / 2.;
            vec4 bounds =rayBoxDst(box_min,box_max,cameraPos.xyz,1.0 / rayDir);
           bounds.x = max( bounds.x, 0.0 );
          if ( bounds.z > bounds.w ) return; //盒子外
           vec3 p = cameraPos.xyz + bounds.x * rayDir; //射线起点

           float distance=bounds.y;//盒子内的步进总距离
           float stepDis=1.5;//每次步进的距离
           int totalStep=int(distance/stepDis);
           vec4 colorSum = vec4(0);        // 积累的颜色
           for ( int t =0; t < totalStep ; t++) {
                float density = getDensity(p) * 0.1;               // 当前点云密度
                vec4 color = vec4(0.9, 0.8, 0.7, 1.0) * density;    // 当前点的颜色
                colorSum = colorSum + color * (1.0 - colorSum.a);   // 与累积的颜色混合
                p += rayDir * stepDis;
 	       }

           out_FragColor.rgb= out_FragColor.rgb*(1.0 - colorSum.a) + colorSum.rgb;
         }
 `;
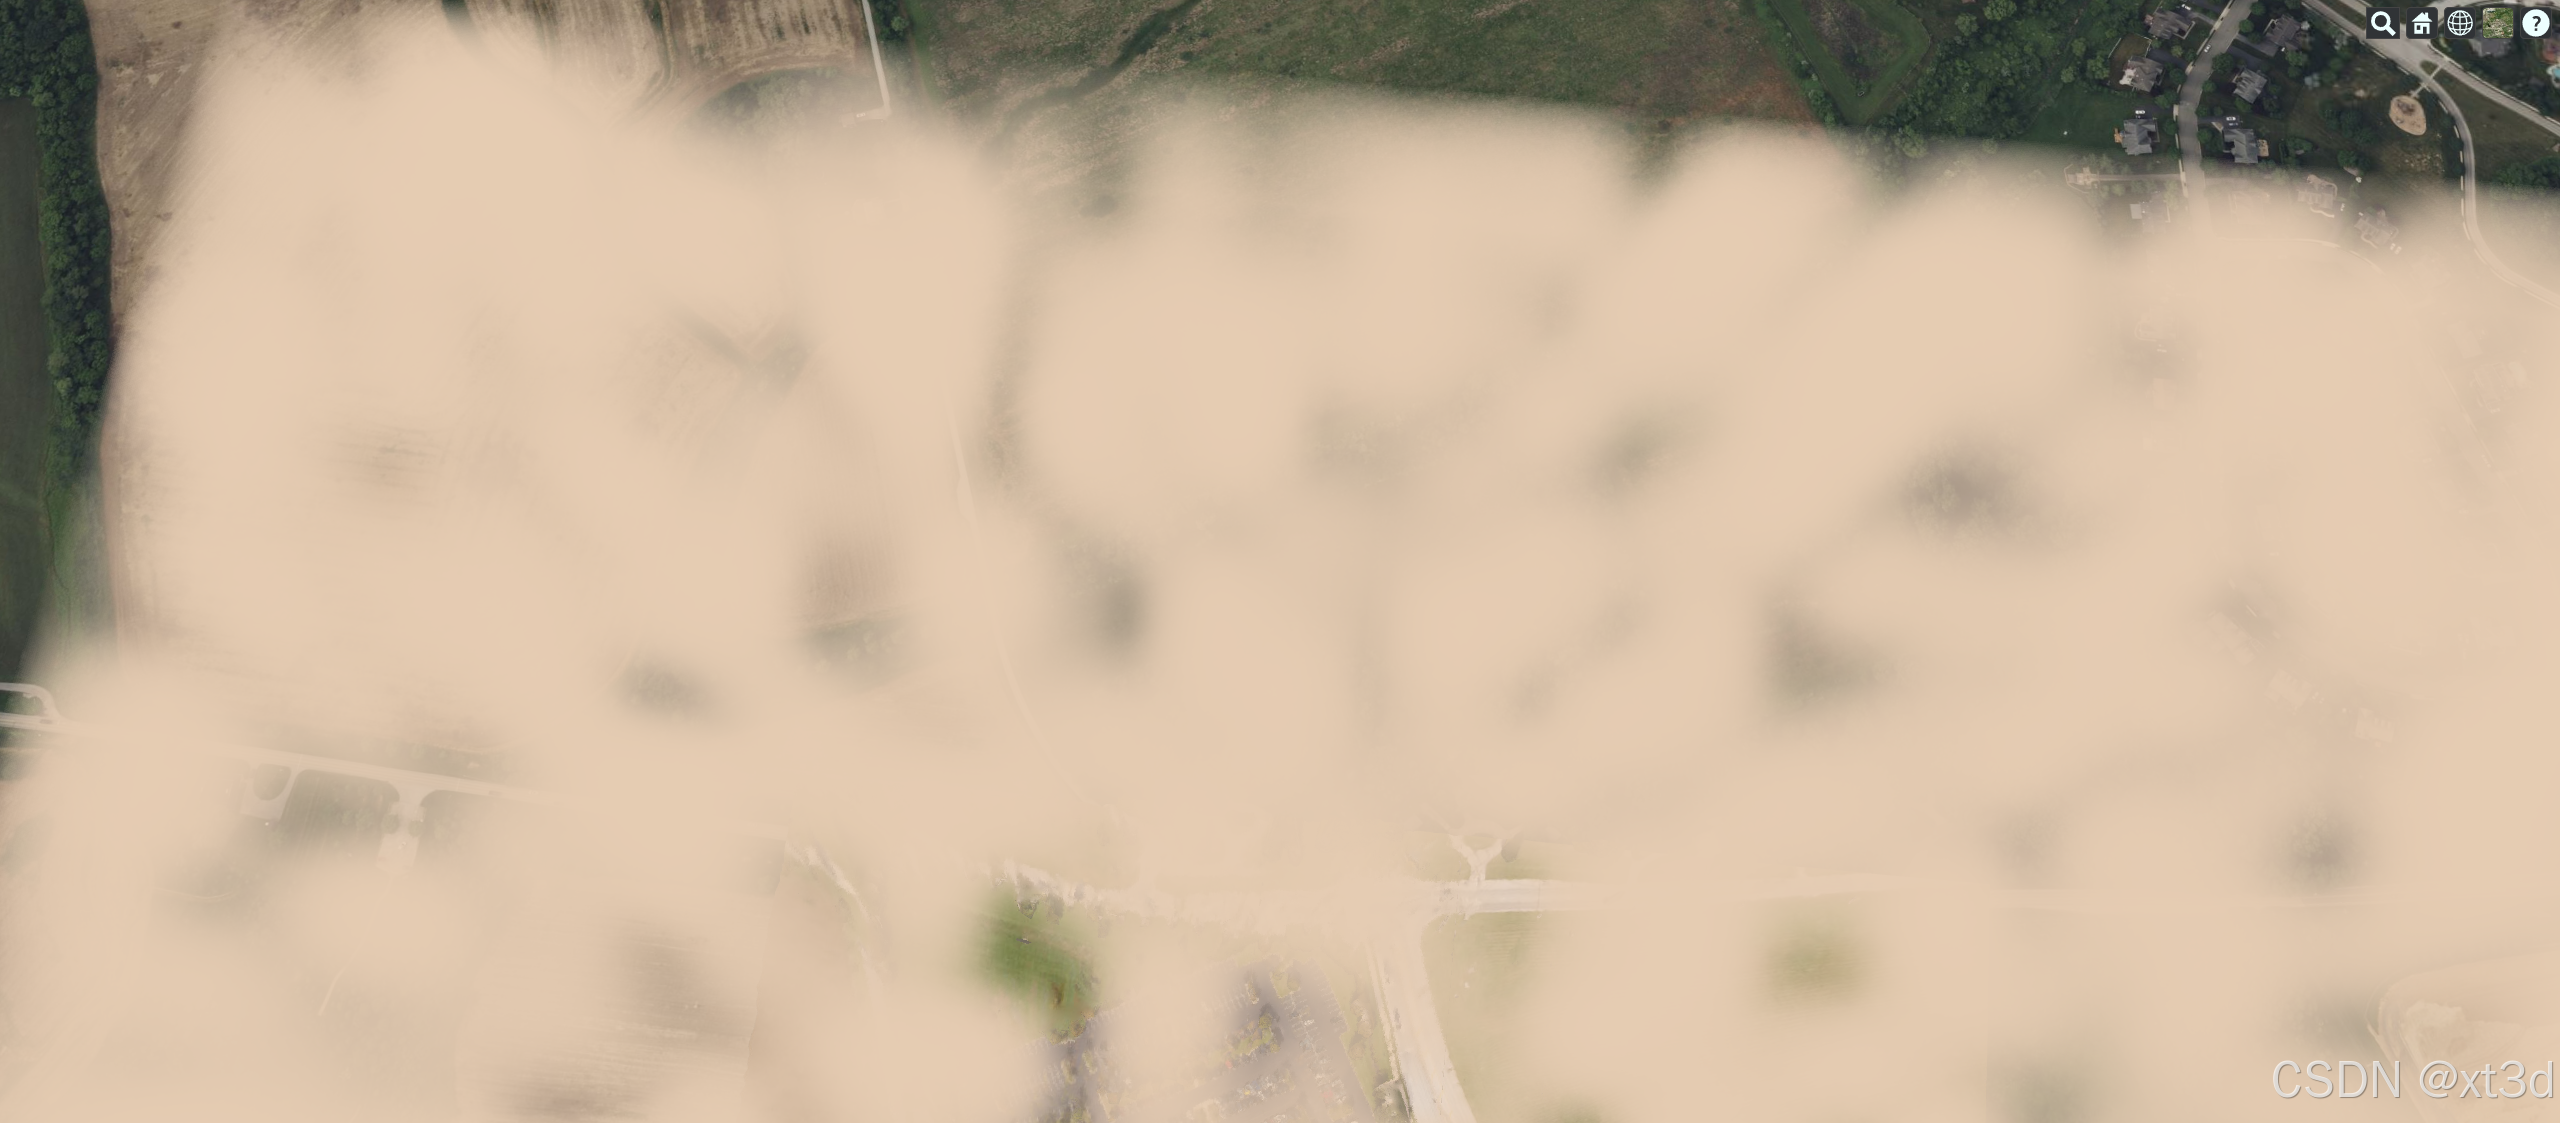
示例效果可到 xt3d 官网 运行查看
四、高度衰减
 let shader=`
       uniform sampler2D colorTexture;
       uniform sampler2D depthTexture;
       in vec2 v_textureCoordinates;
       uniform mat4 inverse;
       uniform sampler2D noiseMap;

       // 计算 云密度
       float getDensity(vec3 pos,float bottom,float top) {

         // 高度衰减
         float mid = (bottom + top) / 2.0;
         float h = top - bottom;
         float weight = 1.0 - 2.0 * abs(mid - pos.z) / h;
         weight = pow(weight, 0.5);

         // 采样噪声图
         vec2 coord = pos.xy * 0.00025;
         float noise = texture (noiseMap, coord).x;
         noise *= weight;

         // 截断
         if(noise<0.3) {
             noise = 0.;
         }
         return noise;
       }

       void main(){
           ...
           vec3 p = cameraPos.xyz + bounds.x * rayDir; //射线起点
           p.z+=50.;

           float distance=bounds.y;//盒子内的步进总距离
           float stepDis=1.5;//每次步进的距离
           int totalStep=int(distance/stepDis);
           vec4 colorSum = vec4(0);        // 积累的颜色
           for ( int t =0; t < totalStep ; t++) {
                float density = getDensity(p,-2.,102.) * 0.1;               // 当前点云密度
                vec4 color = vec4(0.9, 0.8, 0.7, 1.0) * density;    // 当前点的颜色
                colorSum = colorSum + color * (1.0 - colorSum.a);   // 与累积的颜色混合
                if(colorSum.a>1.)break;
                p += rayDir * stepDis;
 	       }

           out_FragColor.rgb= out_FragColor.rgb*(1.0 - colorSum.a) + colorSum.rgb;
         }
 `;
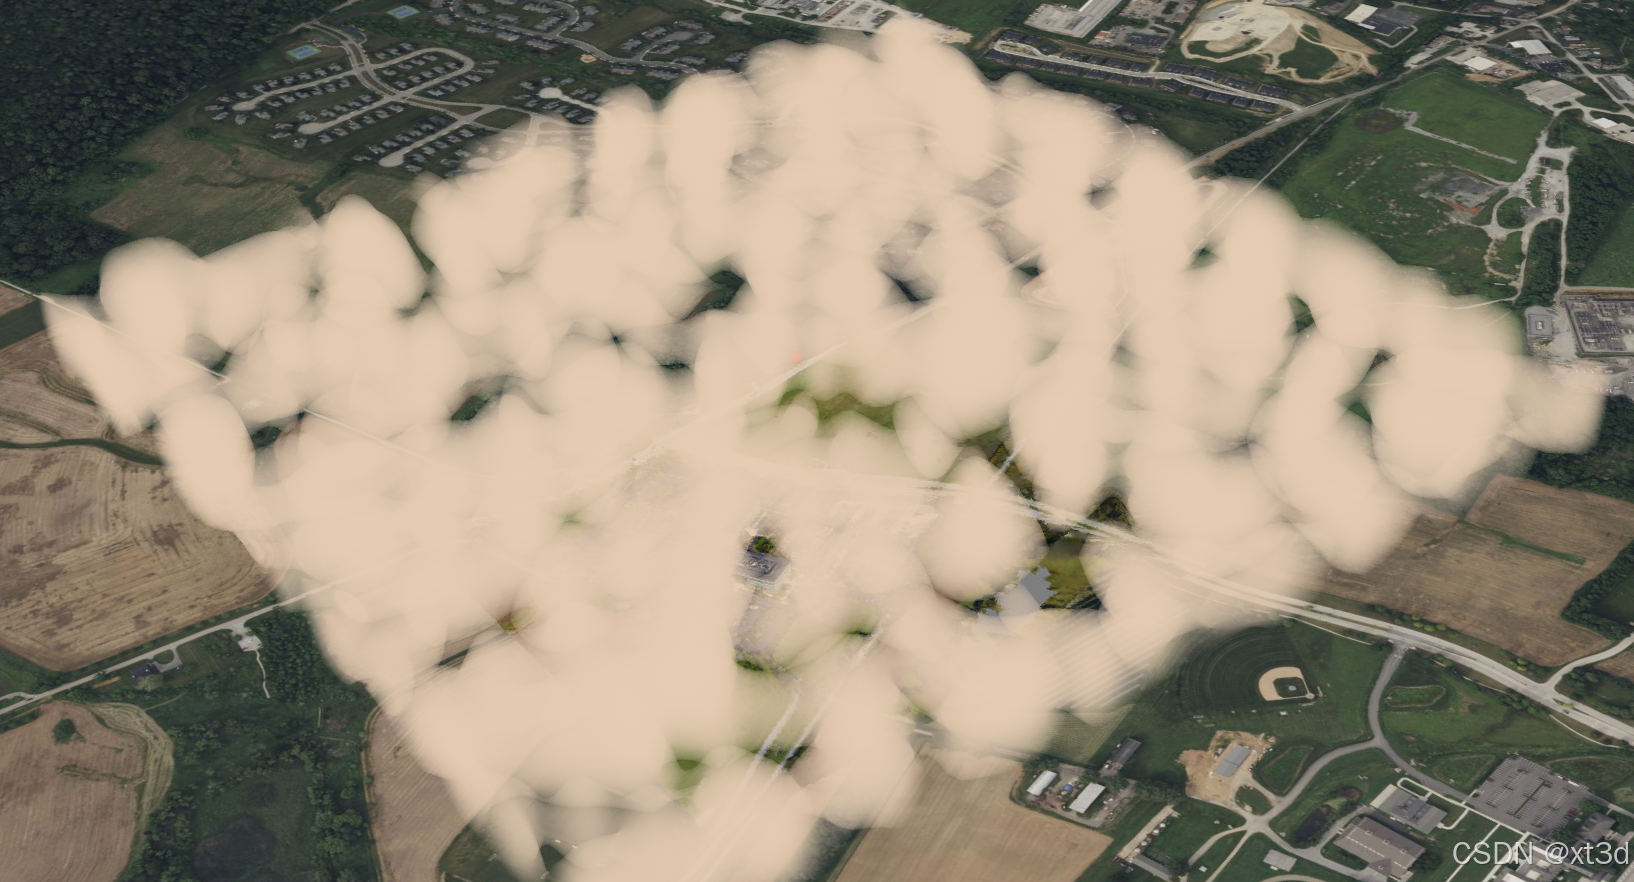
示例效果可到 xt3d 官网 运行查看
五、多次采样噪声
// 计算 云密度
float getDensity(vec3 pos,float bottom,float top) {
   // 高度衰减
   float mid = (bottom + top) / 2.0;
   float h = top - bottom;
   float weight = 1.0 - 2.0 * abs(mid - pos.z) / h;
   weight = pow(weight, 0.5);      // 采样噪声图
   vec2 coord = pos.xy * 0.00025;
   float noise = texture (noiseMap, coord).x;
    noise += texture (noiseMap, coord*3.5).x/3.5;
    noise += texture (noiseMap, coord*12.5).x/12.5;
    noise += texture (noiseMap, coord*42.87).x/42.87;
    noise/=1.6472;
    noise *= weight;
    noise *= weight;   // 截断
   if(noise<0.3) {
       noise = 0.;
   }
   return noise;
 }
示例效果可到 xt3d 官网 运行查看
五、 设置颜色,加入动效
完整的shader如下
 let shader=`
      uniform sampler2D colorTexture;
      uniform sampler2D depthTexture;
      in vec2 v_textureCoordinates;
      uniform mat4 inverse;
      uniform sampler2D noiseMap;

      vec4 rayBoxDst(vec3 boundsMin, vec3 boundsMax,  vec3 rayOrigin, vec3 invRaydir)
      {
          vec3 t0 = (boundsMin - rayOrigin) * invRaydir;
          vec3 t1 = (boundsMax - rayOrigin) * invRaydir;
          vec3 tmin = min(t0, t1);
          vec3 tmax = max(t0, t1);

          float dstA = max(max(tmin.x, tmin.y), tmin.z); //进入点
          float dstB = min(tmax.x, min(tmax.y, tmax.z)); //出去点

          ...;
          return vec4(dstToBox, dstInsideBox,dstA,dstB);
      }


      // 计算 云密度
      float getDensity(vec3 pos,float bottom,float top) {

        // 高度衰减
        float mid = (bottom + top) / 2.0;
        ...;

        // 采样噪声图
        vec2 coord = pos.xy * 0.00025;
        float noise = texture (noiseMap, coord).x;

        noise += texture (noiseMap, coord*3.5).x/3.5;
        noise += texture (noiseMap, coord*12.5).x/12.5;
        noise += texture (noiseMap, coord*42.87).x/42.87;
        noise/=1.6472;
        noise *= weight;

        // 截断
        if(noise<0.3) {
            noise = 0.;
        }
        return noise;
      }


     #define baseBright  vec3(1.26,1.25,1.29)    // 基础颜色 -- 亮部
     #define baseDark    vec3(0.31,0.31,0.32)    // 基础颜色 -- 暗部
     #define lightBright vec3(1.29, 1.17, 1.05)  // 光照颜色 -- 亮部
     #define lightDark   vec3(0.7,0.75,0.8)      // 光照颜色 -- 暗部
      void main(){
          out_FragColor = texture(colorTexture, v_textureCoordinates);
          vec4 rawDepthColor = texture(czm_globeDepthTexture, v_textureCoordinates);
          float depth = czm_unpackDepth(rawDepthColor);
          if (depth == 0.0) {
            depth = 1.0;
          }
          vec4 eyeCoordinate4 = czm_windowToEyeCoordinates(gl_FragCoord.xy, depth);
          vec3 eyeCoordinate3 = eyeCoordinate4.xyz/eyeCoordinate4.w;
          vec4 worldCoordinate4 = czm_inverseView * vec4(eyeCoordinate3,1.) ;
          vec3 worldCoordinate = worldCoordinate4.xyz / worldCoordinate4.w;
          ...

          vec3 vDirection=worldPos.xyz-cameraPos.xyz;//方向
          vec3 rayDir = normalize( vDirection );

          vec3 dim= vec3(1000.,1000.,100.);//盒子长宽高
          vec3 box_min = vec3(0.) - dim / 2.;
          vec3 box_max = vec3(0.) + dim / 2.;

          vec4 bounds =rayBoxDst(box_min,box_max,cameraPos.xyz,1.0 / rayDir);
           ...; //盒子外
           ...;//盒子内的步进总距离
          float stepDis=1.5;//每次步进的距离
          int totalStep=int(distance/stepDis);
          vec4 colorSum = vec4(0);        // 积累的颜色
          for ( int t =0; t < totalStep ; t++) {
               ...;               // 当前点云密度
               ...;    // 当前点的颜色
               colorSum = colorSum + color * (1.0 - colorSum.a);   // 与累积的颜色混合
               if(colorSum.a>1.)break;
               p += rayDir * stepDis;
 	       }

          out_FragColor.rgb= out_FragColor.rgb*(1.0 - colorSum.a) + colorSum.rgb;
        }
`;
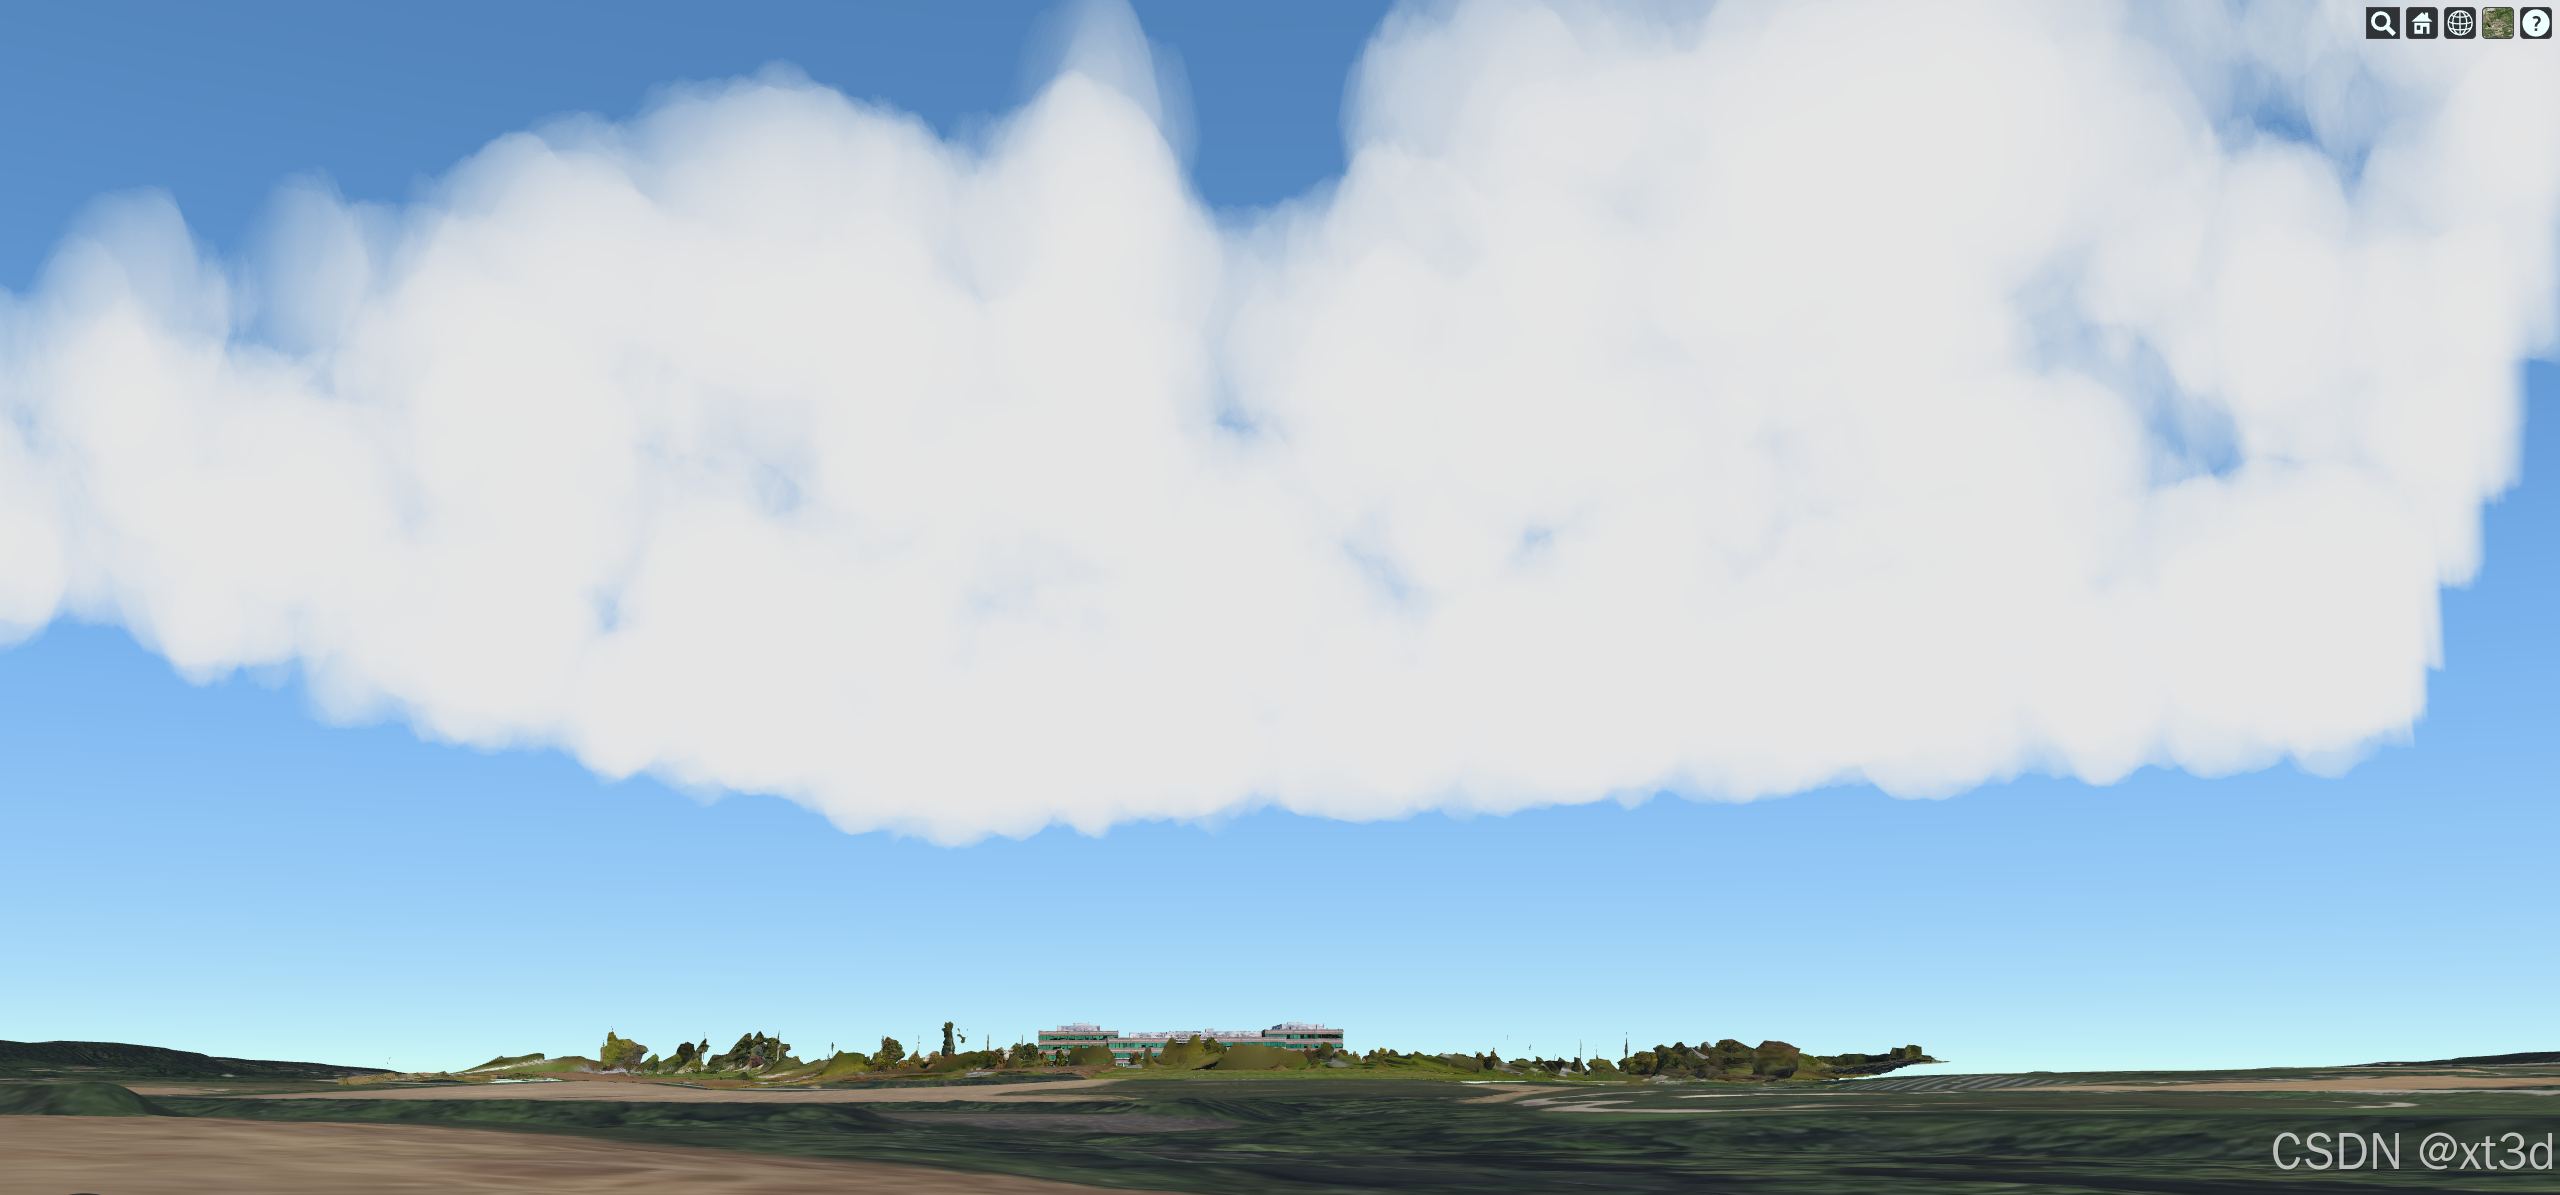
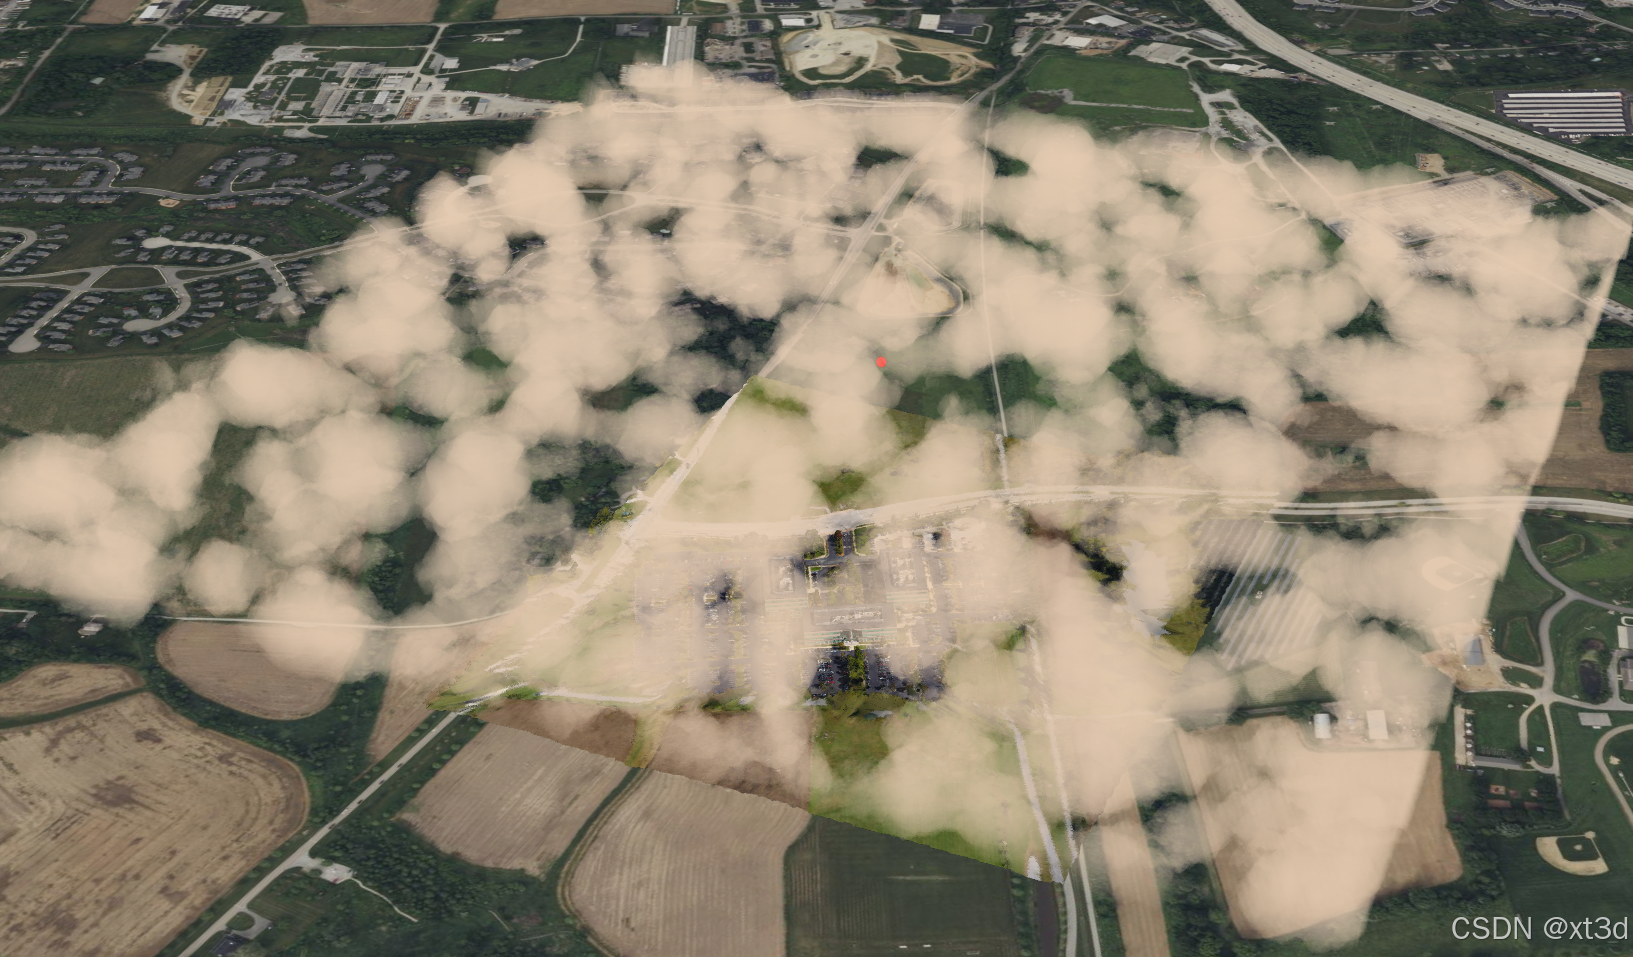
此时的效果
示例效果可到 xt3d 官网 运行查看
更多内容见 Cesium高级教程-教程简介
本节到此结束,至于后面的改进,如果您有时间,可以继续研究,作为教程,到此已经包含所有体积云的关键知识点。


 458
458

 被折叠的 条评论
为什么被折叠?
被折叠的 条评论
为什么被折叠?
 到【灌水乐园】发言


