


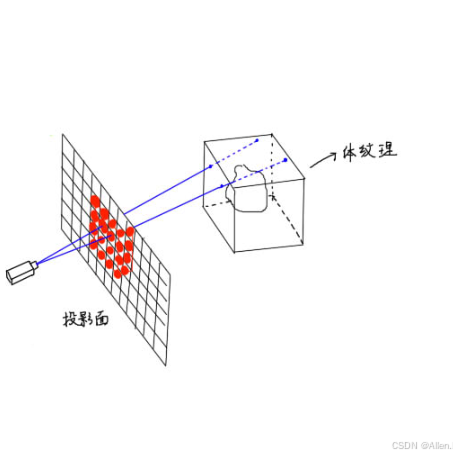
RayMarching
RayMarching 也就是光线步进,是 3D 图形学中的一种渲染方法,常常用来作为体渲染的主要渲染方式。
本次实现的体积云和大气效果都是基于 RayMarching 这种渲染方式进行渲染的。
基本实现原理是,在每个像素上计算一条光线,当光线进入体纹理范围内后,将光线细分成更小的光线片段进行步进迭代,每次步进时计算相应的强度信息。最终迭代结束后,将所有步进结果进行叠加计算,得到像素的颜色。
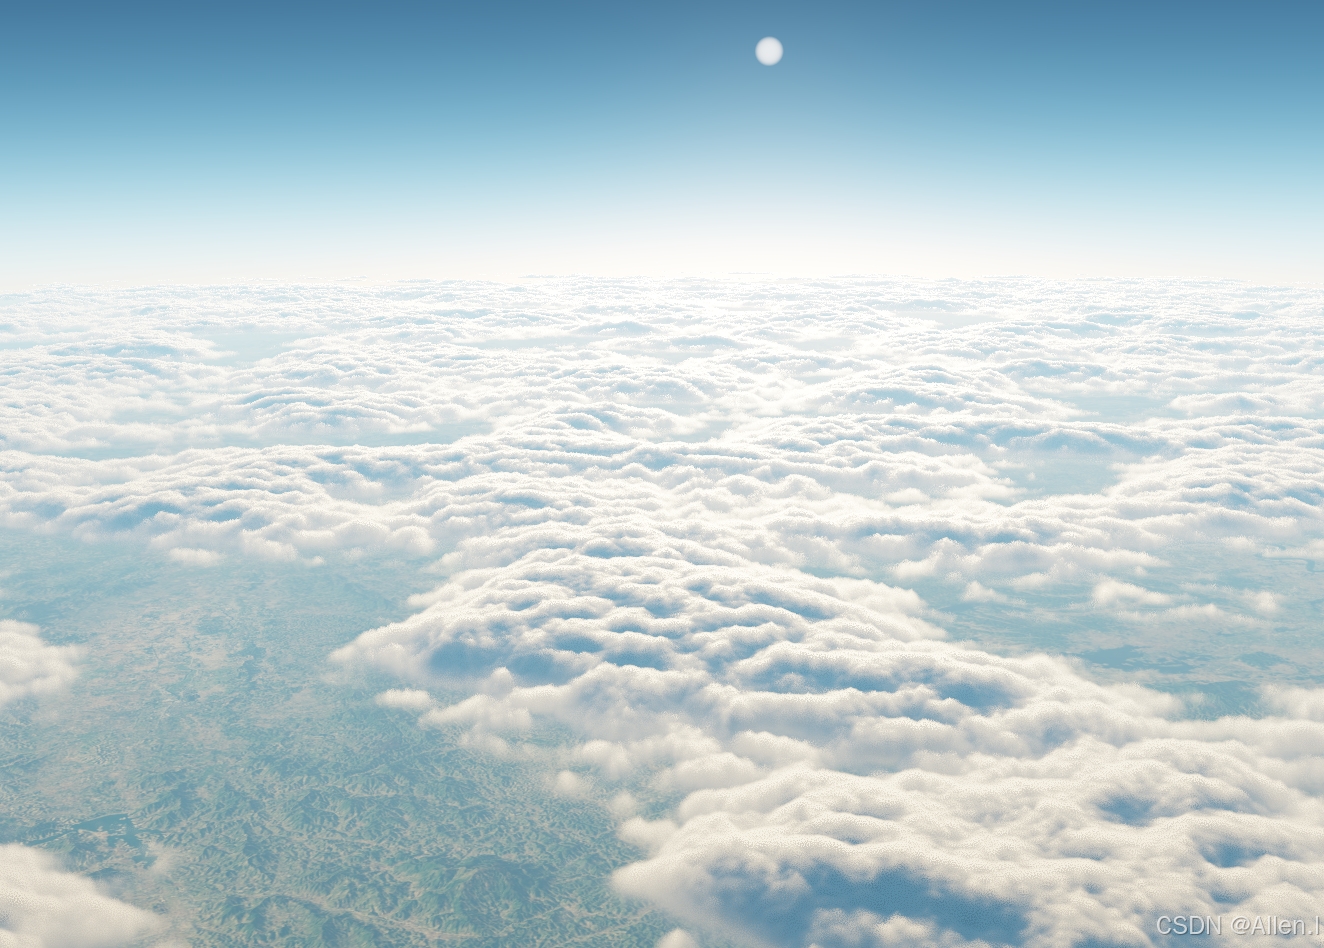
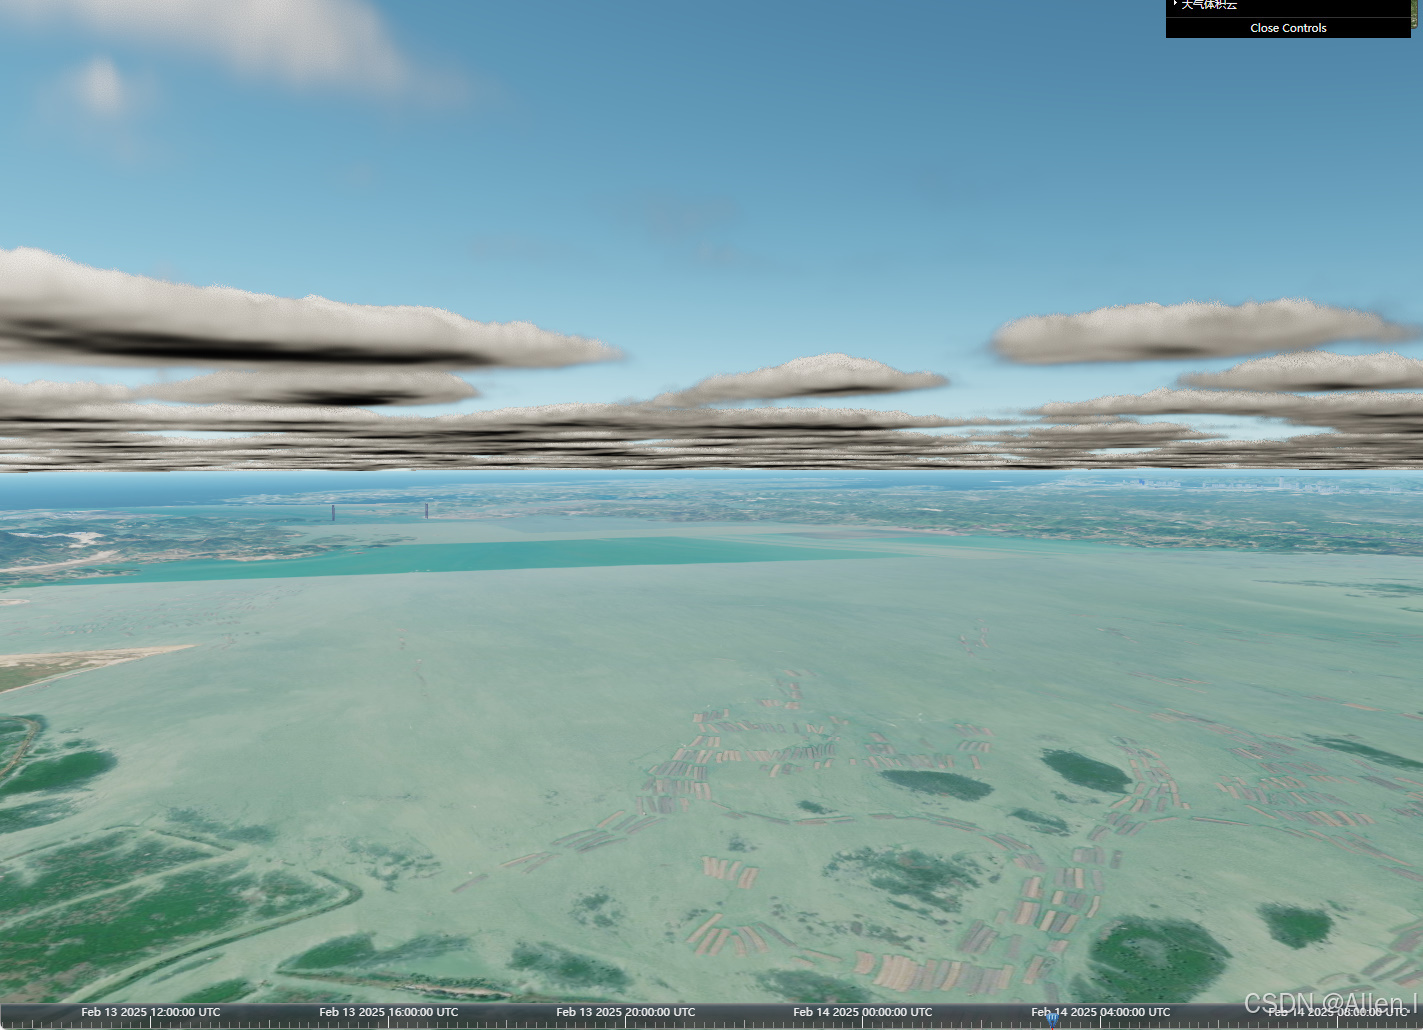
体积云
体积云的实现原理之前的文章已经提到过了,这里就不再赘述。
值得注意的是,这次实现的体积云视觉效果会和之前实现的不太一样。
这是因为计算云的密度这一步使用的云层建模函数不同了,好的云层建模函数能够生成逼真的体积云,并且性能消耗更低。
大气散射
大气散射是对现实世界大气的一种模拟,其大致的效果体现在白天和傍晚天空天空颜色的不同。
现实生活中,大气散射根据大气散射现象可以大致分为三类:
- 瑞利散射:瑞利散射是晴空万里的时候主要发生的光学现象,光线穿梭在空气中遇到比光波长小得多(~1/10以下)的小分子之后会进行 “波长敏感”的散射,它是我们的天蓝色的天空与橙红色的落日晚霞的主要成因。
- 米氏散射:米氏散射是灰蒙蒙的天气时会发生的光学现象,是空气中粒子尺寸(大约)大于等于光波长的时候会发生的散射现象,例如丁达尔效应、各种水雾、烟、尘的散射等其实都可以归类为米氏散射。米氏散射吸收的光能量并 不是“波长敏感” 的,对于入射光颜色的“修改能力”较弱。实时渲染的时候一般会用米氏散射的近似模型。
- 拉曼散射:拉曼散射在粒子半径远远小于光的波长时发生,但是拉曼散射发生的是非弹性碰撞,意味着拉曼散射之后,光子的能量和频率都会发生改变,对于计算机来说处理十分复杂。而且拉曼散射对于颜色的贡献很小,因此在渲染领域一般不考虑这个散射。
大气散射渲染学习案例
大气散射已经有很多成熟的案例,这里给大家分享一个我个人比较推荐学习/移植的案例Atmospheric scattering explained
该案例有详细的注释,解释了渲染大气散射的过程,并且因为是编写在 shadertoy 上,因此可以实时修改代码查看变化效果。
大气散射渲染学习案例大致讲解
该学习案例上几乎每行代码都有相应的注释,非常详细,这里就简单过一下。
和体积云类似,大气散射也定义了两个球体范围,关于大气散射颜色计算的过程仅发生在这两个球体之间。
因此第一步当然是先计算从相机出发的视线,是否与大气外层球体相交。
如果不相交,说明该视线方向上不会发生大气散射,此时,直接返回透明色即可。
float a = dot(dir, dir);
float b = 2.0 * dot(dir, start);
float c = dot(start, start) - (atmo_radius * atmo_radius);
float d = (b * b) - 4.0 * a * c;

// stop early if there is no intersect
if (d < 0.0) return scene_color;
如果相交,则说明该视线方向上会发生大气散射,此时,就可以预先根据视线方向和光线方向,计算瑞利散射相函数(Rayleigh phase function)和米氏散射相函数(Mie phase function)了。
ps: 相函数(phase function): 描述了介质散射入射的光波时其介质内粒子散射能量的空间分布,表示为散射波在某方向单位立体角内的散射能量与所有方向的散射能量总和之比。
// 预计算一些常用的量
float mu = dot(dir, light_dir);
float mumu = mu * mu;
float gg = g * g;
// 计算瑞利散射和米氏散射的相函数
float phase_ray = 3.0 / (50.2654824574 /* (16 * pi) */) * (1.0 + mumu);
float phase_mie = allow_mie ? 3.0 / (25.1327412287 /* (8 * pi) */) * ((1.0 - gg) * (mumu + 1.0)) / (pow(1.0 + gg - 2.0 * mu * g, 1.5) * (2.0 + gg)) : 0.0;
接着就进入 RayMarching 阶段,该阶段会进行两个嵌套的 RayMarching,这两个嵌套的 RayMarching 执行的过程极为相似。它们在每个光线步进点上计算当前点的高程,并且通过高程计算粒子的密度(瑞利和米)和大气对光的吸收程度。最终将这些信息进行累加,从而可以获取该光线经过了多少粒子。
内层的 RayMarching 从视线步进点出发,沿着光线方向步进,最终获取到的信息可以计算“当前步进点有多亮”。
// “当前步进点有多亮”
// and the optical depth of this ray
vec3 opt_l = vec3(0.0);

// now sample the light ray
// this is similar to what we did before
for (int l = 0; l < steps_l; ++l) {

    // calculate where we are along this ray
    vec3 pos_l = pos_i + light_dir * ray_pos_l;

    // the heigth of the position
    float height_l = length(pos_l) - planet_radius;

    // calculate the particle density, and add it
    // this is a bit verbose
    // first, set the density for ray and mie
    vec3 density_l = vec3(exp(-height_l / scale_height), 0.0);

    // then, the absorption
    float denom = (height_absorption - height_l) / absorption_falloff;
    density_l.z = (1.0 / (denom * denom + 1.0)) * density_l.x;

    // multiply the density by the step size
    density_l *= step_size_l;

    // and add it to the total optical depth
    opt_l += density_l;

    // and increment where we are along the light ray.
    ray_pos_l += step_size_l;
}
外层的 RayMarching 从眼睛出发沿着视线方向步进,最终获取到的信息可以计算“到达眼睛还剩多亮”(最终的瑞利散射量和米氏散射量)
for (int i = 0; i < steps_i; ++i) {

    // calculate where we are along this ray
    vec3 pos_i = start + dir * ray_pos_i;

    // and how high we are above the surface
    float height_i = length(pos_i) - planet_radius;

    // now calculate the density of the particles (both for rayleigh and mie)
    vec3 density = vec3(exp(-height_i / scale_height), 0.0);

    // and the absorption density. this is for ozone, which scales together with the rayleigh,
    // but absorbs the most at a specific height, so use the sech function for a nice curve falloff for this height
    // clamp it to avoid it going out of bounds. This prevents weird black spheres on the night side
    float denom = (height_absorption - height_i) / absorption_falloff;
    density.z = (1.0 / (denom * denom + 1.0)) * density.x;

    // multiply it by the step size here
    // we are going to use the density later on as well
    density *= step_size_i;

    // Add these densities to the optical depth, so that we know how many particles are on this ray.
    opt_i += density;

    // Calculate the step size of the light ray.
    // again with a ray sphere intersect
    // a, b, c and d are already defined
    a = dot(light_dir, light_dir);
    b = 2.0 * dot(light_dir, pos_i);
    c = dot(pos_i, pos_i) - (atmo_radius * atmo_radius);
    d = (b * b) - 4.0 * a * c;

    // no early stopping, this one should always be inside the atmosphere
    // calculate the ray length
    float step_size_l = (-b + sqrt(d)) / (2.0 * a * float(steps_l));

    // and the position along this ray
    // this time we are sure the ray is in the atmosphere, so set it to 0
    float ray_pos_l = step_size_l * 0.5;

    // 内层 RayMarching,获取“当前步进点有多亮”信息
    vec3 opt_l;

    // Now we need to calculate the attenuation
    // this is essentially how much light reaches the current sample point due to scattering
    vec3 attn = exp(-beta_ray * (opt_i.x + opt_l.x) - beta_mie * (opt_i.y + opt_l.y) - beta_absorption * (opt_i.z + opt_l.z));

    // accumulate the scattered light (how much will be scattered towards the camera)
    total_ray += density.x * attn;
    total_mie += density.y * attn;

    // and increment the position on this ray
    ray_pos_i += step_size_i;
}
根据瑞利散射颜色值、米氏散射颜色值、环境光颜色和通过RayMarching得到的深度信息,计算大气的“透明度”
vec3 opacity = exp(-(beta_mie * opt_i.y + beta_ray * opt_i.x + beta_absorption * opt_i.z));
最终通过瑞利散射相函数、瑞利散射颜色值、瑞利散射量、米氏散射相函数、米氏散射颜色值、米氏散射量等信息,即可计算最终大气散射的颜色。
// calculate and return the final color
return (
  phase_ray * beta_ray * total_ray // rayleigh color
  + phase_mie * beta_mie * total_mie // mie
  + opt_i.x * beta_ambient // and ambient
) * light_intensity + scene_color * opacity; // now make sure the background is rendered correctly
体积云融合大气散射
通常来说体积云和大气散射融合在一起时,体积云的颜色需要mix上一些大气的颜色,使得二者叠加起来效果更和谐。
当然如果需要进行颜色的mix,就意味着在绘制云的过程中需要进行额外的大气散射计算,这会带来一些额外的性能开销。
至于是否觉得这个操作带来效果有必要,则让因人而异。
基于我的实现,我把是否mix大气颜色的对比放在下面
可以发现mix颜色之后效果会更自然。
如果渲染云层时,颜色调的好也许可以不使用大气散射颜色?这个应该是可行的,但是由于我这边大气散射的实现比较省,因此是否mix对性能影像很小,所以还是采用mix大气散射颜色的方式。
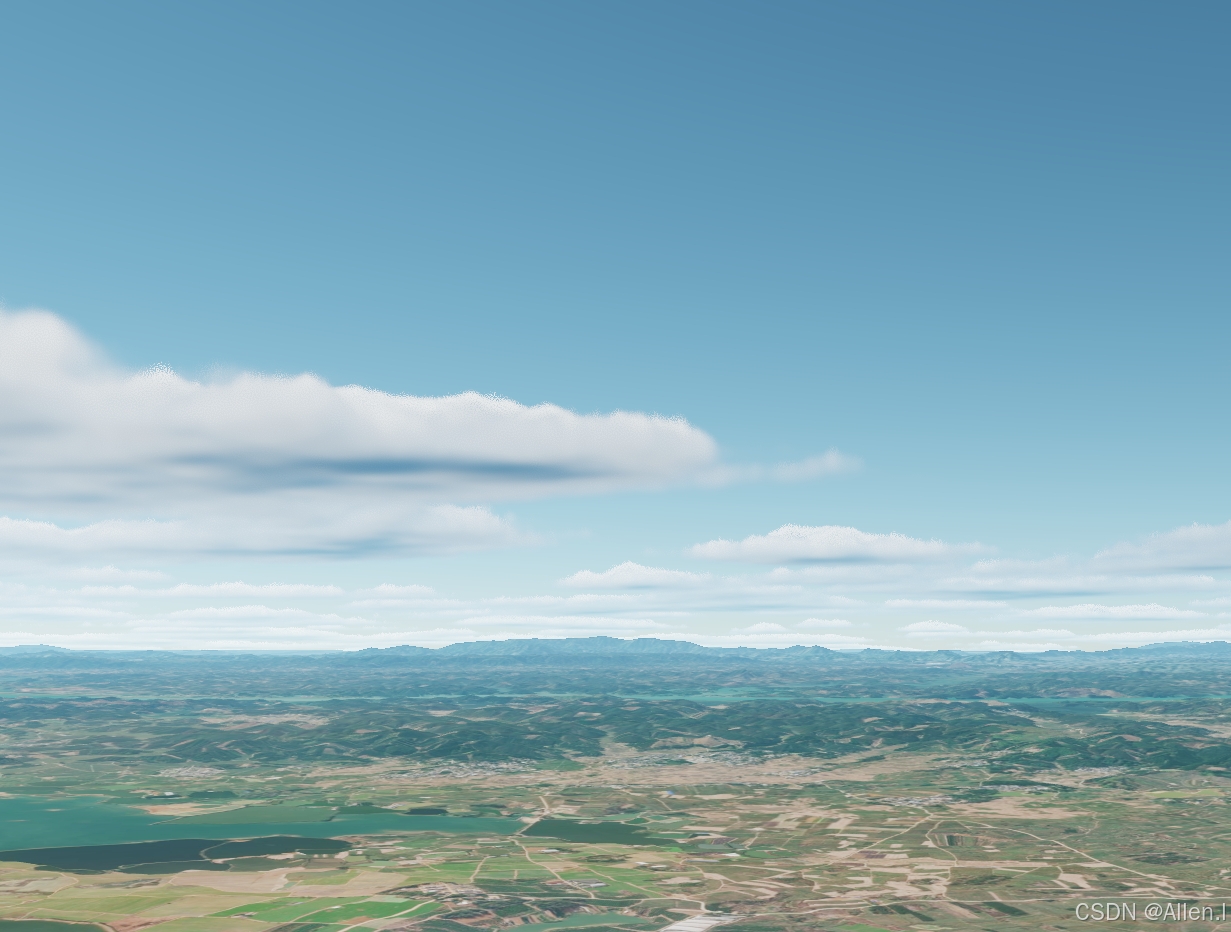
场景明暗变化
在原生的Cesium中,仅有地形和部分模型支持随着太阳角度不同的明暗变化。并且有时候这种明暗变化不能同步。
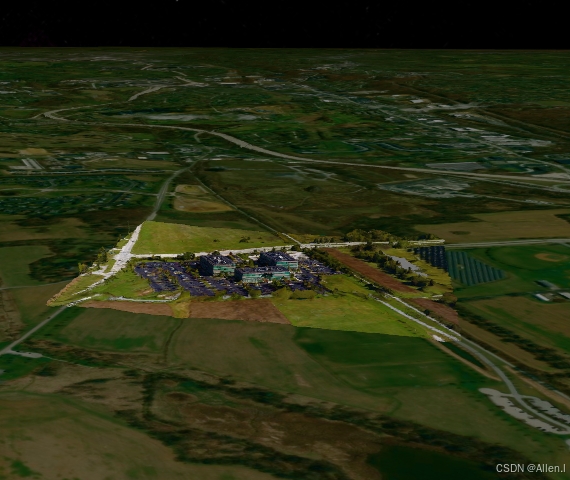
如上图所示,由于倾斜模型是不应用光照的,而地形可以开启光照计算,并且通过设置globe.baseColor来设置地形受到的光照颜色。
因此很容易造成这种颜色上的差异。
我这边的解决办法是通过类似后处理的方式,对场景中所有的元素进行统一的颜色计算,达到明暗变化同步的效果。
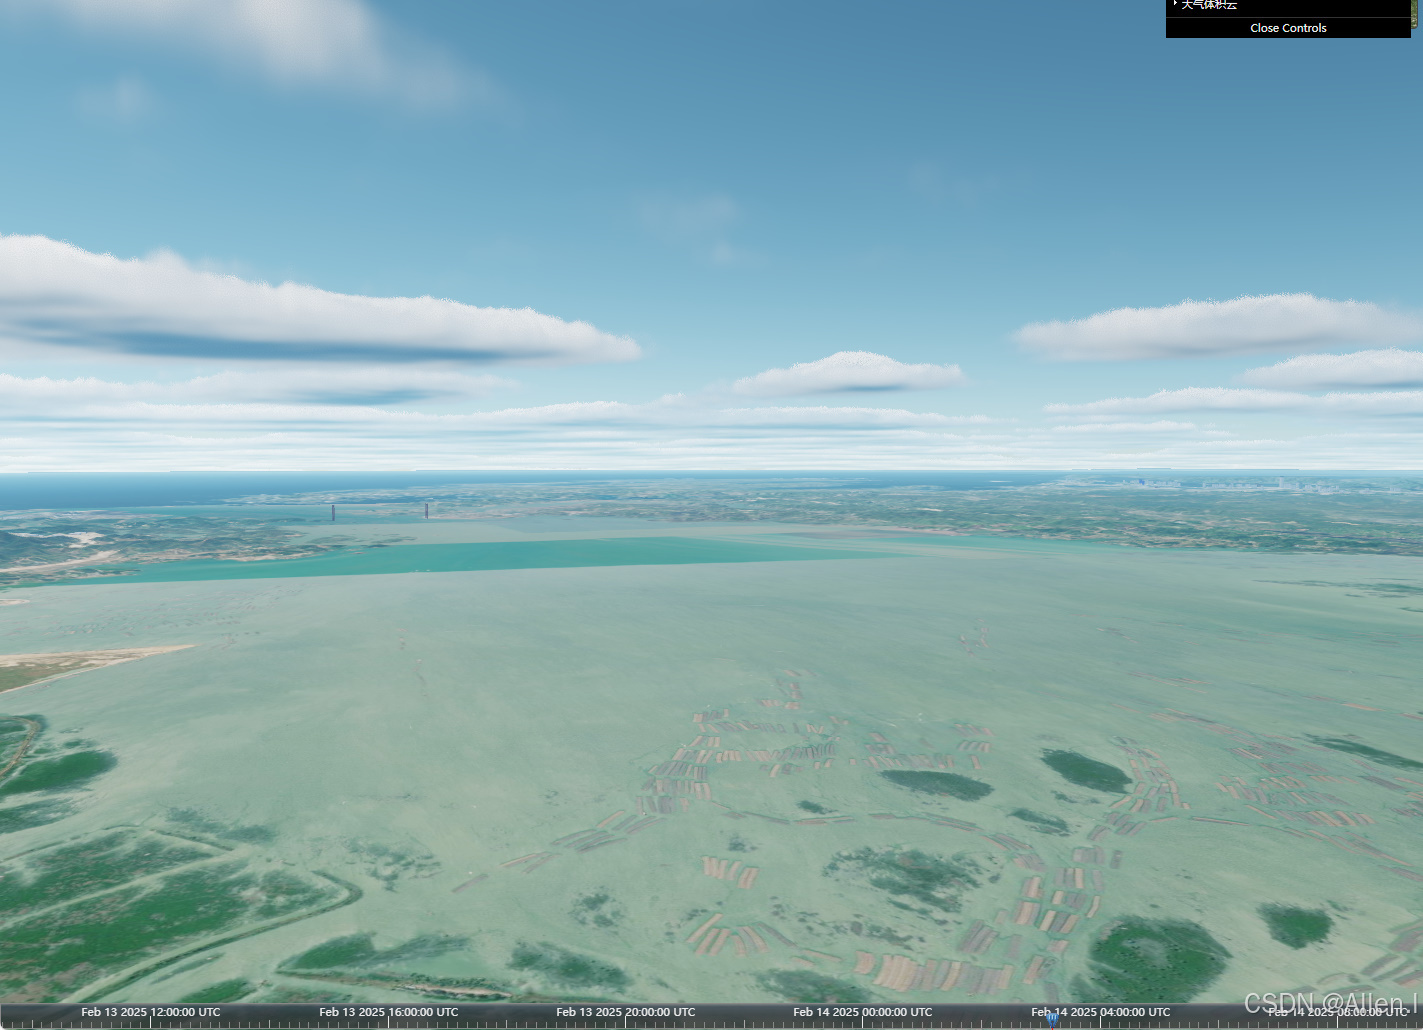
最终效果展示
Cesium中实现大气美化+体积云+多光源
又来一个新的Cesium体积云大气效果


 514
514

 被折叠的 条评论
为什么被折叠?
被折叠的 条评论
为什么被折叠?
 到【灌水乐园】发言


