


一、问题描述
ES集群安装sql插件后,重启ES报错:uncaught exception in thread [main]
org.elasticsearch.bootstrap.StartupException: java.lang.IllegalArgumentException:Cannot replace existing handler for [/_sql] for method: POST


环境:ES 7.0.1 ;JDK 1.8.*;es-sql:7.0.1
二、问题处理
1、原因:这是因为elasticsearch-sql与自带的x-pack-sql模块冲突,修改配置文件elasticsearch.yml,新增:xpack.sql.enabled: false后,重启ES。
2、编辑配置conf/elasticsearch.yml

2、重启ES:这时已经可以正常启动。


三、插件安装
3.1、elasticsearch-sql-7.0.1插件
elasticsearch-sql-7.0.1.0插件下载:
wget --no-check-certificate --no-cookies --header "Cookie: oraclelicense=accept-securebackup-cookie" https://github.com/NLPchina/elasticsearch-sql/releases/download/7.0.1.0/elasticsearch-sql-7.0.1.0.zip
下载完成后解压到es的plugin下即可,执行:
bin/elasticsearch-plugin list  #输出
sql
cd sql/
ls  #输出如下
druid-1.1.16.jar  elasticsearch-sql-7.0.1.0.jar  guava-15.0.jar  plugin-descriptor.properties
3.2、elasticsearch-head插件
elasticsearch-head是elasticsearch的一款可视化Web工具,依赖于node.js ,所以需要先安装node.js。其中grunt是对每个项目进行控制的,通过两个文件来配置相应的配置。分别是 package.json 和 Gruntfile.js ,要放在项目的根目录下。
插件下载:Elasticsearch 5.x, 6.x, and 7.x中,该插件将作为独立服务器运行,而不是一个插件
git clone git://github.com/mobz/elasticsearch-head.git  #或者
https://github.com/mobz/elasticsearch-head/archive/master.zip
unzip elasticsearch-head-master.zip
cd elasticsearch-head
wget  https://nodejs.org/download/release/v6.0.0/node-v6.0.0-linux-x64.tar.gz
tar -xf node-v6.0.0-linux-x64.tar.xz  -C /opt/deepinsight/
#或
#查看npm仓库
npm config get registry  #默认https://registry.npmjs.org/
#或
npm info express
#修改为淘宝的源
npm config set registry https://registry.npm.taobao.org
npm config list
npm -v  #我使用3.8.6
npm install -g grunt --registry=https://registry.npm.taobao.org //安装grunt,使用taobao源,华为源:https://mirrors.huaweicloud.com/repository/npm/
npm install -g grunt-cli
npm install   #安装插件
cd node_modules/grun
npm install grunt --save  #Grunt是基于Node.js的项目构建工具。它可以自动运行你所设定的任务
vi ../Gruntfile.js  ##新增hostname: 'zk-ip',


安装bzip2后重新npm install


如果还不行,尝试:
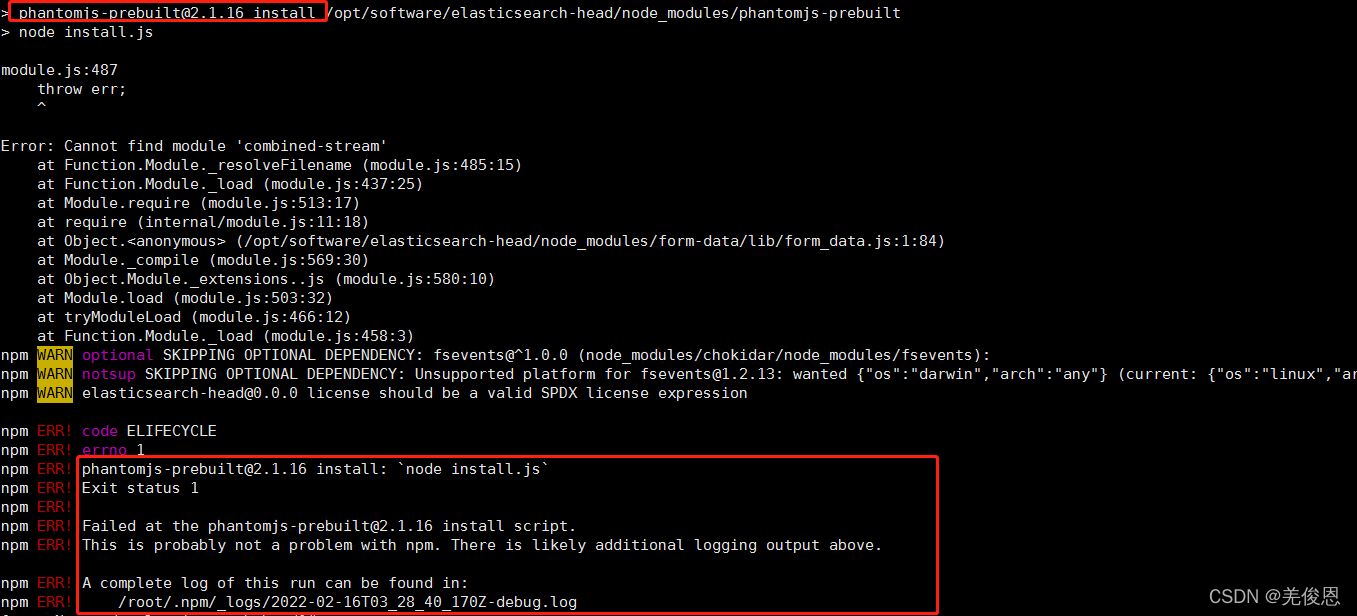
npm install phantomjs-prebuilt@2.1.16 --ignore-scripts

如还不行,执行:
rm -rf node_modules
rm package-lock.json
npm cache clear --force或npm cache clean -f或npm cache verify
npm install

修改 _site/app.js文件中如下图处参数,修改为ES服务器IP:大概4839行

如果需要跨域和域名支持,修改config/elasticsearch.yml文件,增加:
http.cors.enabled: true     #是否支持跨域
http.cors.allow-origin: "*" #支持所有域
http.cors.allow-headers: Authorization,X-Requested-With,Content-Length,Content-Type         #如果集群健康值:未连接


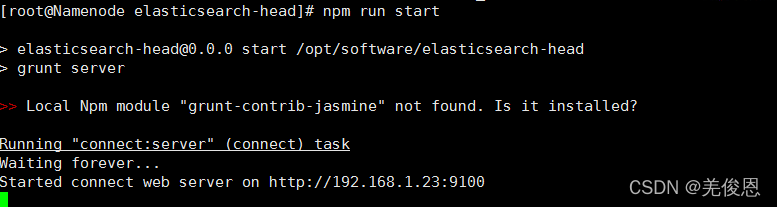
重启ES后,启动head插件:
cd elasticsearch-head
nohup npm run start  > /dev/null 2>&1 &
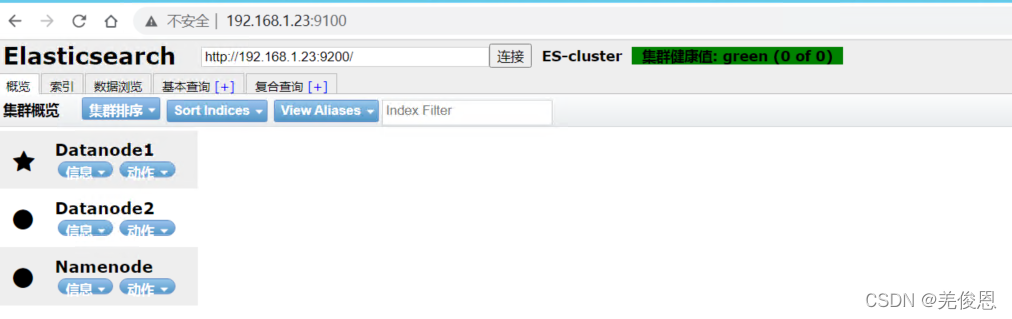
**验证:**浏览器访问:http://localhost:9100/
**ES-head使用密码访问ES:**编辑es.yml文件后,重启ES集群
http.cors.enabled: true
http.cors.allow-origin: "*"
#http.cors.allow-headers: Authorization  #这个配置改为下面的
http.cors.allow-headers: Authorization,X-Requested-With,Content-Length,Content-Type
xpack.security.enabled: true
xpack.security.transport.ssl.enabled: true
如果Elasticsearch开启了x-pack后,登录9200端口需要用户和密码,在使用Elasticsearch-head时,就不能直接访问9100了,在url上需要添加用户名和密码:
http://localhost:9100/?auth_user=elastic&auth_password=123456
3.3、ik 分词器
软件下载: https://github.com/medcl/elasticsearch-analysis-ik
解压并进入elasticsearch-analysis-pinyin-master目录,mvn打包:mvn package,成功以后, 会生成一个target文件夹, 在elasticsearch-analysis-ik-master/target/releases目录下, 找到elasticsearch-analysis-ik-5.1.1.zip, 这就是我们需要的安装文件; 解压elasticsearch-analysis-ik-5.1.1.zip, 并将内容拷贝到elasticsearch安装目录的plugins/ik目录下(在plugins目录下新建ik文件夹)
配置文件:plugins/ik/config/IKAnalyzer.cfg.xml #配置es实时监听词库
四、FAQ:
4.1 执行grunt --version 报错:SyntaxError: Unexpected token …
node_modules/micromatch/index.js:44
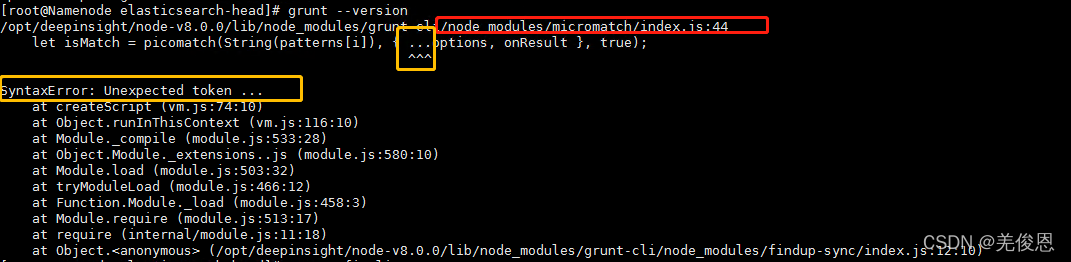
这是micromatch index.js "…“的扩展语法, (…) 允许在预期零个或多个参数(用于函数调用)或元素(用于数组字面量)的地方扩展诸如数组表达式或字符串之类的可迭代对象,或者将对象表达式扩展为需要零个或多个键值对(对于对象文字)的地方。相关建议:降级当前的micromatch到3.x版本( micromatch (“3.1.10”)),该版本不使用”…"的扩展语法;micromatch是javascript/node.js 的全局匹配。
参考:
https://github.com/micromatch/micromatch/blob/master/index.js
https://github.com/micromatch/micromatch/blob/3.1.10/index.js
https://github.com/micromatch/micromatch
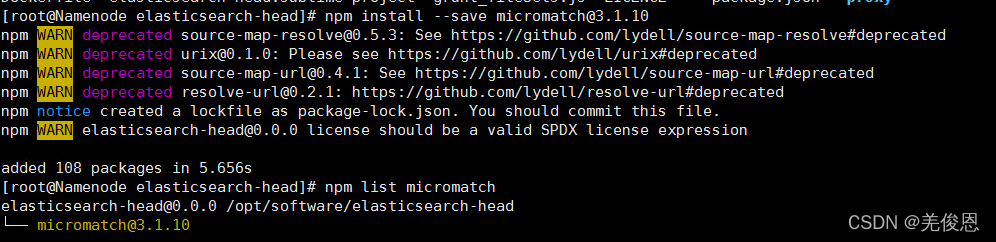
npm install --save micromatch@3.1.10
npm view micromatch versions
npm install browser-sync@2.26.7
版本兼容性检查参考:https://kangax.github.io/compat-table/es2016plus/#test-object_rest/spread_properties
grunt --version
npm install -g grunt-cli --registry=https://registry.npm.taobao.org
npm install phantomjs-prebuilt@2.1.16 --ignore-scripts
npm install
npm i node_modules  #重新安装
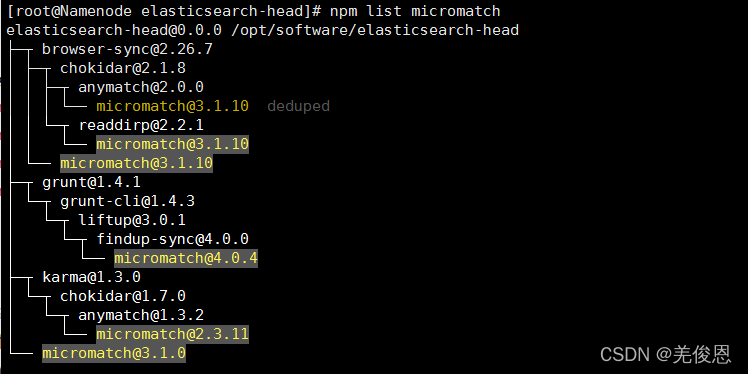
从上可知,grunt在node 8.0当前可用的只有1.4.1版本,而其又依赖micromatch@4.0.4,如不想升级node8以上版本,可指定使用:grunt-cli@1.3.1版本跳过
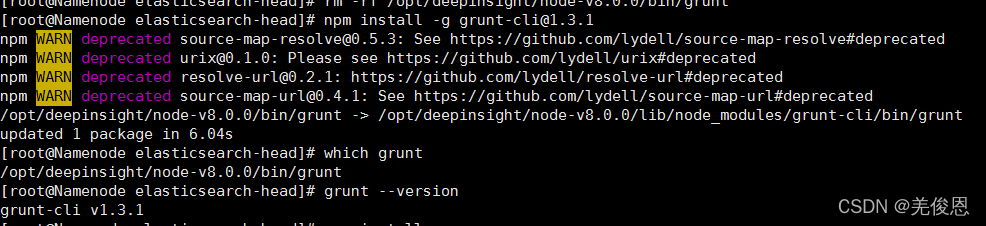
npm install -g grunt-cli@1.3.1
npm install --save micromatch@3.1.10
实践表明这样并不可取,因为在node8下执行npm run start 无法启动,因无法安装grunt 1.3.1版本。且执行npm install会自动安装1.4.1版本,你可以尝试修改package.json更改为使用指定的软件包版本;本次采用node9.0.0后,执行:
npm install -g grunt
grunt --version
npm install phantomjs-prebuilt@2.1.16 --ignore-scripts
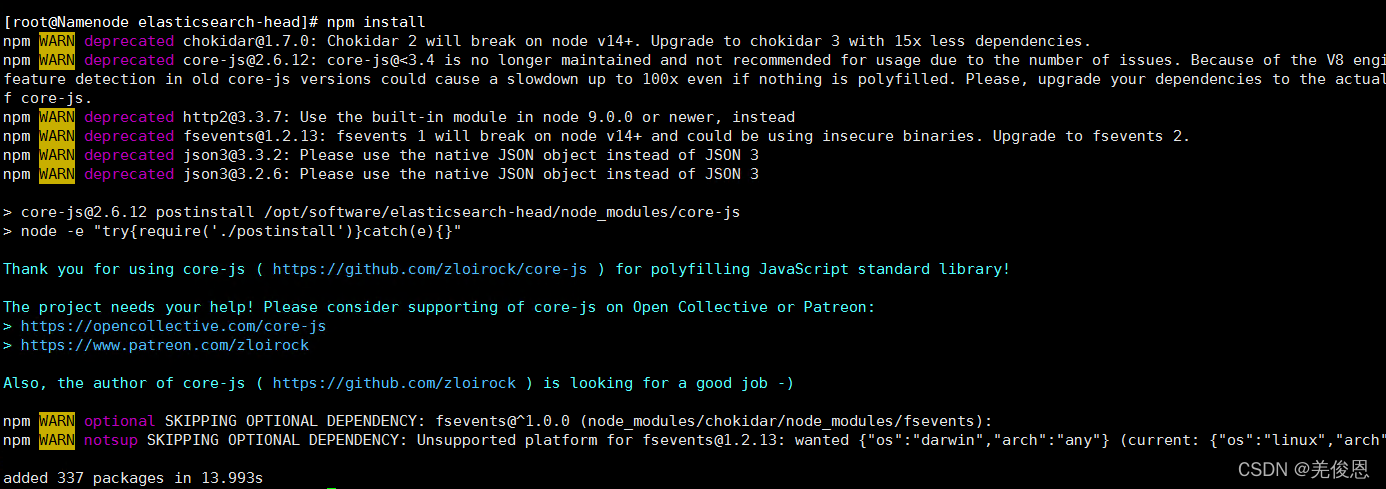
npm install
npm run start //访问ip:9200正常后,执行
nohup npm run start > /dev/null 2>&1 &
注意:使用IE11访问显示空白,使用google访问如下所示:
4.2 optional SKIPPING OPTIONAL DEPENDENCY: fsevents@^1.0.0 (node_modules/chokidar/node_modules/fsevents):
fsevents是苹果系统的可选依赖;
4.3、关于:npm WARN elasticsearch-head@0.0.0 license should be a valid SPDX license expression
解决:打开elasticsearch-head目录下的package.json文件,找到license位置,修改为Apache-2.0
elasticsearch-head@0.0.0 license should be a valid SPDX license expression


 193
193


 被折叠的 条评论
为什么被折叠?
被折叠的 条评论
为什么被折叠?
 到【灌水乐园】发言


