


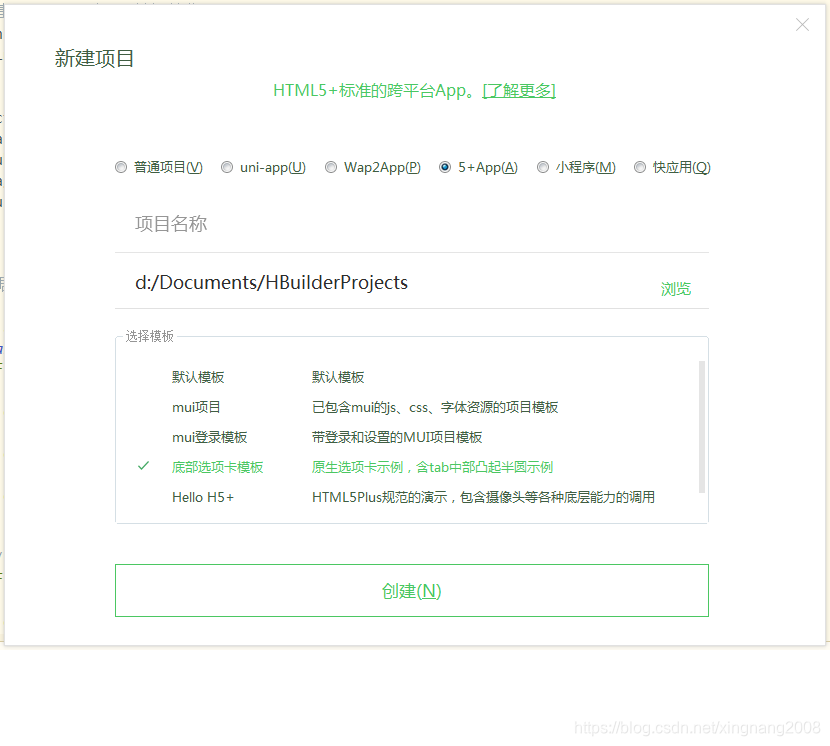
一、创建项目
1.选择 5+app 的底部选项模板
2.index.html修改
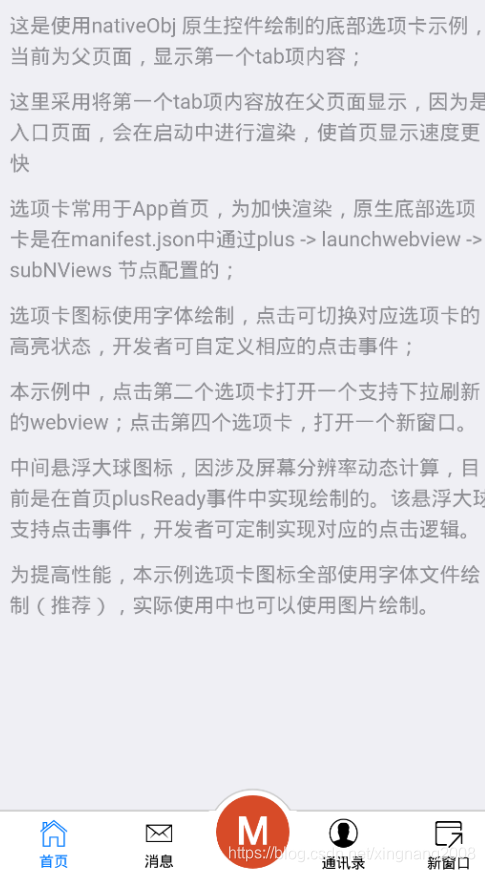
需要去掉中间的大M图标。然后平均每个选项
删除 index.html中的代码
						var self = plus.webview.currentWebview(),
						leftPos = Math.ceil((window.innerWidth - 60) / 2); // 设置凸起大图标为水平居中

					/**
					 * drawNativeIcon 绘制带边框的半圆,
					 * 实现原理:
					 *   id为bg的tag 创建带边框的圆
					 *   id为bg2的tag 创建白色矩形遮住圆下半部分,只显示凸起带边框部分
					 * 	 id为iconBg的红色背景图
					 *   id为icon的字体图标
					 *   注意创建先后顺序,创建越晚的层级越高
					 */
					var drawNativeIcon = util.drawNative('icon', {
						bottom: '5px',
						left: leftPos + 'px',
						width: '60px',
						height: '60px'
					}, [{
						tag: 'rect',
						id: 'bg',
						position: {
							top: '1px',
							left: '0px',
							width: '100%',
							height: '100%'
						},
						rectStyles: {
							color: '#fff',
							radius: '50%',
							borderColor: '#ccc',
							borderWidth: '1px'
						}
					}, {
						tag: 'rect',
						id: 'bg2',
						position: {
							bottom: '-0.5px',
							left: '0px',
							width: '100%',
							height: '45px'
						},
						rectStyles: {
							color: '#fff'
						}
					}, {
						tag: 'rect',
						id: 'iconBg',
						position: {
							top: '5px',
							left: '5px',
							width: '50px',
							height: '50px'
						},
						rectStyles: {
							color: '#d74b28',
							radius: '50%'
						}
					}, {
						tag: 'font',
						id: 'icon',
						text: '\ue600', //此为字体图标Unicode码'\e600'转换为'\ue600'
						position: {
							top: '0px',
							left: '5px',
							width: '50px',
							height: '100%'
						},
						textStyles: {
							fontSrc: '_www/fonts/iconfont.ttf',
							align: 'center',
							color: '#fff',
							size: '30px'
						}
					}]);
					// append 到父webview中
					self.append(drawNativeIcon);

					//自定义监听图标点击事件
					var active_color = '#fff';
					drawNativeIcon.addEventListener('click', function(e) {
						mui.alert('你点击了图标,你在此可以打开摄像头或者新窗口等自定义点击事件。', '悬浮球点击事件');
						// 重绘字体颜色
						if(active_color == '#fff') {
							drawNativeIcon.drawText('\ue600', {}, {
								fontSrc: '_www/fonts/iconfont.ttf',
								align: 'center',
								color: '#000',
								size: '30px'
							}, 'icon');
							active_color = '#000';
						} else {
							drawNativeIcon.drawText('\ue600', {}, {
								fontSrc: '_www/fonts/iconfont.ttf',
								align: 'center',
								color: '#fff',
								size: '30px'
							}, 'icon');
							active_color = '#fff';
						}

					});
					// 中间凸起图标绘制及监听点击完毕
3.最后一个改为
						if(currIndex !== 4) {
							//底部选项卡切换
							util.toggleNview(currIndex);
							// 子页面切换
							util.changeSubpage(targetPage, activePage, aniShow);
							//更新当前活跃的页面
							activePage = targetPage;
						}
4.修改选项
manifest.json——源码视图
{
							"tag": "font",
							"id": "newsText",
							"text": "消息",
							"position": {
								"top": "23px",
								"left": "25%",
								"width": "25%",
								"height": "24px"
							},
5.改图标
去阿里矢量图标库,下载图标

然后找到 iconfont.css 文件和 iconfont.ttf 文件,并分别放置到MUI项目的css和fonts文件夹,然后打开 iconfont.css 文件
修改路径
  @font-face {font-family: "iconfont";
        src:url('../fonts/iconfont.ttf') format('truetype'); /* chrome、firefox、opera、Safari, Android, iOS 4.2+*/
    }
引用图标:
1.html中引用iconfont.css
2.引用图标代码 (注意 \u + e数字、fontSrc : _www/fonts/iconfont.ttf)

6 改跳转页面
a.在js/util.js里修改subpages
b.在html 目录下新建 main.html ,market.html , my.html


 1067
1067


 被折叠的 条评论
为什么被折叠?
被折叠的 条评论
为什么被折叠?
 到【灌水乐园】发言


