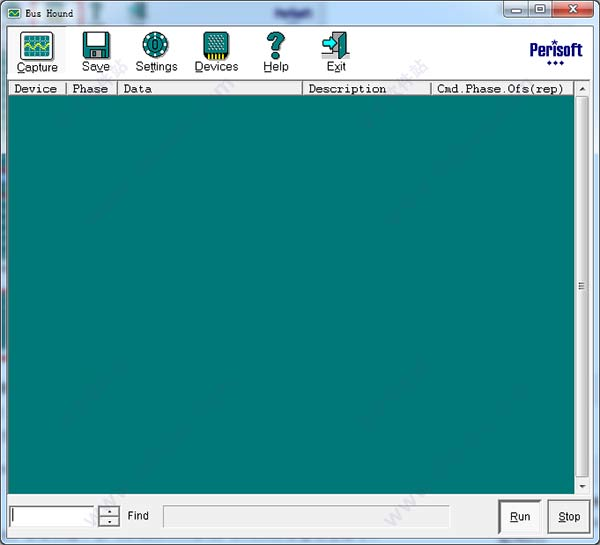
Bus Hound 5.0<br><br>Copyright (C) Perisoft 2000-2003. All rights reserved worldwide.<br><br>Bus Hound is a powerful software bus analyzer for capturing I/O and protocol from devices. Features include:<br><br> Supports every version of IDE, SCSI, USB, 1394<br> Supports all devices such as hard drives, DVD, mice, scanners, web cams, and everything else<br> Supports Windows 95, 98, Me, NT 4.0, 2000, 2003, XP and XP Embedded<br> Capture megabytes of I/O limited only by available memory<br> Automatically stop the capture upon a trigger condition<br> Measure individual read, write, and isochronous device performance<br> Captures device driver packets such as IRP’s<br> Filter what type of phases are captured<br> Run on an unlimited number of machines at the same time<br> Capture any number of devices in parallel, regardless of bus type<br> Fits on a diskette for easy transportability and quick downloads<br> Drag and drop captured data to other products in html format<br> Save captured data to a text file or zip file<br> Simple device selection from a graphical tree of devices<br> Capture the system startup process<br> Arrange captured data to user preferences such as the byte width per line<br> View low level protocol including SCSI sense data and USB setup packets<br> View microsecond resolution timing of each phase<br> Watch I/O on screen in real time as it happens<br> Pure software solution--no extra hardware or system changes needed<br><br><br><br>The Capture Window<br><br>Commands sent to devices consist of one or more phases. Examples of phases are command bytes, data bytes, and status bytes. Bus hound logs each phase complete with timing information and a description of the content.<br><br>Capture columns<br><br>Below are descriptions of information in each column of the Capture Window:<br><br>Device<br><br>Device ID. Each device is assigned a number which can be matched up with devices in the Devices Window. The first detected device on the system is Device ID 0, the second is Device ID 1, and so on. This field is useful in the event multiple devices are being captured in parallel.<br><br>For USB devices, the endpoint is also displayed (eg: 4.1 = device 4, endpoint 1).<br><br>Phase<br><br>Phase type. Please refer to the table for details of each phase type.<br><br>Phase Description<br>ADDR 8 byte 1394 transfer address<br>ATI 7 byte ATA task file returned from an IDE device<br>ATO 7 byte ATA task file sent to an IDE device <br>ATP Windows ATA_PASS_THROUGH data structure<br>CDB SCSI command descriptor block<br> (Known as a packet command for ATAPI devices)<br>CTL 8 byte setup packet of a USB control transfer<br>DI Data In (Device to PC transfer)<br>DO Data Out (PC to device transfer)<br>IOR Windows VXD I/O Request data structure<br>IRB Windows 1394 I/O Request Block data structure<br>IRP Windows I/O Request Packet data structure<br>ISOC Isochronous transfer data bytes<br>LEN Data transfer length of a DI,DO, or ISOC phase in <br> decimal units. This field is off by default and can be<br> turned on from the settings Window<br>LOCK 1394 lock transaction<br>NSTS Windows 4 byte kernel mode NTSTATUS field<br>RSET Bus or device reset<br>RSTS Windows VXD IOR status<br>SNS SCSI request sense data<br>SPT Windows SCSI Pass Through data structure<br>SRB Windows SCSI Request Block (SRB) data structure<br>SSTS Windows 1 byte SCSI Request Block (SRB) status<br>STAK Windows IO_STACK_LOCATION data structure<br>URB Windows USB Request Block (URB) data structure<br>USTS Windows 4 byte USBD_STATUS code<br><br><br>Data<br><br>Data bytes associated with the phase. Examples are command bytes, data transfer bytes, and status bytes.<br><br>Description<br><br>A text description of this phase provided for your convenience.<br><br>Delta<br><br>Elapsed time from the previous phase to the current phase. The following table describes the units of the time format.<br><br>Name Units<br>us Microseconds<br>ms Milliseconds<br>sc Seconds<br>mn Minutes<br>hr Hours<br>dy Days<br><br><br>Cmd.Phase.Ofs(rep)<br><br>This unique tag identifies the exact position within the captured data. All values are in decimal.<br><br>Cmd is the command number. Commands start at 1 and increment for each new command sent to a device.<br><br>Phase is the phase number within this command. A command is usually composed of multiple phases such as data transfer and status. This value starts at 1 and increments for each new phase within the command.<br><br>Ofs is the byte offset of the data within this phase. This value starts at 0 and increments for each byte of data in the data transfer.<br><br>Rep is the number of identical commands issued back to back. The repeat count feature can be turned off by deselecting the “Merge Repeated Commands” check box in the settings Window.<br><br>Date<br><br>Date the phase occurred in year/month/day format.<br><br>Time<br><br>Time the phase occurred in hour:minute:second.millisecond format. The hour ranges from 0 to 23 (military time).<br><br><br>Capturing the system startup process<br><br>If the Bus Hound application is exited while the Run button is pressed, the device driver portion of Bus Hound continues capturing data. In the event the system is restarted, it will start capturing data early in the system startup process.<br><br>If Bus Hound is exited while stopped, no capture will occur until returning to the product and pressing Run.<br><br>Customizing the capture display<br><br>The column order can be modified by dragging the column headers to the desired position. The byte width per line can be 1, 2, 4, 8, 16, or 32 bytes and is based on the width of the window. These settings are respected for Saving and drag & drop.<br><br>Searching<br><br>Searching can be performed from the capture window in either the up or down direction by typing the search string in the lower left edit box followed by pressing the up or down arrow to search up or down respectively. If the search string is not found, the trace position is not changed. Searching is not case sensitive.<br><br>Drag and Drop<br><br>To use drag and drop, first select the desired range of lines by clicking on the starting line, then hold down shift and click the ending line. The data can now be dragged using the mouse to another product.<br><br>Pressing control-c copies the selected lines to the clipboard.<br><br>Command Overlap<br><br>Overlapped commands are identified when a command starts before previous commands to the same device have completed. It is possible for Commands to be overlapped at the I/O subsystem level (which Bus Hound displays), but not at the hardware level.<br><br>Multiple DI/DO phases<br><br>Windows 9x only: if multiple DI/DO phases are listed for the same command, it indicates the transfer was split across multiple memory address ranges<br><br>PS2 Mouse data format<br><br>Below is the format of the data returned in the data in phase for PS/2 mice. This is known as the MOUSE_INPUT_DATA structure in the Windows DDK:<br><br>Offset Length Content<br>0 2 Not used<br>2 2 Position type:<br> 0000h = relative position<br> 0001h = absolute position<br>4 2 Button flags:<br> 0001h = left button down<br> 0002h = left button up<br> 0004h = right button down<br> 0008h = right button up<br> 0010h = middle button down<br> 0020h = middle button up<br> 0040h = button 4 down<br> 0080h = button 4 up<br> 0100h = button 5 down<br> 0200h = button 5 up<br> 0400h = mouse wheel<br>6 2 Mouse wheel data<br>8 4 Not used<br>12 4 X position<br>16 4 Y position<br>20 4 Device specific information<br><br>PS2 Keyboard data format<br><br>Below is the format of the data returned in the data in phase for PS/2 keyboards. This is known as the KEYBOARD_INPUT_DATA structure in the Windows DDK:<br><br>Offset Length Content<br>0 2 Not used<br>2 2 Scan code of key<br>4 2 Flags:<br> 0000h = key pressed<br> 0001h = key released<br> 0002h = extended scan code E0<br> 0004h = extended scan code E1<br>6 2 Not used<br>8 4 Device specific information<br><br><br><br>The Save Window<br><br>The Save button saves all captured data to the specified file. The format of the file can be either a text file containing standard ASCII characters or a Zip file. The data will be saved in the same column order and byte width as seen on the screen.<br><br>A comment can be provided that will be placed into the header of the captured data. The current date and time can be included in the comment by inserting %c anywhere inside the comment. If saving to a zip file, the comment is also used for the zip file comment.<br><br><br><br>The Settings Window<br><br>This Window allows you to customize the capture process. Checkbox options in this window are applied instantly. Numeric entries are applied by pressing the apply button, switching to another window, or exiting Bus Hound.<br><br>Buffer Size<br><br>Specifies the number of kilobytes of RAM to use for capturing data. The size is limited only by system RAM. If not enough RAM is available to satisfy the requested size, the size is reduced to available RAM. If you need to get as much space as possible, besides adding more RAM to a system you can also try setting the buffer size before starting other applications. Note: allocating a very large buffer size under Windows 95/98/Me can take a minute.<br><br>Max Phase<br><br>Specifies the maximum number of bytes that will be captured on each phase. Example: if Max Phase is set to 32 bytes and a 64K read operation occurs, only the first 32 bytes of the read will be captured. This option is useful for keeping the size of the captured data to a minimum.<br><br>Stop When...<br><br>These are triggers that allow the capture to automatically stop when the specified condition is met. Any combination of triggers may be selected. When a trigger condition is met, the capture stops and the trigger text is highlighted in red.<br><br>Any Other Error stops the capture when an error occurs that does not fall into any of the other categories.<br><br>Buffer Full stops the capture when Bus Hound's buffer is full. If Buffer Full is deselected, capturing continues after the buffer is full, keeping the most recently captured data.<br><br>Bus Reset stops the capture when a bus reset occurs.<br><br>Data Overrun stops the capture when a data overrun or data underrun occurs.<br><br>Hardware Error stops the capture when a hardware error occurs.<br><br>Invalid Command stops the capture when an invalid command is issued.<br><br>Media Error stops the capture when a device reports a media error such as a bad sector.<br><br>No Media stops the capture when a device reports no media is present.<br><br>Not Ready stops the capture upon a not ready, timeout, or busy condition.<br><br>Text Pattern / Hex Pattern stops the capture when the specified data pattern is detected in the captured data. For text patterns, the match is case sensitive. The pattern is checked against the data transferred in any phase including commands, data, and status.<br><br>Vendor Error stops the capture when a vendor unique error occurs.<br><br>Windows Error stops the capture when an operating system type error occurs.<br><br>Phases to Capture<br><br>Contains a list of all the phase types Bus Hound can capture. Placing a check mark next to a phase allows it to be captured. Removing a check mark next to a phase results in the phase not being captured. This option is useful for filtering out phases that are not of interest or including special operating system phases that are off by default.<br><br>To the right of the check box, a white circle may appear. This indicates the phase has been detected and exists in the captured data. If the circle blinks bright green, it is a real time activity light indicating the phase has occurred and has been captured.<br><br>Merge Repeated Commands<br><br>When selected, if a command occurs that is identical to the previous command, the new command will not be logged separately. Instead, the repeat count of the previous command is incremented. This option is useful for compacting the captured data when a device is being continually polled with the same command.<br><br>Enable Sounds<br><br>If this option is enabled, Bus Hound will make an audible "ping" if the capture, settings, or devices window is up and a trigger condition is met. <br><br>Columns to Display<br><br>Place a checkmark in the boxes to include the desired columns in the Capture Window. The selected columns will also be included in drag & drop and save operations. See the section “The Capture Window” for more details about each column.<br><br><br><br>The Devices Window<br><br>The list of devices represents every device on the system which Bus Hound supports. The list automatically refreshes to reflect new or removed devices. To select/deselect a device to capture, click in the check box next to the device. The selection will be applied instantly.<br><br>Each device is assigned a number which is in parenthesis before the name of the device. This number is displayed in the capture window under the "Device" column. The number reflects the order in which the device was added to the system.<br><br>If a device is displayed in a light font, it indicates the device is not currently present on the system.<br><br>Capture new devices<br><br>Selecting this checkbox will automatically capture data for new devices that are detected. This feature is useful for capturing the first commands sent to hot plugged devices. <br><br>Device Properties<br><br>This window pane displays details about the device such as the performance. The performance is calculated by summing the total bytes transferred divided by the total elapsed time of the commands. The performance statistics are cleared when the run button is pressed in the Capture window.<br><br>Send Commands<br><br>You can send your own custom commands to a device using Bus Commander. To start Bus Commander, highlight a device with the mouse and click the “Send Commands” button or simply double click the device. Bus Commander is a very powerful complementary tool that lets you submit USB, 1394, ATA and SCSI commands to devices. You can also perform operations like bus resets and hardware port i/o.<br><br><br><br>Files Installed<br><br>BUSHOUND.EXE - Bus Hound application<br>BUSCMDR.EXE - Bus Commander application<br>BHUNINST.EXE - uninstaller<br>BHLOG.EXE - capture to disk tool (site license version only)<br>BHOUND3.VXD - device driver for Windows 95, 98, Me<br>BHOUND4.SYS - device driver for Windows NT 4.0<br>BHOUND5.SYS - device driver for Windows 98, Me, 2000, 2003, XP<br>HELP.RTF - product help file (this file)<br><br><br><br>Site License<br><br>The site license version of Bus Hound includes the bhlog.exe command line tool in the folder where Bus Hound is installed. bhlog spools captured data to a disk file in real time. This tool raises the maximum capture size from available RAM to available disk space. bhlog also has the ability to retain captured data in the event a system freezes or reboots by directing captured data to a file on a network drive.<br><br><br><br>FAQ<br><br>1. What type of I/O is captured?<br><br>Bus Hound takes a snap shot of packets sent across the bus. This includes commands, data, status, and timing of each command. Bus Hound does not monitor individual hardware signals.<br><br>2. Will Bus Hound change the behavior of my devices?<br><br>No. Bus Hound simply “listens” for packets. Bus Hound does not alter commands, does not send its own commands, does not replace any system drivers, and does not access the hardware. The system and devices will operate identically whether Bus Hound is installed or not.<br><br>3. Will Bus Hound degrade system performance?<br><br>Customers capturing data from extremely fast devices in parallel have been impressed by Bus Hound’s ability not to effect performance. Bus Hound is even more innocuous when in the stopped state.<br><br>4. Which devices are supported?<br><br>All IDE, SCSI, USB and 1394 devices are supported including disk drives, mice, scanners, web cams, and everything else. Devices that emulate one of these buses are also supported such as certain parallel port devices.<br><br>5. Why are there duplicate devices?<br><br>For some devices, Windows first forms high level packets that are then translated into low level packets which are in turn sent to the hardware. Bus Hound shows several devices so you can choose which level of I/O you wish to capture.<br><br>6. What does capturing I/O for a controller do?<br><br>Some controllers receive commands and some do not. You can experiment capturing data for a controller to see if the packets are of interest.<br><br>7. What if Bus Hound does not show a device?<br><br>No devices are displayed when the system is started in safe mode. This is a safety feature to keep safe mode as clean as possible.<br><br>Devices which are marked with a problem in device manager are not displayed.<br><br>SCSI adapters are not displayed under Windows 95/98/Me unless they have one or more devices attached.<br><br>8. Why are some devices grayed out?<br><br>A grayed out device indicates it is currently not attached to the system.<br><br>9. Windows 95/98/Me crashes when pressing run. What do I do?<br><br>Due to limitations in the Windows 9x architecture, if too many device drivers ask to receive notification of I/O completion, the system will crash. Microsoft device drivers and other installed software such as Bus Hound need such notifications. To resolve this, remove software likely to have additional device drivers installed for the device. For CD/DVD drives, an easy solution is to rename the legacy scsi1hlp.vxd to scsi1hlp.bak which is in the windows/system/iosubsys folder.<br><br>10. Why am I not able to capture all 1394 events?<br><br>Some 1394 devices Bus Hound displays are logical devices such as AV/VHS devices. Select devices further up the tree to capture bus activity for such devices.<br><br>While Bus Hound logs every isochronous transaction, there is no practical way for Bus Hound to see every asynchronous transaction. If you need to see more 1394 activity, note Bus Hound can capture a great deal more in operating systems prior to XP, particularly for SBP-2 devices.<br><br>11. Why am I not seeing task file (ATA) commands for IDE hard drives?<br><br>Bus Hound captures ATA commands only when an application or driver explicitly sends an ATA command (eg: SMART, IDENTIFY). For normal file system requests, Bus Hound captures SCSI CDB's instead of ATA commands due to the monolithic nature of the Windows IDE device driver. Note the CDB's captured have a one to one relationship with ATA commands and can be easily translated to their native ATA equivalent. Also note the data captured with the CDB is identical to the ATA data transfer.<br><br>12. Where can I get more detailed information on the captured data?<br><br>For your convenience, please visit www.perisoft.net/engineer for handy reference data and specifications. Also please note the following resources:<br><br>Specification Location<br>USB www.usb.org <br>SCSI www.t10.org <br>IDE, ATA, ATAPI www.t13.org <br>1394, Firewire www.1394ta.org or www.ieee.org <br>Windows DDK www.microsoft.com/ddk <br><br>14. Where do I get support?<br><br>Visit www.perisoft.net. Any questions, comments, or problem reports on the free or full version are welcome.<br><br>


 482
482

 被折叠的 条评论
为什么被折叠?
被折叠的 条评论
为什么被折叠?
 到【灌水乐园】发言


