


1. Eclipse中建立Dynamic Web Project
项目中的各个目录解析:
- deployment descriptor:部署的描述。
- Web App Libraries:自己加的包可以放在里面。
- build:放入编译之后的文件。
- WebContent:放进写入的页面。
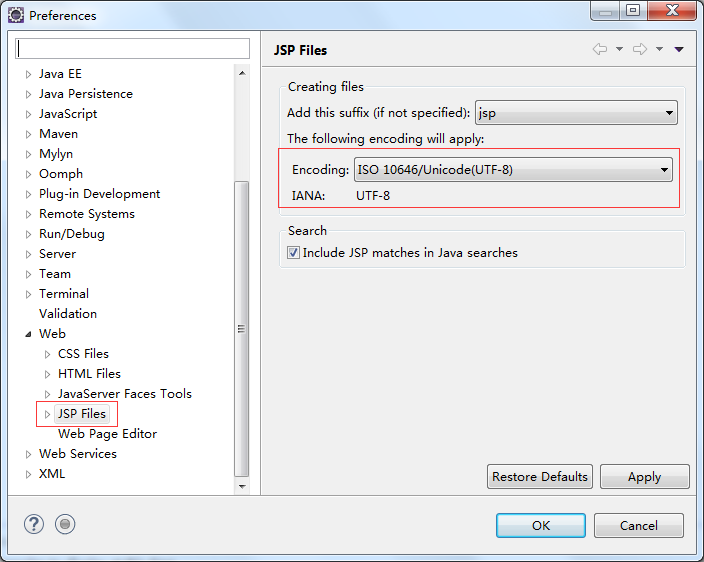
2. 创建jsp文件
首先,你可以注意到Eclipse为你创建的jsp模板编码都是ISO-8859-1。需要到Preferences中改一下。
为jsp文件添加如下代码:
<%@ page language="java" contentType="text/html; charset=UTF-8"
    pageEncoding="UTF-8"%>
<!DOCTYPE html PUBLIC "-//W3C//DTD HTML 4.01 Transitional//EN" "http://www.w3.org/TR/html4/loose.dtd">
<html>
<head>
<meta http-equiv="Content-Type" content="text/html; charset=UTF-8">
<title>菜鸟教程</title>
</head>
<body>
<%
    out.println("Hello World");
%>
</body>
</html>
在运行之前,还可以改一下浏览器选项,使用系统浏览器而不是Eclipse提供的浏览器。具体步骤百度。
3. 创建servlet文件
文件内容如下
package com.runoob.test;

import java.io.IOException;
import javax.servlet.ServletException;
import javax.servlet.annotation.WebServlet;
import javax.servlet.http.HttpServlet;
import javax.servlet.http.HttpServletRequest;
import javax.servlet.http.HttpServletResponse;

/**
 * Servlet implementation class HelloServlet
 */
@WebServlet("/HelloServlet")
public class HelloServlet extends HttpServlet {
    private static final long serialVersionUID = 1L;

    /**
     * @see HttpServlet#HttpServlet()
     */
    public HelloServlet() {
        super();
        // TODO Auto-generated constructor stub
    }

    /**
     * @see HttpServlet#doGet(HttpServletRequest request, HttpServletResponse response)
     */
    protected void doGet(HttpServletRequest request, HttpServletResponse response) throws ServletException, IOException {
        // 设置编码要在前面,否则不生效
        response.setCharacterEncoding("utf-8");
        response.getWriter().append("Served at: ").append(request.getContextPath());
        response.getWriter().write("\n菜鸟教程:http://www.runoob.com");
    }

    /**
     * @see HttpServlet#doPost(HttpServletRequest request, HttpServletResponse response)
     */
    protected void doPost(HttpServletRequest request, HttpServletResponse response) throws ServletException, IOException {
        // TODO Auto-generated method stub
        doGet(request, response);
    }

}
然后右键Run on server就可以了,因为servlet映射已经通过注解配好了。
如果要用web.xml配,则这么写:
<?xml version="1.0" encoding="UTF-8"?>
<web-app xmlns:xsi="http://www.w3.org/2001/XMLSchema-instance"
        xmlns="http://xmlns.jcp.org/xml/ns/javaee"
        xsi:schemaLocation="http://xmlns.jcp.org/xml/ns/javaee
                            http://xmlns.jcp.org/xml/ns/javaee/web-app_3_1.xsd"
        id="WebApp_ID"
        version="3.1">
  <servlet>
     <!-- 类名 -->
    <servlet-name>HelloServlet</servlet-name>
    <!-- 所在的包 -->
    <servlet-class>com.runoob.test.HelloServlet</servlet-class>
  </servlet>
  <servlet-mapping>
    <servlet-name>HelloServlet</servlet-name>
    <!-- 访问的网址 -->
    <url-pattern>/TomcatTest/HelloServlet</url-pattern>
    </servlet-mapping>
</web-app>


 415
415


 被折叠的 条评论
为什么被折叠?
被折叠的 条评论
为什么被折叠?
 到【灌水乐园】发言


