


1. 每个activity都需要在AndroidManifest.xml文件中配置,如果一个APP中有很多activity,那么必然导致xml配置文件的臃肿。
而且activity在 同屏下如果要显示多个activity 不方便, 特别是在平板开发中。
所以需要用到Fragment, 被称为轻量级的activity,平且不需要在xml文件中配置,能够在一个activity中同时显示多个fragment。
2. 示例代码: 动态创建fragment,以选项卡为例, 点击“新闻,娱乐,工作”标题,下面显示出不同的fragment.


MainActivity.java
import android.os.Bundle;
import android.app.Activity;
import android.app.FragmentManager;
import android.app.FragmentTransaction;
import android.view.Menu;
import android.view.View;
import android.view.View.OnClickListener;
import android.view.WindowManager;
import android.widget.TextView;

public class MainActivity extends Activity implements OnClickListener {

	private TextView tv1;
	private TextView tv2;
	private TextView tv3;
	private FragmentManager fm;
	private FragmentTransaction ft;

	@Override
	protected void onCreate(Bundle savedInstanceState) {
		super.onCreate(savedInstanceState);
		setContentView(R.layout.activity_main);

		tv1 = (TextView) findViewById(R.id.tv1);
		tv2 = (TextView) findViewById(R.id.tv2);
		tv3 = (TextView) findViewById(R.id.tv3);

		tv1.setOnClickListener(this);
		tv2.setOnClickListener(this);
		tv3.setOnClickListener(this);

		fm = getFragmentManager();
		ft = fm.beginTransaction();
		ft.replace(R.id.content, new Fragment1());
		ft.commit();

	}

	@Override
	public void onClick(View v) {
		ft = fm.beginTransaction();

		switch (v.getId()) {
		case R.id.tv1:
			ft.replace(R.id.content, new Fragment1());
			break;
		case R.id.tv2:
			ft.replace(R.id.content, new Fragment2());
			break;
		case R.id.tv3:
			ft.replace(R.id.content, new Fragment3());
			break;
		}
		ft.commit();
	}

}
Fragment1.java
import android.app.Fragment;
import android.os.Bundle;
import android.view.LayoutInflater;
import android.view.View;
import android.view.ViewGroup;

public class Fragment1 extends Fragment {

	@Override
	public View onCreateView(LayoutInflater inflater, ViewGroup container,
			Bundle savedInstanceState) {
		return inflater.inflate(R.layout.fragment1, container, false);
	}

}
Fragment2.java Fragment2.java 同1, 修改R.layout.fragment1 即可
activity_main.xml 布局文件
<LinearLayout xmlns:android="http://schemas.android.com/apk/res/android"
    xmlns:tools="http://schemas.android.com/tools"
    android:layout_width="match_parent"
    android:layout_height="match_parent"
    android:orientation="vertical"
    tools:context=".MainActivity" >

	<LinearLayout
	    android:layout_width="match_parent"
    	android:layout_height="wrap_content"
    	android:orientation="horizontal">

	    <TextView
	        android:id="@+id/tv1"
	        android:layout_width="0dp"
    		android:layout_height="wrap_content"
    		android:layout_weight="1"
    		android:gravity="center"
    		android:text="新闻"/>
	    <TextView
	        android:id="@+id/tv2"
	        android:layout_width="0dp"
    		android:layout_height="wrap_content"
    		android:layout_weight="1"
    		android:gravity="center"
    		android:text="娱乐"/>
	    <TextView
	        android:id="@+id/tv3"
	        android:layout_width="0dp"
    		android:layout_height="wrap_content"
    		android:layout_weight="1"
    		android:gravity="center"
    		android:text="工作"/>

	</LinearLayout>

	<LinearLayout
	    android:id="@+id/content"
	    android:layout_width="match_parent"
    	android:layout_height="match_parent"
    	android:orientation="vertical">

	</LinearLayout>

</LinearLayout>
fragment1.xml
<?xml version="1.0" encoding="utf-8"?>
<LinearLayout xmlns:android="http://schemas.android.com/apk/res/android"
    android:layout_width="match_parent"
    android:layout_height="match_parent"
    android:orientation="vertical"
    android:background="#ff0000" >

    <TextView
        android:gravity="center"
        android:layout_width="match_parent"
    	android:layout_height="match_parent"
    	android:text="this is fragment1"/>

</LinearLayout>
fragment2.xml fragment2.xml 同1, 修改背景颜色 和 显示Text即可
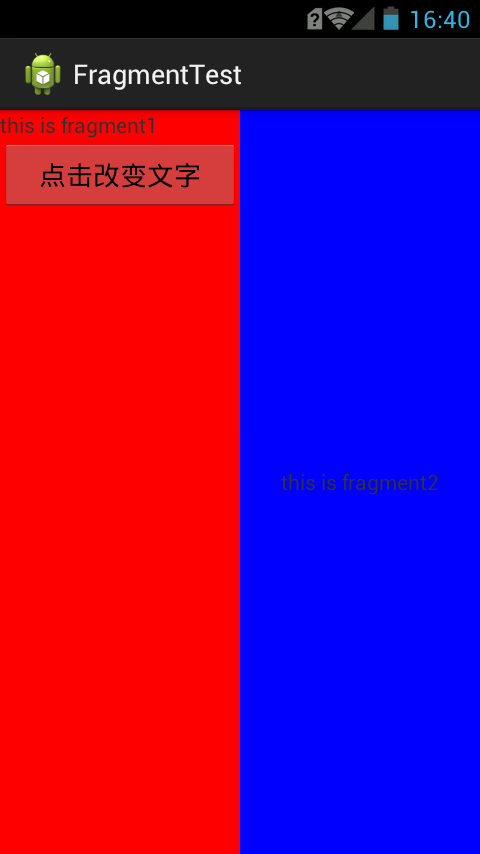
3. 静态创建和fragment之间的通信,上面是动态的在代码里面添加fragment, 其实还可以在布局xml文件中像添加其他控件一样添加fragment.
示例代码: xml添加fragment, 两个fragment之间通信。
MainActivity.java ,由于fragment已经在xml布局文件中添加,实质和一般控件没两样
public class MainActivity extends Activity  {

	private FragmentManager fm;
	private FragmentTransaction ft;

	@Override
	protected void onCreate(Bundle savedInstanceState) {
		super.onCreate(savedInstanceState);
		setContentView(R.layout.activity_main);

	}
}
Fragment1.java, f1中需要响应button的点击事件,在事件中获得f2,并调用f2暴露的方法,设置TextView
import android.app.Fragment;
import android.os.Bundle;
import android.view.LayoutInflater;
import android.view.View;
import android.view.View.OnClickListener;
import android.view.ViewGroup;
import android.widget.Button;

public class Fragment1 extends Fragment {

	@Override
	public View onCreateView(LayoutInflater inflater, ViewGroup container,
			Bundle savedInstanceState) {

		View v = inflater.inflate(R.layout.fragment1, container, false);
		Button bt = (Button) v.findViewById(R.id.bt);
		bt.setOnClickListener(new OnClickListener() {
			@Override
			public void onClick(View v) {
				Fragment2 f2 = (Fragment2) getActivity().getFragmentManager().findFragmentById(R.id.f2);
				f2.setTv("xxxxxxxx");
			}
		});
		return v;
	}

}
Fragment2.java, 需要暴露出方法设置 TextView
public class Fragment2 extends Fragment {

	private TextView tv;

	@Override
	public View onCreateView(LayoutInflater inflater, ViewGroup container,
			Bundle savedInstanceState) {
		View v = inflater.inflate(R.layout.fragment2, container, false);
		tv = (TextView) v.findViewById(R.id.tv);
		return v;
	}

	public void setTv(String str){
		tv.setText(str);
	}

}
activity_main.xml 布局文件
<LinearLayout xmlns:android="http://schemas.android.com/apk/res/android"
    xmlns:tools="http://schemas.android.com/tools"
    android:layout_width="match_parent"
    android:layout_height="match_parent"
    android:orientation="horizontal"
    tools:context=".MainActivity" >

	<fragment
	    android:id="@+id/f1"
	    android:name="com.kevin.fragmenttest.Fragment1"
	    android:layout_width="0dp"
    	android:layout_height="match_parent"
    	android:layout_weight="1"/>

	<fragment
	    android:id="@+id/f2"
	    android:name="com.kevin.fragmenttest.Fragment2"
	    android:layout_width="0dp"
    	android:layout_height="match_parent"
    	android:layout_weight="1"/>

</LinearLayout>
fragment1.xml
<?xml version="1.0" encoding="utf-8"?>
<LinearLayout xmlns:android="http://schemas.android.com/apk/res/android"
    android:layout_width="match_parent"
    android:layout_height="match_parent"
    android:orientation="vertical"
    android:background="#ff0000" >

    <TextView
        android:layout_width="match_parent"
    	android:layout_height="wrap_content"
    	android:text="this is fragment1"/>

    <Button
        android:id="@+id/bt"
        android:gravity="center"
        android:layout_width="match_parent"
    	android:layout_height="wrap_content"
        android:text="点击改变文字"/>

</LinearLayout>
fragment2.xml
<?xml version="1.0" encoding="utf-8"?>
<LinearLayout xmlns:android="http://schemas.android.com/apk/res/android"
    android:layout_width="match_parent"
    android:layout_height="match_parent"
    android:orientation="vertical"
    android:background="#0000ff" >

    <TextView
        android:id="@+id/tv"
        android:gravity="center"
        android:layout_width="match_parent"
    	android:layout_height="match_parent"
    	android:text="this is fragment2"/>

</LinearLayout>


 1086
1086


 被折叠的 条评论
为什么被折叠?
被折叠的 条评论
为什么被折叠?
 到【灌水乐园】发言


