


1 认识SpringSecurity

1.1 认证

设置配置文件
@Configuration
public class SecurityConfig extends WebSecurityConfigurerAdapter {

 	 @Bean
    PasswordEncoder passwordEncoder() {
    	return NoOpPasswordEncoder.getInstance();}

    //认证用户账号和密码
    @Override
    protected void configure(AuthenticationManagerBuilder auth) throws Exception {
        auth.inMemoryAuthentication()
                .withUser("admin")
                .password("123456").roles("admin");
    }

    //静态资源不拦截
    @Override
    public void configure(WebSecurity web) throws Exception {
        web.ignoring().antMatchers("/js/**", "/css/**","/images/**");
}

    //表单登录设置
    @Override
    protected void configure(HttpSecurity http) throws Exception {
        http
            .authorizeRequests()
                .anyRequest().authenticated()
                .and()
            .formLogin()
                .loginPage("/login.html")
                .permitAll()
                .and()
            .csrf()
                .disable();
    }
}
在 Spring Security 中,如果我们不做任何配置,默认的登录页面和登录接口的地址都是 /login,也就是说,默认会存在如下两个请求:
GET http://localhost:8080/login
POST http://localhost:8080/login
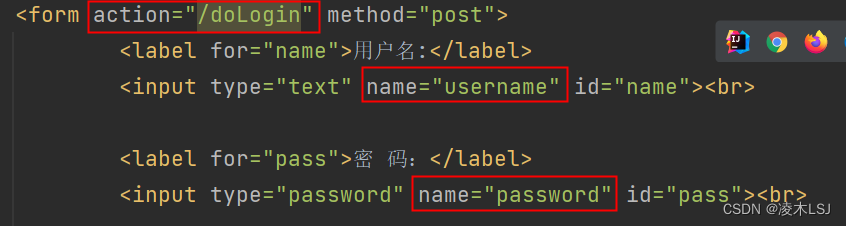
可以通过 loginProcessingUrl 方法来指定登录接口地址 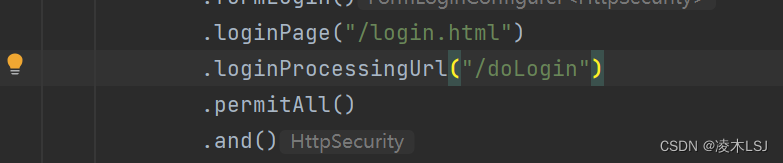
此时我们还需要修改登录页面里边的 action 属性,改为 /doLogin
设置登录成功重定向:
- defaultSuccessUrl:只设定一个参数时,指定登录成功的跳转页面为 /index,此时分两种情况:如果你是直接在浏览器中输入的登录地址,登录成功后,就直接跳转到 /index;如果你是在浏览器中输入了其他地址,例如 http://localhost:8080/hello,结果因为没有登录,又重定向到登录页面,此时登录成功后,是来到 /hello 页面。第二个参数如果不设置默认为 false,也就是我们上面的的情况,如果手动设置第二个参数为 true,则 defaultSuccessUrl 的效果和 successForwardUrl 一致。
- successForwardUrl:不管你是从哪里来的,登录后一律跳转到 successForwardUrl 指定的地址。
与登录成功相似,登录失败也是有两个方法:
- failureForwardUrl:是登录失败之后会发生服务端跳转
- failureUrl:则在登录失败之后,会发生重定向
1.2 授权
设置两个账号进行权限实验测试:
 @Override
    protected void configure(AuthenticationManagerBuilder auth) throws Exception {
        auth.inMemoryAuthentication()
                .withUser("lm").password("123123").roles("root")
                .and()
                .withUser("admin").password("123456").roles("admin")
                .and()
                .passwordEncoder(new UserPasswordEncoder());
    }
加密UserPasswordEncoder
public class UserPasswordEncoder implements PasswordEncoder {

    @Override
    public String encode(CharSequence charSequence) {
        return charSequence.toString();
    }

    @Override
    public boolean matches(CharSequence charSequence, String s) {
        return s.equals(charSequence.toString());
    }
}
路径权配置
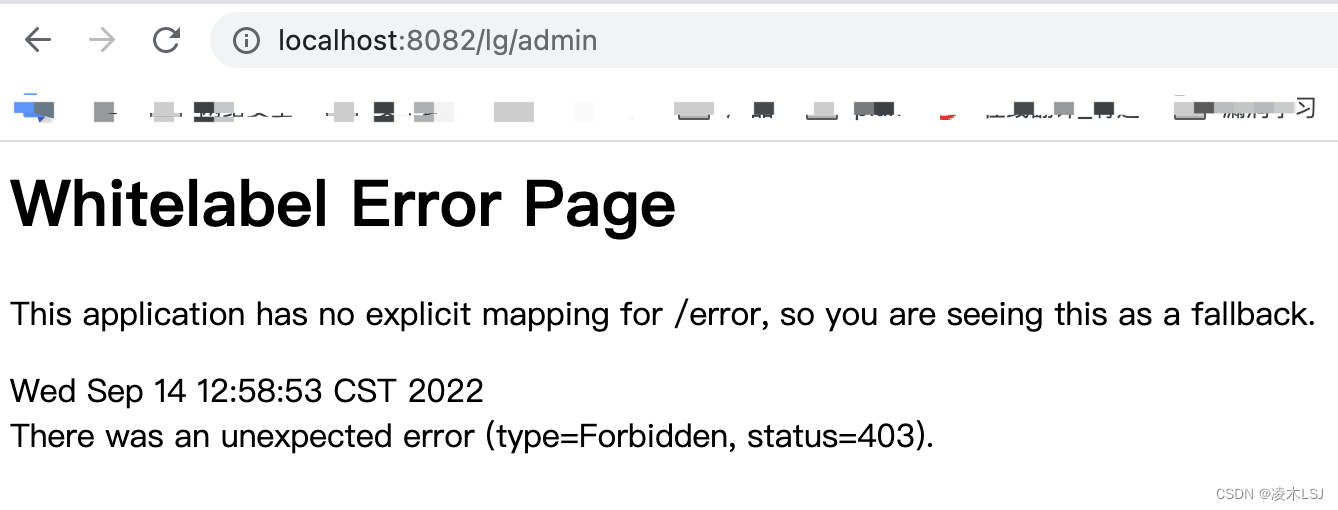
http
    .authorizeRequests()
        .antMatchers("/lg/admin/**").hasRole("admin")
        .antMatchers("/lg/root/**").hasRole("root")
        .anyRequest().authenticated()
        .and()
        ...
1)「hasAuthority(String)」 判断角色是否具有特定权限
http.authorizeRequests().antMatchers("/main1.html").hasAuthority("admin")
2)「hasAnyAuthority(String ...)」 如果用户具备给定权限中某一个,就允许访问
http.authorizeRequests().antMatchers("/admin/read").hasAnyAuthority("xxx","xxx")
3)「hasRole(String)」 如果用户具备给定角色就允许访问。否则出现403
http.authorizeRequests().antMatchers("/admin/read").hasRole("管理员")
4) 「hasAnyRole(String ...)」 如果用户具备给定角色的任意一个,就允许被访问
http.authorizeRequests().antMatchers("/guest/read").hasAnyRole("管理员", "访客")
5) 「hasIpAddress(String)」 请求是指定的IP就运行访问
http.authorizeRequests().antMatchers("/ip").hasIpAddress("127.0.0.1")
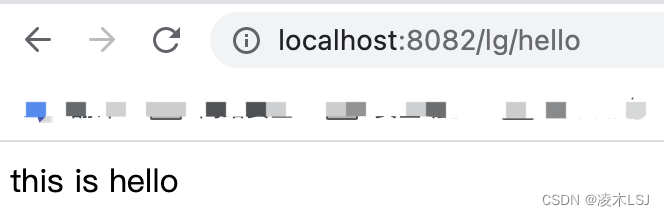
测试demo
@Controller
@RequestMapping("/lg")
public class HelloControl {

    @RequestMapping(value = "/index",method = RequestMethod.GET)
    public String userLogin(){
        return "index";
    }

    @RequestMapping(value = "/hello",method = RequestMethod.GET)
    @ResponseBody
    public String hello(){
        return "this is hello";
    }

    @RequestMapping(value = "/root",method = RequestMethod.GET)
    @ResponseBody
    public String root(){
        return "this is root";
    }

    @RequestMapping(value = "/admin",method = RequestMethod.GET)
    @ResponseBody
    public String admin(){
        return "this is admin";
    }
}
使用lm账号登录测试一下:


1.3 日志
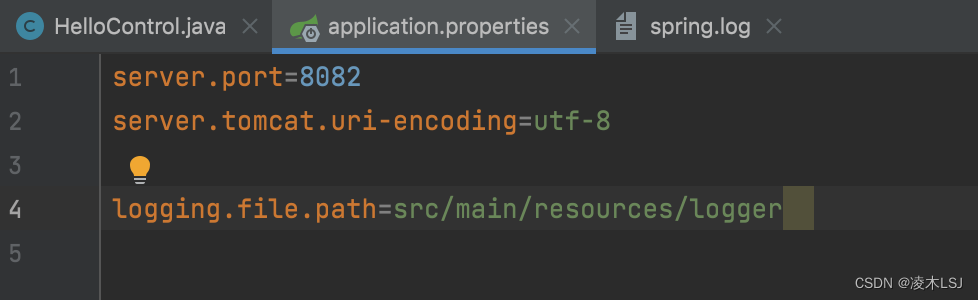
Spring Boot默认使用LogBack日志系统,如果不需要更改为其他日志系统如Log4j2等,则无需多余的配置,LogBack默认将日志打印到控制台上。
使用日志功能,只需要在相应类上加上@Slf4j(lambok组件)注解,在对应方法中log.info(),log.error()等就可以输出日志。
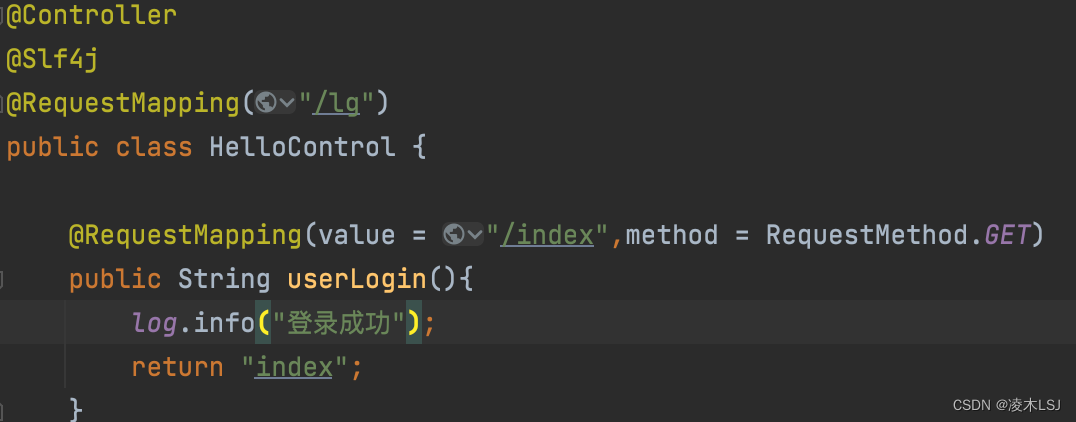
![]()
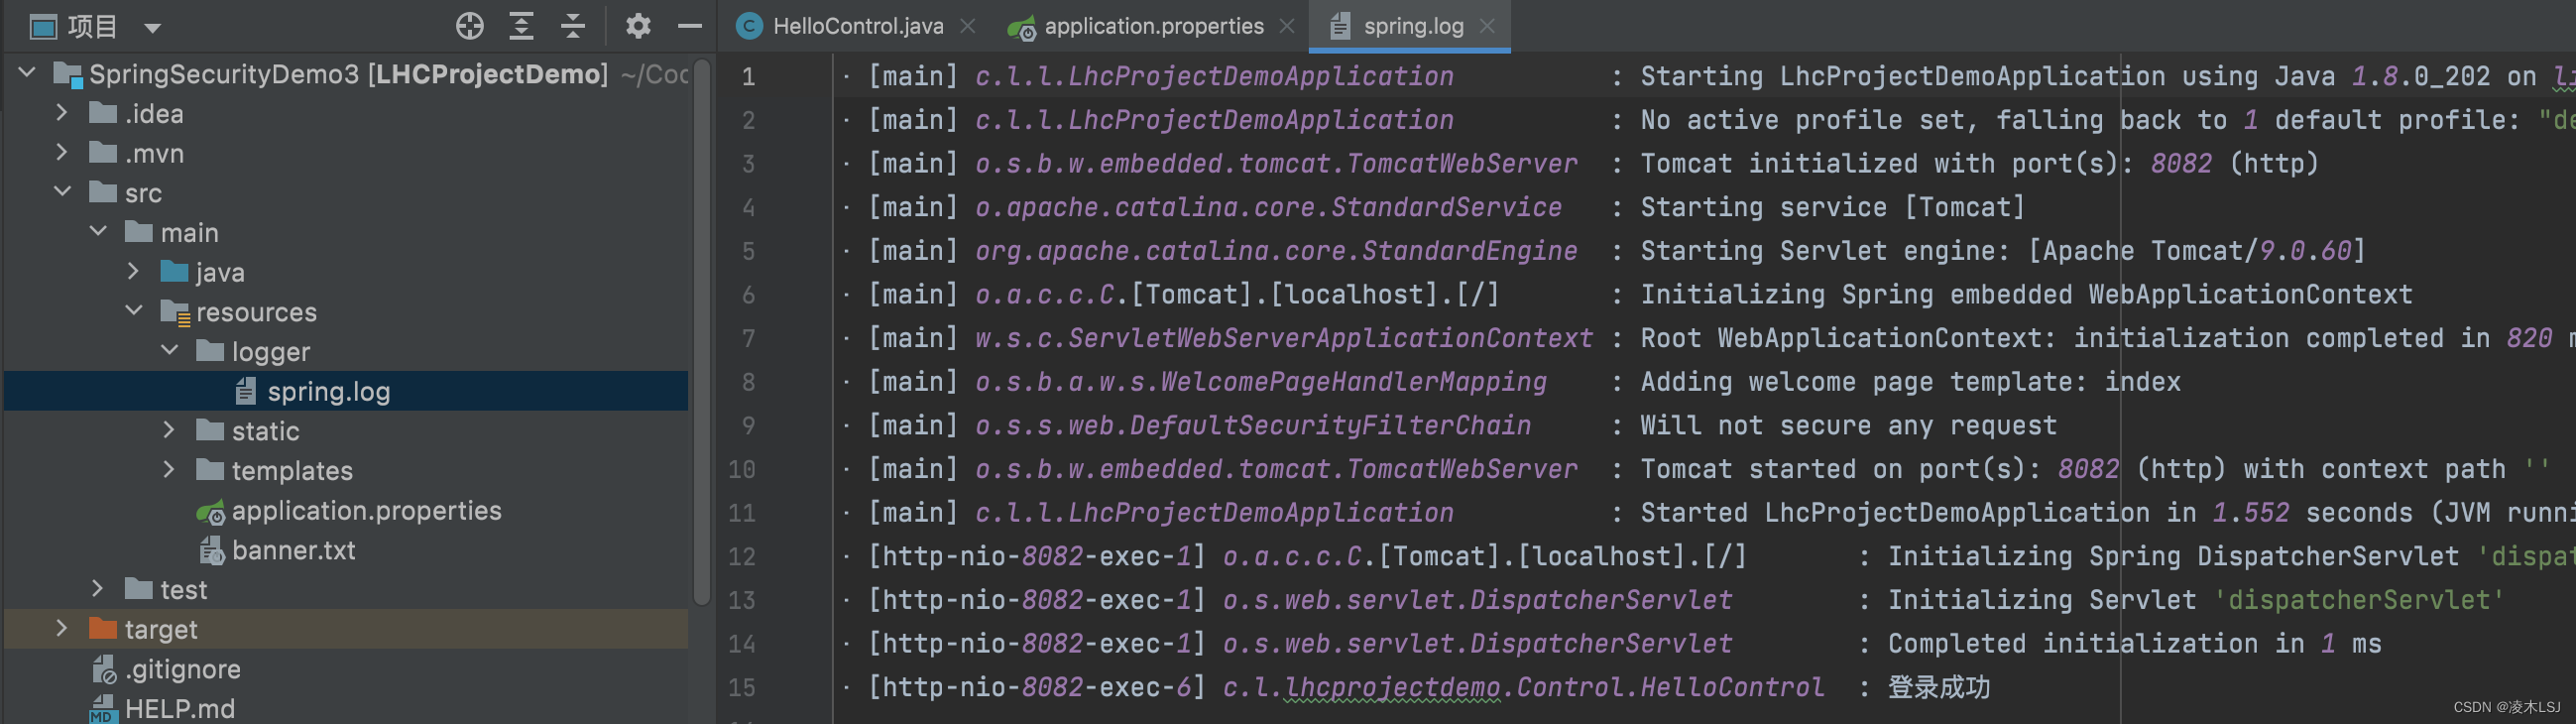
同时可以在application.properties里进行配置,将日志写入本地
2 SpringSecurity 权限管理设计
2.1 用户角色权限设计
1)pom.xml配置
        <dependency>
            <groupId>org.mybatis.spring.boot</groupId>
            <artifactId>mybatis-spring-boot-starter</artifactId>
            <version>2.1.2</version>
        </dependency>
        <dependency>
            <groupId>org.projectlombok</groupId>
            <artifactId>lombok</artifactId>
            <optional>true</optional>
        </dependency>
        <!--druid连接池-->
        <dependency>
            <groupId>com.alibaba</groupId>
            <artifactId>druid-spring-boot-starter</artifactId>
            <version>1.1.21</version>
        </dependency>
        <dependency>
            <groupId>mysql</groupId>
            <artifactId>mysql-connector-java</artifactId>
            <scope>runtime</scope>
        </dependency>
2)application.properties配置
spring.datasource.driver-class-name=com.mysql.cj.jdbc.Driver
spring.datasource.url=jdbc:mysql://localhost:3306/springsecurity
spring.datasource.username=root
spring.datasource.password=rootlhc
# 初始化配置
spring.datasource.druid.initial-size=3
# 最小连接数
spring.datasource.druid.min-idle=3
# 最大连接数
spring.datasource.druid.max-active=15
# 获取连接超时时间
spring.datasource.druid.max-wait=5000
# 连接有效性检测时间
spring.datasource.druid.time-between-eviction-runs-millis=90000
# 最大空闲时间
spring.datasource.druid.min-evictable-idle-time-millis=1800000
spring.datasource.druid.test-while-idle=true
spring.datasource.druid.test-on-borrow=false
spring.datasource.druid.test-on-return=false
spring.datasource.druid.validation-query=select 1
# 配置监控统计拦截的filters
spring.datasource.druid.filters=stat
spring.datasource.druid.web-stat-filter.url-pattern=/*
spring.datasource.druid.web-stat-filter.exclusions="*.js,*.gif,*.jpg,*.bmp,*.png,*.css,*.ico,/druid/*"
spring.datasource.druid.stat-view-servlet.enabled=true
spring.datasource.druid.stat-view-servlet.url-pattern=/druid/*
spring.datasource.druid.stat-view-servlet.reset-enable=true
spring.datasource.druid.stat-view-servlet.login-username=admin
spring.datasource.druid.stat-view-servlet.login-password=admin
spring.jackson.date-format=yyyy-MM-dd HH:mm:ss
spring.jackson.time-zone=GMT+8

mybatis.type-aliases-package=com.lhc.lhcprojectdemo.util.entity
mybatis.mapper-locations=classpath:/mappers/*
mybatis.configuration.map-underscore-to-camel-case=true
3)SysUser设置
SysUser.java
@Data
@EqualsAndHashCode(callSuper = true)
@NoArgsConstructor
public class SysUser extends BaseEntity{
    private static final long serialVersionUID = -6525908145032868837L;

    private Integer userId;

    private Integer deptId;

    private String userName;

    private String password;

    private String nickName;

    private String phone;

    private String email;

    private Integer status;

    public interface Status {
        int LOCKED = 0;
        int VALID = 1;
    }
}
UserDao.java
@Mapper
public interface UserDao {
    /**
     * 分页返回所有用户
     */
    List<SysUser> getAllUserByPage(@Param("startPosition")Integer startPosition, @Param("limit")Integer limit);

}
UserService.java
public interface UserService {
    ResultUtil<SysUser> getAllUsersByPage(Integer startPosition, Integer limit);
}
UserServiceImpl.java
@Service
public class UserServiceImpl implements UserService {
    @Autowired
    private UserDao userDao;

    @Override
    public ResultUtil<SysUser> getAllUsersByPage(Integer startPosition, Integer limit) {
        return ResultUtil.ok().data(userDao.getAllUserByPage(startPosition,limit)).code(ResultCode.TABLE_SUCCESS);
    }
}
UseControl.java
@Controller
@RequestMapping("/api/user")
public class UserControl {
    @Autowired
    private UserService userService;

    @GetMapping("/index")
    @ResponseBody
    public ResultUtil<SysUser> index(PageTableRequest pageTableRequest){
        pageTableRequest.countOffset();
        return userService.getAllUsersByPage(pageTableRequest.getOffset(),pageTableRequest.getLimit());
    }
}
UserMapper.xml
<?xml version="1.0" encoding="UTF-8" ?>
<!DOCTYPE mapper PUBLIC "-//mybatis.org//DTD Mapper 3.0//EN" "http://mybatis.org/dtd/mybatis-3-mapper.dtd">
<mapper namespace="com.lhc.lhcprojectdemo.dao.UserDao">
<select id="getAllUserByPage" resultType="com.lhc.lhcprojectdemo.util.entity.SysUser">
SELECT u.user_id,u.dept_id,u.user_name,u.password,u.nick_name,u.phone,u.email,u.status,u.create_time,u.update_time
FROM sys_user u
ORDER BY u.user_id
</select>
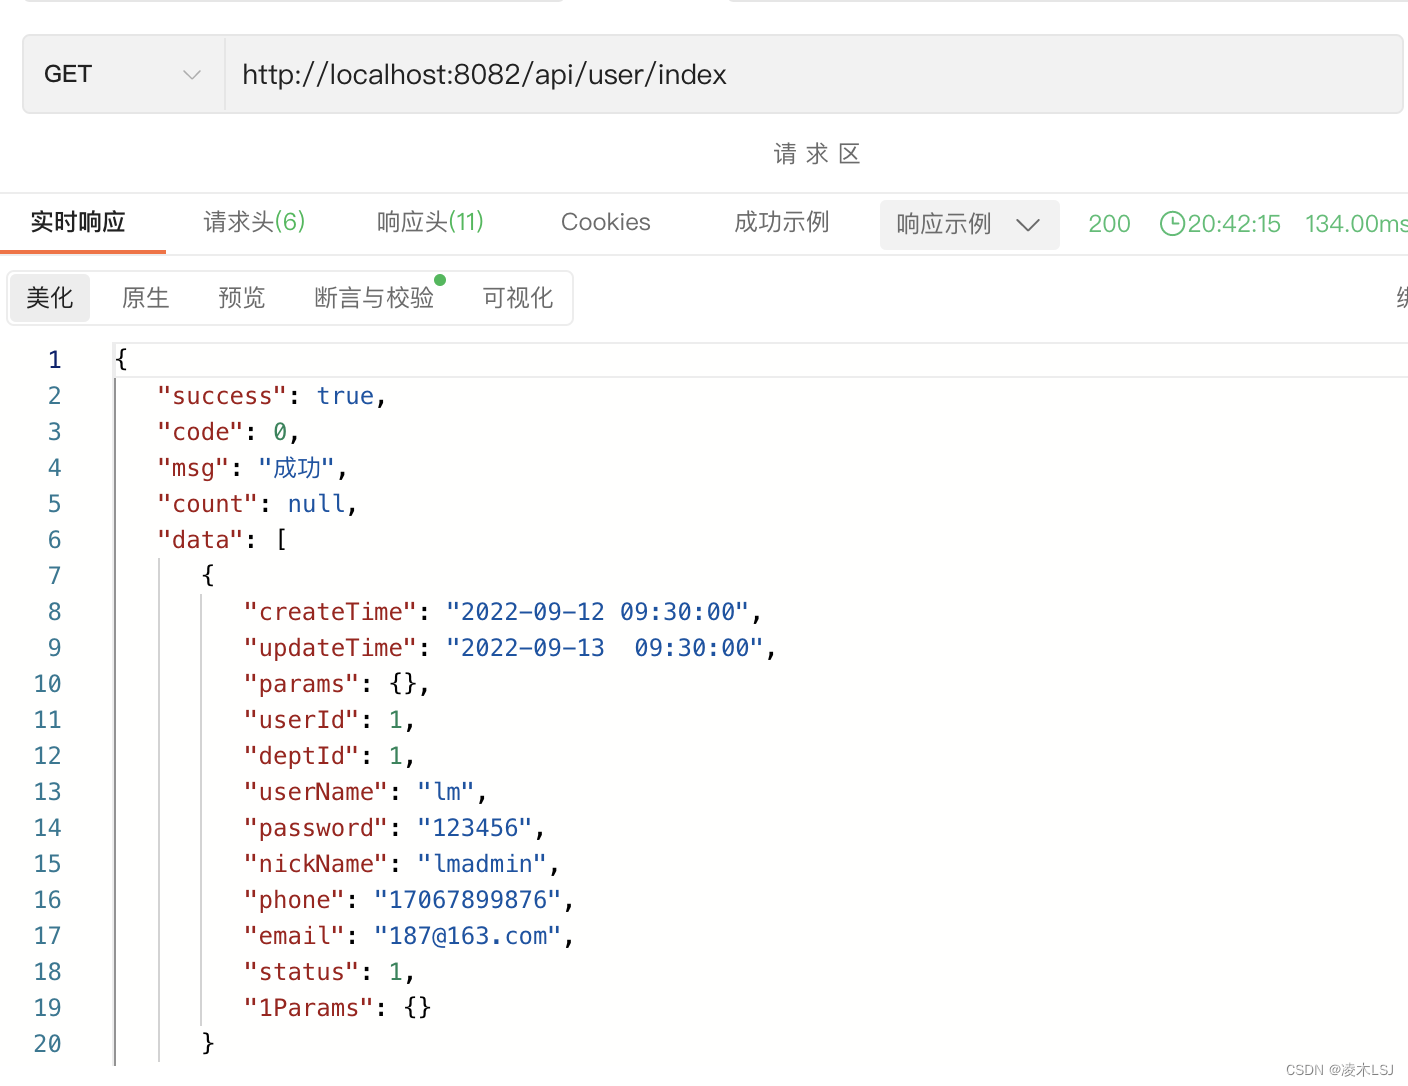
</mapper>4)测试
5)设置角色和权限
sys_role
 sys_menu(可以简单设置sys_permit)
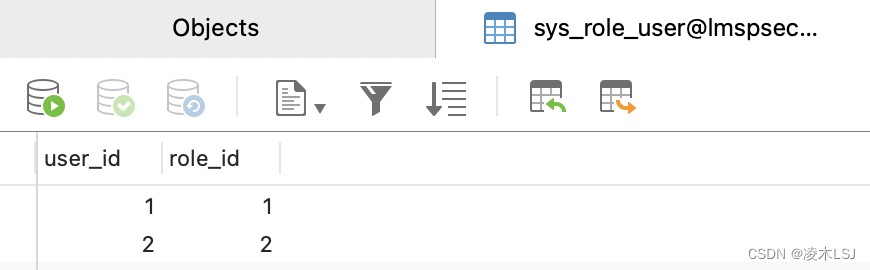
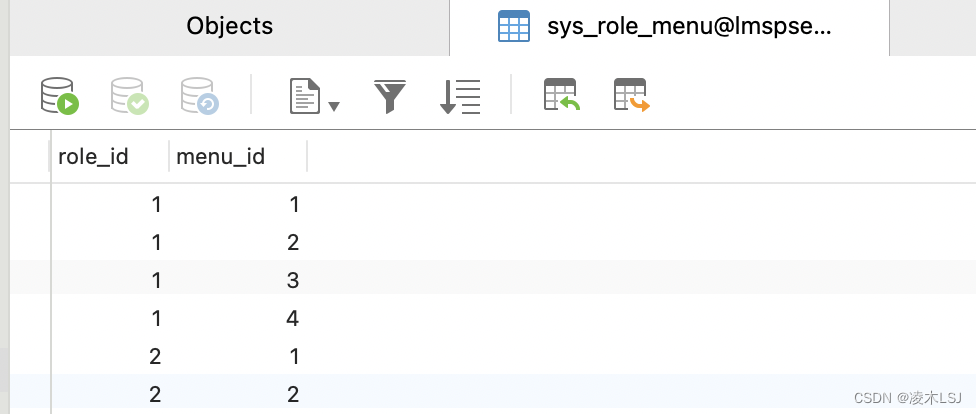
 然后关联user- role,menu-role(permit-role)
2.2 security权限控制
1)给API添加权限
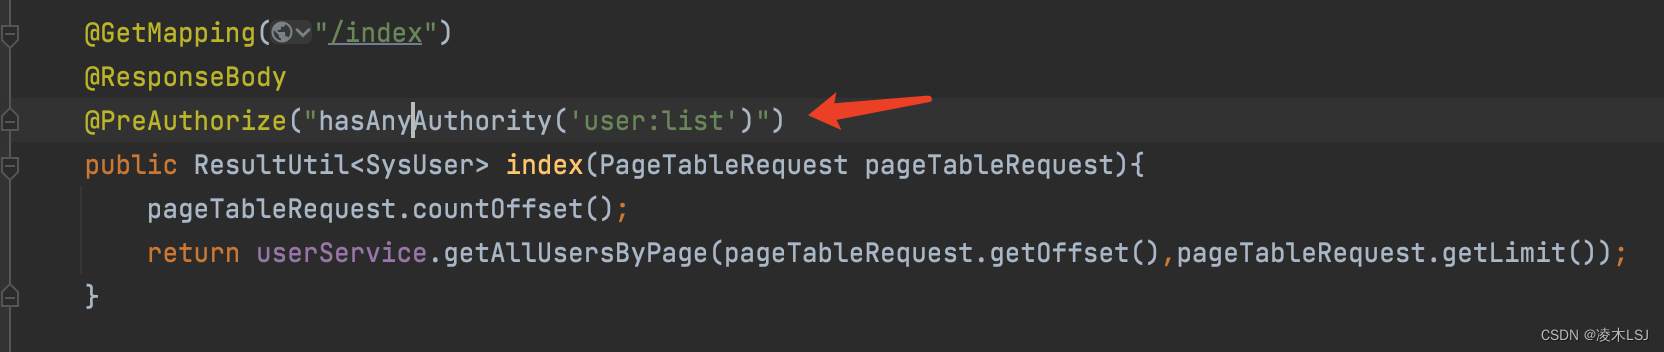
2)添加security配置注解

3)认证授权
@Autowired
private UserDetailsService userDetailsService;

@Bean
public PasswordEncoder passwordEncoder(){
    return new BCryptPasswordEncoder();
}

@Override
protected void configure(AuthenticationManagerBuilder auth) throws Exception {
    auth.userDetailsService(userDetailsService).passwordEncoder(passwordEncoder());
}
4)自定义用户信息
@Data
@ToString
public class JwtUserDto implements UserDetails {
    /**
     * 用户数据
     */
    private SysUser myUser;

    //private List<SysRole> roleInfo;
    /**
     * 用户权限的集合
     */
    @JsonIgnore
    private List<GrantedAuthority> authorities;

    public List<String> getRoles() {
        return authorities.stream().map(GrantedAuthority::getAuthority).collect(Collectors.toList());
    }


    /**
     * 加密后的密码
     * @return
     */
    public String getPassword() {
        return myUser.getPassword();
    }


    /**
     * 用户名
     * @return
     */
    public String getUsername() {
        return myUser.getUserName();
    }


    /**
     * 是否过期
     * @return
     */
    public boolean isAccountNonExpired() {
        return true;
    }


    /**
     * 是否锁定
     * @return
     */
    public boolean isAccountNonLocked() {
        return true;
    }


    /**
     * 凭证是否过期
     * @return
     */
    public boolean isCredentialsNonExpired() {
        return true;
    }


    /**
     * 是否可用
     * @return
     */
    public boolean isEnabled() {
        return myUser.getStatus() == 1 ? true : false;
    }


    public JwtUserDto(SysUser sysUser, List<GrantedAuthority> authorities) {
        this.myUser = sysUser;
        this.authorities = authorities;
    }
}
5)自定义一个UserDetailsServiceImpl实现UserDetailsService
@Service
@Slf4j
public class UserDetailsServiceImpl implements UserDetailsService {

    @Autowired
    private UserService userService;
    @Autowired
    private RoleService roleService;
    @Autowired
    private RoleUserService roleUserService;
    @Autowired
    private MenuDao menuDao;

    @Override
    public JwtUserDto loadUserByUsername(String userName) throws UsernameNotFoundException {
        SysUser user = userService.getUserByName(userName);//根据用户名获取用户
        if (user == null ){
            throw new UsernameNotFoundException("用户名不存在");//这个异常一定要抛
        }else if (user.getStatus().equals(SysUser.Status.LOCKED)) {
            throw new LockedException("用户被锁定,请联系管理员");
        }
        List<GrantedAuthority> grantedAuthorities = new ArrayList<>();
        //菜单表中获取信息
        List<MenuIndexDto> list = menuDao.listByUserId(user.getUserId());

        List<String> collect = list.stream().map(MenuIndexDto::getPermission).collect(Collectors.toList());
        for (String authority : collect){
            if (!("").equals(authority) & authority !=null){
                GrantedAuthority grantedAuthority = new SimpleGrantedAuthority(authority);
                //获取到user:list等具体权限
                grantedAuthorities.add(grantedAuthority);
            }
        }
        JwtUserDto loginUser =new JwtUserDto(user,grantedAuthorities);
        return loginUser;
    }
}
2.3 引入验证码
1)配置pom文件
 <!--验证码-->
<dependency>
    <groupId>com.github.whvcse</groupId>
    <artifactId>easy-captcha</artifactId>
    <version>1.6.2</version>
</dependency>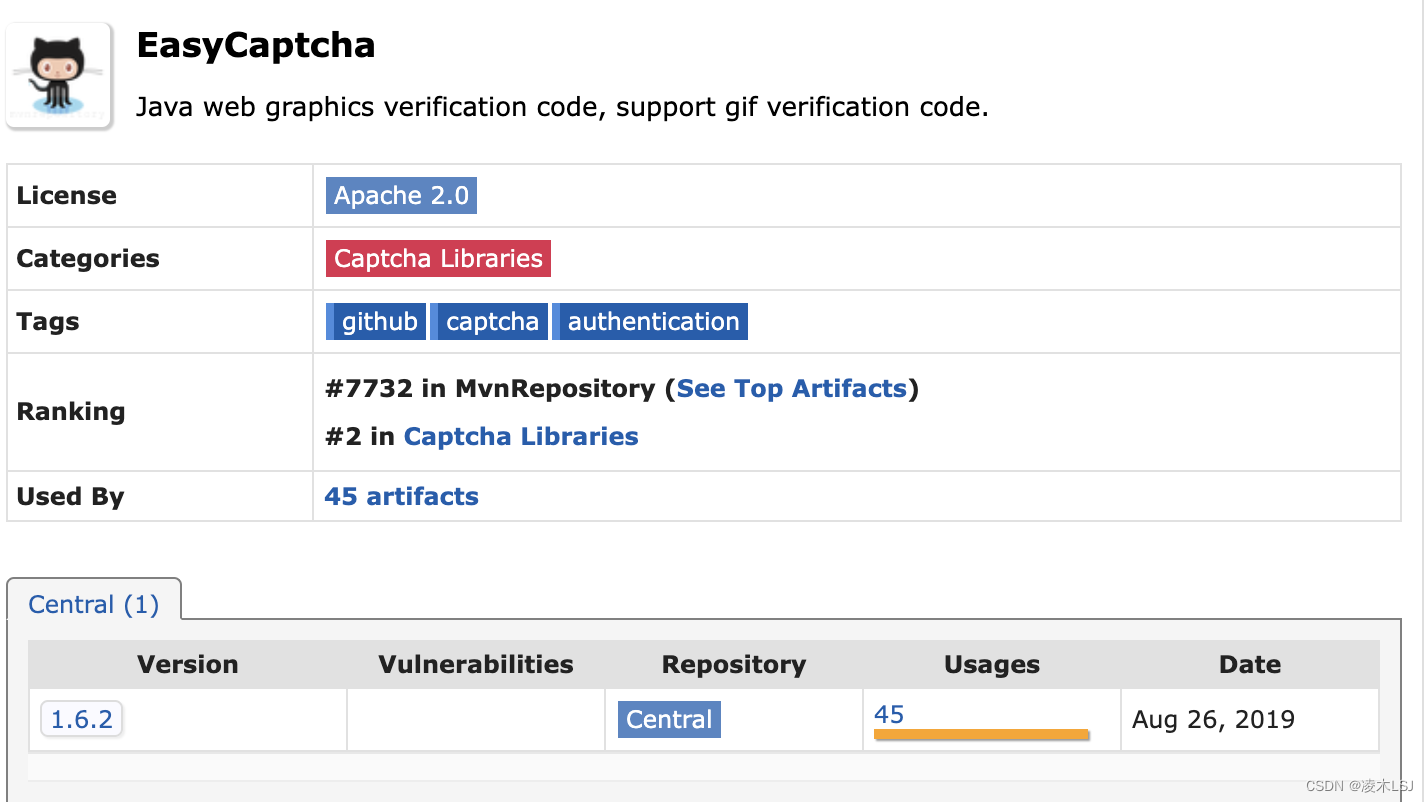
2)准备验证码生成control
@Controller
public class CaptchaController {

    @RequestMapping("/captcha")
    public void captcha(HttpServletRequest request, HttpServletResponse response) throws Exception {
        CaptchaUtil.out(120, 45, 4, request, response);
    }
}
3)login.html登录界面配置验证码
<div>
<input id="captcha" name="captcha"  size="6" style="width:150px;height:40px" placeholder="验 证 码:" type="text">
<img src="/captcha" width="130px" height="40px" onclick="this.src=this.src+'?'+Math.random()" title="点击刷新"/>
</div>
4)验证码校验
@Component
public class VerifyCodeFilter extends OncePerRequestFilter {
    private String defaultFilterProcessUrl = "/dologin";
    private String method = "POST";

    @Override
    protected void doFilterInternal(HttpServletRequest request, HttpServletResponse response, FilterChain chain) throws ServletException, IOException {
        if (method.equalsIgnoreCase(request.getMethod()) && defaultFilterProcessUrl.equals(request.getServletPath())) {
            // 登录请求校验验证码,非登录请求不用校验
            HttpSession session = request.getSession();
            String requestCaptcha = request.getParameter("captcha");
            //验证码的信息存放在seesion种,具体看EasyCaptcha官方解释
            String genCaptcha = (String) request.getSession().getAttribute("captcha");
            response.setContentType("application/json;charset=UTF-8");
            if (requestCaptcha.isEmpty()){
                //删除缓存里的验证码信息
                session.removeAttribute("captcha");
                response.getWriter().write(JSON.toJSONString(ResultUtil.error().message("验证码不能为空!")));
                return;
            }
            if (genCaptcha.isEmpty()){
                response.getWriter().write(JSON.toJSONString(ResultUtil.error().message("验证码已失效!")));
                return;
            }
            if (!genCaptcha.equalsIgnoreCase(requestCaptcha)){
                session.removeAttribute("captcha");
                response.getWriter().write(JSON.toJSONString(ResultUtil.error().message("验证码错误!")));
                return;
            }
        }
        chain.doFilter(request, response);
    }
}
5)security配置


 74
74


 被折叠的 条评论
为什么被折叠?
被折叠的 条评论
为什么被折叠?
 到【灌水乐园】发言


