


 本文详细介绍了如何在CentOS7环境下使用Nginx1.20.1和SpringBoot2.7.12集成WebSocket功能,包括SpringBootWebSocket配置、Maven依赖管理和Nginx的wss配置,以及处理微信小程序的WebSocket连接和心跳检测。
环境说明
服务器的是centos7
nginx版本nginx/1.20.1
springboot2.7.12
nginx安装教程点击这里
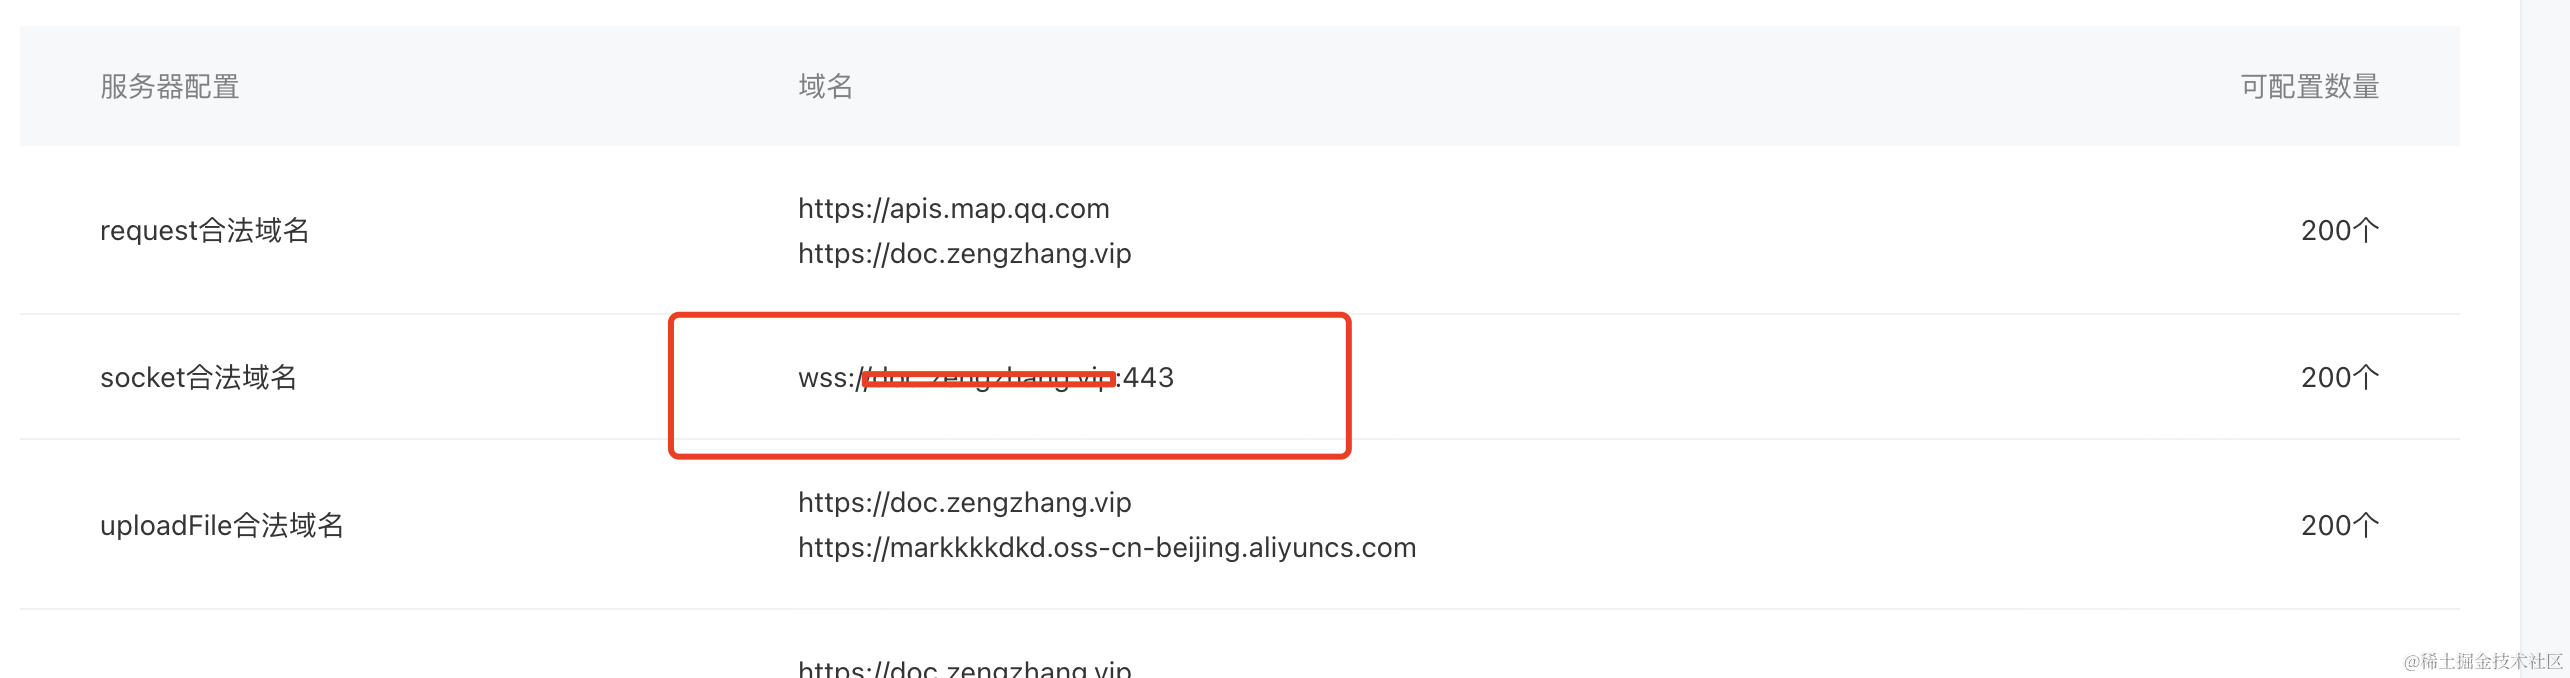
微信小程序wss配置
如果您的业务是开发微信小程序, 请先进行如下配置。
boot集成websocket
- maven
<dependency>
    <groupId>org.springframework.boot</groupId>
    <artifactId>spring-boot-starter-websocket</artifactId>
</dependency>
- config配置文件
import org.springframework.context.annotation.Bean;
import org.springframework.context.annotation.Configuration;
import org.springframework.web.socket.server.standard.ServerEndpointExporter;
import org.springframework.web.socket.server.standard.ServletServerContainerFactoryBean;

/**
 * @author mark
 * @description websocket配置
 * @date 2024-04-21
 */
@Configuration
public class WebSocketConfig {

    /**
     * 自动注册使用了@ServerEndpoint注解声明的Websocket endpoint
     *
     * @return
     */

    @Bean
    public ServerEndpointExporter serverEndpointExporter() {
        return new ServerEndpointExporter();
    }

    /**
     * 通信文本消息和二进制缓存区大小
     * 避免对接 第三方 报文过大时,Websocket 1009 错误
     * @return
     */

    @Bean
    public ServletServerContainerFactoryBean createWebSocketContainer() {
        ServletServerContainerFactoryBean container = new ServletServerContainerFactoryBean();
        // 在此处设置bufferSize
        container.setMaxTextMessageBufferSize(10240000);
        container.setMaxBinaryMessageBufferSize(10240000);
        container.setMaxSessionIdleTimeout(15 * 60000L);
        return container;
    }
}
- websocket业务核心代码
import lombok.extern.slf4j.Slf4j;
import org.springframework.stereotype.Component;

import javax.websocket.*;
import javax.websocket.server.ServerEndpoint;
import java.io.IOException;
import java.util.concurrent.CopyOnWriteArraySet;
import java.util.concurrent.atomic.AtomicInteger;

/**
 * @author mark
 * ws://127.0.0.1:8768/jeecg-activiti-gateway/ws/playBack
 * wss://doc.zengzhang.vip:8768
 * @description 统计在线人数
 * @date 2024-04-21
 */
@Slf4j
@Component
@ServerEndpoint(value = "/ws/playBack")
public class WebSocketServerPlayBack {


    /**
     * 记录链接在线数量
     **/
    private static final AtomicInteger onlineCount = new AtomicInteger(0);


    /**
     * 存放每个客户端对应的 WebSocketServer 对象
     **/
    private static CopyOnWriteArraySet<WebSocketServerPlayBack> webSocketSet = new CopyOnWriteArraySet<>();


    /**
     * 与某个客户端的连接会话,需要通过它来给客户端发送数据
     **/
    private Session session;


    /**
     * 心跳报文
     **/
    private static final String HEARTBEAT_PACKETS = "The heartbeat packets";


    /**
     * 连接建立成功调用的方法
     */
    @OnOpen
    public void onOpen(Session session) {
        this.session = session;
        // 加入set中
        webSocketSet.add(this);
        // 在线数加1
        onlineCount.getAndIncrement();

    }


    /**
     * 连接关闭调用的方法
     */
    @OnClose
    public void onClose() {
        // 从set中删除
        webSocketSet.remove(this);
        // 在线数减1
        onlineCount.getAndDecrement();
    }

    /**
     * 发生错误时调用
     */
    @OnError
    public void onError(Session session, Throwable error) {
        log.error("[历史数据回放] - WS 异常断开", session, error);
    }


    /**
     * 收到客户端消息后调用的方法
     *
     * @param message 客户端发送过来的消息
     */
    @OnMessage
    public void onMessage(String message, Session session) {
        log.info("--000--" + message);
        if (HEARTBEAT_PACKETS.equals(message)) {
            log.debug("[消息订阅] - 心跳.");
            return;
        }
        // TODO 接收前端入参后的业务处理

    }

    /**
     * 群发自定义消息
     */
    public static void sendInfo(String message) {
        for (WebSocketServerPlayBack item : webSocketSet) {
            try {

                item.sendMessage(message);
            } catch (IOException e) {
                log.error("[NVR 数据对接] - 数据推送异常, 数据: [{}].", message, e);
                continue;
            }
        }
    }


    /**
     * 指定会话推送
     *
     * @param message
     */
    public static void sendInfo(Session session, String message) {
        for (WebSocketServerPlayBack item : webSocketSet) {
            try {
                if (null != session && item.session.equals(session)) {
                    item.sendMessage(message);
                }

            } catch (IOException e) {
                log.error("[数据对接] - 数据推送异常, 数据: [{}].", message, e);
                continue;
            }
        }
    }

    /**
     * 向链接推送消息
     *
     * @param message
     * @throws IOException
     */
    public void sendMessage(String message) throws IOException {
        log.info("sendMessage:{}", message);
        this.session.getBasicRemote().sendText(message);
    }

}
- SwaggerConfig权限放开
// 授权不需要登录权限的URL
.antMatchers("/swagger*/**",
        "/explain/**",
        "/file/**",
        //这个是webscoket所需的配置
        "/ws/**",
        "/push/**",
        "/v2/api-docs",
        "/webjars*//**").permitAll()
nginx配置
亲测可用,直接贴代码,大家可以直接拿来使用。
注意啦!!!你的域名需要在管理后台下载免费或付费的SSL证书。
upstream doc {
   server 127.0.0.1:8768 weight=1;
}
server {
    listen 443 ssl;
    server_name xxx.com
    listen 80;
    ssl on;
    # 将下载的ssl证书配置在这里
    ssl_certificate  /etc/nginx/conf.d/ssl/doc/doc.zengzhang.vip_bundle.crt;
    ssl_certificate_key /etc/nginx/conf.d/ssl/doc/doc.zengzhang.vip.key;
    ssl_session_cache shared:SSL:1m;
    ssl_session_timeout 5m;
    ssl_ciphers HIGH:!aNULL:!MD5;

    gzip on;
    gzip_min_length 3k;
    gzip_comp_level 9;
    gzip_types text/plain application/javascript application/x-javascript text/css application/xml text/javascript application/x-httpd-php image/jpeg image/gif image/png;
    gzip_vary on;
    gzip_disable "MSIE [1-6]\.";
    root /usr/share/nginx/html;


    location / {
        proxy_pass http://doc;
        proxy_http_version 1.1;
        proxy_set_header Upgrade $http_upgrade;
        proxy_set_header Connection keep-alive;
        proxy_set_header Host $host;
        proxy_cache_bypass $http_upgrade;
        proxy_set_header Connection "Upgrade";
        proxy_set_header X-Forwarded-For $proxy_add_x_forwarded_for;
    }
}
配置好后,直接重启nginx。
命令是:systemctl restart nginx
接下来,敲黑版,重点来啦!!!
没有配置wss的情况下,我们是这样与服务器端建立连接。
ws://xxx.com:8768/jeecg-activiti-gateway/ws/playBack
配置了wss情况下, 我们建立连接的方式是这样的。
wss://xxx.com:443/jeecg-activiti-gateway/ws/playBack
客户端 由之前的请求地址 ws://www.xxx.com:8768 改为了 wss://www.xxxx.com:443
这个点,需要特别注意啦!!! 本人花费4个小时, 终于找到原因。
如果对您有帮助, 多多点赞啦啦啦…
也可以支持一下作者的网站哦, 点击下方链接。
JeecgFlow


 3574
3574


 被折叠的 条评论
为什么被折叠?
被折叠的 条评论
为什么被折叠?
 到【灌水乐园】发言


