


一、使用研华AIMB-701工控机,worksbench4+vxworks7
步骤:
## Target Boot Procedure
This procedure is the most direct strategy for booting the majority of Intel target boards successfully to the VxWorks kernel shell prompt. It can be done from either Linux or Windows workstations.
### Step 1: Set up the Target
1.1 Attach the target to a video monitor, a USB keyboard and a physical network cable.
1.2 Power up the target and enter the target's BIOS configuration. Change the BIOS boot settings to boot first from a USB flash drive. Apply this setting and then power down the target.
1.3 Insert the USB flash drive into the workstation. Make sure it is formatted with either FAT or FAT32.
### Step 2: Create the VxWorks Source Build Project
2.1 From the workstation command terminal, enter the following:
C:\WindRiver\workspace> vxprj vsb create -smp -bsp itl_generic baseline32_smp -S
C:\WindRiver\workspace> cd baseline32_smp
C:\WindRiver\workspace\baseline32_smp> vxprj build
C:\WindRiver\workspace\baseline32_smp> cd ..
### Step 3: Create the VxWorks Image Project
3.1 From the workstation command terminal, enter the following:
C:\WindRiver\workspace> vxprj create -smp itl_generic vip32_smp -profile PROFILE_INTEL_GENERIC -vsb baseline32_smp
C:\WindRiver\workspace> cd vip32_smp
C:\WindRiver\workspace\vip32_smp> vxprj vip component add INCLUDE_MULTI_STAGE_WARM_REBOOT
C:\WindRiver\workspace\vip32_smp> vxprj vip bundle add BUNDLE_STANDALONE_SHELL
3.2 Now, set the VxWorks boot line. You will set the default boot line differently depending on your host operating system.
On Windows:
C:\WindRiver\workspace\vip32_smp> vxprj vip parameter set DEFAULT_BOOT_LINE "\"fs(0,0)host:/vxWorks h=90.0.0.3 e=90.0.0.50 u=user o=gei"\"
On Linux:
~/home/user/WindRiver/workspace/vip32_smp$ vxprj vip parameter set DEFAULT_BOOT_LINE '"fs(0,0)host:/vxWorks h=90.0.0.3 e=90.0.0.50 u=user o=gei"'
**NOTE 1:** The default boot line instructs VxWorks to set the target board network IP address, and attach to the target network interface.
**NOTE 2:** The default boot line assumes VxWorks will attach to an Intel Pro 1000 **gei** network device on the board. If your Intel target does not contain this network device, set it to an alternative boot devices (**fei**, **tei** or **rtg**).
3.3 Build the VIP:
C:\WindRiver\workspace\vip32_smp> vxprj build
### Step 4: Build the UEFI Boot Loader
4.1 From the workstation command terminal, enter the following:
C:\WindRiver\workspace\vip32_smp> cd C:\WindRiver\vxworks-7\pkgs_v2\boot\uefi
C:\WindRiver\vxworks-7\pkgs_v2\boot\uefi> make
### Step 5: Prepare the USB Flash Drive
5.1 Copy the UEFI boot loader to the USB flash drive.
Assuming the USB flash drive volume is mounted on Windows as drive letter E:\, load the UEFI boot loader onto the USB flash drive:
C:\WindRiver\vxworks-7\pkgs_v2\boot\uefi> mkdir E:\EFI E:\EFI\BOOT
C:\WindRiver\vxworks-7\pkgs_v2\boot\uefi> cd C:\WindRiver\vxworks-7\workspace
C:\WindRiver\vxworks-7\workspace> copy uefi_ia32\BOOTIA32.EFI E:\EFI\BOOT
C:\WindRiver\vxworks-7\workspace> copy uefi_x86_64\BOOTX64.EFI E:\EFI\BOOT
5.2 Copy the VIP VxWorks image file to the USB flash drive:
C:\WindRiver\vxworks-7\workspace> cd C:\WindRiver\workspace\vip32_smp\default
C:\WindRiver\workspace\vip32_smp\default> copy vxWorks bootapp.sys
C:\WindRiver\workspace\vip32_smp\default> copy bootapp.sys E:\EFI\BOOT
### Step 6: Boot the Target
6.1 Safely eject and remove the USB flash drive from the workstation.
6.2 Make sure the target is powered down and insert the USB flash drive into the target's USB port.
6.3 Power up the target, and observe the VxWorks UEFI boot loader on the target console while it loads the VxWorks kernel.
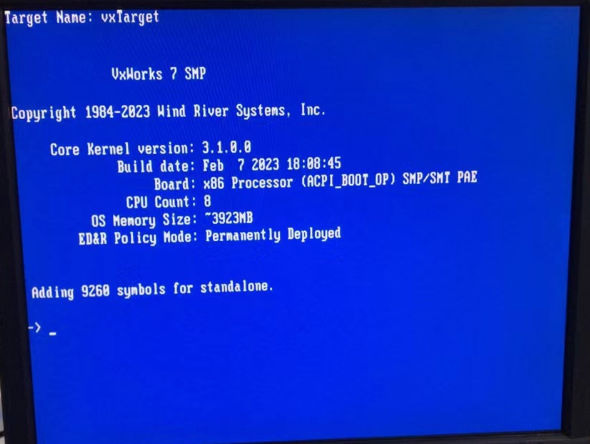
6.4 Once the target has booted, the VxWorks banner becomes visible on the target console.
Target Name: vxTarget
VxWorks 7 SMP
Copyright 1984-2018 Wind River Systems, Inc.
Core Kernel version: 1.2.7.0
Build date: Aug 10 2018 13:53:49
Board: x86 Processor (ACPI_BOOT_OP) SMP/SMT PAE
CPU Count: 4
OS Memory Size: ~8020MB
ED&R Policy Mode: Permanantly Deployed
Adding 9870 symbols for standalone.
->
二、win创建efi引导分区
链接:
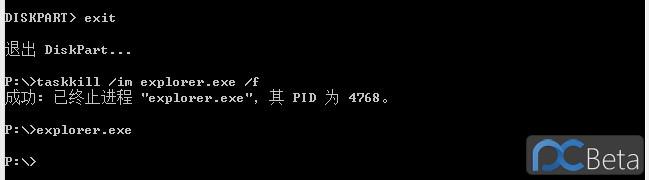
# 选择磁盘 diskpart list disk select disk XXX # 转换为 GPT 分区 clean convert gpt # 创建 EFI 分区 create partition efi size=256 format quick fs=fat32 label="System" assign letter="S"
注意点一:用管理员权限打开命令提示符,依次输入以下命令:diskpart
注意点二:


 861
861

 被折叠的 条评论
为什么被折叠?
被折叠的 条评论
为什么被折叠?
 到【灌水乐园】发言


