


maven 的依赖范围
| 依赖范围 | 对于编译classpath有效 | 对于测试classpath有效 | 对于运行时classpath有效 | 例子 |
|---|---|---|---|---|
| compile | Y | Y | Y | spring-core |
| test | - | Y | - | Junit |
| provided | Y | Y | - | servlet-api |
| runtime | - | Y | Y | JDBC驱动 |
| system | Y | Y | - | 本地的,maven仓库之外的类库 |
在项目中需要正确的使用maven 的坐标范围,值得注意的是如果不在maven中设置scope属性,则默认为compile。
依赖传递
什么是依赖传递
在maven中,依赖是可以传递的,假设存在三个项目,分别是项目A,项目B以及项目C。假设C依赖B,B依赖A,那么我们可以根据maven项目依赖的特征不难推出项目C也依赖A。

如上图所述web项目直接依赖了spring-webmvc,而spring-webmvc依赖了sping-aop、spring-beans等。最终的结果就是在我们的web项目中间接依赖了spring-aop、spring-beans等。
依赖冲突
由于依赖传递现象的存在,由于依赖传递作用,使得项目内部的一些jar包版本重复,混乱,依赖换乱。

解决依赖冲突的办法
使用maven提供的依赖调解原则
   第一声明者优先原则
   在 pom 文件中定义依赖,以先声明的依赖为准。其实就是根据坐标导入的顺序来确定最终使用哪个传递过来的依赖 。

路径近者优先原则
spring-aop 和 spring-webmvc 都会传递过来 spirng-beans,那如果直接把 spring-beans 的依赖直接写到 pom 文件中,那么项目就不会再使用其他依赖传递来的 spring-beans,因为自己直接在 pom 中定义 spring-beans要比其他依赖传递过来的路径要近。

排除依赖

锁定版本
采用直接锁定版本的方法确定依赖jar包的版本,版本锁定后则不考虑依赖的声明顺序或依赖的路径,以锁定的版本为准添加到工程中,此方法在企业开发中经常使用。
版本锁定的使用方式:
第一步:在dependencyManagement标签中锁定依赖的版本
    <dependencyManagement>
        <dependencies>
            <dependency>
                <groupId>org.springframework</groupId>
                <artifactId>spring-core</artifactId>
                <version>5.1.10.RELEASE</version>
            </dependency>
            <dependency>
                <groupId>org.springframework</groupId>
                <artifactId>spring-beans</artifactId>
                <version>5.1.10.RELEASE</version>
            </dependency>
        </dependencies>
    </dependencyManagement>
第二步:在dependencies标签中声明需要导入的maven坐标
		<dependency>
            <groupId>org.springframework</groupId>
            <artifactId>spring-beans</artifactId>
        </dependency>
        <dependency>
            <groupId>org.springframework</groupId>
            <artifactId>spring-core</artifactId>
        </dependency>
        <dependency>
            <groupId>org.springframework</groupId>
            <artifactId>spring-webmvc</artifactId>
            <version>5.0.5.RELEASE</version>
        </dependency>
        <dependency>
            <groupId>org.springframework</groupId>
            <artifactId>spring-aop</artifactId>
            <version>5.0.5.RELEASE</version>
        </dependency>
最终结果


nexus 私服使用
nexus 私服的安装
windows环境下的安装和卸载
下载安装包
去官网下载实在是慢的很,到目前为止,小猿也没有很好的办法,如果有童鞋了解如如何能有效解决这一问题,还网不吝赐教,小猿最后在论坛上面找了windows版本。
安装
- 首先将压缩包解压到需要安装的目录并进入到bin目录下

- 以管理员方式打开cmd,并切换到bin目录下
.
- 执行如下命令
nexus.bat install

安装成功,输入命令打开即可。
nexus start
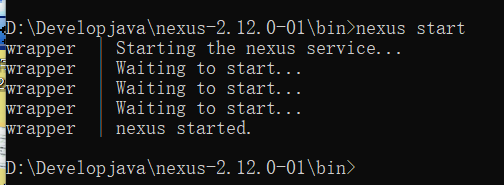
4. 访问nexus
nexus 的主要配置文件在conf目录下的nexus.properties文件中
# Jetty section
application-port=8081
application-host=0.0.0.0
nexus-webapp=${bundleBasedir}/nexus
nexus-webapp-context-path=/nexus

# Nexus section
nexus-work=${bundleBasedir}/../sonatype-work/nexus
runtime=${bundleBasedir}/nexus/WEB-INF
可以修改端口,也可以修改主页路径如小猿进行如下修改,首先关闭nexus

重行启动
nexus.bat restart
访问端口和访问路径都发生了变化

nexus仓库类型

通过前面的仓库列表可以看到,nexus默认内置了很多仓库,这些仓库可以划分为4种类型,每种类型的仓库用于存放特定的jar包,具体说明如下:
①hosted,宿主仓库,部署自己的jar到这个类型的仓库,包括Releases和Snapshots两部分,Releases为公司内部发布版本仓库、 Snapshots为公司内部测试版本仓库 。
②proxy,代理仓库,用于代理远程的公共仓库,如maven中央仓库,用户连接私服,私服自动去中央仓库下载jar包或者插件。
③group,仓库组,用来合并多个hosted/proxy仓库,通常我们配置自己的maven连接仓库组。
④virtual(虚拟):兼容Maven1版本的jar或者插件。
本地仓库的物理地址

如要详细查看各个仓库的物理地址,可参考下图

将项目发布到maven私服
配置maven的settings文件
<server>
<id>releases</id>
<username>xueshanfeitian</username>
<password>xueshanfeitian</password>
</server>
<server>
<id>snapshots</id>
<username>xueshanfeitian</username>
<password>xueshanfeitian</password>
</server>
此处系统用户名和默认密码分别是admin和admin123,如需添加用户或者修改用户,清先以管理员身份登录,登录后到如图所示的菜单中添加说着修改用户。

按照菜单选项提示即可完成用户的添加修改删除以及改变用户权限操作。
配置待上传的目标的pom.xml文件
<distributionManagement>
        <repository>
            <id>releases</id>
            <url>http://localhost:9999/nex/content/repositories/releases/</url>
        </repository>
        <snapshotRepository>
            <id>snapshots</id>
            <url>http://localhost:9999/nex/content/repositories/snapshots/</url>
        </snapshotRepository>
    </distributionManagement>
执行命令

从私服向本地下载jar包
在settings.xml中配置下载模板
	<profile>
		<id>dev</id>
			<repositories>
				<repository>
					<id>nexus</id>
					<!--仓库地址,即nexus仓库组的地址-->
					<url>http://localhost:9999/nex/content/groups/public/</url>
					<!--是否下载releases构件-->
					<releases>
					<enabled>true</enabled>
					</releases>
					<!--是否下载snapshots构件-->
					<snapshots>
						<enabled>true</enabled>
					</snapshots>
				</repository>
			</repositories>
			<pluginRepositories>
			<!-- 插件仓库,maven的运行依赖插件,也需要从私服下载插件 -->
				<pluginRepository>
					<id>public</id>
					<name>Public Repositories</name>
					<url>http://localhost:9999/nex/content/groups/public/</url>
				</pluginRepository>
			</pluginRepositories>
	</profile>
激活下载模板
<activeProfiles>
	<activeProfile>dev</activeProfile>
</activeProfiles>
配置完成,即可从私服下载jar包,当私服没有jar包时,则私服向中央仓库下载jar包,下载到私服仓库,再由私服下载本地仓库。
第三方jar包的安装
本地安装
本地安装在maven 第三节笔记中已有相关说明
再次复习一下:
mvn install:install-file -DgroupId=com.fasterxml.jackson.core -DartifactId=jackson-databind -Dversion=2.9.0 -Dpackaging=jar -Dfile=D:\Develop\mavenlib\maveninstall\jackson-databind-2.9.0.jar
这样就可以将jackson-databind-2.9.0.jar安装到本地仓库
私服安装
配置settings文件
<server>
		<id>thirdparty</id>
		<username>xueshanfeitian</username>
		<password>xueshanfeitian</password>
</server>
执行命令
mvn deploy:deploy-file -DgroupId=com.fasterxml.jackson.core -DartifactId=jackson-databind -Dversion=2.9.0 -Dpackaging=jar -Dfile=D:\Develop\mavenlib\maveninstall\jackson-databind-2.9.0.jar -Durl=http://localhost:9999/nex/content/repositories/thirdparty/ -DrepositoryId=thirdparty
执行命令后报错

到nexus修改上传权限

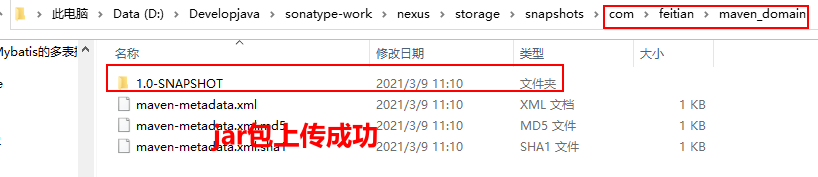
重新执行命令
上传成功

重新验证,则正式发布成功

至于在linux环境下nexus的安装和使用,如有机会,小猿会继续更新。


 2076
2076


 被折叠的 条评论
为什么被折叠?
被折叠的 条评论
为什么被折叠?
 到【灌水乐园】发言


