


Fetch Api
一、概念
1.XMLHttpRequest的问题
- 所有的功能全部集中在同一个对象上,容易书写出混乱不易维护的代码
- 采用传统的事件驱动模式,无法适配新的 Promise Api
2.Fetch Api 的特点
- 并非取代 AJAX,而是对 AJAX 传统 API 的改进
- 精细的功能分割:头部信息、请求信息、响应信息等均分布到不同的对象,更利于处理各种复杂的 AJAX 场景
- 使用 Promise Api,更利于异步代码的书写
- Fetch Api 并非 ES6 的内容,属于 HTML5 新增的 Web Api
- 需要掌握网络通信的知识
二、基本使用
1.必填参数,字符串,请求地址
async function getResult(){
    const url = 'http://101.132.72.36:5100/api/local';
    const resp = await fetch(url);
    console.log(resp);
};
getResult ();

2.选填参数,对象,请求配置
- method:字符串,请求方法,默认值GET
- headers:对象,请求头信息
- body: 请求体的内容,必须匹配请求头中的 Content-Type
- mode:字符串,请求模式
a. cors:默认值,配置为该值,会在请求头中加入 origin 和 referer
b. no-cors:配置为该值,不会在请求头中加入 origin 和 referer,跨域的时候可能会出现问题
c. same-origin:指示请求必须在同一个域中发生,如果请求其他域,则会报错- credentials: 如何携带凭据(cookie)
a. omit:默认值,不携带cookie
b. same-origin:请求同源地址时携带cookie
c. include:请求任何地址都携带cookie- cache:配置缓存模式
a. default: 表示fetch请求之前将检查下http的缓存.
b. no-store: 表示fetch请求将完全忽略http缓存的存在. 这意味着请求之前将不再检查下http的缓存, 拿到响应后, 它也不会更新http缓存.
c. no-cache: 如果存在缓存, 那么fetch将发送一个条件查询request和一个正常的request, 拿到响应后, 它会更新http缓存.
d. reload: 表示fetch请求之前将忽略http缓存的存在, 但是请求拿到响应后, 它将主动更新http缓存.
e. force-cache: 表示fetch请求不顾一切的依赖缓存, 即使缓存过期了, 它依然从缓存中读取. 除非没有任何缓存, 那么它将发送一个正常的request.
f. only-if-cached: 表示fetch请求不顾一切的依赖缓存, 即使缓存过期了, 它依然从缓存中读取. 如果没有缓存, 它将抛出网络错误(该设置只在mode为”same-origin”时有效).
async function getResult(){
    const url = 'http://101.132.72.36:5100/api/local';
    const config = {
        method : 'post',
        headers: {
            'Content-Type': 'application/json'
        },
        body: `{'a':'1'}`
    }
    const resp = await fetch(url,config);
    console.log(resp);
};

3.返回值
1.返回一个 Promise 对象
fetch 函数返回一个 Promise 对象
- 当收到服务器的返回结果后,Promise 进入resolved状态,状态数据为 Response 对象
- 当网络发生错误(或其他导致无法完成交互的错误)时,Promise 进入 rejected 状态,状态数据为错误信息
function getResult(){
    const url = 'http://101.132.72.36:5100/api/local';
    const config = {
        method : 'GET',
        headers: {
            a: 1
        }
    };
    fetch(url,config).then(resp=>{
        console.log(resp);//200,404,500都是推向resolve
    }).catch(err=>{
        console.log(err);//只有断网等状态才是错误
    });
};

优化
async function getResult(){
    const url = 'http://101.132.72.36:5100/api/local';
    const config = {
        method : 'GET',
        headers: {
            a: 1
        }
    };
    try {
        const resp =  await fetch(url,config);
        console.log(resp);
    }catch(err){
        console.log(err);
    }
};
2.Response对象
- ok:boolean,当响应消息码在200~299之间时为true,其他为false
- status:number,响应的状态码
- text():用于处理文本格式的 Ajax 响应。它从响应中获取文本流,将其读完,然后返回一个被解决为 string 对象的 Promise。
- blob():用于处理二进制文件格式(比如图片或者电子表格)的 Ajax 响应。它读取文件的原始数据,一旦读取完整个文件,就返回一个被解决为 blob 对象的 Promise。
- json():用于处理 JSON 格式的 Ajax 的响应。它将 JSON 数据流转换为一个被解决为 JavaScript 对象的promise。
- redirect():可以用于重定向到另一个 URL。它会创建一个新的 Promise,以解决来自重定向的 URL 的响应。
async function getResult(){
    const url = 'http://101.132.72.36:5100/api/local';
    const config = {
        method : 'GET',
        headers: {
            a: 1
        }
    };
    try {
        const resp =  await fetch(url,config);
        // const result = await resp.text();
        const jsonlt = await resp.json();
        // console.log(result);
        console.log(jsonlt);
    }catch(err){
        console.log(err);
    }
};

三、Request 对象
除了使用基本的fetch方法,还可以通过创建一个Request对象来完成请求(实际上,fetch的内部会帮你创建一个Request对象)
async function getResult(){
    const url = 'http://101.132.72.36:5100/api/local';
    const req = new Request(url,{});
    const resp = await fetch(req);
    const result = await resp.json();
    console.log(result);
}

注意点:尽量保证每次请求都是一个新的Request对象
let req;
function getRequestInfo() {
    if (!req) {
        const url = "http://101.132.72.36:5100/api/local";
        req = new Request(url, {});
        console.log(req);
    }
    return req.clone(); //克隆一个全新的request对象,配置一致
    //重用,可能导致重复使用前面的进度
};
async function getProvinces() {
    const resp = await fetch(getRequestInfo())
    const result = await resp.json();
    console.log(result)
};
四、Response 对象
async function getResult() {
    const resp = new Response(`[
        {"id":1, "name":"北京"},
        {"id":2, "name":"天津"}
    ]`, {
        ok: true,
        status: 200
    });//对应url请求到的数据,可利用某些工具库生成测试数据
    const result = await getJSON(resp);
    console.log(result)
};
async function getJSON(resp) {
    const json = await resp.json();
    return json;
};
五、Headers 对象
在Request和Response对象内部,会将传递的请求头对象,转换为Headers
Headers对象中的方法:
- has(key):检查请求头中是否存在指定的key值
- get(key): 得到请求头中对应的key值
- set(key, value):修改对应的键值对
- append(key, value):添加对应的键值对
- keys(): 得到所有的请求头键的集合
- values(): 得到所有的请求头中的值的集合
- entries(): 得到所有请求头中的键值对的集合
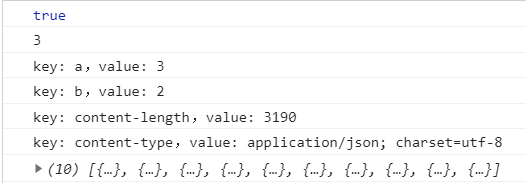
let req;
function printHeaders(headers) {
    const datas = headers.entries();
    for (const pair of datas) {
        console.log(`key: ${pair[0]},value: ${pair[1]}`);
    }
};//得到所有请求头中的键值对的集合
function getCommonHeaders() {
    return new Headers({
        a: 1,
        b: 2
    })
};//设置请求头值
function getRequestInfo() {
    if (!req) {
        const url = "http://101.132.72.36:5100/api/local";
        const headers = getCommonHeaders();
        headers.set("a", 3)
        req = new Request(url, {
            headers
        });
        console.log(headers.has('a'));
        console.log(headers.get('a'));
        printHeaders(headers);
    }
    return req.clone(); //克隆一个全新的request对象,配置一致
};
async function getProvinces() {
    const resp = await fetch(getRequestInfo())
    printHeaders(resp.headers);
    const result = await getJSON(resp);
    console.log(result)
};
async function getJSON(resp) {
    const json = await resp.json();
    return json;
};
六、文件上传
流程:
- 客户端将文件数据发送给服务器
- 服务器保存上传的文件数据到服务器端
- 服务器响应给客户端一个文件访问地址
async function upload() {
    const inp = document.getElementById("avatar");
    if (inp.files.length === 0) {
        alert("请选择要上传的文件");
        return;
    }
    const formData = new FormData(); //构建请求体
    formData.append("imagefile", inp.files[0]);//需要的键的名称(表单域名称)
    const url = "http://101.132.72.36:5100/api/upload"
    const resp = await fetch(url, {
        method: "POST",
        body: formData //自动修改请求头
    });
    const result = await resp.json();//等待上传结果的数据返回并处理
    return result;//返回一个地址信息,可用.path获取地址
};

document.querySelector("button").onclick = async function() {
    const result = await upload();//等待图片上传的返回结果
    const img = document.getElementById("imgAvatar")
    img.src = result.path;
};


 1726
1726


 被折叠的 条评论
为什么被折叠?
被折叠的 条评论
为什么被折叠?
 到【灌水乐园】发言


