还是调试源码最好。
开发环境 JDK1.8+NetBeans8.1
说明:调试HashMap的 public V put(K key, V value) 方法并查看key的值时不能显示变量的值,原因在于oracle提供的jre中rt.jar不带debug信息。
orcale在编译src时使用了 javac -g:none,意思是不带任何调试信息,这样可以减小rt.jar的大小。若想正常调试jdk,就只能重新编译src.zip。
当然也可以只编译单个需要关注的Java即可,例如HashMap.java。
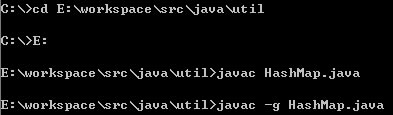
一.解压src.zip
解压src.zip到E:\workspace\下,
src.zip在安装的C:\Program Files\Java\jdk1.8.0_25下
二.javac -g重编译
重新编译src\java\util下的HashMap.java
Windows下进入DOS环境,输入
E:\workspace\src\java\util
然后再输入E:就直接到了E:\workspace\src\java\util
默认如果不带-g编译是没有调试信息是不够的。
# javac -g HashMap.java
三.替换rt.jar
将编译好的所有的HashMap.class都放入C:\Program Files\Java\jdk1.8.0_25\jre\lib的rt.jar
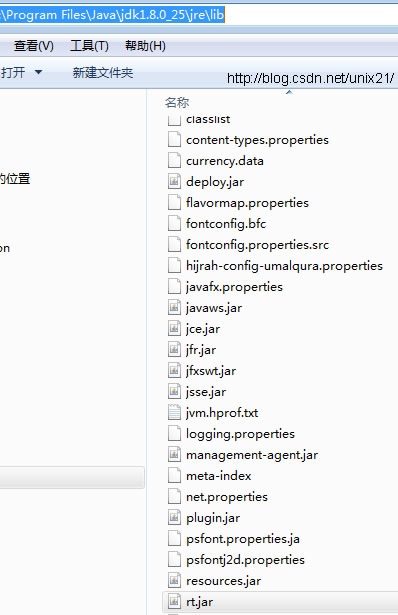
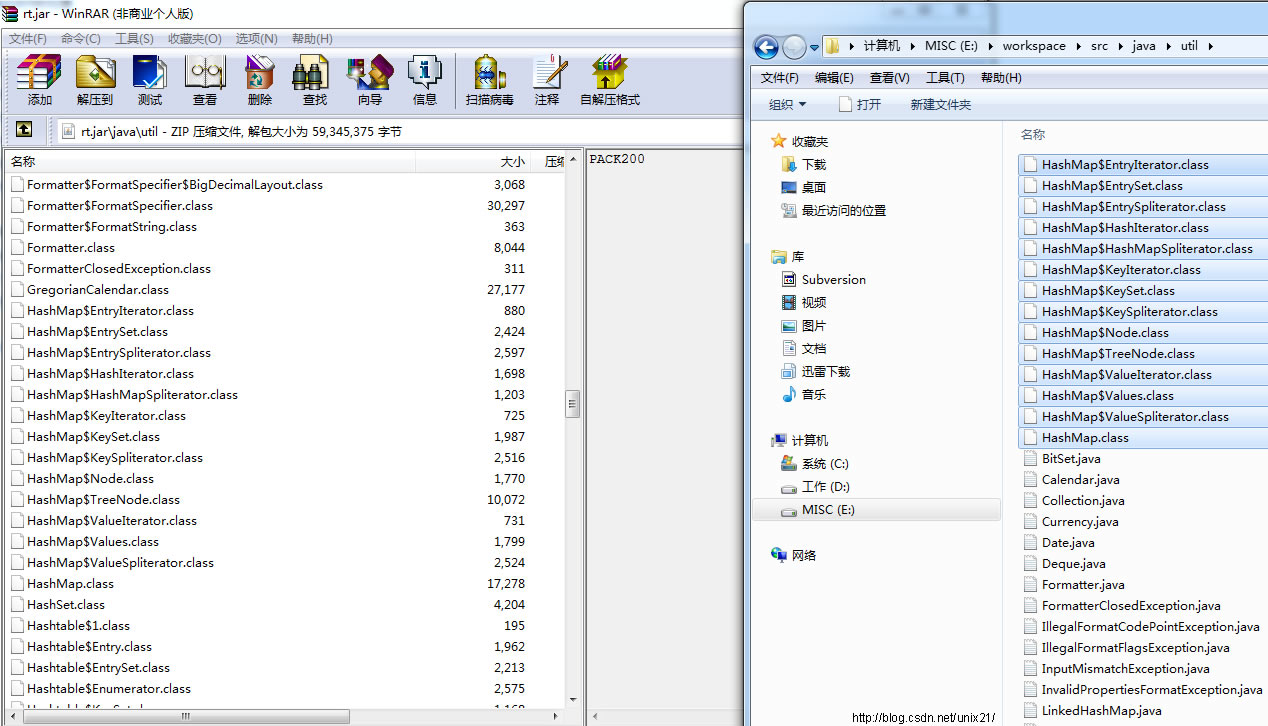
说明:需要做好备份以防搞错。
参考:eclipse如何debug调试jdk源码
初调HashMap,如何修改JDK的源码进行调试
编译JDK源代码,开启Debug信息
四.调试HashMap
先看看HashMap的理论吧
- import java.util.HashMap;
- import java.util.Map;
- import org.junit.Test;
-
- public class TestHash {
-
- @Test
- public void testHashMap() throws Exception {
- System.out.println("==========================");
- Map<String, String> m = new HashMap<String, String>();
- for (int i = 0; i < 18; i++) {
- m.put((char) (i + 65) + (char) (i + 66) + (char) (i + 67) + "", i + ">>>http://blog.csdn.net/unix21/");
- }
- System.out.println("==========================");
- }
- }
下面是源码
-
-
-
-
-
-
-
-
-
-
-
-
- public V put(K key, V value) {
- return putVal(hash(key), key, value, false, true);
- }
-
-
-
-
-
-
-
-
-
-
-
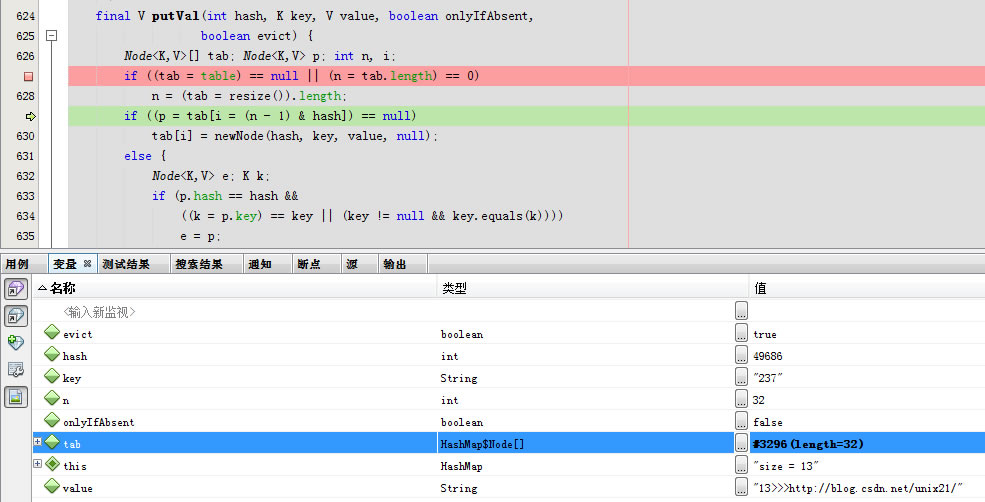
- final V putVal(int hash, K key, V value, boolean onlyIfAbsent,
- boolean evict) {
- Node<K,V>[] tab; Node<K,V> p; int n, i;
- if ((tab = table) == null || (n = tab.length) == 0)
- n = (tab = resize()).length;
- if ((p = tab[i = (n - 1) & hash]) == null)
- tab[i] = newNode(hash, key, value, null);
- else {
- Node<K,V> e; K k;
- if (p.hash == hash &&
- ((k = p.key) == key || (key != null && key.equals(k))))
- e = p;
- else if (p instanceof TreeNode)
- e = ((TreeNode<K,V>)p).putTreeVal(this, tab, hash, key, value);
- else {
- for (int binCount = 0; ; ++binCount) {
- if ((e = p.next) == null) {
- p.next = newNode(hash, key, value, null);
- if (binCount >= TREEIFY_THRESHOLD - 1)
- treeifyBin(tab, hash);
- break;
- }
- if (e.hash == hash &&
- ((k = e.key) == key || (key != null && key.equals(k))))
- break;
- p = e;
- }
- }
- if (e != null) {
- V oldValue = e.value;
- if (!onlyIfAbsent || oldValue == null)
- e.value = value;
- afterNodeAccess(e);
- return oldValue;
- }
- }
- ++modCount;
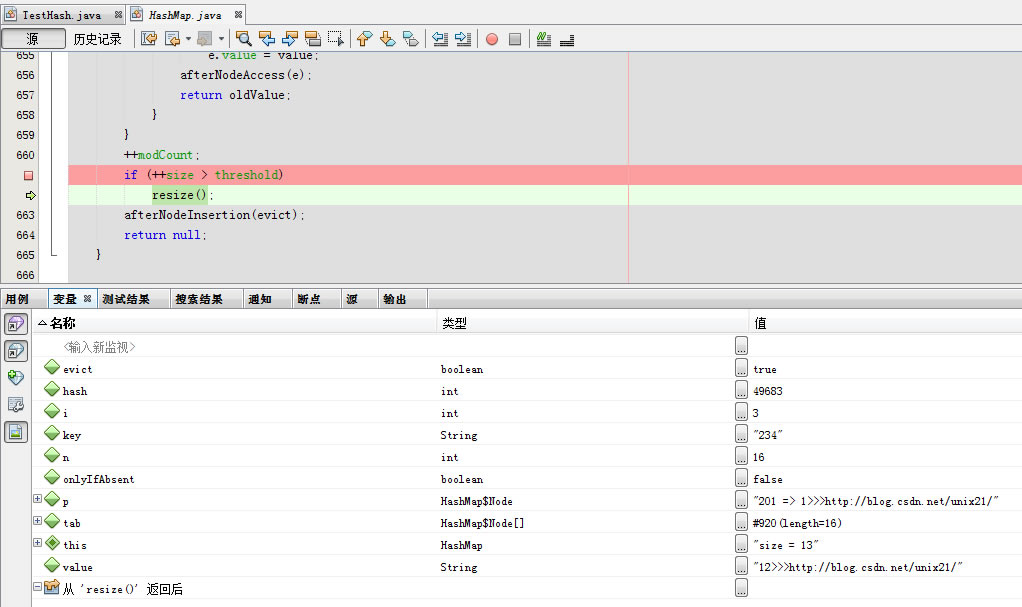
- if (++size > threshold)
- resize();
- afterNodeInsertion(evict);
- return null;
- }
1.第一次进入源码
先初始化增长因子

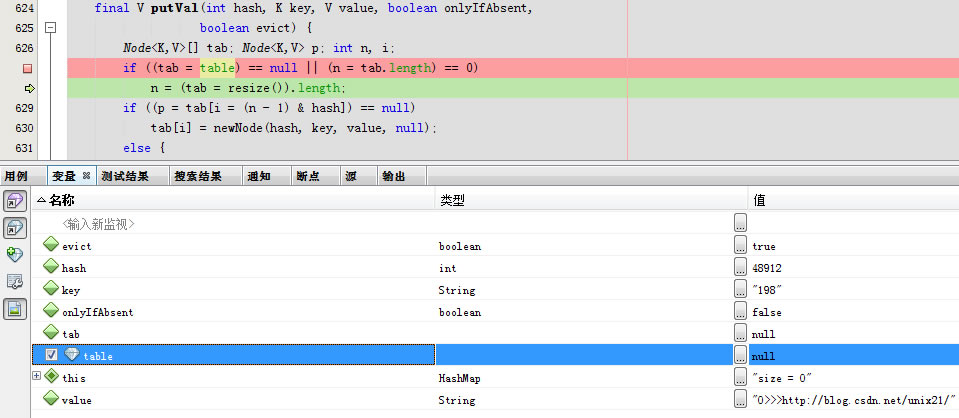
一开始声明一个
- transient Node<K,V>[] table;
java 的transient关键字为我们提供了便利,你只需要实现Serilizable接口,将不需要序列化的属性前添加关键字transient,序列化对象的时候,这个属性就不会序列化到指定的目的地中。
Java transient关键字使用小记
函数体内声明一个Node<K,V>[] tab
一开始table=null,所以tab也是null的
可以看到n=16,如果不使用-g编译是看不到n的,这说明初始的tab长度是16。
然后给tab进行初始化,p=tab[0]=null
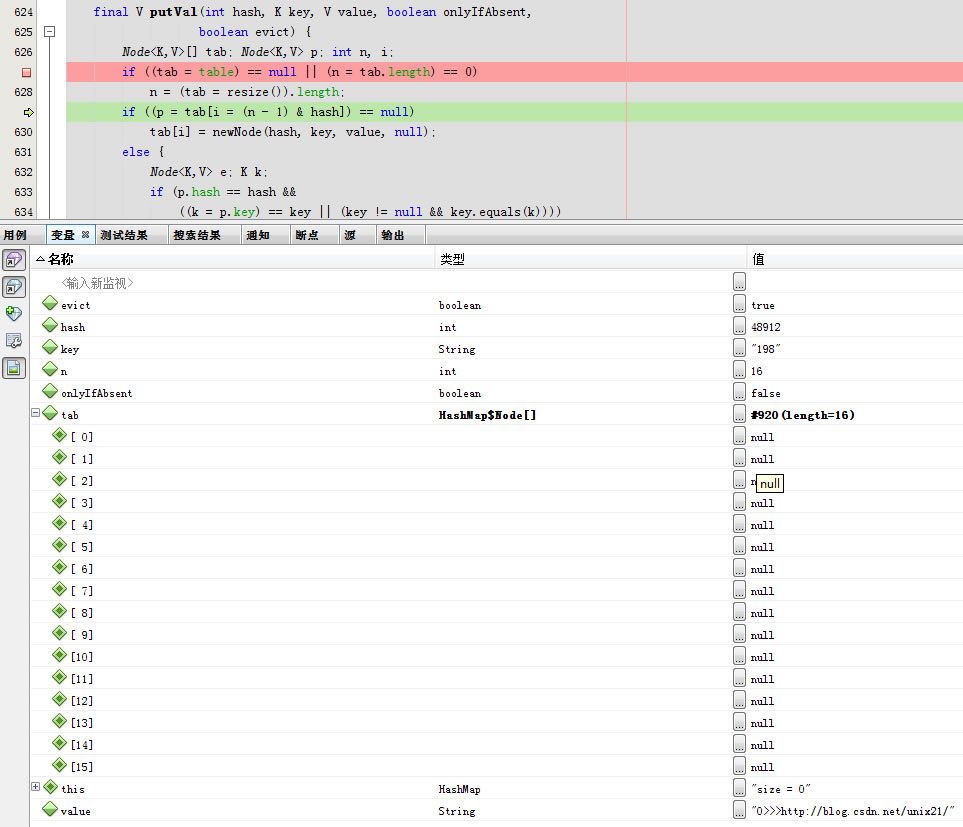
2.插入newNode
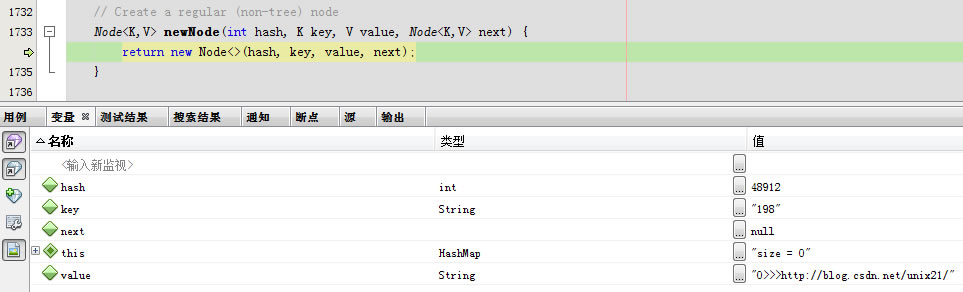
最终会调用static class Node<K,V>的Node(int hash, K key, V value, Node<K,V> next)
-
-
-
-
- static class Node<K,V> implements Map.Entry<K,V> {
- final int hash;
- final K key;
- V value;
- Node<K,V> next;
-
- Node(int hash, K key, V value, Node<K,V> next) {
- this.hash = hash;
- this.key = key;
- this.value = value;
- this.next = next;
- }
-
- public final K getKey() { return key; }
- public final V getValue() { return value; }
- public final String toString() { return key + "=" + value; }
-
- public final int hashCode() {
- return Objects.hashCode(key) ^ Objects.hashCode(value);
- }
-
- public final V setValue(V newValue) {
- V oldValue = value;
- value = newValue;
- return oldValue;
- }
-
- public final boolean equals(Object o) {
- if (o == this)
- return true;
- if (o instanceof Map.Entry) {
- Map.Entry<?,?> e = (Map.Entry<?,?>)o;
- if (Objects.equals(key, e.getKey()) &&
- Objects.equals(value, e.getValue()))
- return true;
- }
- return false;
- }
- }
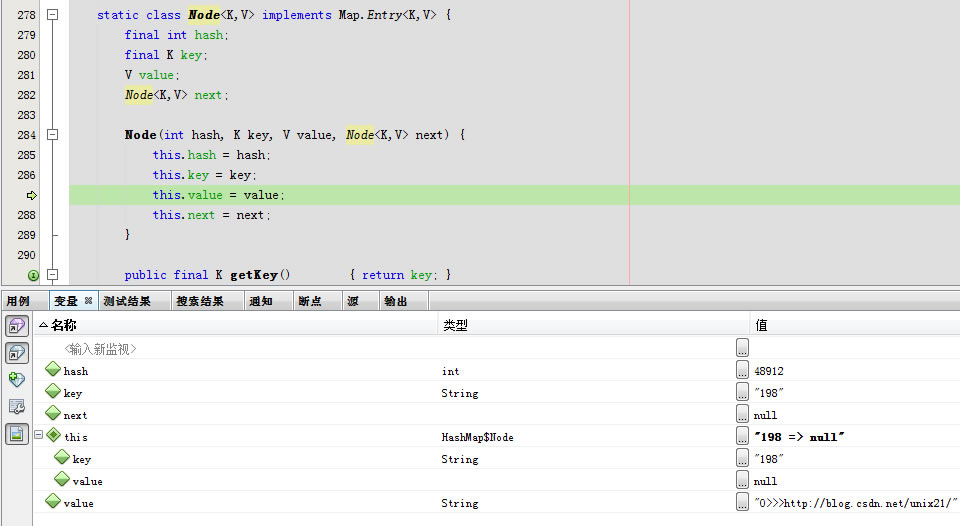
第一个Node节点就有值了,其next为null.
关于静态嵌套类

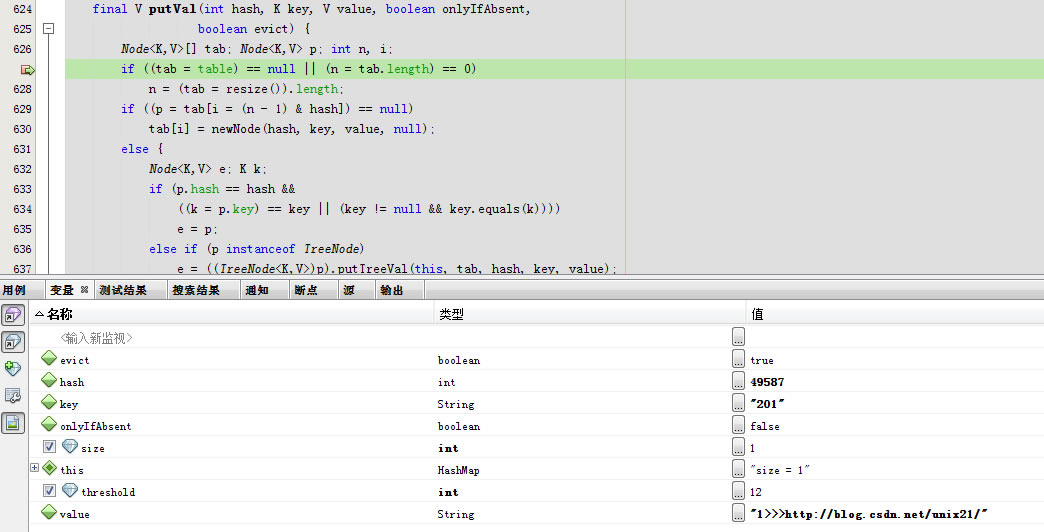
3.回到putVal
tab[0]就是返回的Node
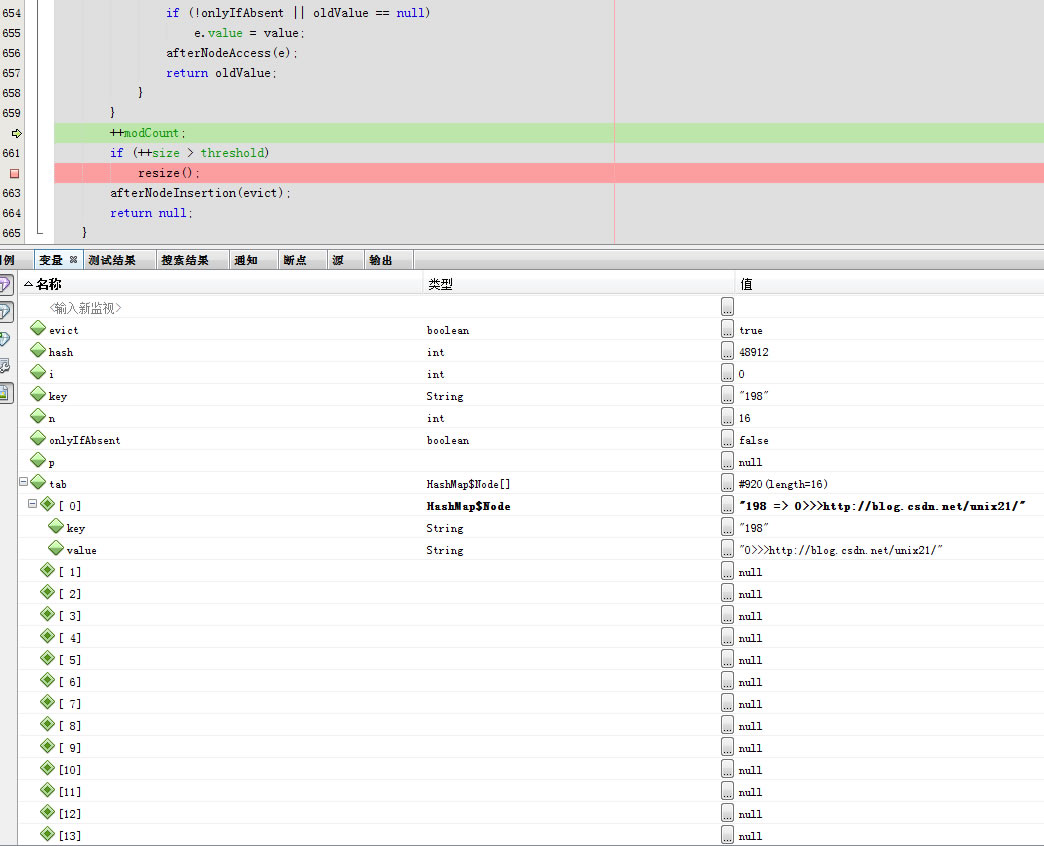
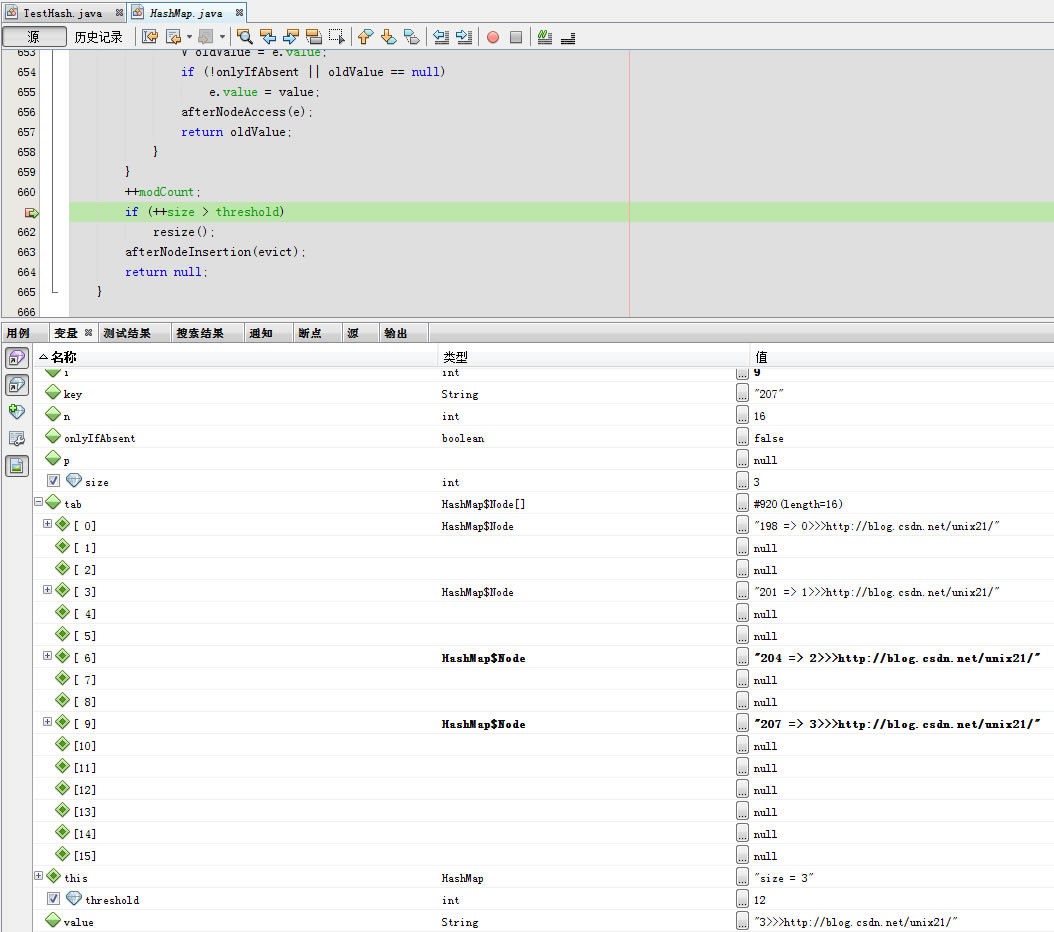
4.查看是否需要扩容
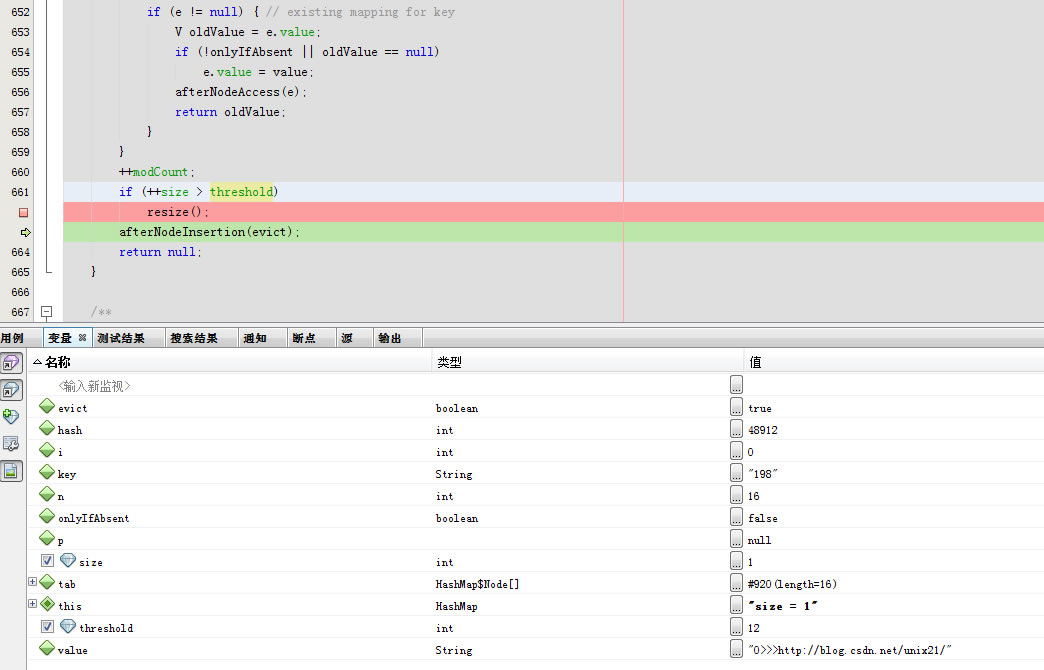
还不到threshold的上限12 ,所以无需扩容。
5.HashMap第二次put进入putVal
很显然这个时候table不为空,因为前次已经插值了。
i=3,p=tab[3]
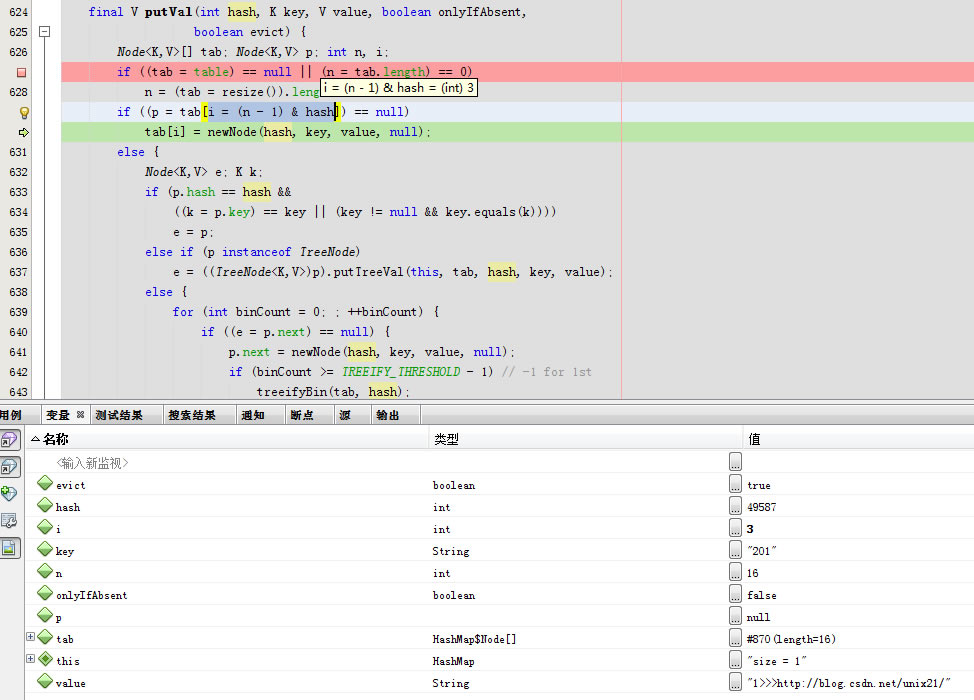
新的node插入在tab[3]上,此次依然无需扩容。
第4次插值
第7次插值
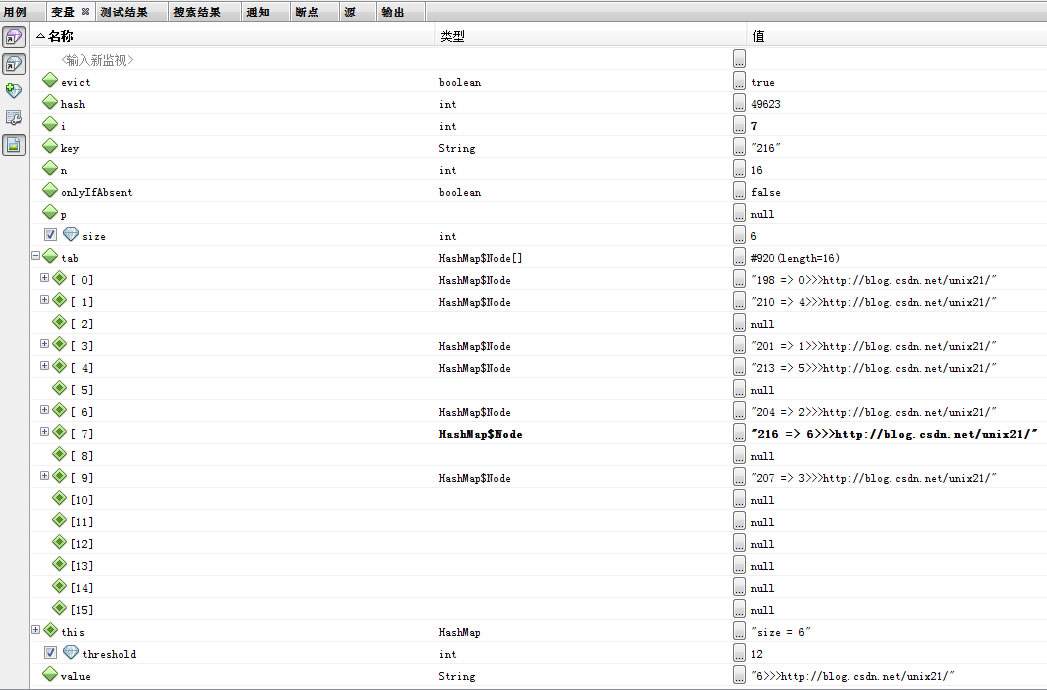
第11次
第12次
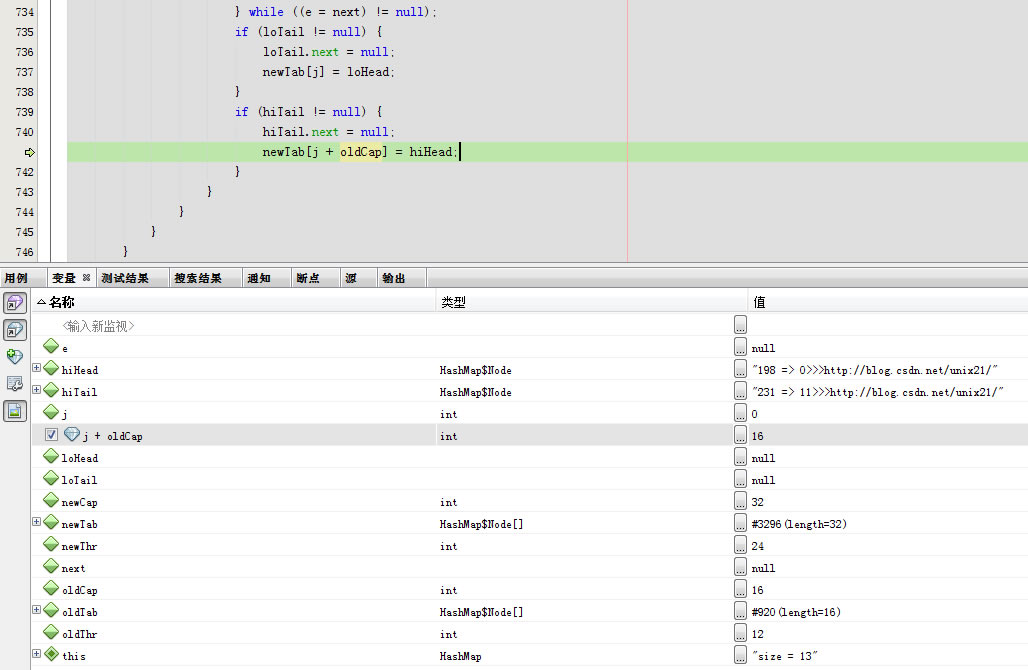
第13次
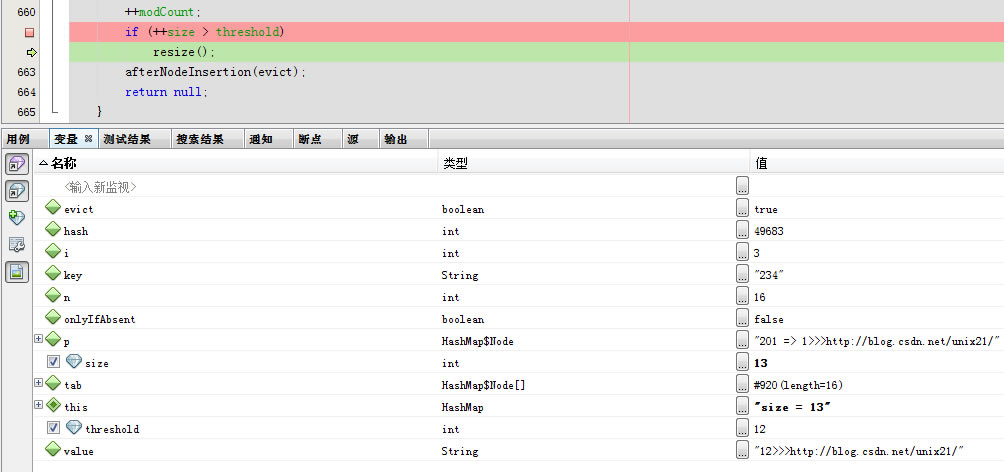
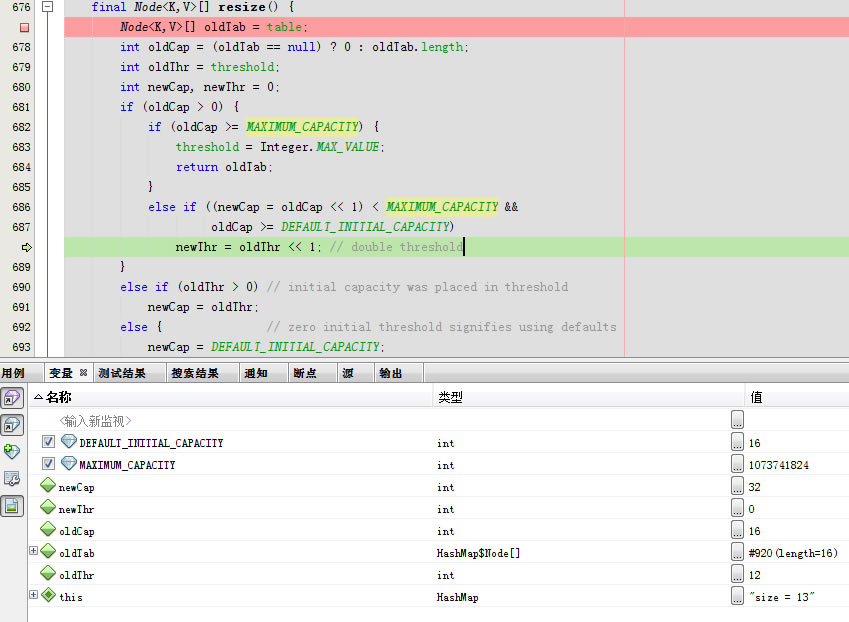
tab和

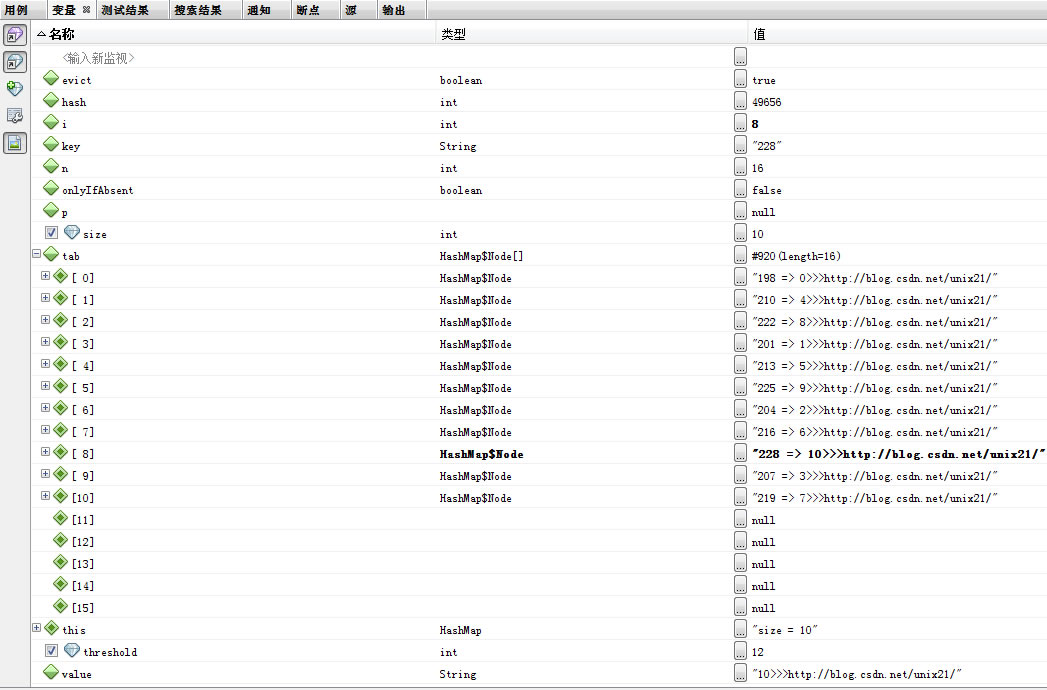
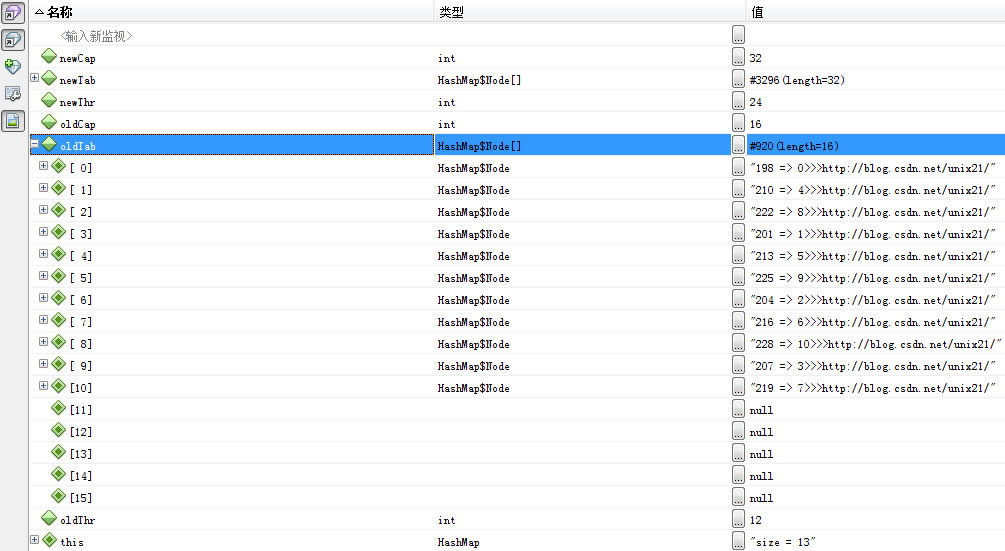
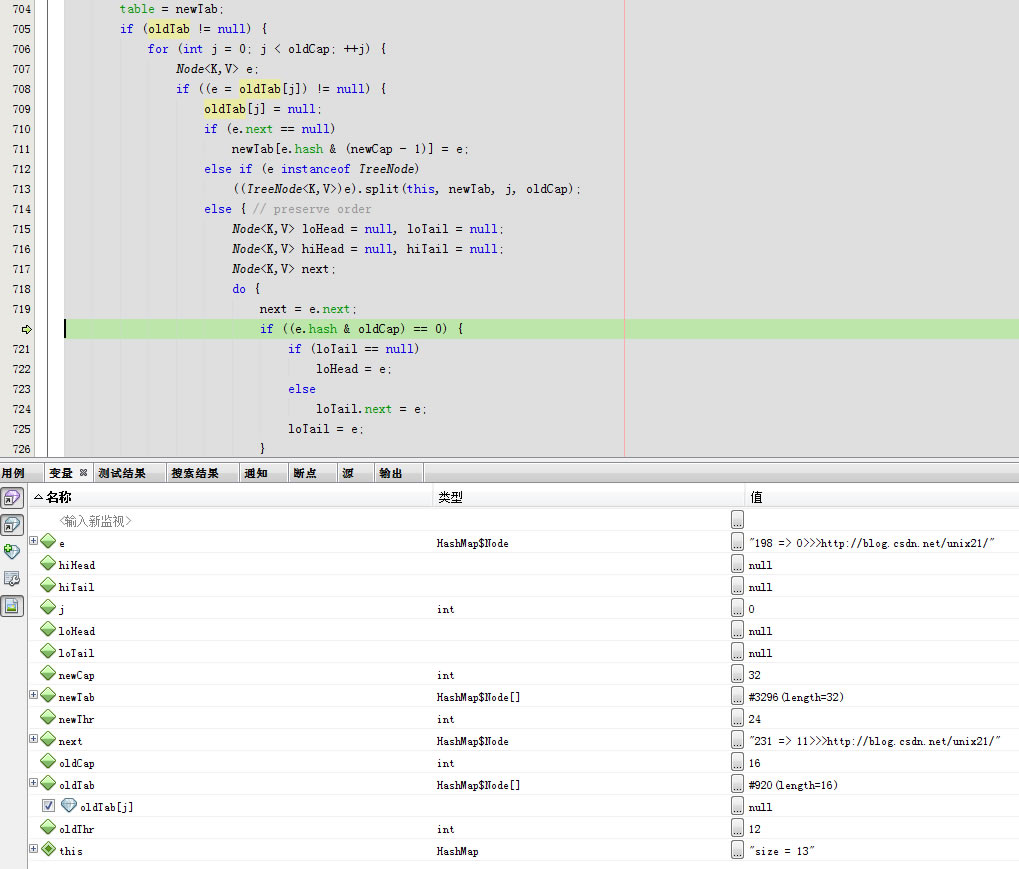
此次需要扩容
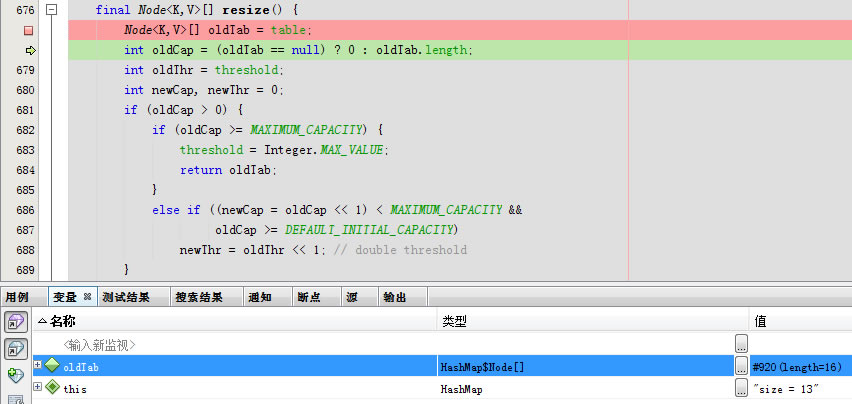
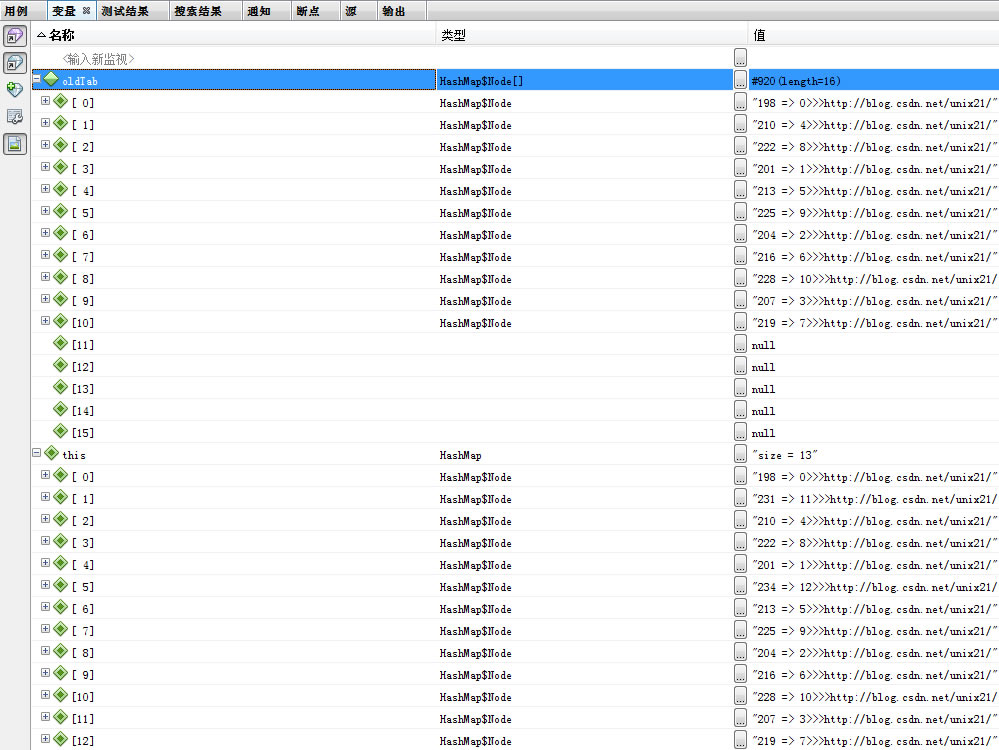
点开oldTab
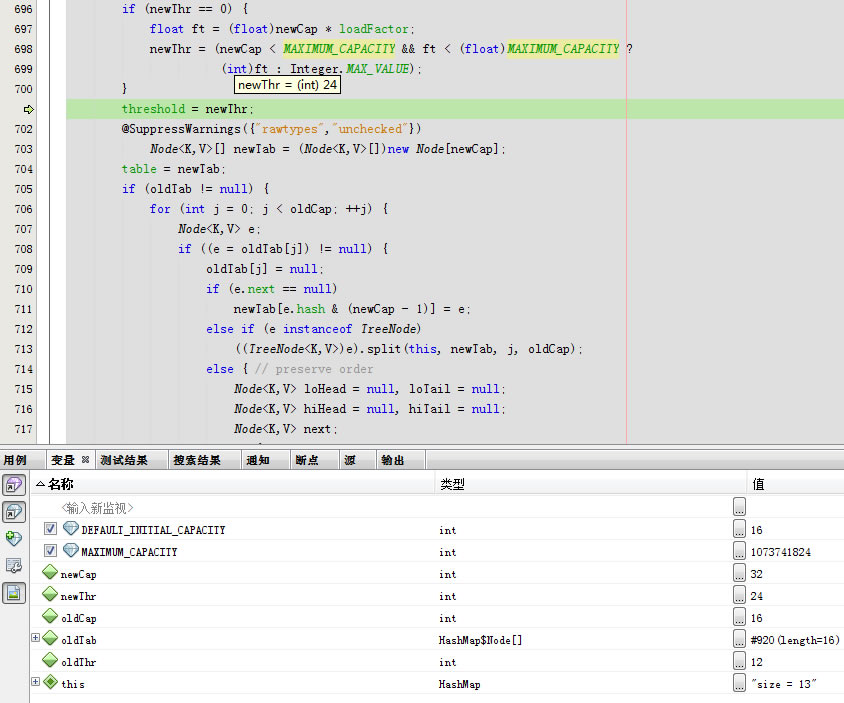
下一步
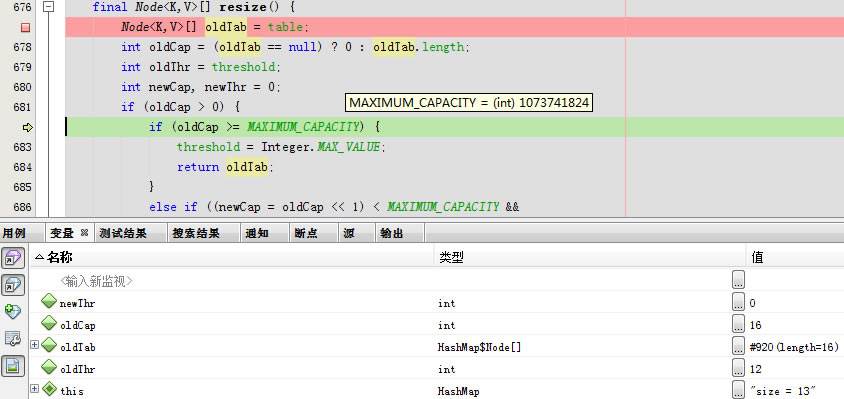
下一步
下一步,threshold升为24
下一步
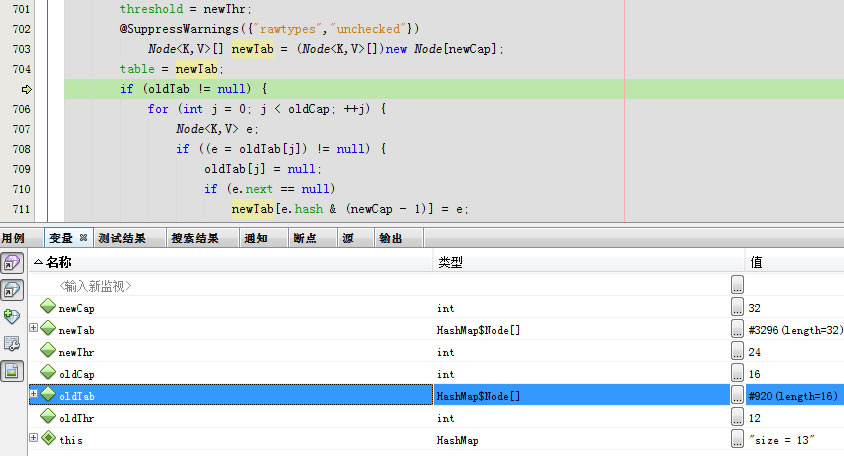
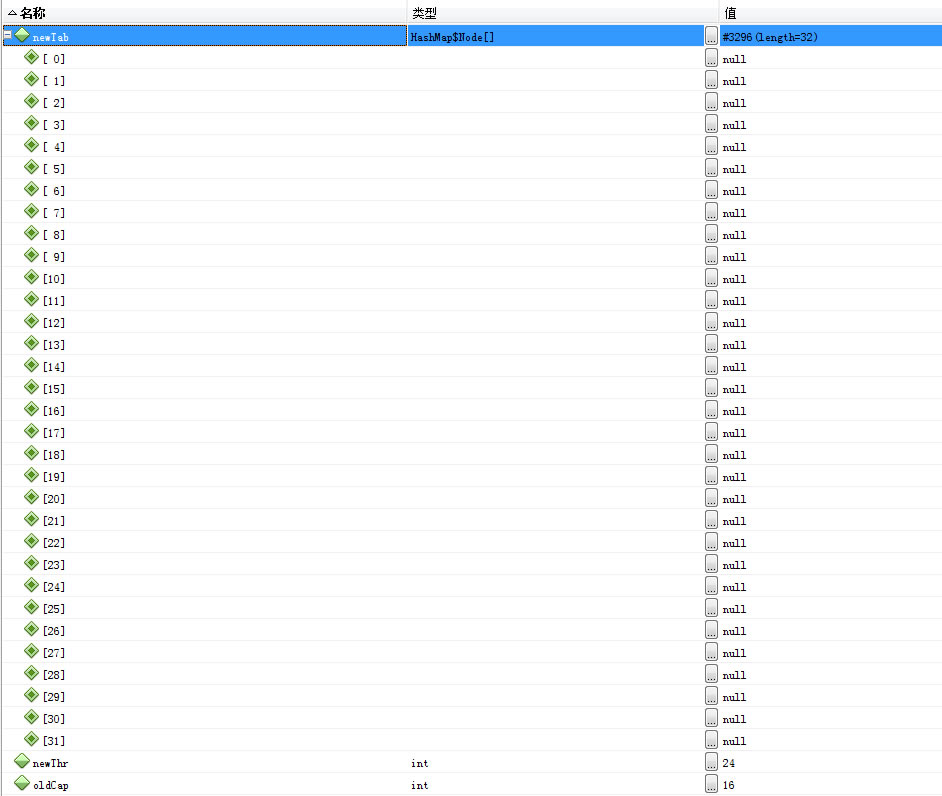
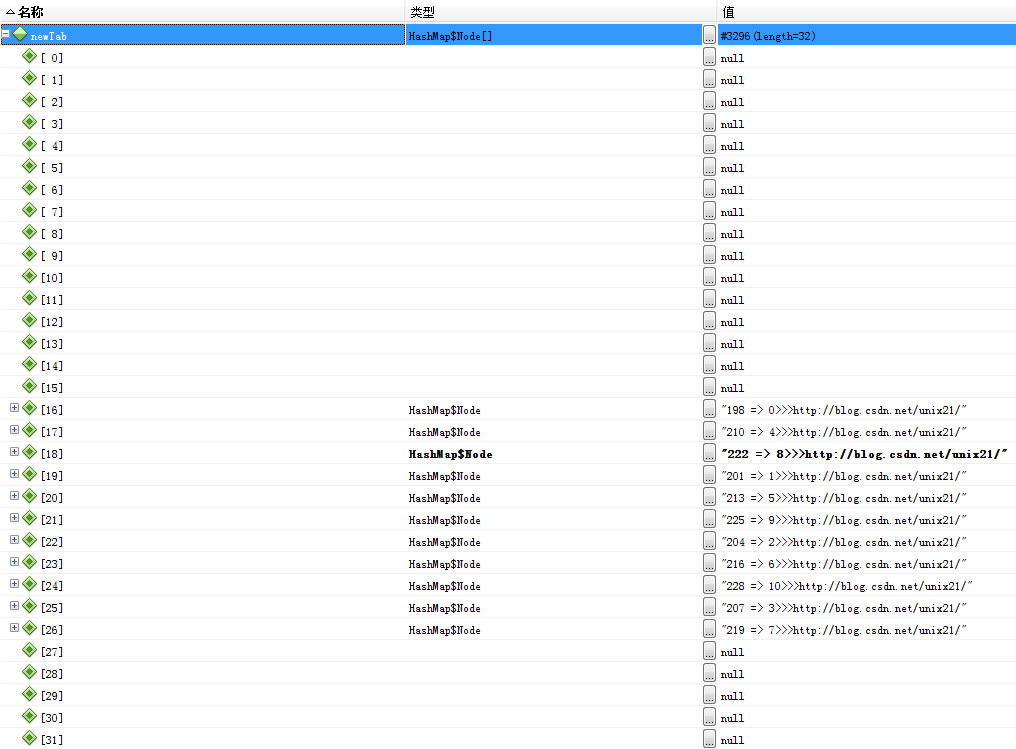
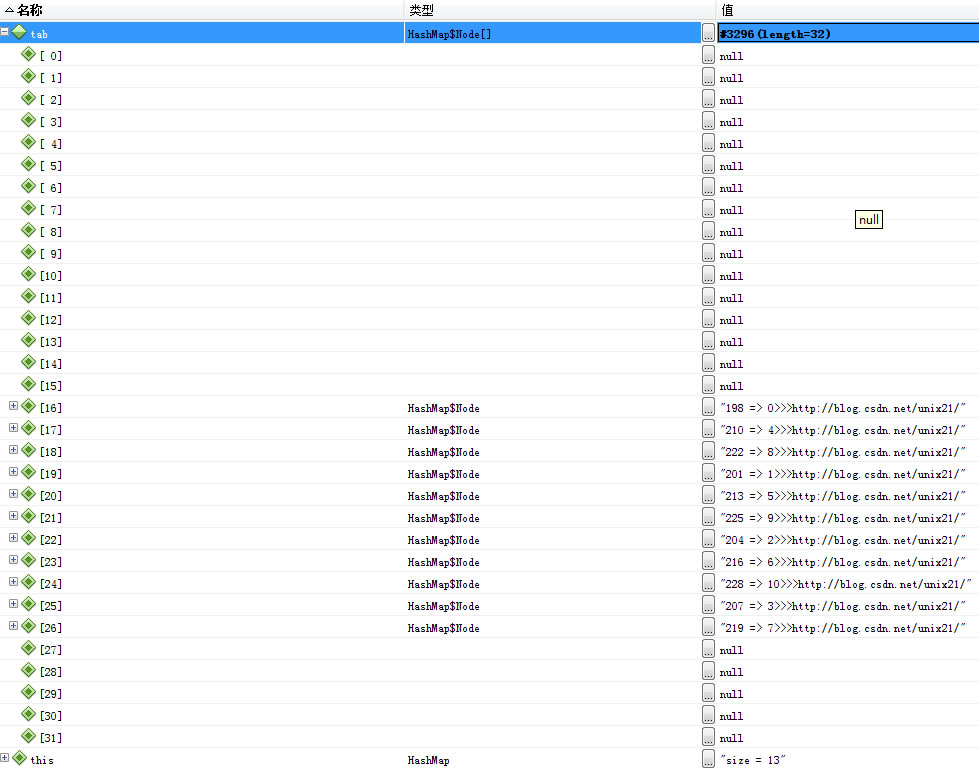
newTab
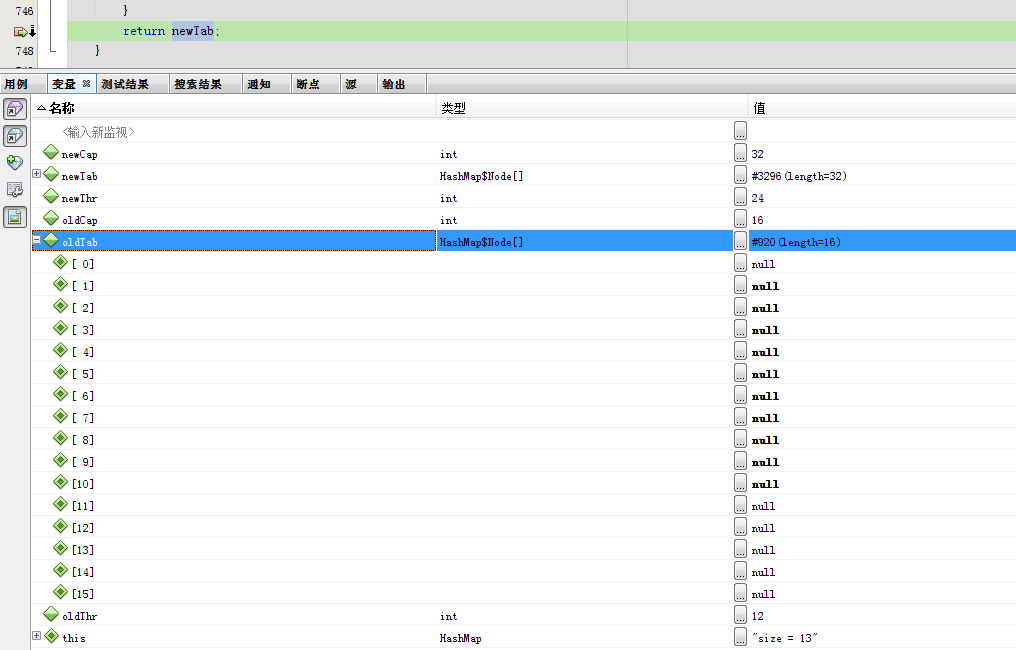
oldTab
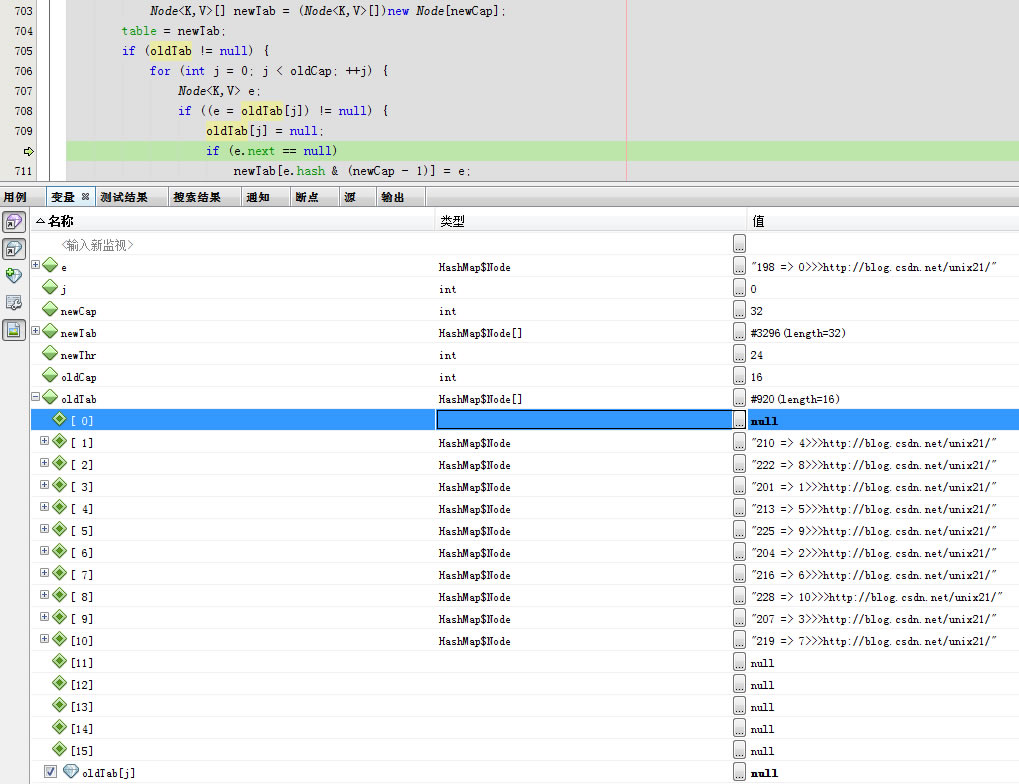
oldTab[0]
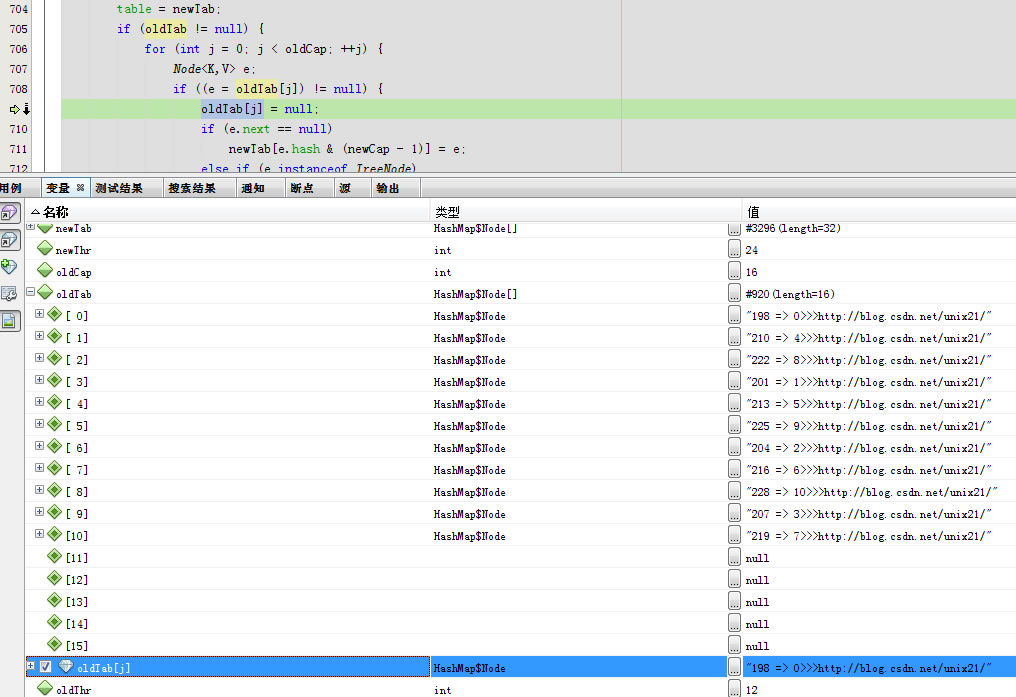
oldTab[j] = null;
下一步
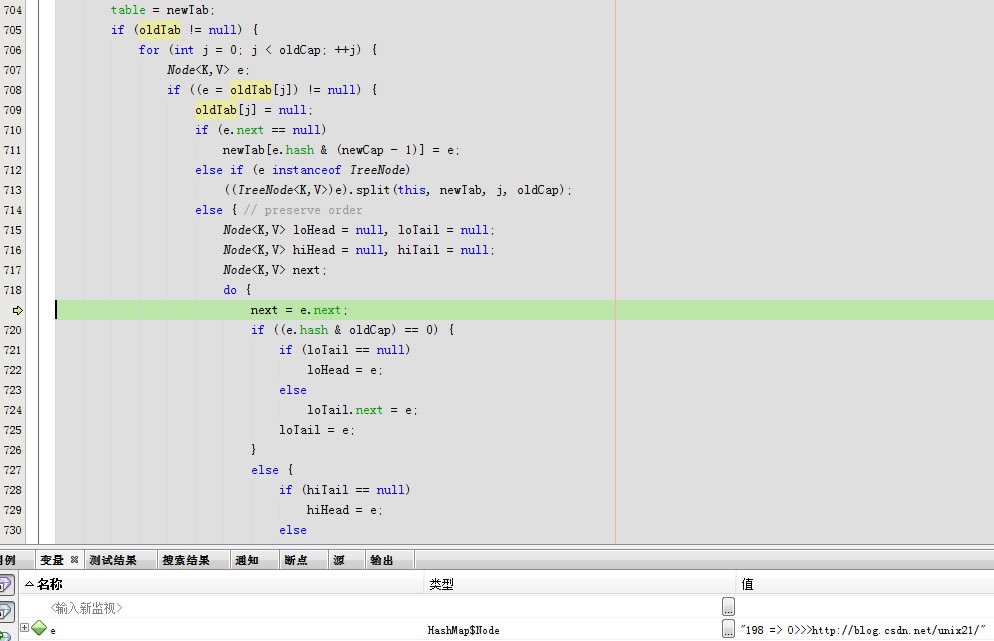
下一步next = e.next;
下一步

下一步
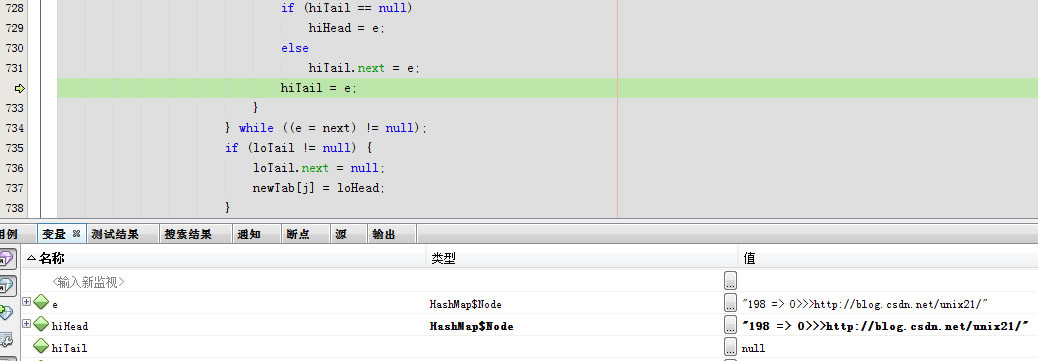
下一步
下一步(e = next) != null
下一步
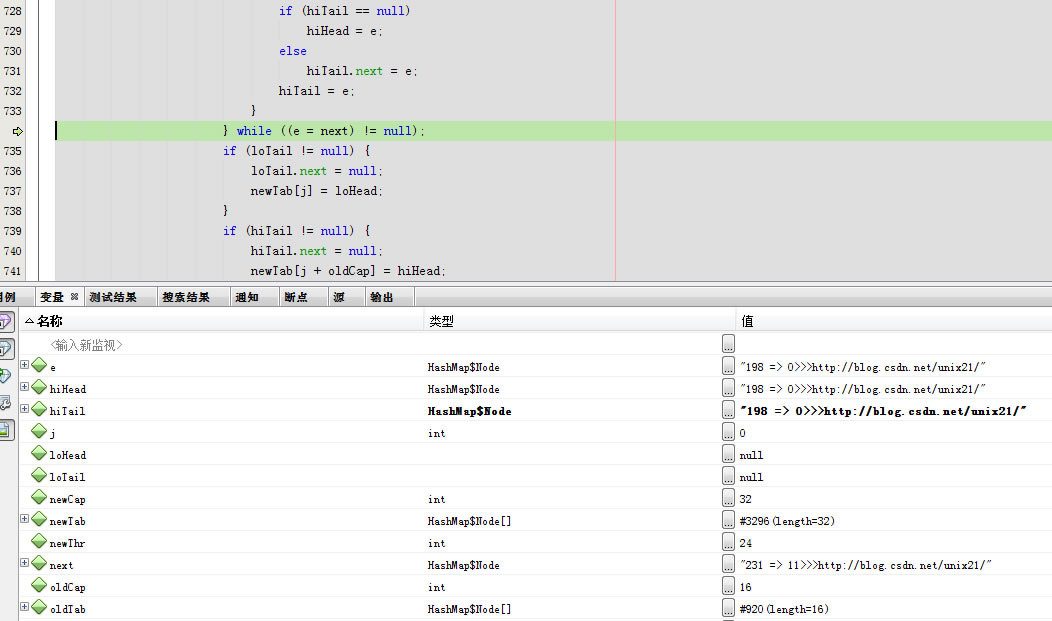
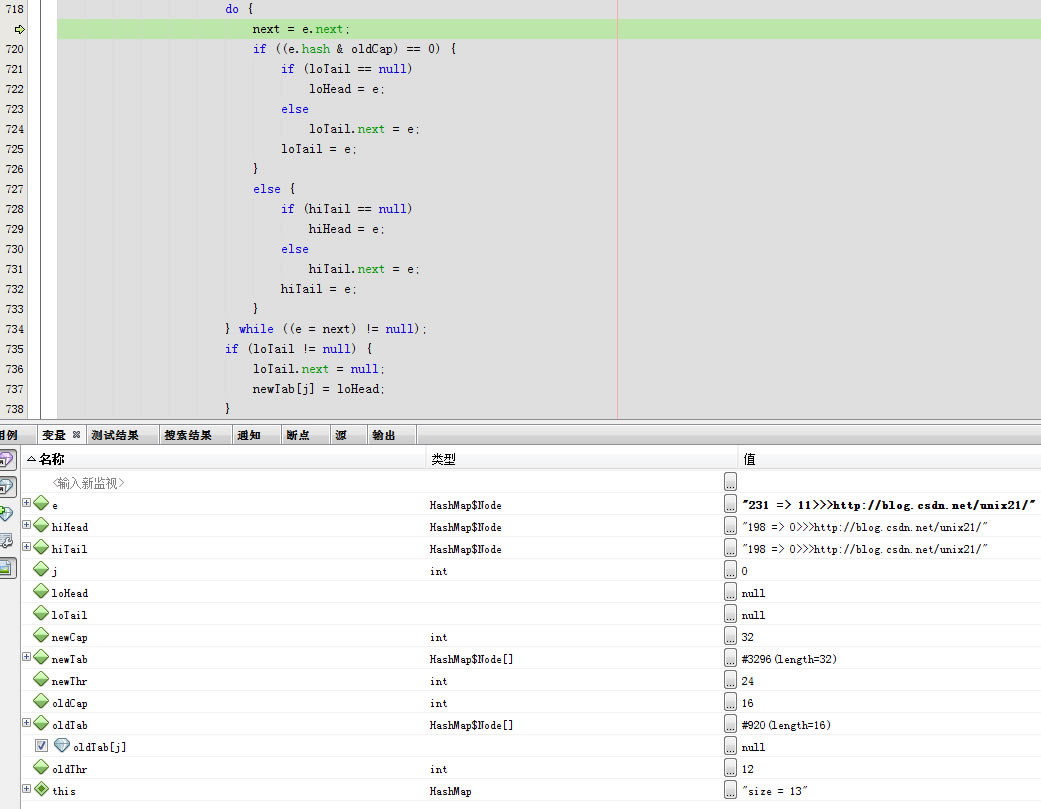
经过N此循环之后
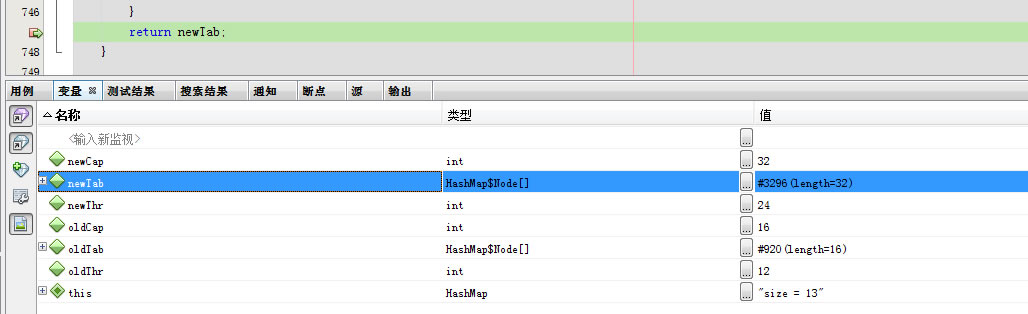
newTab
oldTab
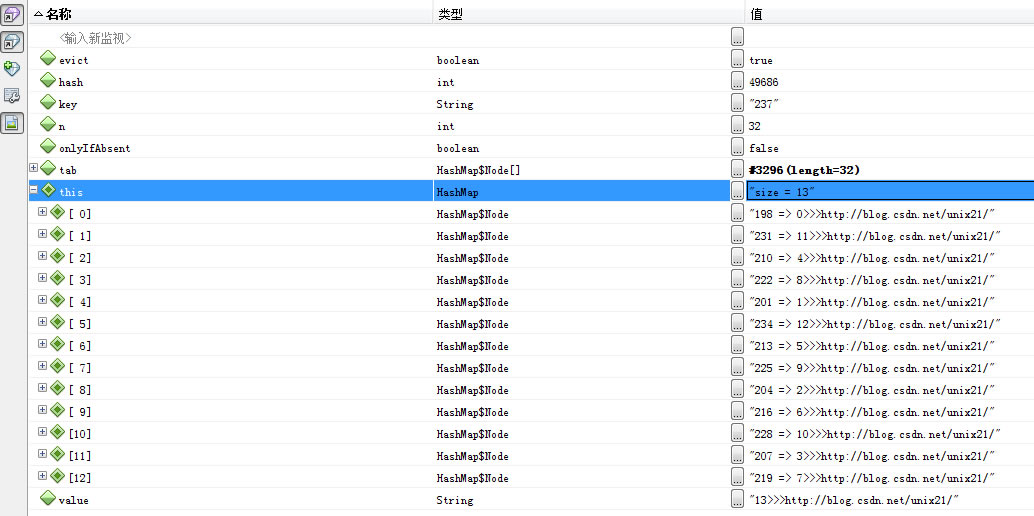
回到putVal
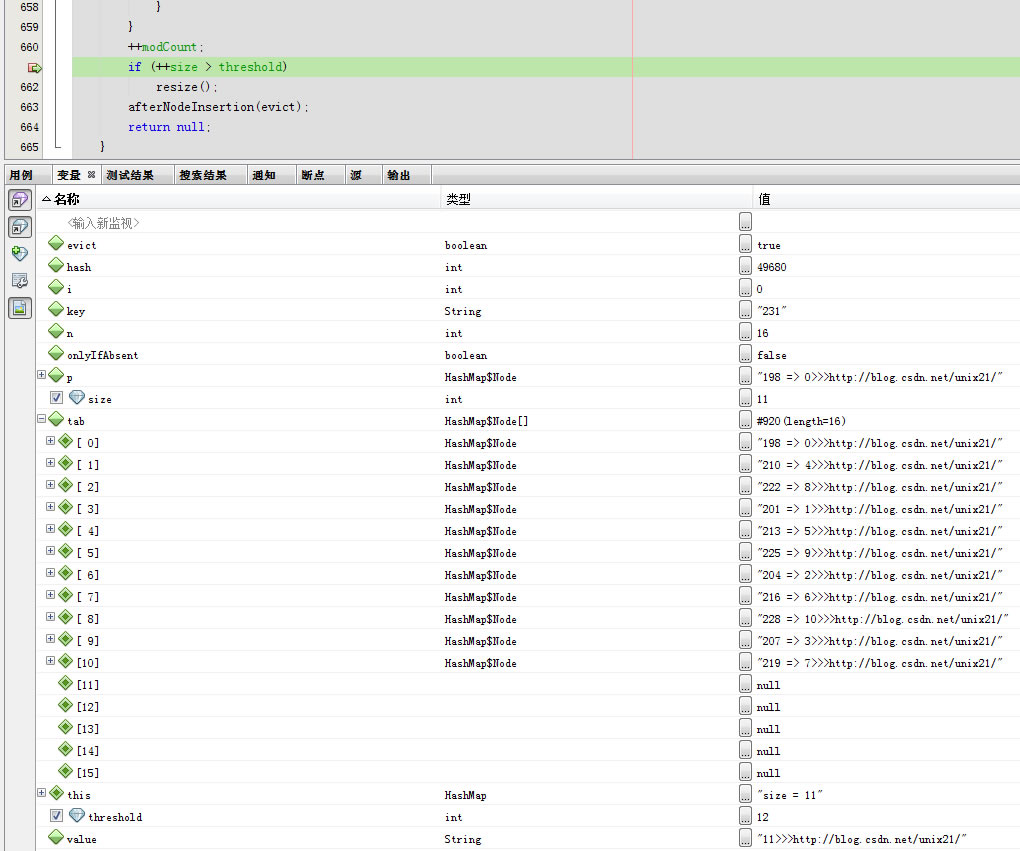
扩容之后再次进入第14次进入
tab
关于HashMap就分析到此,网上有几篇写的不错的帖子结合看看就更明白了,建议阅读下:
深入Java集合学习系列:HashMap的实现原理 引文 深入Java集合学习系列:HashMap的实现原理 原文
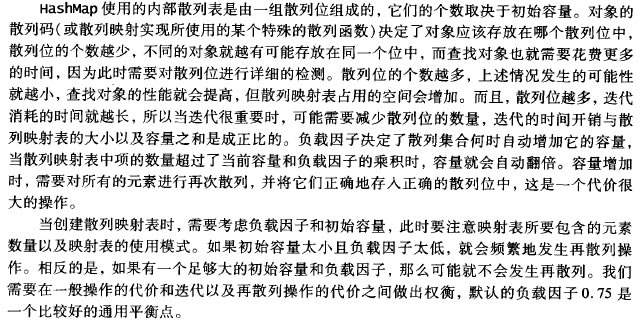
HashMap什么时候进行扩容呢?当HashMap中的元素个数超过数组大小*loadFactor时,就会进行数组扩容,loadFactor的默认值为0.75,这是一个折中的取值。
也就是说,默认情况下,数组大小为16,那么当HashMap中元素个数超过16*0.75=12(这个值就是代码中的threshold值,也叫做临界值)的时候,就把数组的大小扩展为 2*16=32,即扩大一倍,
然后重新计算每个元素在数组中的位置,而这是一个非常消耗性能的操作,所以如果我们已经预知HashMap中元素的个数,那么预设元素的个数能够有效的提高HashMap的性能。
注:本文转自http://blog.csdn.net/unix21/article/details/50911387


 9292
9292

 被折叠的 条评论
为什么被折叠?
被折叠的 条评论
为什么被折叠?
 到【灌水乐园】发言


