


SpringBoot服务的启动,依靠的是其内嵌的Servlet容器,如Tomcat或Jetty等,而且通常会以jar的形式运行服务,这会导致运行JSP时出现异常。除了JSP,在SpringBoot中还有更好的选择,那就是Thymeleaf。

在模板文件index01.html的<body></body>内追加如下内容:

点击获取信息,页面弹窗如下:

1.新建Maven项目
①.创建项目
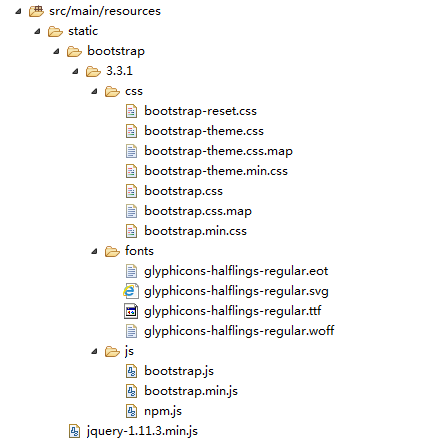
新建Maven项目spring-thymeleaf,项目结构如下:
②.pom依赖
spring-thymeleaf项目的pom.xml内容如下:<project xmlns="http://maven.apache.org/POM/4.0.0" xmlns:xsi="http://www.w3.org/2001/XMLSchema-instance"
xsi:schemaLocation="http://maven.apache.org/POM/4.0.0 http://maven.apache.org/xsd/maven-4.0.0.xsd">
<modelVersion>4.0.0</modelVersion>
<groupId>net.xxpsw.demo</groupId>
<artifactId>spring-thymeleaf</artifactId>
<version>0.0.1-SNAPSHOT</version>
<name>Spring Boot Thymeleaf</name>
<description>Spring Boot Thymeleaf</description>
<parent>
<groupId>org.springframework.boot</groupId>
<artifactId>spring-boot-starter-parent</artifactId>
<version>1.5.7.RELEASE</version>
</parent>
<properties>
<project.build.sourceEncoding>UTF-8</project.build.sourceEncoding>
<project.reporting.outputEncoding>UTF-8</project.reporting.outputEncoding>
<java.version>1.8</java.version>
</properties>
<dependencies>
<dependency>
<groupId>org.springframework.boot</groupId>
<artifactId>spring-boot-starter-thymeleaf</artifactId>
</dependency>
</dependencies>
<build>
<plugins>
<plugin>
<groupId>org.springframework.boot</groupId>
<artifactId>spring-boot-maven-plugin</artifactId>
</plugin>
</plugins>
</build>
</project>③.参数配置
SpringBoot中Thymeleaf配置参数的包路径是org.springframework.boot.autoconfigure.thymeleaf.ThymeleafProperties,该类基本结构如下:@ConfigurationProperties(prefix = "spring.thymeleaf")
public class ThymeleafProperties {
private static final Charset DEFAULT_ENCODING = Charset.forName("UTF-8");
private static final MimeType DEFAULT_CONTENT_TYPE = MimeType.valueOf("text/html");
public static final String DEFAULT_PREFIX = "classpath:/templates/";
public static final String DEFAULT_SUFFIX = ".html";
// Check that the template exists before rendering it (Thymeleaf 3+).
private boolean checkTemplate = true;
// Check that the templates location exists.
private boolean checkTemplateLocation = true;
// Prefix that gets prepended to view names when building a URL.
private String prefix = DEFAULT_PREFIX;
// Suffix that gets appended to view names when building a URL.
private String suffix = DEFAULT_SUFFIX;
// Template mode to be applied to templates. See also StandardTemplateModeHandlers.
private String mode = "HTML5";
// Template encoding.
private Charset encoding = DEFAULT_ENCODING;
// Content-Type value.
private MimeType contentType = DEFAULT_CONTENT_TYPE;
// Enable template caching.
private boolean cache = true;
// Enable MVC Thymeleaf view resolution.
private boolean enabled = true;
}2.Thymeleaf模板
①.静态文件
为了方便演示,这里使用了bootstrap和jquery,当然,这些静态文件不是必须的,可根据实际情况选择,静态文件统一放置在resources下的static目录中,添加完成后的结构如下:
②.页面模板
在classpath:/templates/下新建模板文件index01.html,文件内容如下:<html xmlns:th="http://www.thymeleaf.org">
<head>
<meta content="text/html;charset=UTF-8" />
<meta http-equiv="X-UA-Compatible" content="IE=edge" />
<meta name="viewport" content="width=device-width,initial-scale=1" />
<link th:href="@{/bootstrap/3.3.1/css/bootstrap.min.css}" rel="stylesheet" />
<link th:href="@{/bootstrap/3.3.1/css/bootstrap-theme.min.css}" rel="stylesheet" />
</head>
<body>
</body>
</html>3.数据展示
①.新建控制类
新建实体类Student如下:package net.xxpsw.demo.springboot.thymeleaf.student;
public class Student {
/** ID */
private Long id;
/** 姓名 */
private String name;
/** 年龄 */
private Integer age;
/** 国籍 */
private String nat;
public Student() {
super();
}
public Student(Long id, String name, Integer age, String nat) {
super();
this.id = id;
this.name = name;
this.age = age;
this.nat = nat;
}
public Long getId() {
return id;
}
public void setId(Long id) {
this.id = id;
}
public String getName() {
return name;
}
public void setName(String name) {
this.name = name;
}
public Integer getAge() {
return age;
}
public void setAge(Integer age) {
this.age = age;
}
public String getNat() {
return nat;
}
public void setNat(String nat) {
this.nat = nat;
}
}package net.xxpsw.demo.springboot.thymeleaf.student;
import org.springframework.stereotype.Controller;
import org.springframework.web.bind.annotation.RequestMapping;
@Controller
@RequestMapping("student")
public class StudentController {
}②.展示model信息
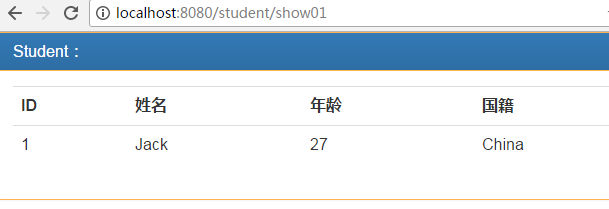
在控制类StudentController中添加如下方法:@RequestMapping("show01")
public String show01(Model model) {
model.addAttribute("student", new Student(1L, "Jack", 27, "China"));
return "index01";
}在模板文件index01.html的<body></body>内追加如下内容:
	<div class="panel panel-primary">
		<div class="panel-heading">
			<h3 class="panel-title">Student:</h3>
		</div>
		<div class="panel-body">
			<table class="table table-hover">
				<tr>
					<th>ID</th>
					<th>姓名</th>
					<th>年龄</th>
					<th>国籍</th>
				</tr>
				<tr>
					<td th:text="${student.id}"></td>
					<td th:text="${student.name}"></td>
					<td th:text="${student.age}"></td>
					<td th:text="${student.nat}"></td>
				</tr>
			</table>
		</div>
</div>③.展示列表信息
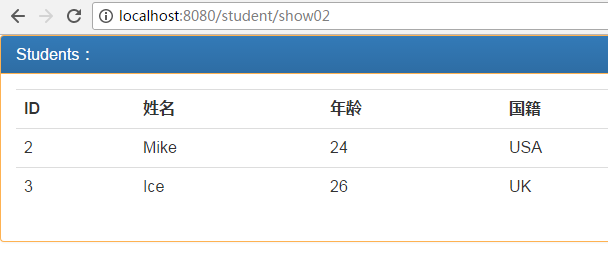
在控制类StudentController中添加如下方法: @RequestMapping("show02")
public String show02(Model model) {
List<Student> students = new ArrayList<>();
students.add(new Student(2L, "Mike", 24, "USA"));
students.add(new Student(3L, "Ice", 26, "UK"));
model.addAttribute("students", students);
return "index02";
} <div class="panel panel-primary">
<div class="panel-heading">
<h3 class="panel-title">Students:</h3>
</div>
<div class="panel-body">
<table class="table table-hover">
<tr>
<th>ID</th>
<th>姓名</th>
<th>年龄</th>
<th>国籍</th>
</tr>
<tr th:each="student:${students}">
<td th:text="${student.id}"></td>
<td th:text="${student.name}"></td>
<td th:text="${student.age}"></td>
<td th:text="${student.nat}"></td>
</tr>
</table>
</div>
</div>其中,th:each用来循环迭代model。
重启SpringBoot服务,浏览器中访问http://localhost:8080/student/show02,页面显示如下:
④.在javascript中访问model
在控制类StudentController中添加如下方法: @RequestMapping("show03")
public String show03(Model model) {
model.addAttribute("student", new Student(4L, "Geoff", 29, "France"));
return "index03";
} <button class="btn" th:οnclick="'getMsg()'">获取信息</button>
<script type="text/javascript" th:src="@{/jquery-1.11.3.min.js}" />
<script th:src="@{/bootstrap/3.3.1/js/bootstrap.min.js}" />
<script th:inline="javascript">
function getMsg(){
var s = [[${student}]];
alert('ID:' + s.id + ' | 姓名:' + s.name + ' | 年龄:' + s.age + ' | 国籍:' + s.nat);
}
</script>点击获取信息,页面弹窗如下:


 2801
2801

 被折叠的 条评论
为什么被折叠?
被折叠的 条评论
为什么被折叠?
 到【灌水乐园】发言


