


UILabel
UILabel是可以显示在屏幕上并且可以显示文字的一种UI视图。
- (void)createUI {
    //定义并且创建一个UILabel对象
    UILabel* label = [[UILabel alloc] init];

    //显示文字的赋值
    label.text = @"嗯 爱慕,世界!McKevince";

    //设定label的显示位置
    label.frame = CGRectMake(100, 300, 266, 120);

    //设置label的背景颜色,clear表示透明
    label.backgroundColor = [UIColor systemPinkColor];

    //self.view.backgroundColor = [UIColor systemPinkColor];  //clear显黑

    //将label显示到屏幕上
    [self.view addSubview: label];

    //设置label文字的大小,使用系统默认文字,大小为24
    label.font = [UIFont systemFontOfSize: 24];

    //设置label文字的颜色
    label.textColor = [UIColor purpleColor];

    //label的高级属性
    //设定阴影的颜色
    label.shadowColor = [UIColor grayColor];
    //设置阴影的偏移位置
    label.shadowOffset = CGSizeMake(0, 3);

    //设置text文字的对齐模式,默认为靠左对齐
    label.textAlignment = NSTextAlignmentLeft;

    //设置label文字显示的行数,默认值为:1
    //其他的大于零的行数,文字会尽量按照设定行数来显示
    //如果值为:0,iOS会对文字自动计算所需要的行数,按照需要的行数来显示文字
    label.numberOfLines = 0;

}
UIButton
创建一个UIButton类的对象就是创建一个普通按钮。
- (void)createUIRectButton {
    //创建一个btn对象,根据对象类型来创建btn
    //圆角类型btn:UIButtonTypeRoundedRect
    //通过类方法来创建buttonWithType:类名+方法名
    UIButton* btn = [UIButton buttonWithType: UIButtonTypeRoundedRect];

    //设置button按钮的位置
    btn.frame = CGRectMake(100, 100, 100, 50);

    //设置按钮的文字内容
    //@parameter
    //P1:字符串类型,显示到按钮上的文字
    //P2:设置文字显示的状态类型:UIControlStateNormal,正常状态
    [btn setTitle: @"按钮" forState: UIControlStateNormal];

    //P1:显示的文字
    //P2:显示文字的状态:UIControlStateHighlighted,按下状态
    [btn setTitle: @"按钮按下" forState: UIControlStateHighlighted];

    //背景颜色
    btn.backgroundColor = [UIColor systemPinkColor];

    //设置文字显示的颜色
    //P1:颜色
    //P2:状态
    [btn setTitleColor: [UIColor whiteColor] forState: UIControlStateNormal];

    //设置按下状态的颜色
    [btn setTitleColor: [UIColor blackColor] forState: UIControlStateHighlighted];

    //设置按钮的风格颜色(色调)
    //tint没有title优先级高,tint的所有状态都为白色
    [btn setTintColor: [UIColor whiteColor]];

    //titleLabel:UILabel控件
    btn.titleLabel.font = [UIFont systemFontOfSize: 18];

    //添加到视图中并显示
    [self.view addSubview: btn];
}
当然还可以创建一个可以显示图片的按钮,通过给buttonWithType:传入自定义类型按钮的参数。
- (void)createImageBtn {
    //创建一个自定义类型的btn
    UIButton* btnImage = [UIButton buttonWithType: UIButtonTypeCustom];

    btnImage.frame = CGRectMake(50, 275, 275, 275);

    UIImage* icon01 = [UIImage imageNamed: @"0069mAlrly1gkmn4wspytj31kw1kwdoz.jpg"];
    UIImage* icon02 = [UIImage imageNamed: @"0069mAlrly1gkmn4uk6g5j31kw1kw4a9.jpg"];

    //设置按钮图片方法设置
    //P1:显示的图片对象
    //P2:控件的状态
    [btnImage setImage: icon01 forState: UIControlStateNormal];

    [btnImage setImage: icon02 forState: UIControlStateHighlighted];

    [self.view addSubview: btnImage];
}
需要说明的是,须将图片素材添加到当前工程的目录下。
UIButton事件处理
这部分就是来处理UIButton按钮在特定状态下会触发的特定事件函数。
- (void)createBtn {
    //创建圆角按钮
    UIButton* btn01 = [UIButton buttonWithType: UIButtonTypeRoundedRect];
    btn01.frame = CGRectMake(100, 100, 80, 40);
    [btn01 setTitle: @"按钮01" forState: UIControlStateNormal];

    //向按钮添加事件函数
    //P1:“谁”来实现事件函数,实现的对象就是”谁“
    //P2:事件函数
    //P3:UIControlEvent:事件处理函数类型
    //UIControlEventTouchUpInside:当手指离开屏幕时并且手指的位置在按钮范围内触发事件函数(当按钮弹起时)
    //UIControlEventTouchUpOutside:手指离开屏幕时在按钮范围外触发事件函数
    //UIControlEventTouchDown:指当我们的手指触碰到屏幕上时
    [btn01 addTarget: self action: @selector(pressBtn: ) forControlEvents: UIControlEventTouchUpInside];

    //触碰时调用事件函数
    [btn01 addTarget: self action: @selector(touchDown) forControlEvents: UIControlEventTouchDown];

    [self.view addSubview: btn01];


    UIButton* btn02 = [UIButton buttonWithType: UIButtonTypeRoundedRect];
    btn02.frame = CGRectMake(200, 200, 80, 40);

    [btn02 setTitle: @"按钮02" forState: UIControlStateNormal];

    //是可以多个按钮使用同一个事件函数来处理不同按钮的事件
    [btn02 addTarget: self action: @selector(pressBtn:) forControlEvents: UIControlEventTouchUpInside];

    [self.view addSubview: btn02];

  //用于在调用同一事件函数的情况下,对不同的按钮进行标识
    btn01.tag = 1;
    btn02.tag = 2;
}
以下定义并实现可调用的事件函数。
- (void)pressBtn02 {
    NSLog(@"按钮2被触发!");
}

- (void)touchDown {
    NSLog(@"按钮被触碰!");
}

//iOS中带参与不带参是两个函数
//参数为调用此函数按钮对象本身
- (void)pressBtn: (UIButton*)btn {
    if  (btn.tag == 1) {
        NSLog(@"btn 01 pressed");
    } else if (btn.tag == 2) {
        NSLog(@"btn 02 pressed");
    }
}

//- (void)pressBtn {
//    NSLog(@"按钮被按下!");
//}
UIView
UIView是iOS中的视图对象,显示在屏幕上的所有的对象的基础类,所有显示在屏幕上的对象一定都继承于UIView,屏幕上能看到的对象都是UIView的子类。
- (void)viewDidLoad {
    [super viewDidLoad];
    // Do any additional setup after loading the view.

    //创建一个UIView对象
    UIView* view = [[UIView alloc] init];

    //设置UIView的位置
    view.frame = CGRectMake(100, 100, 100, 200);

    view.backgroundColor = [UIColor cyanColor];

    //将新建的视图添加到父亲视图上
    //1:将新建的视图显示到屏幕上
    //2:将视图作为父亲视图管理起来
    [self.view addSubview: view];

    //是否隐藏视图对象
    //YES:不显示
    //NO:显示,默认值为NO
    view.hidden = NO;

    //设置视图的透明度
    //alpha = 1:不透明
    //alpha = 0:透明
    //alpha = 0.5:半透明
    view.alpha = 0.2;

    self.view.backgroundColor = [UIColor lightGrayColor];

    //设置是否显示不透明
    //默认值是YES,表示完全不透明,即ta会遮盖在其下面的任何视图上,包括父视图
    view.opaque = YES;

    //将自己从父亲视图删除掉
    //1:从父亲视图的管理中删除
    //2:不会显示在屏幕上
    [view removeFromSuperview];

}
UIView层级关系
    [super viewDidLoad];
    // Do any additional setup after loading the view.

    //创建三个视图
    UIView* view01 = [[UIView alloc] init];
    view01.frame = CGRectMake(100, 100, 150, 150);
    view01.backgroundColor = [UIColor blueColor];
    UIView* view02 = [[UIView alloc] init];
    view02.backgroundColor = [UIColor orangeColor];
    view02.frame = CGRectMake(125, 125, 150, 150);
    UIView* view03 = [[UIView alloc] init];
    view03.frame = CGRectMake(150, 150, 150, 150);
    view03.backgroundColor = [UIColor greenColor];

    //将三个视图对象显示到屏幕上,并且添加到父亲视图上
    //哪一个视图先添加到父亲视图上,就先绘制哪一个视图
    //哪一个视图被最后一个添加到父亲视图中,就最后绘制哪一个视图
    [self.view addSubview: view01];
    [self.view addSubview: view02];
    [self.view addSubview: view03];

    //将某一个视图调整到最前面显示
    //参数:UIView对象,调整哪一个视图到最前方
    [self.view bringSubviewToFront: view01];

    //将某一个视图调整到最后面显示
    //参数:UIView对象,调整哪一个视图到最后方
    [self.view sendSubviewToBack: view02];

    //subviews管理所有self.view的子视图的数组
    UIView* viewFront = self.view.subviews[2];

    //[view01 removeFromSuperview];

    UIView* viewBack = self.view.subviews[0];

    //测试是否为同一个视图
    if (viewBack == view01) NSLog(@"相等!");

}
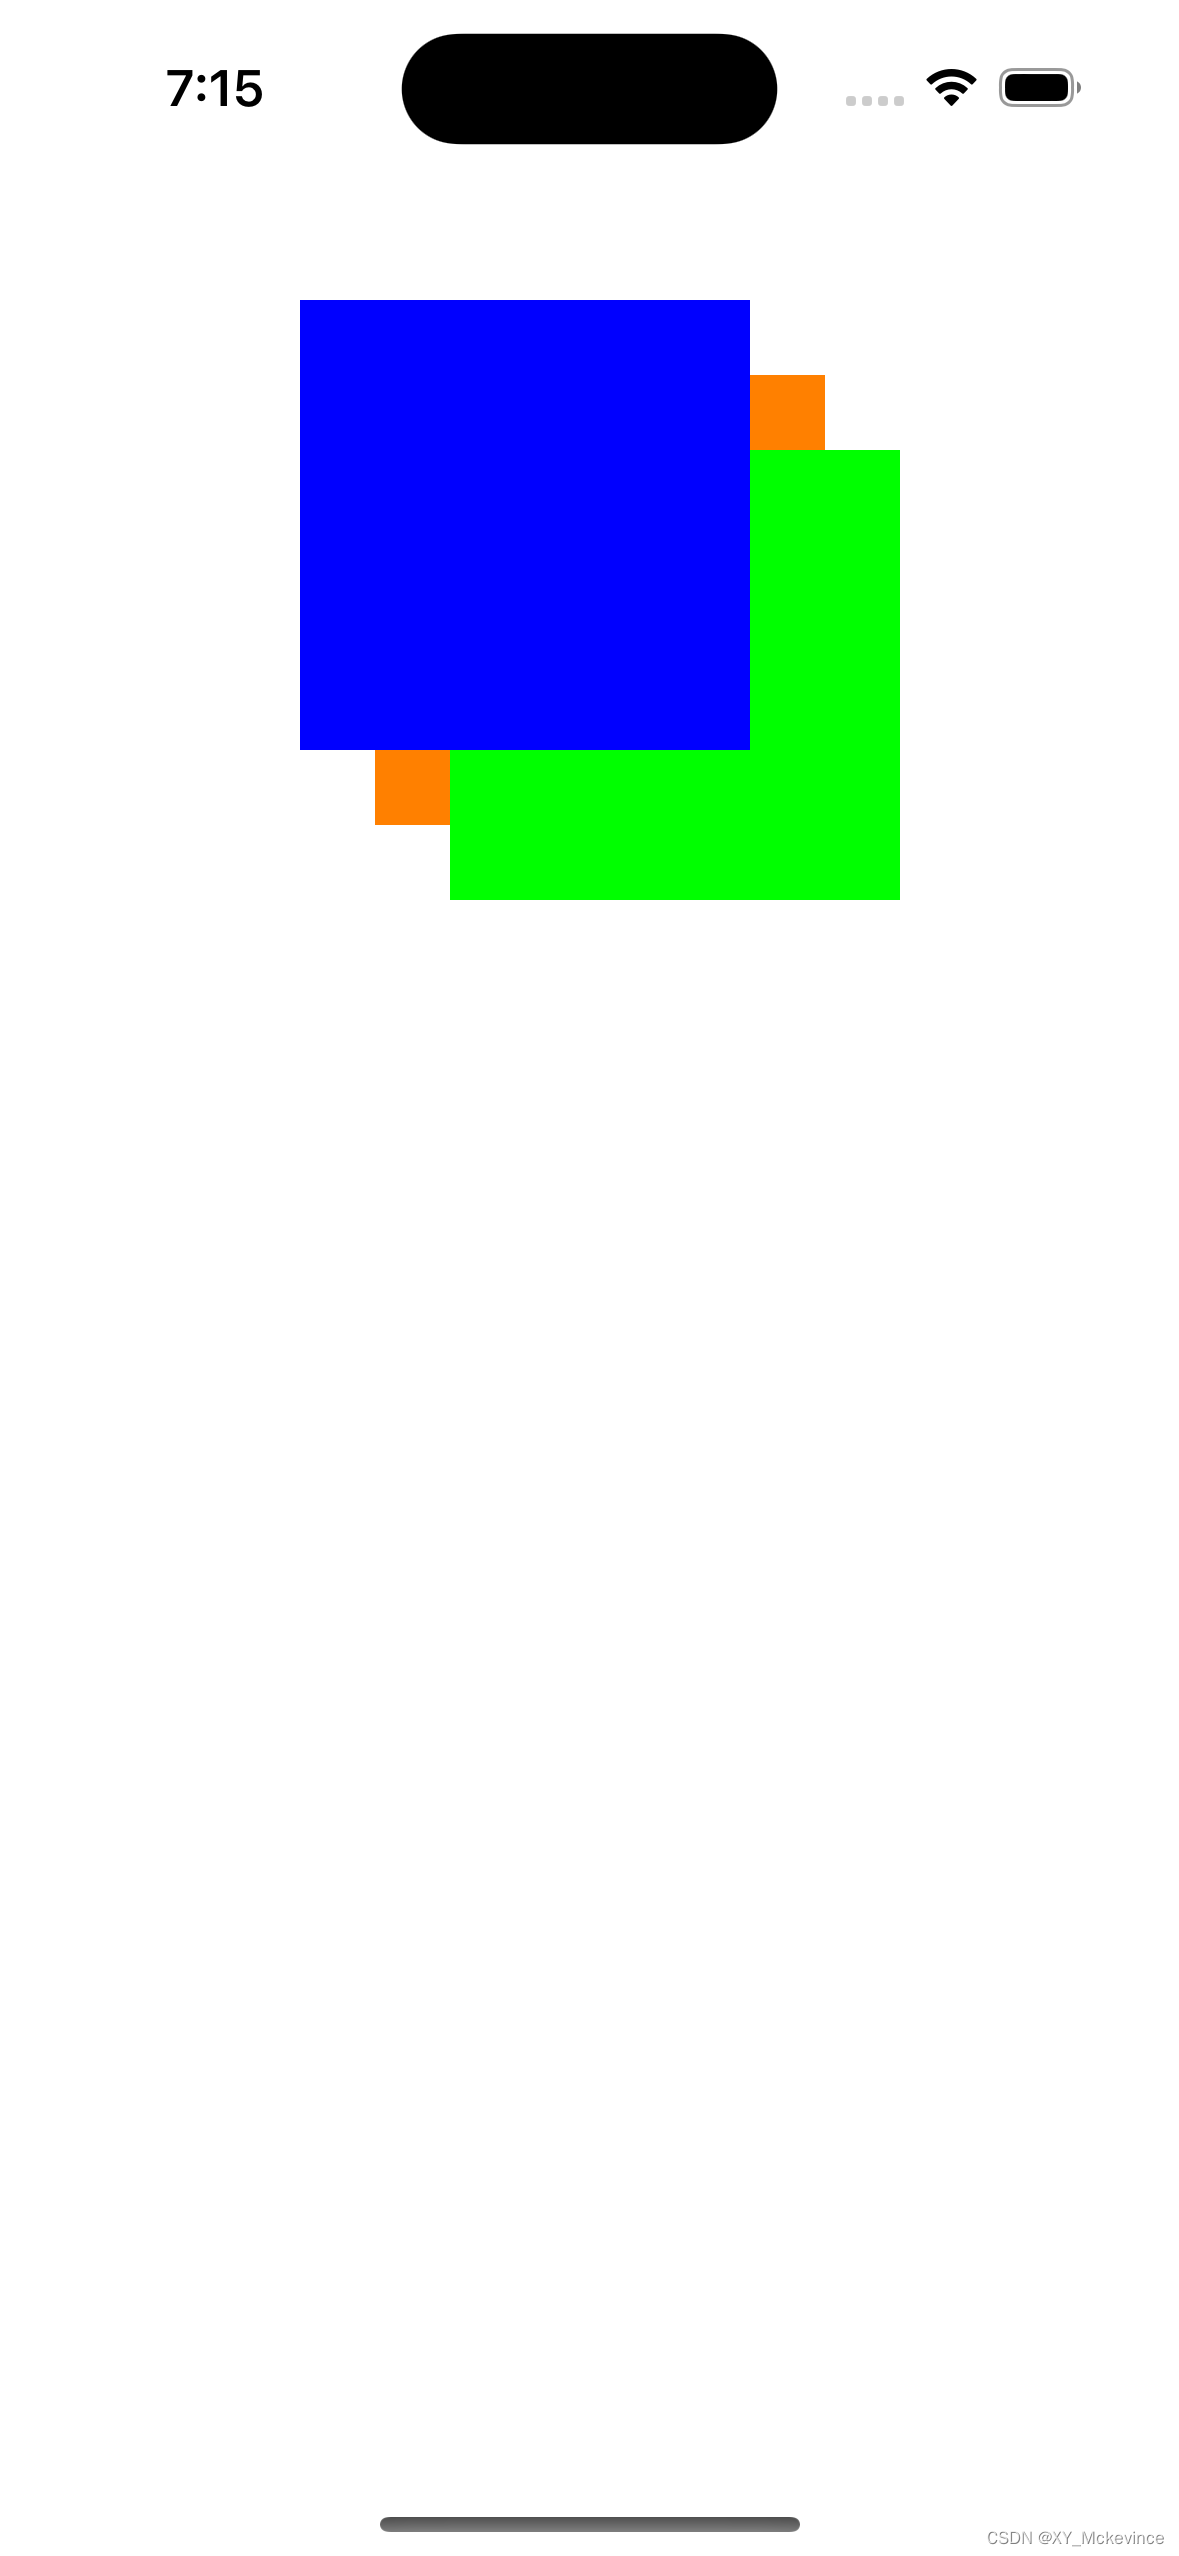
上图为运行结果,可以清晰地看出视图间的层级关系。
UIWindow
UIWindow表示当前程序的窗口,整个程序中只有一个UIWindow对象,UIWindow也是继承于UIView,UIWindow是一个特殊的UIView。
- (void)scene:(UIScene *)scene willConnectToSession:(UISceneSession *)session options:(UISceneConnectionOptions *)connectionOptions {
    // Use this method to optionally configure and attach the UIWindow `window` to the provided UIWindowScene `scene`.
    // If using a storyboard, the `window` property will automatically be initialized and attached to the scene.
    // This delegate does not imply the connecting scene or session are new (see `application:configurationForConnectingSceneSession` instead).
    //创建一个UIWindow对象
    //UIScreen:表示屏幕硬件表示类
    //mainScreen获得主屏幕设备信息
    //bounds表示屏幕的宽高值
    //self.window = [[UIWindow alloc] initWithFrame: [UIScreen mainScreen].bounds];
    //新版不用初始化⬆️,故直接注释掉

    //创建一个视图控制器作为  UIWindow的根视图控制器
    self.window.rootViewController = [[UIViewController alloc] init];

    //设置背景颜色
    self.window.backgroundColor = [UIColor magentaColor];


    UIView* view = [[UIView alloc] initWithFrame: CGRectMake(100, 100, 150, 150)];
    view.backgroundColor = [UIColor orangeColor];

    //背景视图
    UIView* backView = [[UIView alloc] initWithFrame: CGRectMake(0, 0, 240, 360)];
    backView.backgroundColor = [UIColor greenColor];

    //将backView作为view的父亲视图
    //子视图的坐标是参照父亲视图的坐标系的
    //当父亲视图移动时,所有的子视图都会移动
    [backView addSubview: view];
    [self.window addSubview: backView];

    //使window有效并显示到屏幕上
    [self.window makeKeyAndVisible];

    //每一个view都有一个window属性,ta们是同一个UIWindow对象
    NSLog(@"%@", view.window);
    NSLog(@"%@", backView.window);
    NSLog(@"%@", self.window);
    NSLog(@"%@", self.window.rootViewController.view.window);
}
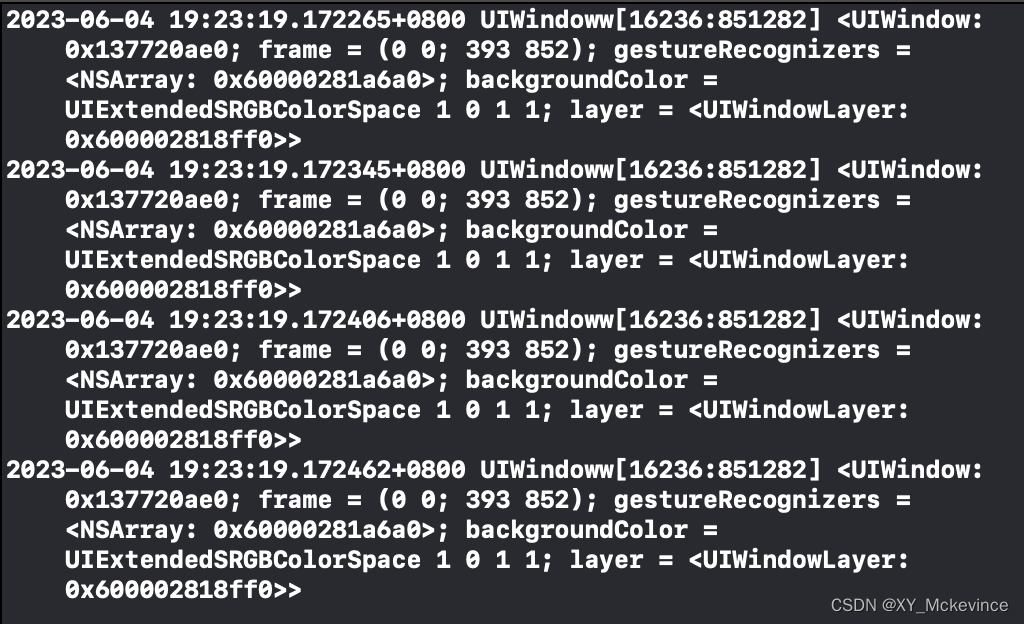
只有一个UIWindow对象,因此日志打印结果中的地址都一样。
UIViewContoller
视图控制器用来管理界面和处理界面的逻辑类对象。
先将UIWindow的各个参数设置好,并为根视图控制器进行赋值,赋一个UIViewController对象,最后将window作为主视图显示出来。
#import "ViewController.h"

- (void)scene:(UIScene *)scene willConnectToSession:(UISceneSession *)session options:(UISceneConnectionOptions *)connectionOptions {
    // Use this method to optionally configure and attach the UIWindow `window` to the provided UIWindowScene `scene`.
    // If using a storyboard, the `window` property will automatically be initialized and attached to the scene.
    // This delegate does not imply the connecting scene or session are new (see `application:configurationForConnectingSceneSession` instead).

//    self.window = [[UIWindow alloc] initWithFrame: [UIScreen mainScreen].bounds];

    //创建视图控制器对象
    ViewController* vcRoot = [[ViewController alloc] init];

    //对窗口的根视图控制器进行赋值操作
    //整个UIKit框架中只有 **一个根视图控制器** ,属于window属性
    //程序启动前必须对根视图控制器赋值
    self.window.rootViewController = vcRoot;

    self.window.backgroundColor = [UIColor magentaColor];

    //将window作为主视图并显示出来
    [self.window makeKeyAndVisible];
}
当视图控制器第一次被加载视图时,调用此函数,用于布局初始化来,初始化资源使用。
- (void)viewDidLoad {

    //调用父亲类的加载视图函数
    [super viewDidLoad];
    // Do any additional setup after loading the view.

    UIView* view = [[UIView alloc] initWithFrame: CGRectMake(100, 100, 100, 200)];

    view.frame = CGRectMake(100, 100, 100, 200);

    //将视图添加到当前控制视图上
    [self.view addSubview: view];

    view.backgroundColor = [UIColor orangeColor];

    self.view.backgroundColor = [UIColor blueColor];

}

// //当系统内存过低时,会发起警告信息,调用此函数
//- (void)didReceiveMemoryWarning {
//    [super didReceiveMemoryWarning];
//    // Dispose of any resources that camn be recreated.
//
//    NSLog(@"内存过低!");
//}
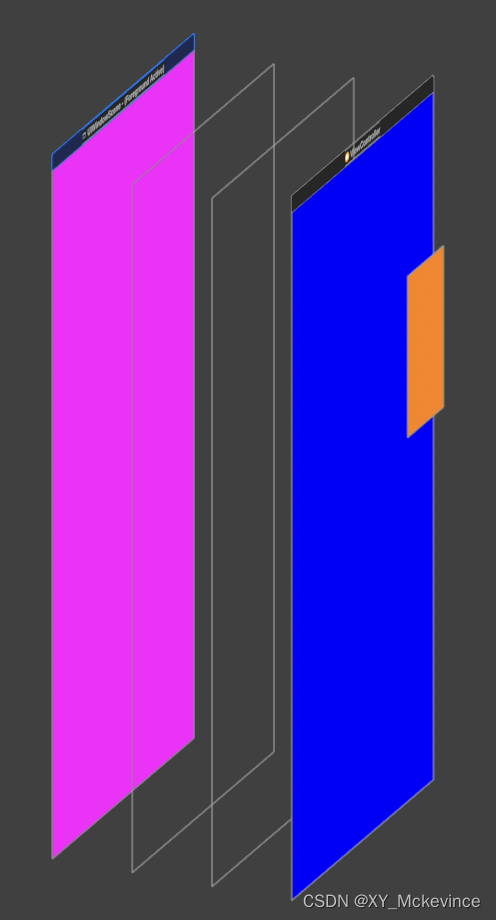
层级关系可看下图。


 482
482


 被折叠的 条评论
为什么被折叠?
被折叠的 条评论
为什么被折叠?
 到【灌水乐园】发言


