


在testset上预测结果不好,那么要先看trainingset上结果好不好。或者说,在trainingset上只有overfitting了,在testset上才有优化的空间。
在trainset上evaluation效果不好时
0 可以观察每一个epoch的每一个bachsize
1 更换activation function,比如从sigmoid改为relu。最后一个用softmax
2 更换学习率更新策略
3 更换objective loss function,因为mse在分类的问题不会得到好的结果(用于回归比较好),分类时用categorical_crossentropy
4 更改batchsize,如从100改为10000,看对结果的影响。batchsize越大,GPU的平行运算(计算大矩阵)效率越高,迭代次数也少。batchsize太大,performance变小。
结论:如果用GPU作加速,则Network的Batchsize要变大,不能为1。而batchsize太大,也可能受限于GPU的并行能力,导致计算卡主。
复习:batchsize是在做gradient descent时,并不会完全的minimize,而是将training data分为多个batch,比如每次选100张图作为一个batch。一个batch要随机分,尽量包含各种样本的y值。当用完所有的bach之后,这一个过程叫做epoh。mini-batch的存在一方面利用GPU加速计算,另一方面防止GPU计算不了太大矩阵。
5 增加deep,再加10层网络。注意叠加的layer特别大时,Network会卡主。???
是不是越deep越好?不是,受限于GPU等能力。
浅层神经网络可以表示的特征抽象程度不高,而层次越深,特征的抽象程度越高,也就是在某些特定任务上所谓的“效果越好”。
隐藏层越多,过分拟合风险越大
以人脑的发育过程做类比,人的大脑6岁时候的神经元之间的连接非常的密集。但是,在14岁的时候变稀疏了,这是因为有用的连接会增强,没用的连接会退化,相当于对大脑模型进行了压缩。
训练神经网络也是这样,一开始网络连接很密集,但是训练之后,发现有些连接用不上,那就砍掉了,压缩模型;之后再训练,再压缩。最后能形成一个性能不错的小型网络。譬如人脸识别的神经网络,可以压缩800倍。
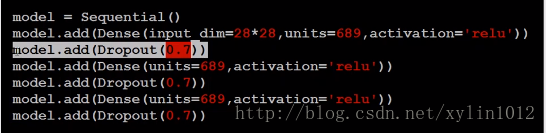
# how to

import keras
import os
import numpy as np
import struct
import gzip
from keras.models import Sequential
from keras.layers.core import Dense, Dropout, Activation
from keras.layers import Conv2D, MaxPooling2D, Flatten
from keras.optimizers import SGD, Adam
from keras.utils import np_utils
from keras.datasets import mnist
# 切换GPU、CPU
# http://blog.csdn.net/u013066730/article/details/77510015

os.environ['TF_CPP_MIN_LOG_LEVEL'] = '2'  #忽略烦人的警告 # Your CPU supports instructions that this TensorFlow binary was not compiled to use: AVX AVX2
import tensorflow as tf
import keras.backend.tensorflow_backend as KTF
# KTF.set_session(tf.Session(config=tf.ConfigProto(device_count={'gpu': 0})))
KTF.set_session(tf.Session(config=tf.ConfigProto(log_device_placement=True)))

trainfile_X = os.getcwd() + '/dataset/MNIST/train-images-idx3-ubyte.gz'
trainfile_y = os.getcwd() + '/dataset/MNIST/train-labels-idx1-ubyte.gz'
testfile_X = os.getcwd() + '/dataset/MNIST/t10k-images-idx3-ubyte.gz'
testfile_y = os.getcwd() + '/dataset/MNIST/t10k-labels-idx1-ubyte.gz'


def read_data(image_url, label_url):
    with gzip.open(label_url) as flbl:
        magic, num = struct.unpack(">II",flbl.read(8))
        label = np.fromstring(flbl.read(),dtype=np.int8)
    with gzip.open(image_url,'rb') as fimg:
        magic, num, rows, cols = struct.unpack(">IIII",fimg.read(16))
        image = np.fromstring(fimg.read(),dtype=np.uint8).reshape(len(label),rows,cols)
    return (image, label)


def load_data():
    # (x_train, y_train),(x_test, y_test) = mnist.load_data()
    (x_train, y_train) = read_data(trainfile_X, trainfile_y)
    (x_test, y_test) = read_data(testfile_X, testfile_y)
    # print(x_train.shape, y_train.shape, x_test.shape, y_test.shape)
    number = 10000
    x_train = x_train[0:number]  # 截取部分样本
    y_train = y_train[0:number]
    x_train = x_train.reshape(number, 28*28)  # ??
    x_test = x_test.reshape(x_test.shape[0], 28*28)
    x_train = x_train.astype('float32')
    x_test = x_test.astype('float32')
    # print(x_train.shape, y_train.shape, x_test.shape, y_test.shape)
    y_train = np_utils.to_categorical(y_train, 10)  # ??
    y_test = np_utils.to_categorical(y_test, 10)
    x_train = x_train / 255  # 矩阵中的每个元素除以255,每个pixel,用0-1之间的值来表示的,如果矩阵中的值没有做nomalizition,则网络中的计算又跑步起来了
    x_test = x_test / 255
    x_test = np.random.normal(x_test)  # 在testset上故意加入噪声,看看训练准确率,肯定会下降,由95到%50
    return (x_train, y_train), (x_test, y_test)

(x_train, y_train),(x_test, y_test) = load_data()
print(x_train.shape, y_train.shape, x_test.shape, y_test.shape)

# the Sequential model
model = Sequential()

# Stacking layers is as easy as .add():
model.add(Dense(input_dim=28*28, units=688, activation='relu'))  # input_layer写确定输入维数
# model.add(Dropout(0.7))
model.add(Dense(units=688, activation='relu'))  # 隐藏层不需要写输入维数,默认用前面的
# model.add(Dropout(0.7))
# for i in range(10):
#     model.add(Dense(units=688, activation='relu'))  # 隐藏层不需要写输入维数,默认用前面的
model.add(Dense(units=10, activation='softmax'))  # 最后一个output_layer要与输出空间样本的特征维数一致
# model.add(Dropout(0.7))

# configure its learning process with .compile()
model.compile(loss='mse', optimizer='adam', metrics=['accuracy'])
# model.compile(loss='categorical_crossentropy', optimizer=SGD(lr=0.1), metrics=['accuracy'])  # SGD(lr=0.01, momentum=0.9, nesterov=True)
# model.compile(loss='mse', optimizer='sgd', metrics=['accuracy'])  另一种方法

# train, x_train and y_train are Numpy arrays --just like in the Scikit-Learn API.
model.fit(x_train, y_train, batch_size=100, epochs=20)  # fit中也可以放入测试集,直接做evaluation

# 先在model在训练集上作evaluation,得到好的accuracy才好
# 方法:更换activation,将第二层原先的sigmoid,换位relu,则ACC从0.6到了0.9
# 方法:更换objective loss function,分类问题用分类的损失函数,如categorical_crossentropy,回归问题用mse等
loss_and_metrics = model.evaluate(x_train, y_train, batch_size=100)
print("Train Acc", loss_and_metrics[1])

# 用model在测试集上作evaluation
loss_and_metrics = model.evaluate(x_test,y_test, batch_size=100)
print("Test Acc", loss_and_metrics[1])

# # Or generate predictions on new data:
# classes = model.predict(x_test, batch_size=100)
# print(classes)


 1078
1078

 被折叠的 条评论
为什么被折叠?
被折叠的 条评论
为什么被折叠?
 到【灌水乐园】发言


