


目录
一.概述
Nginx是一个高性能的HTTP和反向代理服务器
1、优缺点比较:
(1)nginx相对于apache的优点:
-
轻量级,同样是web服务,比apache占用更少的内存及资源
-
抗并发,nginx处理请求是异步非阻塞的,而apache是阻塞型的高并发下,nginx能保持低资源低消耗高性能
-
高度模块化的设计,编写模块相对简单
(2)apache相对于nginx的优点:
-
Rewrite比nginx的rewrite强大 ###rewrite的主要功能就是实现统一资源定位符(URL)的跳转
-
模块多,基本想到的都可以找到
-
少bug,nginx的bug相对较多
-
超稳定
二 Linux的I/O
I/O在计算机中指Input/Output
磁盘I/O:buff写入/cache读取
同步/异步:关注的是消息通信机制,即调用者在等待一件事情的处理结果时,被调用者是否提供完成状态的通知。
- 同步: synchronous,被调用者并不提供事件的处理结果相关的通知消息,需要调用者主动询问事情是否处理完成
- 异步: asynchronous,被调用者通过状态、通知或回调机制主动通知调用者被调用者的运行状态
阻塞/非阻塞:关注调用者在等待结果返回之前所处的状态
- 阻塞: blocking,指IO操作需要彻底完成后才返回到用户空间,调用结果返回之前,调用者被挂起,干不了别的事情。
- 非阻塞: nonblocking,指IO操作被调用后立即返回给用户一个状态值,而无需等到IO操作彻底完成,在最终的调用结果返回之前,调用者不会被挂起,可以去做别的事情。
三.安装调试
安装
yum安装
添加 nginx 到 yum 源中
sudo rpm -Uvh http://nginx.org/packages/centos/7/noarch/RPMS/nginx-release-centos-7-0.el7.ngx.noarch.rpm
安装 nginx (在吧nginx添加到 yum 源之后,就可以使用 yum 安装了)
sudo yum install -y nginx
稍等一会,即可安装完成
启动 nginx
sudo systemctl start nginx.service
如果一切顺利的话,现在就可以通过域名或者 ip 访问了
nginx 配置信息
网站文件存放默认位置(Welcome to nginx 页面)
/usr/share/nginx/html
网站默认站点配置
/etc/nginx/conf.d/default.conf
自定义 nginx 站点配置文件存放目录
/etc/nginx/conf.d/
nginx 全局配置文件
/etc/nginx/nginx.conf
编译安装
1.首先要有安装包,拷贝到系统里

安装依赖关系包
yum -y install pcre-devel zlib-devel gcc gcc-c++ make
新建用户 和组便于管理(nginx 服务程序默认 以 nobody 身份运行,建议为其创建专门的用户账户,以便更准确的控制访问权限)
[root@localhost nginx-1.12.0]# useradd -M -s /sbin/nologin nginx
解压缩文件到/opt下
[root@localhost opt]# tar zxvf nginx-1.12.0.tar.gz -C /opt
到解压后的文件下编译安装
[root@localhost opt]# cd uginx-1.120
-bash: cd: uginx-1.120: No such file or directory
[root@localhost opt]# cd nginx-1.12.0/
[root@localhost nginx-1.12.0]# ls
auto  CHANGES  CHANGES.ru  conf  configure  contrib  html  LICENSE  man  README  src
[root@localhost nginx-1.12.0]# ./configure \
> --prefix=/usr/local/nginx \
> --user=nginx \
> --group=nginx \
> --with-http_stub_status_module
[root@localhost nginx-1.12.0]# make && make install
给服务建立软链接
ln -s /usr/local/nginx/sbin/nginx /usr/local/sbin/
或者加入PATH
[root@localhost nginx-1.12.0]# echo $PATH
/usr/local/sbin:/usr/local/bin:/usr/sbin:/usr/bin:/root/bin
检查语法
[root@localhost nginx-1.12.0]# nginx -t
nginx: the configuration file /usr/local/nginx/conf/nginx.conf syntax is ok
nginx: configuration file /usr/local/nginx/conf/nginx.conf test is successful
启动nginx
[root@localhost nginx-1.12.0]# nginx
[root@localhost nginx-1.12.0]# ss -natp|grep 80
LISTEN     0      128          *:80                       *:*                   users:(("nginx",pid=6319,fd=6),("nginx",pid=6318,fd=6))
关闭nginx 进程
[root@localhost nginx-1.12.0]# kill -3 6318                      这里一定要杀父进程
[root@localhost nginx-1.12.0]# ss -natp|grep 80
添加nginx服务
方法一
[root@localhost nginx-1.12.0]# cd /etc/init.d/
[root@localhost init.d]# vim nginx

[root@localhost init.d]# chmod +x nginx
[root@localhost init.d]# chkconfig --add nginx            加入启动项中
启动服务前后,停止
[root@localhost init.d]# ss -natp|grep 80
[root@localhost init.d]# service nginx start
[root@localhost init.d]# ss -natp|grep 80
LISTEN     0      128          *:80                       *:*                   users:(("nginx",pid=6609,fd=6),("nginx",pid=6608,fd=6))
[root@localhost init.d]# service nginx stop
[root@localhost init.d]# ss -natp|grep 80
方法二:
vim /lib/systemd/system/nginx.service
[Unit]
Description=nginx
After=network.target
[Service]
Type=forking
PIDFile=/usr/local/nginx/logs/nginx.pid
ExecStart=/usr/local/nginx/sbin/nginx
ExecReload=/usr/bin/kill -s HUP $MAINPID
ExecStop=/usr/bin/kill -s QUIT $MAINPID
PrivateTmp=true
[Install]
WantedBy=multi-user.target
这时要用下面系统控制开启服务了
systemctl start nginx
配置文件
[root@localhost init.d]# cd /usr/local/nginx/conf/
[root@localhost conf]# ls
fastcgi.conf          fastcgi_params          koi-utf  mime.types          nginx.conf          scgi_params          uwsgi_params          win-utf
fastcgi.conf.default  fastcgi_params.default  koi-win  mime.types.default  nginx.conf.default  scgi_params.default  uwsgi_params.default
[root@localhost conf]# vim nginx.conf


这里可以改最大65535,因为端口,
这里是内核数*每个内核链接数=正常提供服务的连接数
正常提供服务的连接数查询

可以用ulimit -n 连接数 进行修改

http {
include mine.types;
#默认文件类型 (可以打开mine.type文件查看)
default_type application/octet-stream;
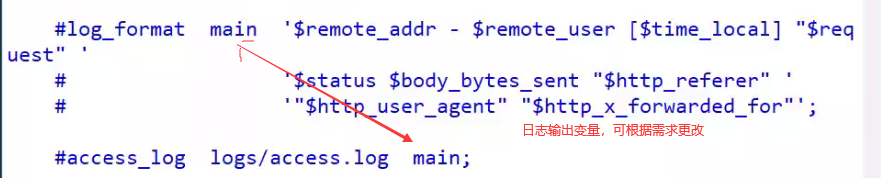
log_format main '$remote_addr - $remote_user [$time_local] "$request" '
'$status $body_bytes_sent "$http_referer" ' '"$http_user_agent" "$http_x_forwarded_for"'; #日志格式设定,可以根据需求更改
#access_log logs/access.log main;
#访问日志位置
sendfile on;
#支持文件发送(下载)
tcp_nopush on;
#此选项允许或禁止使用socketde TCP_CORK的选项(发送数据包前先缓存数据),此选项仅在使用sendfile时使用
keepalive_timeout 0;
keepalive_timeout 65;
#客户连接保持超时时间,单位是秒
gzip on;
#gzip模块设置,设置是否开启gzip压缩输出
web服务的监听设置
server {
     listen       80;
     #监听地址及端口
     server_name  localhost;
 	#站点域名,可以有多个,用空格隔开
     #charset koi8-r;
     #网页的默认字符集
     #access_log  logs/host.access.log  main;
     #这里只记录80端口数据的日志

     location / {
         root   html;
         #网站根目录的位置/usr/local/nginx/html
         index  index.html index.htm;
         #默认首页文件名
     }

     #error_page  404              /404.html;

     # redirect server error pages to the static page /50x.html
     #
     error_page   500 502 503 504  /50x.html;
     #内部错误反馈页面
     location = /50x.html {
     #错误页面设置
         root   html;
     }


新建页面
[root@localhost ~]# cd /usr/local/nginx/
[root@localhost nginx]# ls
client_body_temp  conf  fastcgi_temp  html  logs  proxy_temp  sbin  scgi_temp  uwsgi_temp
[root@localhost nginx]# cd html/
[root@localhost html]# ls
50x.html  index.html
[root@localhost html]# vim test.html

[root@localhost conf]# cp nginx.conf nginx.conf.bak          先备份
[root@localhost conf]# vim nginx.conf


替换成,可支持中文


在原文件中编辑增加此段,指明文件名为test

wq保存后用命令检查没有问题再启动服务
[root@localhost conf]# nginx -t
nginx: the configuration file /usr/local/nginx/conf/nginx.conf syntax is ok
nginx: configuration file /usr/local/nginx/conf/nginx.conf test is successful
[root@localhost conf]# service nginx start
就可以看到主页了

登录test.html

访问状态统计配置
在文件中加入此段

编辑后确认后重启服务
[root@localhost conf]# nginx -t
nginx: the configuration file /usr/local/nginx/conf/nginx.conf syntax is ok
nginx: configuration file /usr/local/nginx/conf/nginx.conf test is successful
[root@localhost conf]# service nginx restart
网页上访问


Active connections: 2
#当前活动链接数
server accepts handled requests
2 2 6
#表示已经处理的连接信息,三个数字一次表示已处理的连接数、成功的TCP握手次数、已处理的请求数
Reading: 0 Writing: 1 Waiting: 1
命令行查看
[root@localhost conf]# curl 192.168.133.100/status
Active connections: 1
server accepts handled requests
 3 3 7
Reading: 0 Writing: 1 Waiting: 0
[root@localhost conf]# vim visit.sh

基于授权密码的访问控制
生成用户密码认证文件
[root@localhost conf]# yum install httpd-tools -y
[root@localhost conf]# htpasswd -c /usr/local/nginx/passwd.db zpq    创建新用户并设置密码,-c判断是否有此文件
New password:
Re-type new password:
Adding password for user zpq
[root@localhost conf]# cat /usr/local/nginx/passwd.db
zpq:$apr1$0..D5jHe$XrlL/8Rhpi5o95ipcaSY2.
[root@localhost conf]#vim /usr/local/nginx/conf/nginx.conf
编辑此段

检查确认无误重启服务
[root@localhost conf]# nginx -t
nginx: the configuration file /usr/local/nginx/conf/nginx.conf syntax is ok
nginx: configuration file /usr/local/nginx/conf/nginx.conf test is successful
[root@localhost conf]# service nginx restart

输入密码后就可以进主页了

基于客户端的访问控制

限制后被限制的主机无法访问

取消限制后该主机可以访问。
基于域名的nginx 虚拟主机
建立两个文件目录
[root@localhost ~]# mkdir -p /var/www/html/{zy,fxy}
[root@localhost ~]# ls /var/www/html/
fxy  zy
[root@localhost ~]# echo "This is zy's web" > /var/www/html/zy/index.html
[root@localhost ~]# echo "This is fxy's web" > /var/www/html/fxy/index.html
[root@localhost ~]# cat /var/www/html/fxy/index.html
This is fxy's web
[root@localhost ~]# cat /var/www/html/zy/index.html
This is zy's web
[root@localhost conf]#vim /usr/local/nginx/conf/nginx.conf

改成

写相同两段一个是“zy”一个是“fxy” ,因为段落长,所有复制在文本前

[root@localhost conf]# nginx -t
nginx: the configuration file /usr/local/nginx/conf/nginx.conf syntax is ok
nginx: configuration file /usr/local/nginx/conf/nginx.conf test is successful
[root@localhost conf]# service nginx restart
在客户机上编辑hosts文件

在网页上打开相应网址


基于IP地址
[root@localhost conf]#vim /usr/local/nginx/conf/nginx.conf
增加相对应地址,可增加虚拟网卡

[root@localhost conf]# ifconfig ens33:0 192.168.133.98
[root@localhost conf]# nginx -t
nginx: the configuration file /usr/local/nginx/conf/nginx.conf syntax is ok
nginx: configuration file /usr/local/nginx/conf/nginx.conf test is successful
[root@localhost conf]# service nginx restart


基于端口
[root@localhost conf]#vim /usr/local/nginx/conf/nginx.conf
更改2个地方ip地址端口

[root@localhost conf]# nginx -t
nginx: the configuration file /usr/local/nginx/conf/nginx.conf syntax is ok
nginx: configuration file /usr/local/nginx/conf/nginx.conf test is successful
[root@localhost conf]# service nginx restart

nginx→taomcat
1,端口连接端口
2,进程监控端口
3,端口转发是因为配置文件的upstream池和location
4,因为反向代理和负载均衡产生的算法,比如轮巡,权重,IP_HAXY,最小链接


 1万+
1万+

 被折叠的 条评论
为什么被折叠?
被折叠的 条评论
为什么被折叠?
 到【灌水乐园】发言


