


Day 03
链表 Part 01
1. 链表基础
- C++ 中链表写法:C++用结构体定义链表节点,结构体有两个成员,一个是整数val,一个是指向ListNode类型的指针next,并且给了三个构造函数,构造函数冒号后面的内容代表初始化列表。
struct ListNode{
int val;
ListNode* next;
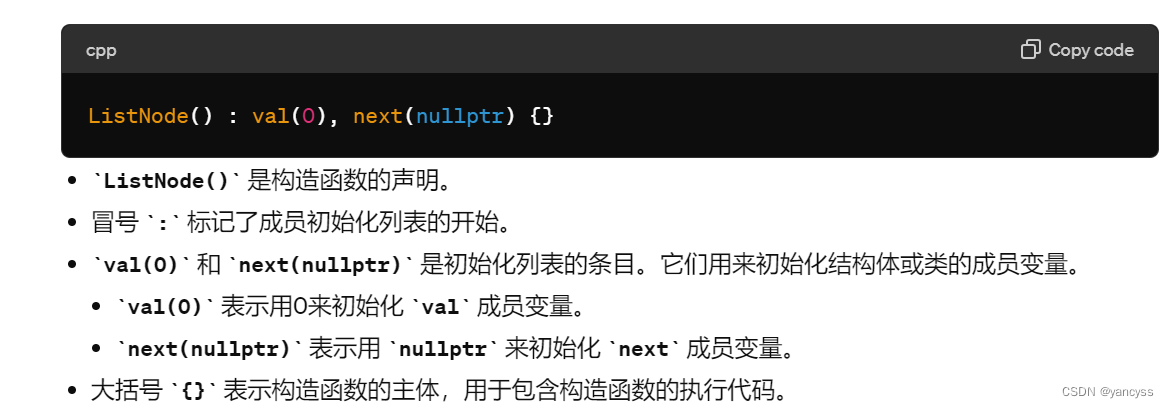
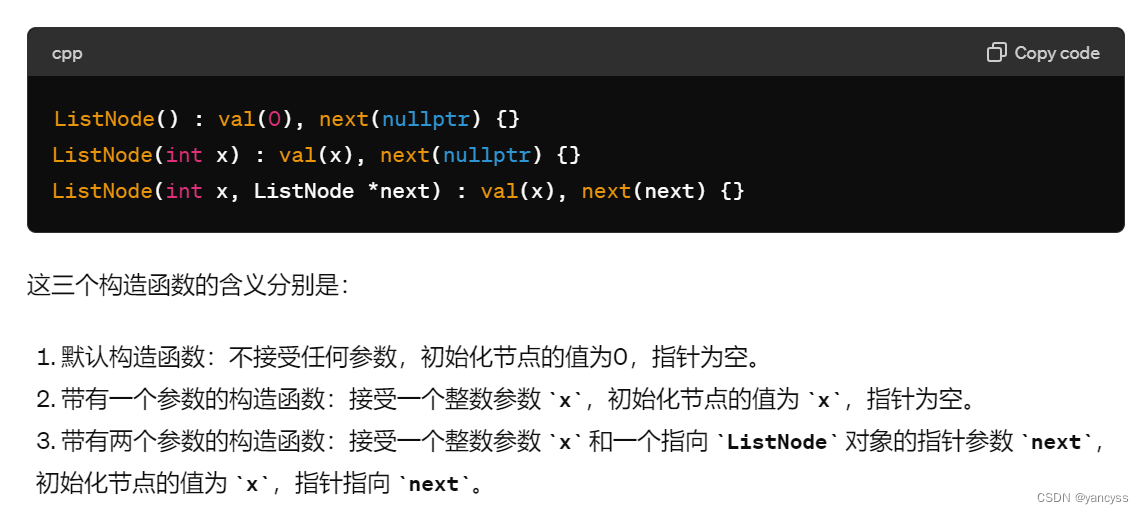
ListNode():val(0),next(nullptr){}
ListNode(int x):val(x),next(nullptr){}
ListNode(int x,ListNode *next):val(x).next(next){}
};
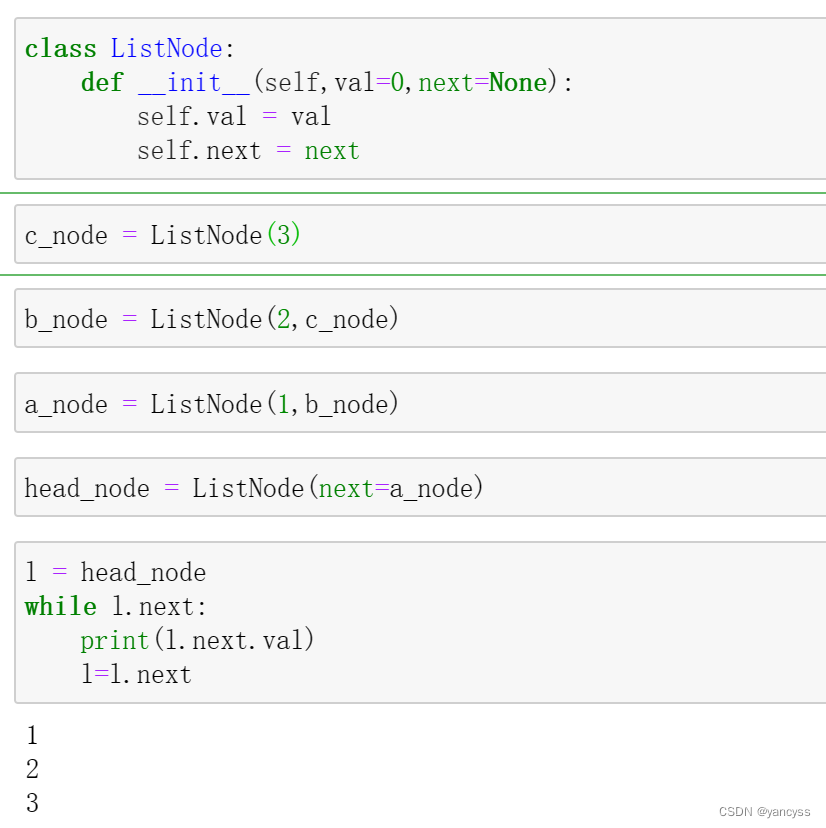
- Python 中链表写法:python用类代表链表节点,val和next是这个类的两个属性。python中没有指针概念,next就是一个普通变量,它将记录指向对象的一个引用。
class ListNode:
	def __init__(self,val=0,next=None):
		self.val = val
		self.next = next
2. 删除元素(力扣203)
- 题目描述:移除元素
- 思路:如果不引入虚拟头结点,那么当要删除的对象在头结点时,需要对head单独操作。因此为了代码统一,引入虚拟头结点dummy_head。最终返回结果时,要返回dummy_head.next。
- Python 语法细节:
在初始化一个类的时候,不传递参数时参数为构造函数中的默认值。 - Python 代码
# Definition for singly-linked list.
# class ListNode:
#     def __init__(self, val=0, next=None):
#         self.val = val
#         self.next = next
class Solution:
    def removeElements(self, head: Optional[ListNode], val: int) -> Optional[ListNode]:
        dummy_head=ListNode(next=head)
        l = dummy_head
        while l.next:
            if l.next.val == val:
                l.next = l.next.next
            else:
                l=l.next

        return dummy_head.next
- C++语法细节:
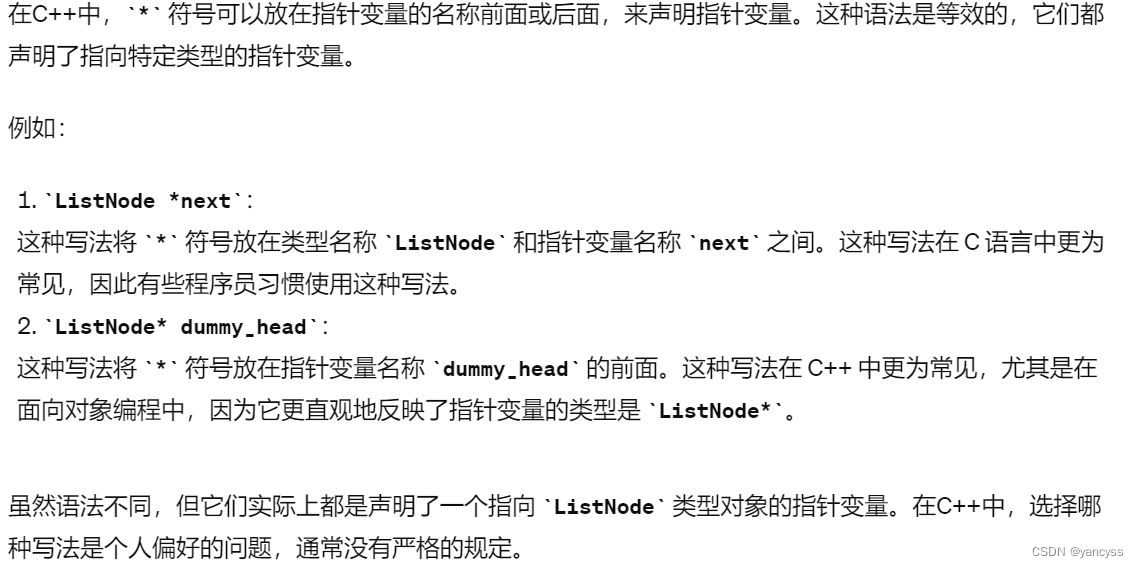
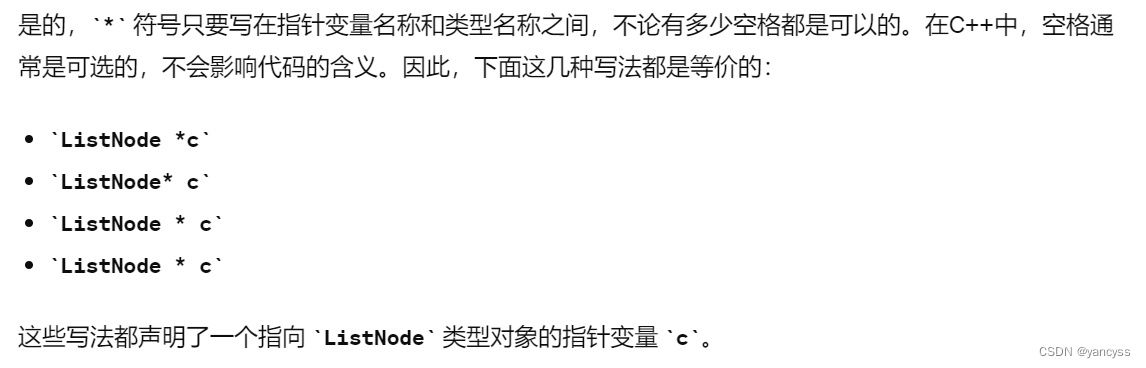
- 定义指针的写法:
ListNode *next ,ListNode* dummy_head这里*的位置靠前或者靠后都可以。
- new的用法:
new 是 C++ 中用于动态分配内存并在堆上创建对象的运算符。它的用法是在需要动态创建对象时,使用 new 来分配内存,并调用对象的构造函数来初始化对象。通常情况下,new 运算符返回指向新分配对象的指针。

- C++ 代码
/**
 * Definition for singly-linked list.
 * struct ListNode {
 *     int val;
 *     ListNode *next;
 *     ListNode() : val(0), next(nullptr) {}
 *     ListNode(int x) : val(x), next(nullptr) {}
 *     ListNode(int x, ListNode *next) : val(x), next(next) {}
 * };
 */
class Solution {
public:
    ListNode* removeElements(ListNode* head, int val) {
    /*用new在堆上创建一个头结点*/
        ListNode* dummy_head = new ListNode(0,head);
        ListNode* c = dummy_head;
        while (c->next != NULL){
            if (c->next->val == val){
                ListNode* tmp = c->next;
                c->next = c->next->next;
                delete tmp;
            }
            else{
                c=c->next;
            }
        }
        head = dummy_head->next;
        delete dummy_head;
        return head;


    }
};
3. 设计链表(力扣707)
- 题目描述:设计链表
- 思路:先定义链表的结点,再定义我的链表。用类来定义,类的成员包括虚拟表头和链表长度,因为类的一些方法需要判断index是否符合规范,所以需要有链表程度属性。
3.python 语法细节:
- 在类的方法中需要使用类的成员时,需要加上
self. - 按索引进行插入时,插入是在指定位置index之前(注意链表索引从0开始),因此可以插入的位置包括最后一个元素的后面(也就是说index=size也是可以的,是插在了最后边),遍历指针l需要指向待插入位置的前一个。
- 按索引进行删除时,删除的是index指定的位置,可以删除的位置不包括index=size,遍历指针l需要指向待删除位置的前一个
- 按索引进行查找时,删除的是index指定的位置,可查找的位置不包括index=size,遍历指针就遍历到要查的位置(不是前一个,因此定义l的时候为l=self.dummy.next)
- Python代码
class ListNode:
    def __init__(self,val=0,next=None):
        self.val = val
        self.next = next

class MyLinkedList:

    def __init__(self):
        self.dummy_head = ListNode()
        self.size = 0
    def get(self, index: int) -> int:
    	# index不可以是size
        if index<0 or index>=self.size:
            return -1
        # l指向要查找的元素
        l = self.dummy_head.next
        for i in range(index):
            l = l.next
        return l.val


    def addAtHead(self, val: int) -> None:
        self.dummy_head.next = ListNode(val,self.dummy_head.next)
        self.size = self.size+1

    def addAtTail(self, val: int) -> None:
        l = self.dummy_head
        while l.next:
            l = l.next
        l.next = ListNode(val)
        self.size = self.size+1

    def addAtIndex(self, index: int, val: int) -> None:
    	#index可以是size
        if index<0 or index > self.size:
            print('index out of sixe')
            return
        else:
        #l遍历到待插入位置的前一个元素
            l = self.dummy_head
            for i in range(index):
                l = l.next
            l.next = ListNode(val,l.next)
            self.size = self.size+1

    def deleteAtIndex(self, index: int) -> None:
    	#index不可以是size
        if index < 0 or index >= self.size:
            return
        #l指针遍历导要删除的位置的前一个
        l = self.dummy_head
        for i in range(index):
            l = l.next
        l.next = l.next.next
        self.size = self.size -1
- C++代码细节:
- 链表节点的定义,使用在类中定义的结构体。结构体被定义在类的内部时,它们仅仅是类的一部分,而不是类的实例。这意味着每个类的实例都有一个嵌套的结构体类型,并且类的所有实例共享这个结构体定义。因此,结构体定义不会占用类的实例的存储空间。
- 成员变量 dummy_head 是指向结构体ListNode 的指针,因此他**一定要写在结构体定义的后边!**否则就会报如下错误:
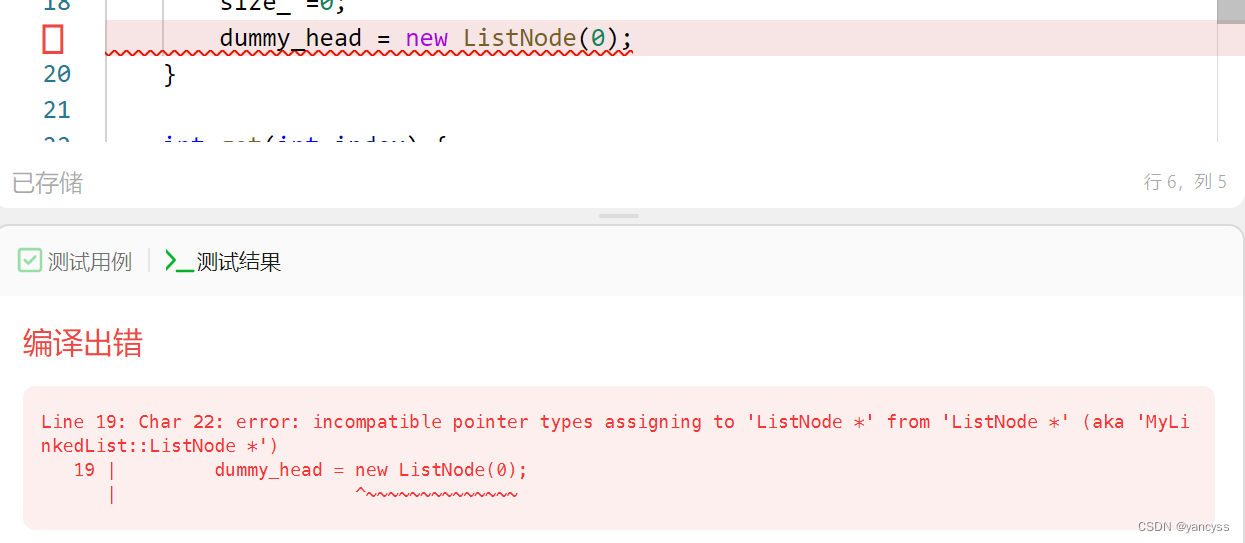
- 构造 函数MyLinkedList(),实现的是对类的成员的赋值。变量的赋值和变量的声明要有区分,此处不能再写 int size_ = 0 会识别为两个变量。
- 空指针写法:
nullptr - for 循环写法
for(int i =0;i<index;i++)注意 要写int 要写; - C++ 中不能只写return 要写返回值。
- C++实现 语法:
class MyLinkedList {
private:
    int size_;

public:

    struct ListNode{
    int val;
    ListNode* next;
    ListNode(int x):val(x),next(nullptr){}
    ListNode(int x,ListNode* next):val(x),next(next){}
};
    ListNode* dummy_head;

    MyLinkedList() {
        size_ =0;
        dummy_head = new ListNode(0);
    }

    int get(int index) {
        if((index <0) or (index >= size_)){
            return -1;
        }
        ListNode* cur = dummy_head->next;
        for(int i=0;i<index;i++){
            cur = cur->next;
        }
        return cur->val;


    }

    void addAtHead(int val) {
        dummy_head->next = new ListNode(val,dummy_head->next);
        size_++;
    }

    void addAtTail(int val) {
        ListNode* cur = dummy_head;
        while (cur->next != nullptr){
            cur = cur->next;
        }
        cur->next = new ListNode(val,nullptr);
        size_++;
    }

    void addAtIndex(int index, int val) {
        if((index <0) or (index >size_)){
            return;
        }
        ListNode* cur = dummy_head;
        for(int i=0;i<index;i++){
            cur = cur->next;
        }
        cur->next = new ListNode(val,cur->next);
        size_++;

    }

    void deleteAtIndex(int index) {
        if((index <0) or (index >=size_)){
            return;
        }
        ListNode* cur = dummy_head;
        for(int i=0;i<index;i++){
            cur = cur->next;
        }
        ListNode* tmp = cur->next;
        cur->next = cur->next->next;
        delete tmp;
        tmp = nullptr;
        size_--;
    }

};
4. 反转链表(力扣206)
- 题目描述:反转链表
- 思路:将每个节点的指针指向反转即可。使用pre 指针记录前一个节点,cur记录当前节点,tmp指针记录cur的下一个节点。
- python语法细节:
- pre 指针在定义时不要新建一个节点,直接定义为None,需要的时候再让它指向cur
- Python代码
# Definition for singly-linked list.
# class ListNode:
#     def __init__(self, val=0, next=None):
#         self.val = val
#         self.next = next
class Solution:
    def reverseList(self, head: Optional[ListNode]) -> Optional[ListNode]:
        ### 双指针转向法
        # if head == None:
        #     return head
        # cur = head
        # pre = None
        # while cur :
        #     tmp = cur.next
        #     cur.next = pre
        #     pre = cur
        #     cur = tmp
        # cur = pre
        # while cur:
        #     print(cur.val)
        #     cur = cur.next
        # return pre
        ### 递归法
        return self.reverse(head,None)

    def reverse(self,cur:ListNode,pre:ListNode) ->ListNode:
        if cur == None:
            return pre
        tmp = cur.next
        cur.next = pre
        return self.reverse(tmp,cur)
- C++语法细节
- 定义指针一定要初始化,不然会有问题,报错不容易察觉。
- C++代码
/**
 * Definition for singly-linked list.
 * struct ListNode {
 *     int val;
 *     ListNode *next;
 *     ListNode() : val(0), next(nullptr) {}
 *     ListNode(int x) : val(x), next(nullptr) {}
 *     ListNode(int x, ListNode *next) : val(x), next(next) {}
 * };
 */
class Solution {
public:
    ListNode* reverseList(ListNode* head) {
        // /*双指针法*/
        // if(head == nullptr){
        //     return head;
        // }
        // ListNode* cur;
        // ListNode* pre = nullptr;
        // cur = head;
        // while(cur != nullptr){
        //     ListNode* tmp = cur->next;
        //     cur->next = pre;

        //     pre = cur;
        //     cur = tmp;
        // }
        // cur = pre;
        // while(cur != nullptr){
        //     cout<<cur->val<<endl;
        //     cur = cur->next;
        // }
        // return pre;

        /*递归法*/
        ListNode* pre = nullptr;
        return reverse(head,pre);

    }
    ListNode* reverse(ListNode* cur,ListNode* pre) {
        if (cur == nullptr){
            return pre;
        }
        ListNode* tmp = cur->next ;
        cur->next = pre;
        return reverse(tmp,cur);

    }
};


 211
211


 被折叠的 条评论
为什么被折叠?
被折叠的 条评论
为什么被折叠?
 到【灌水乐园】发言


