


模型上下文协议MCP与Ollama的整合实现指南
在过去一两个个月里,模型上下文协议(Model Context Protocol,MCP)频繁出现在各种技术微信交流群中。我们已经看到了许多很酷的集成案例,大家似乎相信这个标准会长期存在,因为它为大模型与工具或软件的集成设立了规范。
前面一篇文章给大家分享了MCP一些基础概念,但是读完之后还是模棱两可,所以决定尝试将Ollama中的小型语言模型与MCP服务器连接起来,体验一下这个新标准。今天,向大家展示如何实现Ollama与MCP服务器的集成。
实现步骤
整个集成的主要步骤包括:
- 创建测试以及使用MCP服务
- 创建客户端文件来发送请求并启动服务
- 从服务获取工具到客户端
- 将工具转换为pydantic模型
- 通过response format将工具(作为pydantic模型)传递给Ollama
- 通过Ollama发送对话并接收结构化输出
- 如果响应中包含工具,则向服务器发送请求
安装依赖
要运行这个项目,需要安装必要的包。fastmcp库在使用uv运行代码时效果最佳。uv很容易下载和使用,类似于Poetry和pip。
使用以下命令将所需库添加到你的项目中:
uv add fastmcp ollama
这会同时安装MCP服务器和Ollama聊天库,以便你在它们的基础上构建客户端和服务器逻辑。
文件结构
设置时,你的文件夹应该是这样的:
your folder
├── server.py
└── client.py
server.py文件包含MCP服务器和想要暴露的工具。client.py文件在后台进程中启动服务器,获取可用工具,并与Ollama连接。
示例MCP服务器
首先,让我们使用fastmcp库创建一个简单的MCP服务器。该服务器暴露了一个名为magicoutput的工具。这个函数接受两个字符串输入并返回一个固定的字符串作为输出。
@mcp.tool()装饰器用于将函数注册为MCP服务器中的可用工具。当服务器启动后,任何客户端都可以获取并调用这个工具。
通过在主块中调用mcp.run()来启动服务器。
# server.py
from fastmcp import FastMCP
# 创建MCP服务器
mcp = FastMCP("TestServer")
# 我的工具:
@mcp.tool()
def magicoutput(obj1: str, obj2: str) -> int:
    """使用此函数获取魔法输出"""
    print(f"输入参数:obj1:{
     obj1},obj2:{
     obj2}")
    return f"输入参数:obj1:{
     obj1},obj2:{
     obj2},魔法输出:Hello MCP,MCP Hello"
if __name__ == "__main__":
    mcp.run()
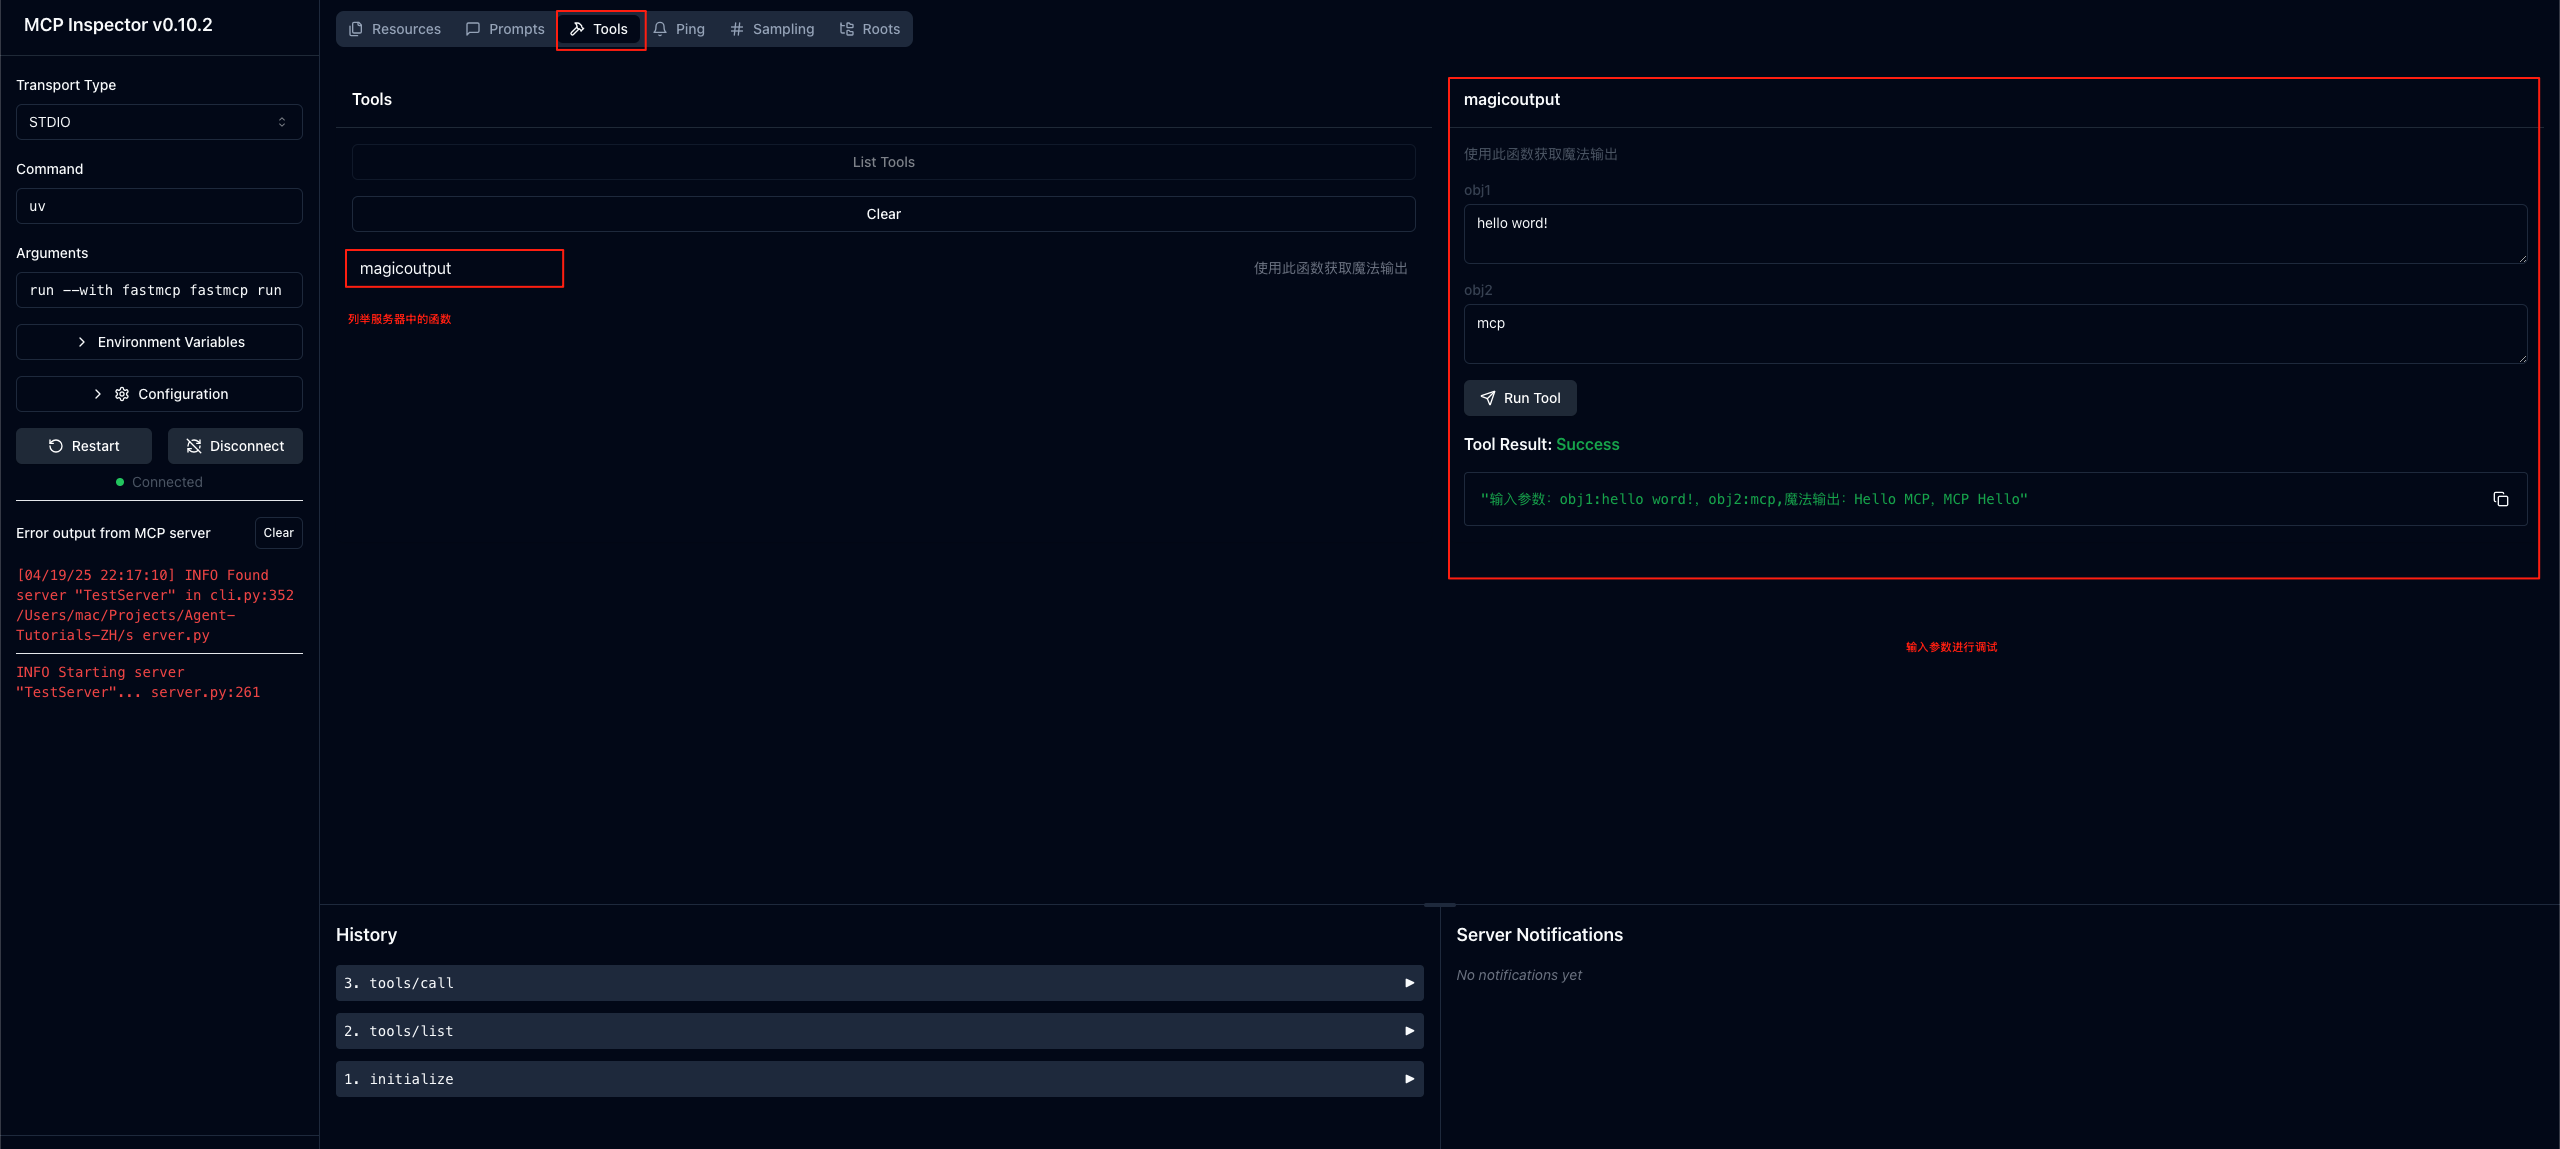
我们运行下面命令,进行调试服务端的工具:
fastmcp dev server.py
输入日志如下:
Need to install the following packages:
@modelcontextprotocol/inspector@0.10.2
Ok to proceed? (y) y

Starting MCP inspector...
⚙️ Proxy server listening on port 6277
🔍 MCP Inspector is up and running at http://127.0.0.1:6274 🚀
New SSE connection
Query parameters: [Object:
本地访问页面http://127.0.0.1:6274/#tools,我们可以看构造的函数,并且可以调试
获取服务器工具
为了连接到MCP服务器并列出可用工具,我们使用来自mcp库的ClientSession、StdioServerParameters和stdio_client。
我们定义一个名为OllamaMCP的类来处理服务器连接和工具获取。在类内部,_async_run方法启动异步会话,初始化它,并从服务器获取工具列表。
我们使用threading.Event()来跟踪会话何时准备就绪,并将工具列表存储在self.tools中。
在脚本末尾,我们定义服务器参数并在后台线程中运行客户端。这会启动连接并打印服务器返回的工具元数据。
# client.py
import asyncio
import threading
from pathlib import Path
from mcp import ClientSession, StdioServerParameters
from mcp.client.stdio import stdio_client
from typing import Any

class OllamaMCP:
    """
    Ollama和FastMCP的简单集成
    """
    def __init__(self, server_params: StdioServerParameters):
        self.server_params = server_params
        self.initialized = threading.Event()
        self.tools: list[Any] = []
    def _run_background(self):
        asyncio.run(self._async_run())
    async def _async_run(self):
        try:
            async with stdio_client(self.server_params) as (read, write):
                async with ClientSession(read, write) as session:
                    await session.initialize()
                    self.session = session
                    tools_result = await session.list_tools()
                    self.tools = tools_result.tools
                    print(tools_result)
        except Exception as e:
            print(f"启动MCP服务器时出错 {
     str(e)}")
if __name__ == "__main__":
    server_parameters = StdioServerParameters(
        command="uv",
        args=["run", "python", "server.py"],
        cwd=str(Path.cwd())
    )
    ollamamcp = OllamaMCP(server_params=server_parameters)
    ollamamcp._run_background()
运行上面的代码后,你会从服务器得到以下响应,其中可以看到服务器上可用的工具列表。
[04/19/25 12:10:47] INFO     Starting server "TestServer"...       server.py:261
meta=None nextCursor=None tools=[Tool(name='magicoutput', description='使用此函数获取魔法输出', inputSchema={'properties': {'obj1': {'title': 'Obj1', 'type': 'string'}, 'obj2': {'title': 'Obj2', 'type': 'string'}}, 'required': ['obj1', 'obj2'], 'title': 'magicoutputArguments', 'type': 'object'})]
将工具转换为pydantic模型
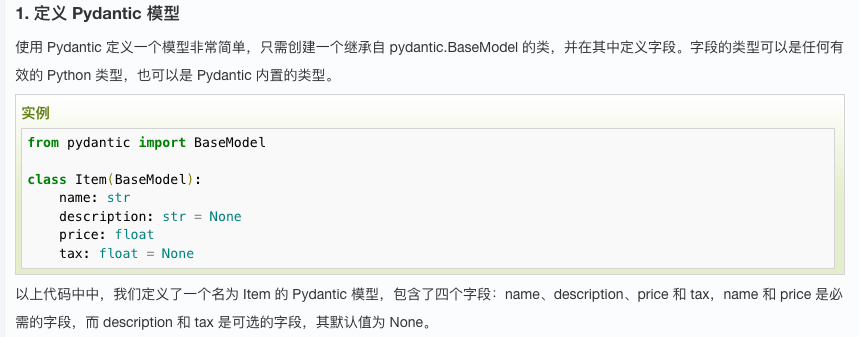
现在我们已经从服务器接收到了工具列表,下一步是将它们转换为Pydantic模型。我们使用Pydantic的create_model来动态定义新的响应模式,基于服务器的工具定义。还有一个辅助函数来将JSON类型映射到有效的Python类型。
Pydantic 是一个用于数据验证和序列化的 Python 模型库。它在 FastAPI 中广泛使用,用于定义请求体、响应体和其他数据模型,提供了强大的类型检查和自动文档生成功能
这帮助我们动态定义模型,使语言模型确切知道在返回工具参数时应使用什么结构。
# client.py
import asyncio
import threading
from pathlib import Path
from mcp import ClientSession, StdioServerParameters
from mcp.client.stdio import stdio_client
from typing import Any, Union, Optional
from pydantic import BaseModel, create_model, Field

class OllamaMCP:
    """Ollama和FastMCP的简单集成"""

    def __init__(self, server_params: StdioServerParameters):
        self.server_params = server_params
        self.initialized = threading.Event()
        self.tools: list[Any] = []

    def _run_background(self):
        asyncio.run(self._async_run())

    async def _async_run(self):
        try:
            async with stdio_client(self.server_params) as (read, write):
                async with ClientSession(read, write) as session:
                    await session.initialize()
                    self.session = session
                    tools_result = await session.list_tools()
                    self.tools = tools_result.tools
        except Exception as e:
            print(f"启动MCP服务器时出错 {
     str(e)}")


    def create_response_model(self):
        dynamic_classes = {
   }
        for tool in self.tools
最低0.47元/天 解锁文章


 2801
2801

 被折叠的 条评论
为什么被折叠?
被折叠的 条评论
为什么被折叠?
 到【灌水乐园】发言


