


最近开发了一个原生小程序,在开发过程中遇到了一些问题,做一个学习记录
技术栈:
- UI组件库用的是TDesign
- 原生组件
- wx.request
工具:微信小程序开发工具
1、封装wx.request
创建公共request.js
// 封装一个请求方法


export default function request(url, method, data) {
  return new Promise((resolve, reject) => {

    wx.request({
      url: 'http://172.26.1.82/' + url,
      method: method,
      data: data, // GET 请求时,data 应该为空对象
      header: {
        "Authorization": 'Bearer ' + wx.getStorageSync('token')
      },
      success: function (res) {
        console.log(res, 'gg')
        if (res.data.code == 401) {
          wx.showToast({
            title: '未登录,请授权登录~',
            icon: 'error',
            duration: 10000
          })
          setTimeout(function () {
            wx.navigateTo({
              url: '/pages/login/login',
            })
          }, 1000)

        }
        if (res.data && res.statusCode === 200) {
          resolve(res.data);
        } else {
          reject(res);
        }
      },
      fail: function (error) {
        reject(error);
      }
    });
  });
}
在页面js引入并使用
import request from "../../utils/request"
、、、
  request('common/user/detail', 'get')
      .then(response => {
        console.log(response.data)
        that.setData({
          detail: response.data, //父
          type: true
        })
      })
省市区列表页面组件包
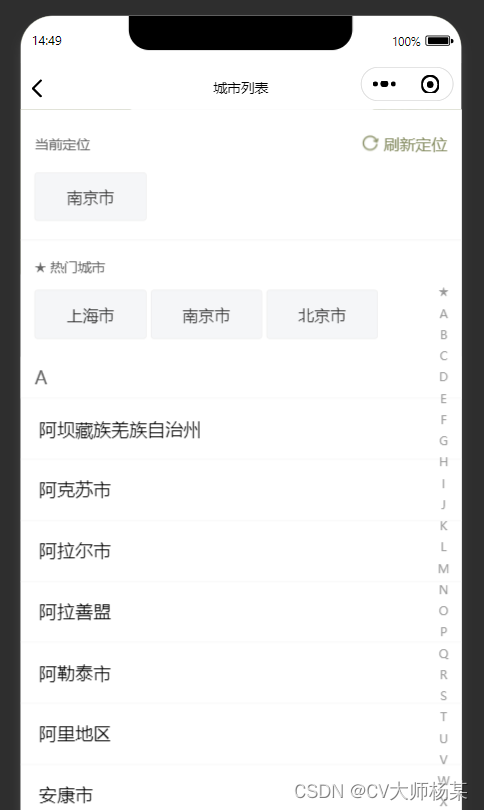
这个城市列表是借鉴这篇文章的
微信小程序调起扫一扫功能
- 第一步在wxml中给个点击事件
<view bindtap="tapScan">扫码</view>
- 在页面js中使用wx.scanCode API,在回调res中获取的数据,就是你扫描二维码的数据
tapScan(){
        wx.scanCode({
            success: function(res) {
                console.log('扫码获取的参数',res)
            }
        })
    },
在小程序中跳转另外一个小程序
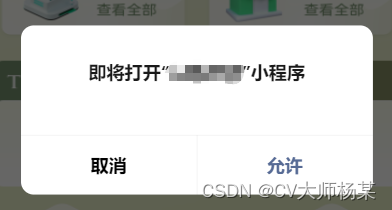
这里用到的是wx.navigateToMiniProgram
  wx.navigateToMiniProgram({
      appId: '填写你自己的appid',
      path: '/pages/index/index',
      //develop开发版;trial体验版;release正式版
      envVersion: 'release',
      success(res) {
        // 打开成功
        console.log("跳转小程序成功!", res);
      }
    })
动态修改页面标题
    wx.setNavigationBarTitle({
      title: type == 0 ? '推荐入驻' : '成为理疗师' //修改title
    })
场景:小程序渲染富文本数据,但是小程序用的是image,富文本图片img,对img设置样式
 richModiFyimg(data, pcss, imgcss) {
    let zsdata = data.split("<img ")
    let gxdata = zsdata[0]
    console.log("首次切割:", zsdata)
    for (let i = 1; i < zsdata.length; i++) {
      gxdata += "<img " + zsdata[i].split("style=\"")[0] + "style=\""
      let cc = zsdata[i].split("style=\"")[1].split("\"")[0]
      console.log("分段得:", cc)
      gxdata += "width: 100%;\""
      gxdata += zsdata[i].split("style=\"")[1].split("\"")[1]
    }
    console.log("修改好后的值:", gxdata)
    let xgp = gxdata.replace(/<p([\s\w"=\/\.:;]+)((?:(style="[^"]+")))/ig, '<p')
      .replace(/<p>/ig, `<p style="${imgcss}">`)
      .replace(/<img([\s\w"-=\/\.:;]+)((?:(height="[^"]+")))/ig, '<img$1')
      .replace(/<img([\s\w"-=\/\.:;]+)((?:(width="[^"]+")))/ig, '<img$1')
      .replace(/<img([\s\w"-=\/\.:;]+)((?:(style="[^"]+")))/ig, '<img$1')
      .replace(/<img([\s\w"-=\/\.:;]+)((?:(alt="[^"]+")))/ig, '<img$1')
      .replace(/<img([\s\w"-=\/\.:;]+)/ig, `<img style="${pcss}" $1`);
    console.log(xgp)
    return xgp
  },
使用wx.getFuzzyLocation获取位置信息
1、首先第一步要去微信公众平台去申请使用api资格
2、申请成功后要现在app.json声明
  "requiredPrivateInfos": [
    "chooseAddress",
    "getFuzzyLocation",
    "choosePoi"
  ],
3、在页面js使用
  var that = this
   wx.getFuzzyLocation({
      type: 'wgs84',
      success(res) {
        console.log(res)
        //填入自己的key
        qqmapsdk = new QQMapWX({
            key: "填写你自己的地图key,这个key需要去腾讯或者高德地图申请"
          }),
          that.data.latitude = res.latitude;
        that.data.longitude = res.longitude;
        qqmapsdk.reverseGeocoder({
          location: {
            latitude: that.data.latitude,
            longitude: that.data.longitude
          },
          success: function (res) {
            console.log(res)
            var obj = {
              cityid: res.result.ad_info.city_code,
              cityname: res.result.ad_info.city
            }
            that.data.weizhi = obj;
            wx.setStorageSync('weizhi', obj)
            that.setData({
              weizhi: obj
            })
            console.log(that.data.weizhi)
          },
          fail: function (err) {
            console.log(err);
          },
        })
      }
    })
Tips
OK,先记录这些,记录的意义在于有些功能点是从网上翻阅的,那如果以后在遇到且别人的文章被删除,可以打开自己的csdn快速解决当前问题


 3315
3315


 被折叠的 条评论
为什么被折叠?
被折叠的 条评论
为什么被折叠?
 到【灌水乐园】发言


