


提示:文章写完后,目录可以自动生成,如何生成可参考右边的帮助文档
MyBatisPlus实现多数据源
前言
通过MyBatisPlus配置实现单个项目连接多个数据源
应用场景:项目业务复杂需要分库处理、需要实现读写分离。
实现原理:MyBatisPlus通过配置对数据源调用时进行切换,且数据源对应的mapper和xml需分开存放。
提示:以下是本篇文章正文内容,下面案例可供参考
一、准备工作
1.目录结构

2.pom依赖
<dependencies>
        <!--springboot-->
        <dependency>
            <groupId>org.springframework.boot</groupId>
            <artifactId>spring-boot-starter</artifactId>
        </dependency>

        <dependency>
            <groupId>org.springframework.boot</groupId>
            <artifactId>spring-boot-starter-test</artifactId>
            <scope>test</scope>
        </dependency>

        <dependency>
            <groupId>org.springframework.boot</groupId>
            <artifactId>spring-boot-starter-web</artifactId>
        </dependency>

        <!--MyBatisPlus-->
        <dependency>
            <groupId>mysql</groupId>
            <artifactId>mysql-connector-java</artifactId>
        </dependency>

        <dependency>
            <groupId>org.postgresql</groupId>
            <artifactId>postgresql</artifactId>
            <version>42.2.7</version>
        </dependency>

        <dependency>
            <groupId>com.baomidou</groupId>
            <artifactId>mybatis-plus-boot-starter</artifactId>
            <version>3.0.5</version>
        </dependency>

        <dependency>
            <groupId>com.baomidou</groupId>
            <artifactId>mybatis-plus</artifactId>
            <version>3.0.5</version>
        </dependency>

    </dependencies>
3.yml配置
#端口
server:
  port: 8088

spring:
  datasource:
    one:  #此行命名可随意
      username: root
      password: root
      jdbc-url: jdbc:mysql://localhost:3306/test  #url需换成jdbc-url
      driver-class-name: com.mysql.cj.jdbc.Driver

    two:  #此行命名可随意
      username: root
      password: root
      jdbc-url: jdbc:mysql://localhost:3306/test2 #url需换成jdbc-url
      driver-class-name: com.mysql.cj.jdbc.Driver
二、编写代码
1.编写多数据源配置类
OneSqlConfig.java:
package com.example.demo.config;

import javax.sql.DataSource;
import org.apache.ibatis.session.SqlSessionFactory;
import org.mybatis.spring.SqlSessionFactoryBean;
import org.mybatis.spring.SqlSessionTemplate;
import org.mybatis.spring.annotation.MapperScan;
import org.springframework.beans.factory.annotation.Qualifier;
import org.springframework.boot.context.properties.ConfigurationProperties;
import org.springframework.boot.jdbc.DataSourceBuilder;
import org.springframework.context.annotation.Bean;
import org.springframework.context.annotation.Configuration;
import org.springframework.context.annotation.Primary;
import org.springframework.core.io.support.PathMatchingResourcePatternResolver;
import org.springframework.jdbc.datasource.DataSourceTransactionManager;

@Configuration
//配置数据源扫码mapper路径,sqlSessionFactoryRef为该数据源的工厂名
@MapperScan(basePackages = "com.example.demo.mapper", sqlSessionFactoryRef = "SqlSessionFactory1")
public class OneSqlConfig {

    //Primary注解表示此配置类为主数据源
    @Primary
    @Bean
    //ConfigurationProperties引入yml中主数据源的配置
    @ConfigurationProperties(prefix = "spring.datasource.one")
    public DataSource DataSource1() {
        return DataSourceBuilder.create().build();
    }

    @Primary
    @Bean
    public SqlSessionFactory SqlSessionFactory1(@Qualifier("DataSource1") DataSource dataSource) throws Exception {
        SqlSessionFactoryBean bean = new SqlSessionFactoryBean();
        bean.setDataSource(dataSource);
        bean.setMapperLocations(new PathMatchingResourcePatternResolver().getResources("classpath:mapper/*.xml"));
        return bean.getObject();
    }

    @Primary
    @Bean
    public DataSourceTransactionManager TransactionManager1(@Qualifier("DataSource1") DataSource dataSource) {
        return new DataSourceTransactionManager(dataSource);
    }

    @Primary
    @Bean
    public SqlSessionTemplate SqlSessionTemplate1(@Qualifier("SqlSessionFactory1") SqlSessionFactory sqlSessionFactory) throws Exception {
        return new SqlSessionTemplate(sqlSessionFactory);
    }

}
TwoSqlConfig.java:
package com.example.demo.config;

import javax.sql.DataSource;
import org.apache.ibatis.session.SqlSessionFactory;
import org.mybatis.spring.SqlSessionFactoryBean;
import org.mybatis.spring.SqlSessionTemplate;
import org.mybatis.spring.annotation.MapperScan;
import org.springframework.beans.factory.annotation.Qualifier;
import org.springframework.boot.context.properties.ConfigurationProperties;
import org.springframework.boot.jdbc.DataSourceBuilder;
import org.springframework.context.annotation.Bean;
import org.springframework.context.annotation.Configuration;
import org.springframework.core.io.support.PathMatchingResourcePatternResolver;
import org.springframework.jdbc.datasource.DataSourceTransactionManager;

@Configuration
//配置数据源扫码mapper路径,sqlSessionFactoryRef为该数据源的工厂名
@MapperScan(basePackages = "com.example.demo.twomapper", sqlSessionFactoryRef = "SqlSessionFactory2")
public class TwoSqlConfig {

    //从数据源不使用Primary注解
    @Bean
    @ConfigurationProperties(prefix = "spring.datasource.two")
    public DataSource DataSource2() {
        return DataSourceBuilder.create().build();
    }

    @Bean
    public SqlSessionFactory SqlSessionFactory2(@Qualifier("DataSource2") DataSource dataSource) throws Exception {
        SqlSessionFactoryBean bean = new SqlSessionFactoryBean();
        bean.setDataSource(dataSource);
        //配置xml的扫码路劲
        bean.setMapperLocations(new PathMatchingResourcePatternResolver().getResources("classpath:twomapper/*.xml"));
        return bean.getObject();
    }

    @Bean
    public DataSourceTransactionManager TransactionManager2(@Qualifier("DataSource2") DataSource dataSource) {
        return new DataSourceTransactionManager(dataSource);
    }

    @Bean
    public SqlSessionTemplate SqlSessionTemplate2(@Qualifier("SqlSessionFactory2") SqlSessionFactory sqlSessionFactory) throws Exception {
        return new SqlSessionTemplate(sqlSessionFactory);
    }

}
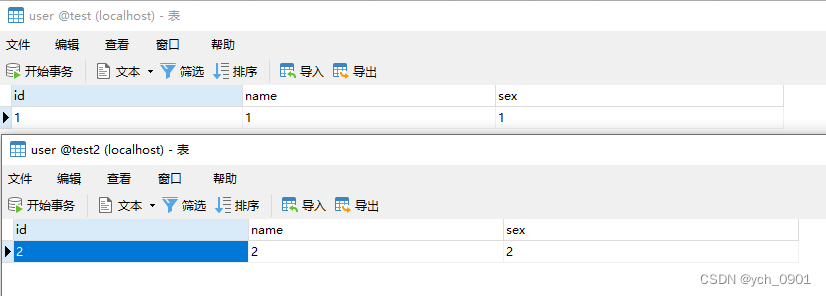
2.数据库及表结构
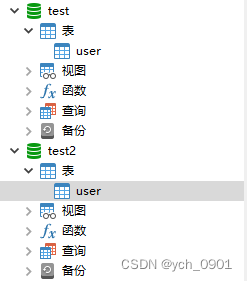
两张表结构相同

3.创建Test类存储数据
public class Test {

    private String id;

    private String name;

    private String sex;

}
4.编写Mapper和xml方法
两个Mapper相同
public interface testMapper {
    Test select(String id);
}
两个xml相同
<?xml version="1.0" encoding="UTF-8"?>
<!DOCTYPE mapper PUBLIC "-//mybatis.org//DTD Mapper 3.0//EN" "http://mybatis.org/dtd/mybatis-3-mapper.dtd">
<mapper namespace="com.example.demo.mapper.testMapper">
    <select id="select" resultType="com.example.demo.entity.Test" parameterType="java.lang.String">
        select * from user where id = #{id, jdbcType = VARCHAR}
    </select>
</mapper>
5.编写Controller方法
package com.example.demo.controller;

import com.example.demo.entity.Test;
import com.example.demo.mapper.testMapper;
import com.example.demo.twomapper.test2Mapper;
import org.springframework.beans.factory.annotation.Autowired;
import org.springframework.web.bind.annotation.RequestMapping;
import org.springframework.web.bind.annotation.RestController;

@RestController
@RequestMapping("hello")
public class HelloController {

    @Autowired
    private testMapper testMapper;

    @Autowired
    private test2Mapper test2Mapper;

    @RequestMapping("test")
    public void test(){
        Test test = testMapper.select("1");
        test = test2Mapper.select2("2");
        System.out.println("success");
    }

}
三、DeBug测试

总结
以上就是今天要讲的内容,本文仅仅简单介绍了MyBatisPlus连接多数据源的方法,可方便处理分库的业务和读写分离操作。


 1万+
1万+


 被折叠的 条评论
为什么被折叠?
被折叠的 条评论
为什么被折叠?
 到【灌水乐园】发言


