


1. 适用范围
Service主要使用在后台比较耗时和运行时间较长的逻辑。但是在service中使用 Thread.currentThread().getId() 获取得到的却是1,也就是主线程。如果想要在服务里执行耗时的逻辑,也需要创建一个子线程,否则也会阻塞线程。
2. 生命周期

左图是startService()所创建;右图是bindService()所创建。
3. Service与Activity通信
目的就是让Activity指定Service去执行什么任务,这样一个简单操作。由于直接启动和关闭Service相信大家都会,在这就先不说了,无非就是调用了startService( )和stopService( ),参数是一个意图。
首先,先把AndroidManifest.xml中先将准备使用的Service注册上。
<service android:name=".BindService"/>两个按钮,分别是开始绑定和解除绑定的按钮。
    <Button
        android:layout_width="match_parent"
        android:layout_height="wrap_content"
        android:text="bind service"
        android:onClick="bindService"/>

    <Button
        android:layout_width="match_parent"
        android:layout_height="wrap_content"
        android:text="unbind service"
        android:onClick="unbindService"/>
在Activity中把两个点击事件实现。这里我为了偷懒用了onClick,平时我还是用OnClickListener的。
public void bindService(View view)

public void unbindService(View view)
先在Service中实现一个继承自Binder的内部类,用来进行通讯。里面随便写一个方法,模拟做一些事情。
    class MyBinder extends Binder {

        public void download() {
            Log.e(TAG, "start download ...");
        }
    }
这时候就要把onBind()这个方法中的返回值设置成刚才的内部类了。
    private MyBinder mBinder = new MyBinder();

    @Override
    public IBinder onBind(Intent intent) {
        return mBinder;
    }
这样,Service中的修改基本就算结束了。接下来就是修改Activity了,在Activity中,主要就是创建了一个ServiceConnection这样一个类,并重写他它的两个方法onServiceConnected()和onServiceDisconnected(),值得注意的是,建立关联的时候:在onBind()方法中需返回一个IBinder实例,不然onServiceConnected方法不会调用;在解除关联的时候:onServiceDisconnected() 在连接正常关闭的情况下是不会被调用的, 该方法只在Service 被破坏了或者被杀死的时候调用。
经过向下转型,得到了MyBinder的实例,就可以随便调用MyBinder的任何方法了。
    private BindService.MyBinder myBinder;

    private ServiceConnection conn = new ServiceConnection() {
        @Override
        public void onServiceConnected(ComponentName componentName, IBinder iBinder) {
            Log.e(TAG, "onServiceConnected()开始绑定");
            myBinder = (BindService.MyBinder) iBinder;
            myBinder.download();
        }

        @Override
        public void onServiceDisconnected(ComponentName componentName) {
            Log.e(TAG, "onServiceDisconnected()解除绑定");
        }
    };
最后,再把绑定和解除绑定的按钮添加完成。三个参数分别是意图;ServiceConnection;标志位。其中BIND_AUTO_CREATE表示在Activity和Service建立关联后自动创建Service。
    public void bindService(View view) {
        Log.e(TAG, "bindService()");
        Intent bindIntent = new Intent(MainActivity.this, BindService.class);
        bindService(bindIntent, conn, BIND_AUTO_CREATE);
    }

    public void unbindService(View view) {
        Log.e(TAG, "unbindService()");
        unbindService(conn);
    }
这时候注意如果同时使用了startService()和bindService()方法来启动Service,这时候,只使用stopService()或者unbindService()方法都是关不掉的,解决方法就是把两个方法都用一遍:先使用stopService(),service还依然存在,再使用unbindService(),service就关闭了。
4. 通知栏的Service
这一类Service是为了满足将数据的更新,且一直在前台显示的需求,类似于通知。事实上就是通知。:-)
同样,先起开一个Service。
    public void startNotificationService(View view) {
        Log.e(TAG, "startNotificationService()");
        Intent startNotificationService = new Intent(MainActivity.this,NotificationService.class);
        startService(startNotificationService);
    }
并在AndroidManifest里注册这个Service。
<service android:name=".NotificationService"/>接下来,就是通知栏的实现了,之前的那种setLatestEventInfo方式早已被弃用,所以我们直接用新的方式。
首先,我们先构建一个Notification,Notification的基本样式就在这里成型了。这里因为Service本身就是Context的一个实现,所以,我们直接传this就可以了。
        Notification notification = new Notification.Builder(this)
                .setContentTitle("This is Content Title")
                .setContentText("This is Content Text")
                .setSmallIcon(R.drawable.ic_launcher_foreground)
                .setLargeIcon(BitmapFactory.decodeResource(this.getResources(), R.drawable.suyichen))
                .build();
对应的:

然后,拿到NotificationManager。
NotificationManager notificationManager = (NotificationManager) this.getSystemService(this.NOTIFICATION_SERVICE);
最后,创建。第一个参数唯一的标识该Notification,第二个参数就是Notification对象。
notificationManager.notify(1, notification);一个炒鸡简单的通知栏就实现了。
5. 远程Service
这不禁就要问了,远程Service和本地Service有什么区别呢?
远程嘛,顾名思义,就是说这个Service和调用者不存在一个进程中;相对的,本地Service和调用者是在一个进程中的。
那相对于本地Service,远程Service有什么优势吗?
远程Service可以常驻在后台,不受其他的Activity影响,可以说非常灵活。比如说,现在有一个非常非常耗时的操作需要执行,但是又不能把他放到本地Service中,因为本地Service其实是在主线程中运行的,这样的耗时操作会阻塞进程,造成ANR,这时候,远程Service就可以大展身手了。
使用场景当然是多个应用程序共享一个后台服务了。
好了,说了这么多,看一下具体实现吧,比如说我就是简单的获取一个字符串这样一个小功能。我这里全都写到了一个应用,在实际使用的时候大多是两个应用。
服务端:
首先需要建一个aidl文件,并定义他所需要的方法。
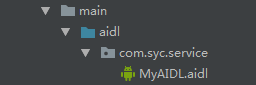
interface MyAIDL {

  String getString();
}
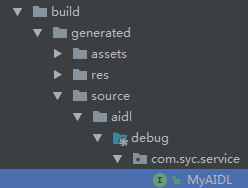
这时候,一定要把studio重新build一下……,然后就在build - >generated ->source ->aidl->debug的目录下生成一个aidl文件。
紧接着,需要建一个Service,来提供一些远程服务。这里先将MyAIDL.Stub实现,然后重写里面的方法,最后onBind()方法中将MyAIDL.Stub的实现返回(Stub其实就是Binder的子类),主要的代码如下。
    @Override
    public IBinder onBind(Intent intent) {
        return new MyBind();
    }

    class MyBind extends MyAIDL.Stub{

        @Override
        public String getString() throws RemoteException {

            String string = "This is the string returned by the server";

            return string;
        }
    }
客户端:
首先将刚刚在服务端创建的MyAIDL原封不动的复制到客户端来(路径要一模一样),剩下的与绑定本地服务差不多。
    private MyAIDL myAIDL;

    //connect remote service
    private ServiceConnection remoteConn = new ServiceConnection() {
        @Override
        public void onServiceConnected(ComponentName name, IBinder service) {
            myAIDL = MyAIDL.Stub.asInterface(service);
            try {
                String str = myAIDL.getString();
                Log.e(TAG,"return :" + str);
            } catch (RemoteException e) {
                e.printStackTrace();
            }
        }

        @Override
        public void onServiceDisconnected(ComponentName name) {
            myAIDL = null;
        }
    };
剩下的,是开始绑定和解除绑定的地方了。
    public void startRemoteService(View view) {
        Log.e(TAG, "startRemoteService()");
        Intent remoteServiceIntent = new Intent();
        remoteServiceIntent.setAction("com.example.service.MyService");
        remoteServiceIntent.setPackage("com.syc.service");
        bindService(remoteServiceIntent,remoteConn,BIND_AUTO_CREATE);
    }

    public void stopRemoteService(View view) {
        Log.e(TAG, "stopRemoteService()");
        unbindService(remoteConn);
    }
上面的setAction是服务端的AndroidManifest.xml;setPackage是设置Service所在服务端的包名。
        <service
            android:name=".RemoteService"
            android:process=":remote">
            <intent-filter>
                <action android:name="com.example.service.MyService" />
            </intent-filter>
        </service>
OK,这样,全部的远程Service就实现了。

Android对这类数据的格式支持只能传递Java的基本数据类型、字符串、List或Map等。如果想传递一个自定义的类就必须要让这个类去实现Parcelable接口,并且要给这个类也定义一个同名的AIDL文件去实现。


 1711
1711


 被折叠的 条评论
为什么被折叠?
被折叠的 条评论
为什么被折叠?
 到【灌水乐园】发言


