


用法:
- @PropertySource 注解提供便利和声明的机制添加 PropertySource 到Spring的 Environment
- @PropertySource 和 @Value组合使用,可以将自定义属性文件中的属性变量值注入到当前类的使用@Value注解的成员变量中
- @PropertySource 和 @ConfigurationProperties组合使用,可以将属性文件与一个Java类绑定,将属性文件中的变量值注入到该Java类的成员变量中
- @EnableConfigurationProperties注解 和 @ConfigurationProperties组合使用
例子:
app.properties
name=tianming
age=18
db.name=root
db.password=admin
示例一:
AppConfig1.java
import org.springframework.beans.factory.annotation.Autowired;
import org.springframework.context.annotation.Configuration;
import org.springframework.context.annotation.PropertySource;
import org.springframework.core.env.Environment;


@Configuration
@PropertySource("classpath:/app.properties")
public class AppConfig {

	@Autowired
	Environment env;

}
示例二:
AppConfig2.java
import org.springframework.beans.factory.annotation.Value;
import org.springframework.context.annotation.PropertySource;
import org.springframework.stereotype.Component;

@Component
@PropertySource(value = {"/app.properties"})
public class AppConfig2 {

	@Value("${name}")
	public String name;

	@Value("${age}")
	public Integer age;

}
示例三:
AppConfig3.java
import org.springframework.boot.context.properties.ConfigurationProperties;
import org.springframework.context.annotation.PropertySource;
import org.springframework.stereotype.Component;

@Component
@PropertySource(value = {"/app.properties"})
@ConfigurationProperties(prefix = "db")
public class AppConfig3 {

	private String name;

	private String password;

	public String getName() {
		return name;
	}

	public void setName(String name) {
		this.name = name;
	}

	public String getPassword() {
		return password;
	}

	public void setPassword(String password) {
		this.password = password;
	}

}
示例四:
@EnableConfigurationProperties注解的作用是:使 使用 @ConfigurationProperties 注解的类生效。
如果一个配置类只配置@ConfigurationProperties注解,而没有使用@Component或者实现了@Component的其他注解,那么在IOC容器中是获取不到properties 配置文件转化的bean。说白了 @EnableConfigurationProperties 相当于把使用 @ConfigurationProperties 的类进行了一次注入。
简单点说@EnableConfigurationProperties的功能类似于@Component。
application.properties
dp.name=yiguang
dp.age=13
StudentConfig.class
import org.springframework.beans.factory.annotation.Value;
import org.springframework.boot.context.properties.ConfigurationProperties;
import org.springframework.boot.context.properties.EnableConfigurationProperties;
import org.springframework.context.annotation.PropertySource;
import org.springframework.stereotype.Component;

//@Component 使用@EnableConfigurationProperties替代
@ConfigurationProperties(prefix="dp") // 根据application.properties中的配置填充字段
//@PropertySource("classpath:config.properties") 如果使用此注解和@EnableConfigurationProperties一起使用,不报错,但是填充的字段为null
public class StudentConfig {

    public String name;

    public int age;

	public String getName() {
		return name;
	}

	public void setName(String name) {
		this.name = name;
	}

	public int getAge() {
		return age;
	}

	public void setAge(int age) {
		this.age = age;
	}


}
@EnableConfigurationProperties在实际项目中的使用场景
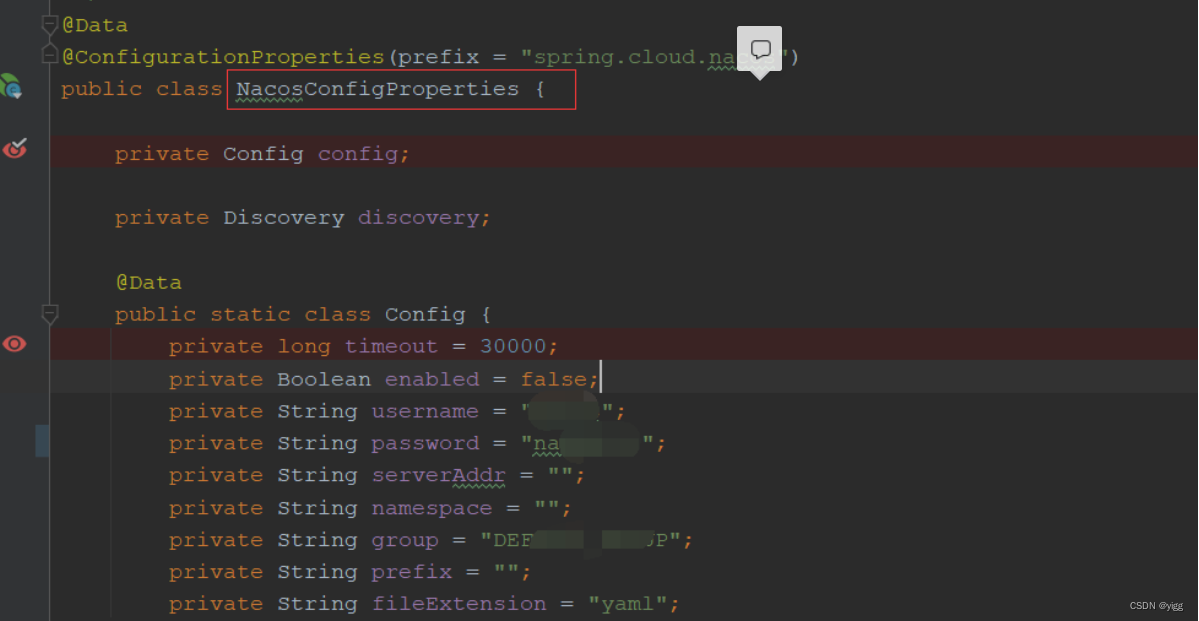
如下,在配置类NacosConfigAutoConfiguration的头上加注解@EnableConfigurationProperties(NacosConfigProperties.class),
而在NacosConfigProperties配置类本身并没有实现了@Component相关的注解,也就是说运行项目时,不会直接把NacosConfigProperties配置类注入到Spring 容器中,而是在执行NacosConfigAutoConfiguration这个配置类时才会去把NacosConfigProperties类注入到spring

如下,NacosConfigProperties类本身并没有@Component相关注解:
例:
Application.class
import org.springframework.boot.SpringApplication;
import org.springframework.boot.autoconfigure.SpringBootApplication;
import org.springframework.boot.builder.SpringApplicationBuilder;
import org.springframework.boot.context.properties.EnableConfigurationProperties;
import org.springframework.boot.web.servlet.ServletComponentScan;
import org.springframework.boot.web.support.SpringBootServletInitializer;

import springboot111.springboot.config.StudentConfig;

@SpringBootApplication
@ServletComponentScan
@EnableConfigurationProperties(StudentConfig.class) // 注意此处
public class Application extends SpringBootServletInitializer {

    @Override
    protected SpringApplicationBuilder configure(SpringApplicationBuilder application) {
        return application.sources(Application.class);
    }

    public static void main(String[] args) {
        SpringApplication.run(Application.class, args);
    }
}
结果:
HelloController.java
import org.springframework.beans.factory.annotation.Autowired;
import org.springframework.core.env.Environment;
import org.springframework.web.bind.annotation.RequestMapping;
import org.springframework.web.bind.annotation.RestController;

import springboot111.springboot.config.AppConfig;
import springboot111.springboot.config.AppConfig2;
import springboot111.springboot.config.AppConfig3;
import springboot111.springboot.config.StudentConfig;

@RestController
public class HelloController {

	@Autowired
	Environment env;

	@Autowired
	AppConfig2 appConfig2;

	@Autowired
	AppConfig3 appConfig3;

	@Autowired
	StudentConfig studentConfig;

    @RequestMapping("/hello")
    public String hello() {
    	System.out.println(env.getProperty("name")); // tianming
        return "Hello Spring Boot!";
    }

    @RequestMapping("/hello2")
    public String hello2() {
    	System.out.println(appConfig2.name);	// tianming
    	System.out.println(appConfig2.age);		// 18
        return "Hello Spring Boot!";
    }

    @RequestMapping("/hello3")
    public String hello3() {
    	System.out.println(appConfig3.getName());	// root
    	System.out.println(appConfig3.getPassword());	// admin
        return "Hello Spring Boot!";
    }

    @RequestMapping("/hello4")
    public String hello() {
    	System.out.println(studentConfig.name); // yiguang
        return "Hello Spring Boot!";
    }

}


 291
291


 被折叠的 条评论
为什么被折叠?
被折叠的 条评论
为什么被折叠?
 到【灌水乐园】发言


