


一、新建 package.json
在一个文件夹下,新建一个 package.json ,并初始填入以下内容
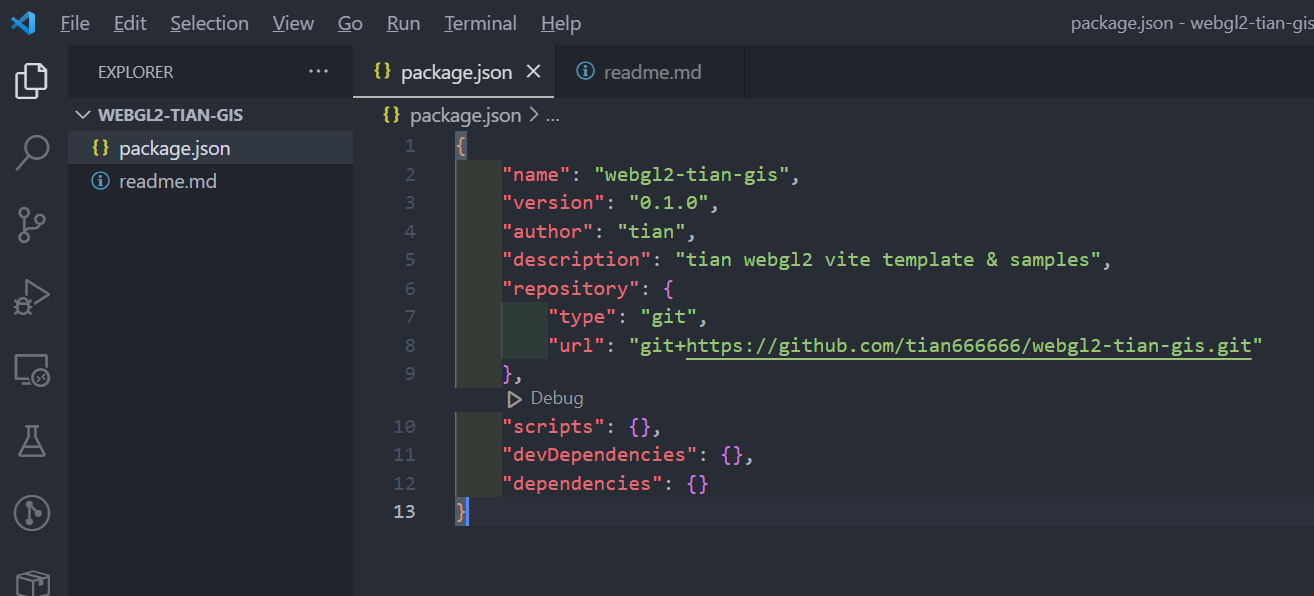
{
    "name": "webgl2-tian-gis",
    "version": "0.1.0",
    "author": "tian",
    "description": "tian webgl2 vite template & samples",
    "repository": {
        "type": "git",
        "url": "git+https://github.com/tian666666/webgl2-tian-gis.git"
    },
    "scripts": {},
    "devDependencies": {},
    "dependencies": {}
}
二、新建 readme.md
新建 readme.md,并填入以下初始化内容
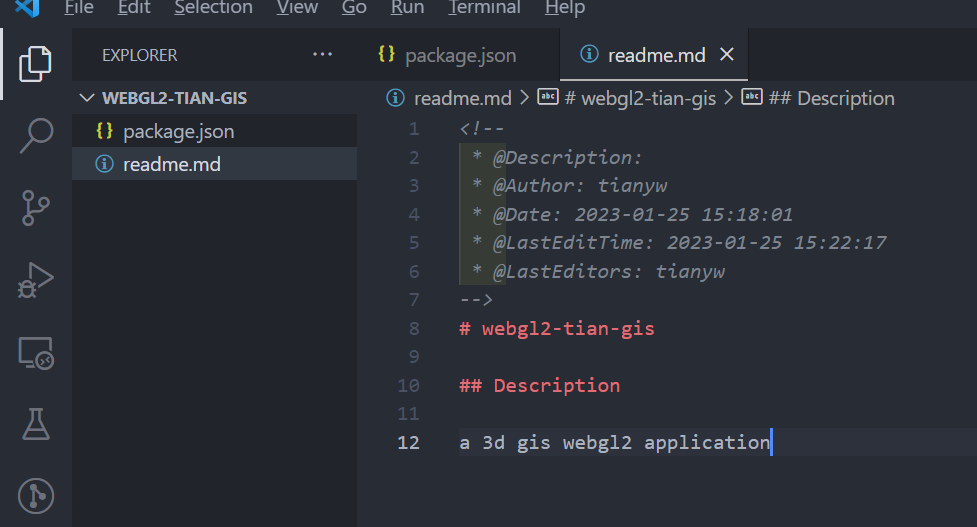
<!--
* @Description:
* @Author: tianyw
* @Date: 2023-01-25 15:18:01
* @LastEditTime: 2023-01-25 15:22:17
* @LastEditors: tianyw
-->
# webgl2-tian-gis
## Description
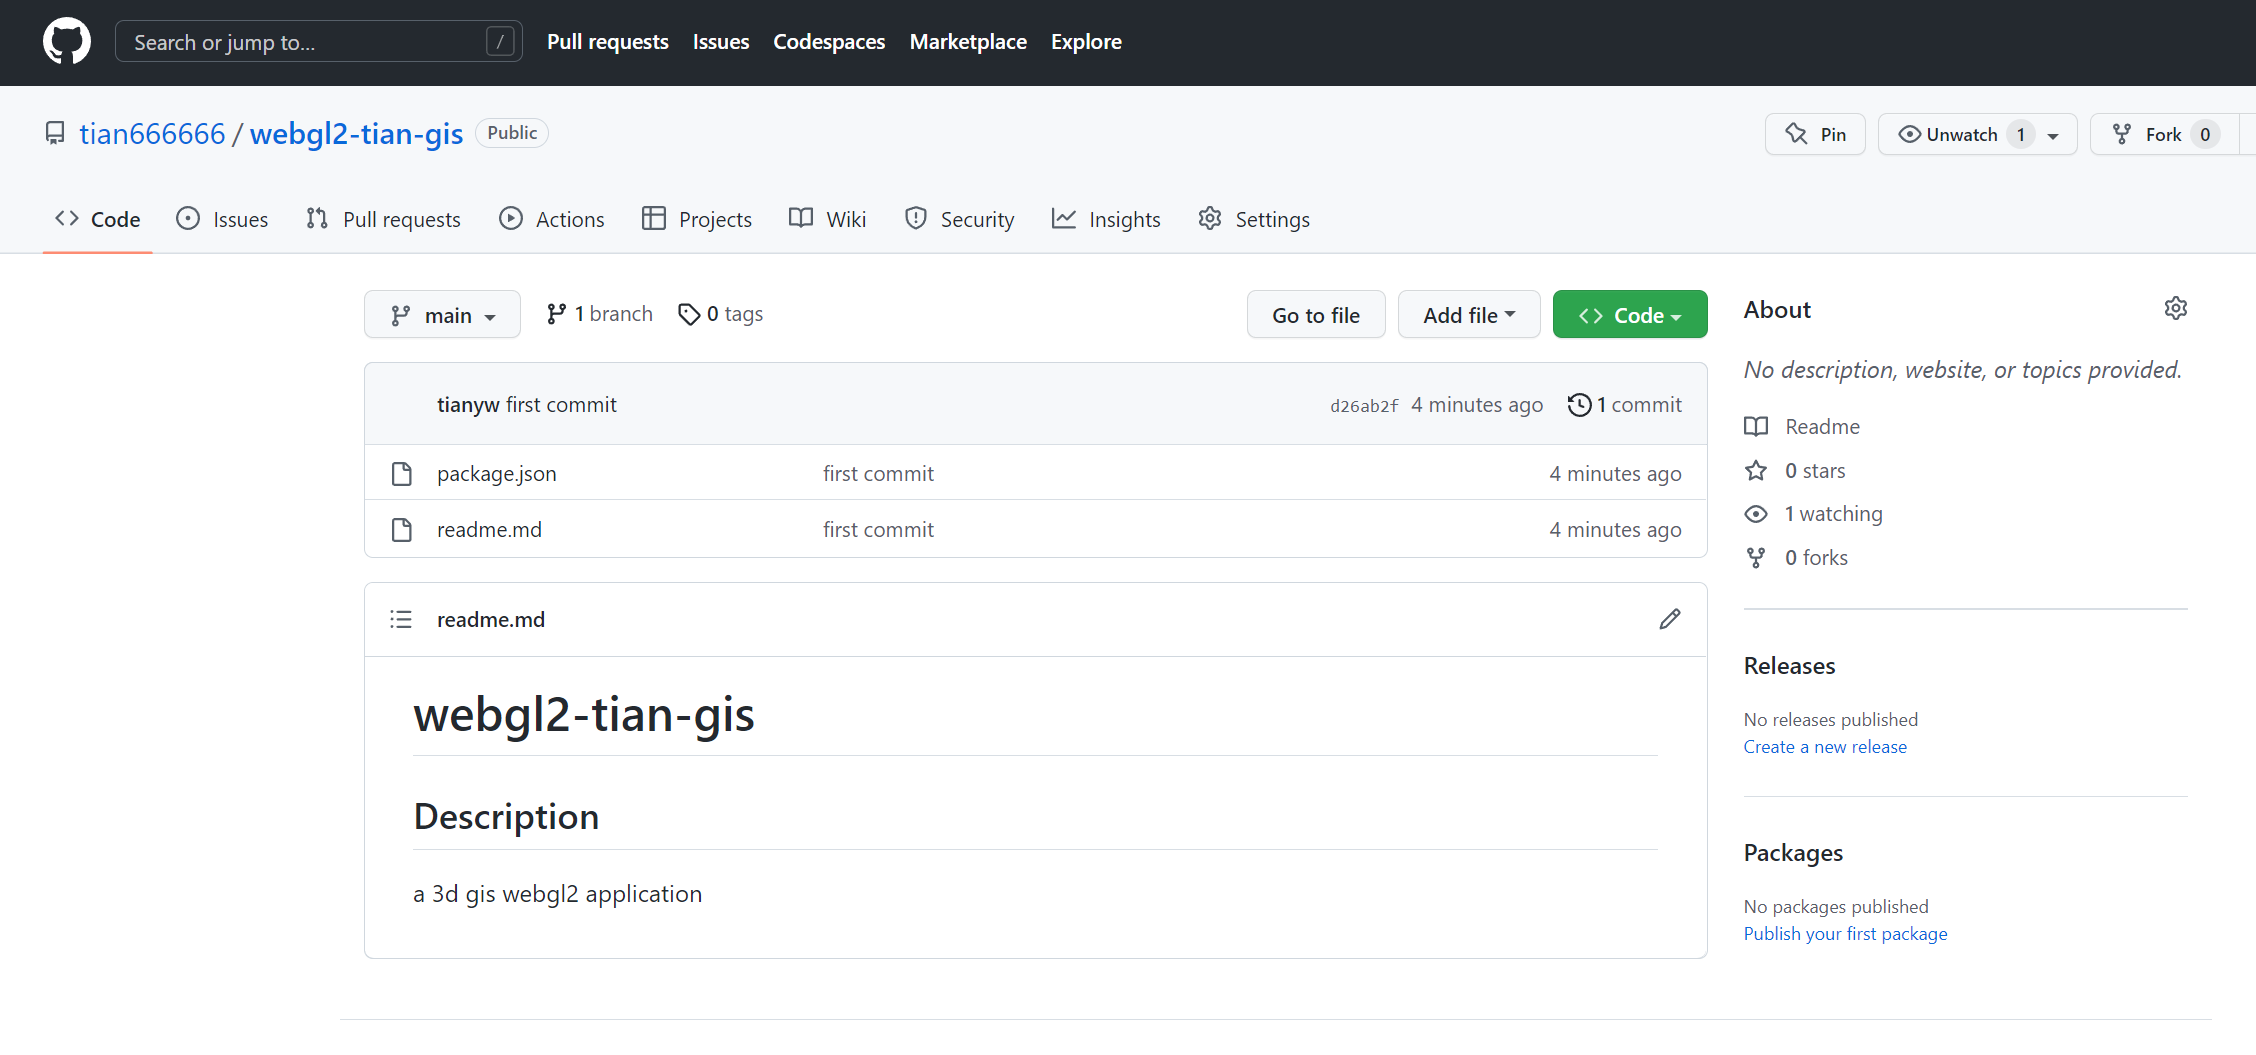
a 3d gis webgl2 application三、上传至 github
1、git init
执行 git init 命令

2、git add .
执行 git add . 命令

3、git commit -m "first commit"
执行 git commit 命令 提交

4、git branch -M main
执行 git branch -M 命令

5、git remote add origin https://github.com/tian666666/webgl2-tian-gis.git
执行建立远程连接 github

6、git push -u origin main
提交代码

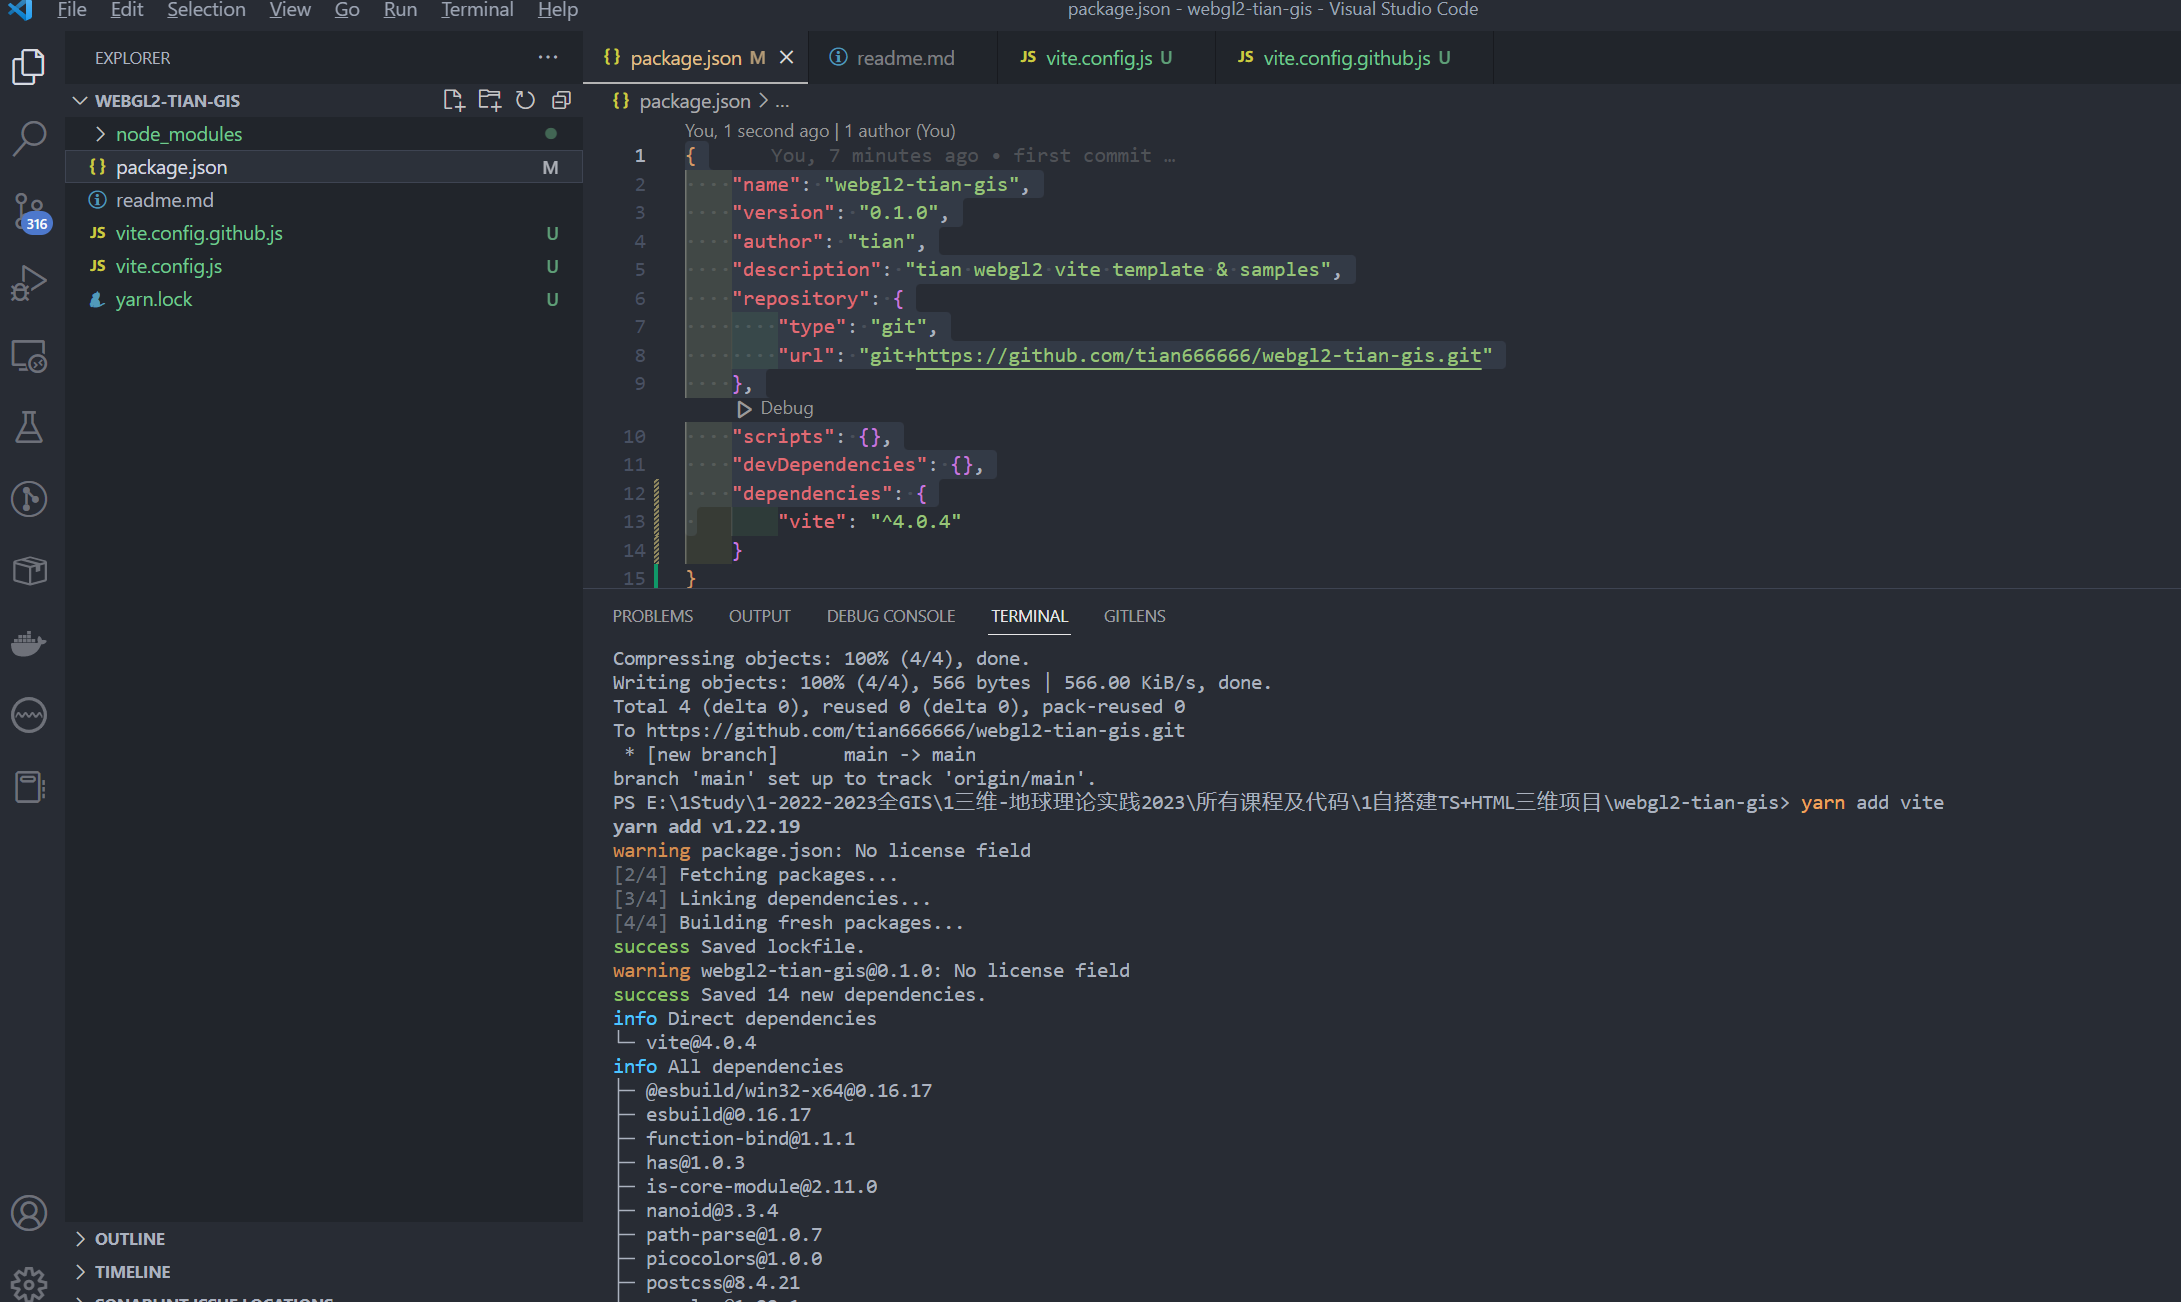
四、vite 、ts 使用及配置
1、yarn add vite
先安装 vite 依赖。
2、npm install -g typescript
全局安装 typescript 后,执行 tsc -version 来查看当前 typescript 版本。

3、tsconfig.json 配置
新建 tsconfig.json ,并配置如下:
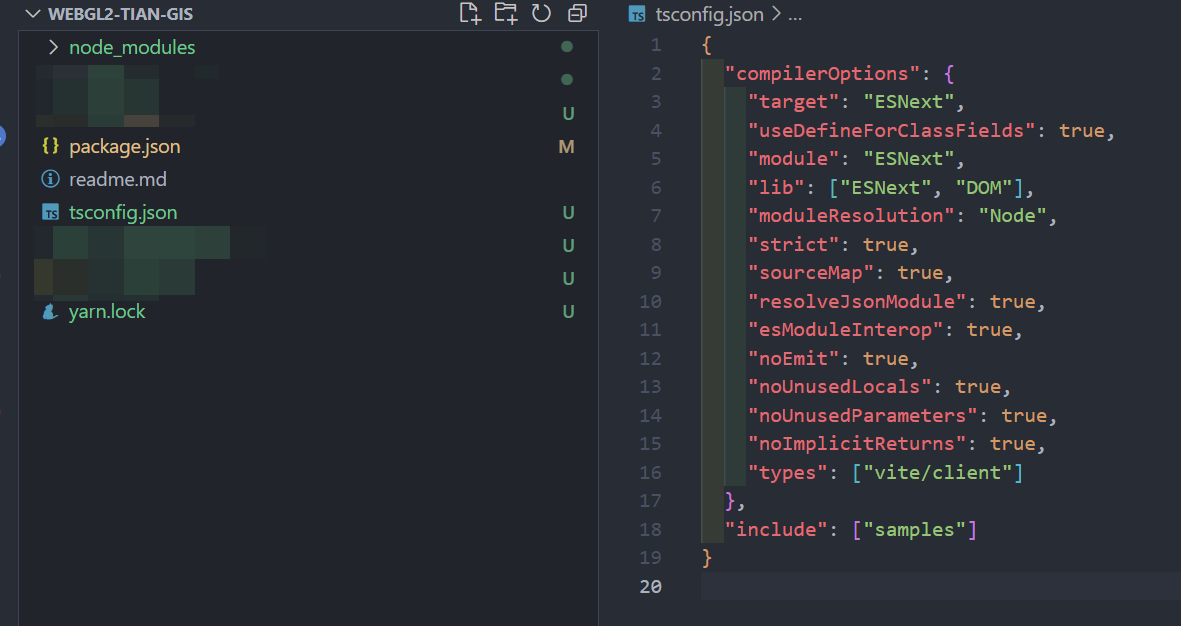
{
  "compilerOptions": {
    "target": "ESNext",
    "useDefineForClassFields": true,
    "module": "ESNext",
    "lib": ["ESNext", "DOM"],
    "moduleResolution": "Node",
    "strict": true,
    "sourceMap": true,
    "resolveJsonModule": true,
    "esModuleInterop": true,
    "noEmit": true,
    "noUnusedLocals": true,
    "noUnusedParameters": true,
    "noImplicitReturns": true,
    "types": ["vite/client"]
  },
  "include": ["samples"]
}
其中 "include": ["samples"] 表示 设置需要进⾏编译的⽂件,⽀持路径模式匹配
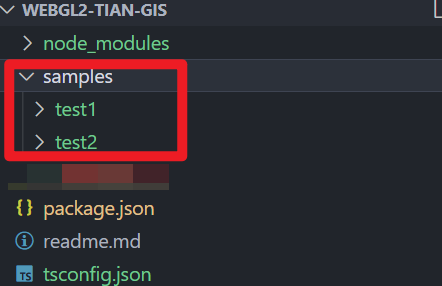
因此需要根目录下新建 samples 文件夹。
4、新建 samples 文件夹
samples 文件夹用于表示所有 webgl 的 demo 的存放位置,这里规定,samples 文件夹下的文件夹具备以下特性:每个文件夹都是一个单独的 demo、每个文件夹至少有 2 个文件:即与文件夹同名的 html 文件 和 与文件夹同名的 ts 文件、且 该 html 引用了同名的 ts 文件。具体如:samples 文件夹下有个 test 文件夹,test 文件夹下有 test.html 和 test.ts,test.html 中引用了 test.ts。本次项目新建如下:
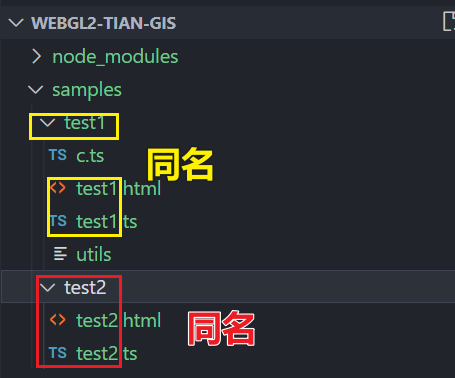
test1.html 中使用了 test1.ts
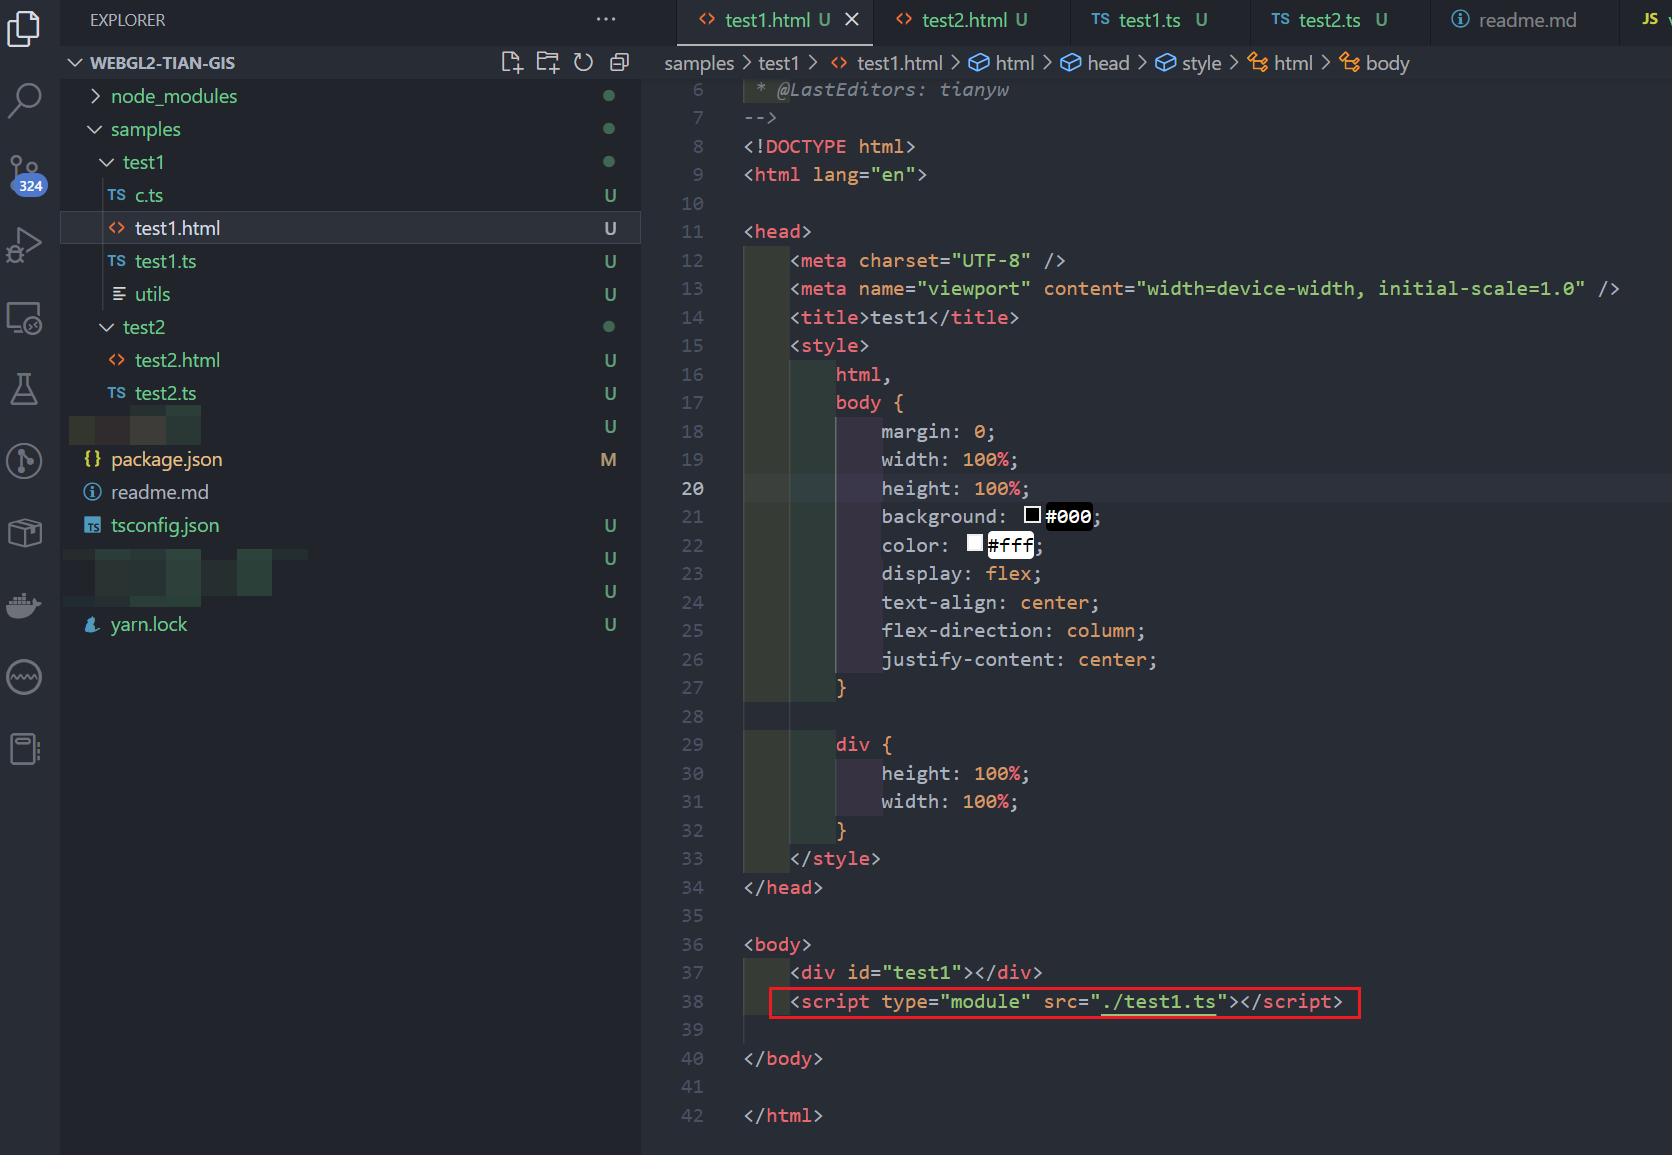
所有文件夹及文件和代码如下:
test1 文件夹下:
test.html 内容:
    <!--
 * @Description:
 * @Author: tianyw
 * @Date: 2022-11-11 12:50:23
 * @LastEditTime: 2023-01-25 15:44:42
 * @LastEditors: tianyw
-->
<!DOCTYPE html>
<html lang="en">

<head>
    <meta charset="UTF-8" />
    <meta name="viewport" content="width=device-width, initial-scale=1.0" />
    <title>test1</title>
    <style>
        html,
        body {
            margin: 0;
            width: 100%;
            height: 100%;
            background: #000;
            color: #fff;
            display: flex;
            text-align: center;
            flex-direction: column;
            justify-content: center;
        }

        div {
            height: 100%;
            width: 100%;
        }
    </style>
</head>

<body>
    <div id="test1"></div>
    <script type="module" src="./test1.ts"></script>

</body>

</html>
test1.ts 文件内容:
  /*
 * @Description:
 * @Author: tianyw
 * @Date: 2023-01-25 15:40:47
 * @LastEditTime: 2023-01-25 16:07:19
 * @LastEditors: tianyw
 */
import { cprint } from "./c";
function run() {
  const divEl = document.getElementById("test1") as HTMLElement;

  const childDivEl = document.createElement("div");
  childDivEl.innerHTML = "I am Test1";

  divEl.appendChild(childDivEl);
}
run();
cprint();
c.ts 文件内容:
   /*
 * @Description:
 * @Author: tianyw
 * @Date: 2023-01-25 16:04:28
 * @LastEditTime: 2023-01-25 16:05:32
 * @LastEditors: tianyw
 */
export function cprint() {
  console.log("test1打印");
}
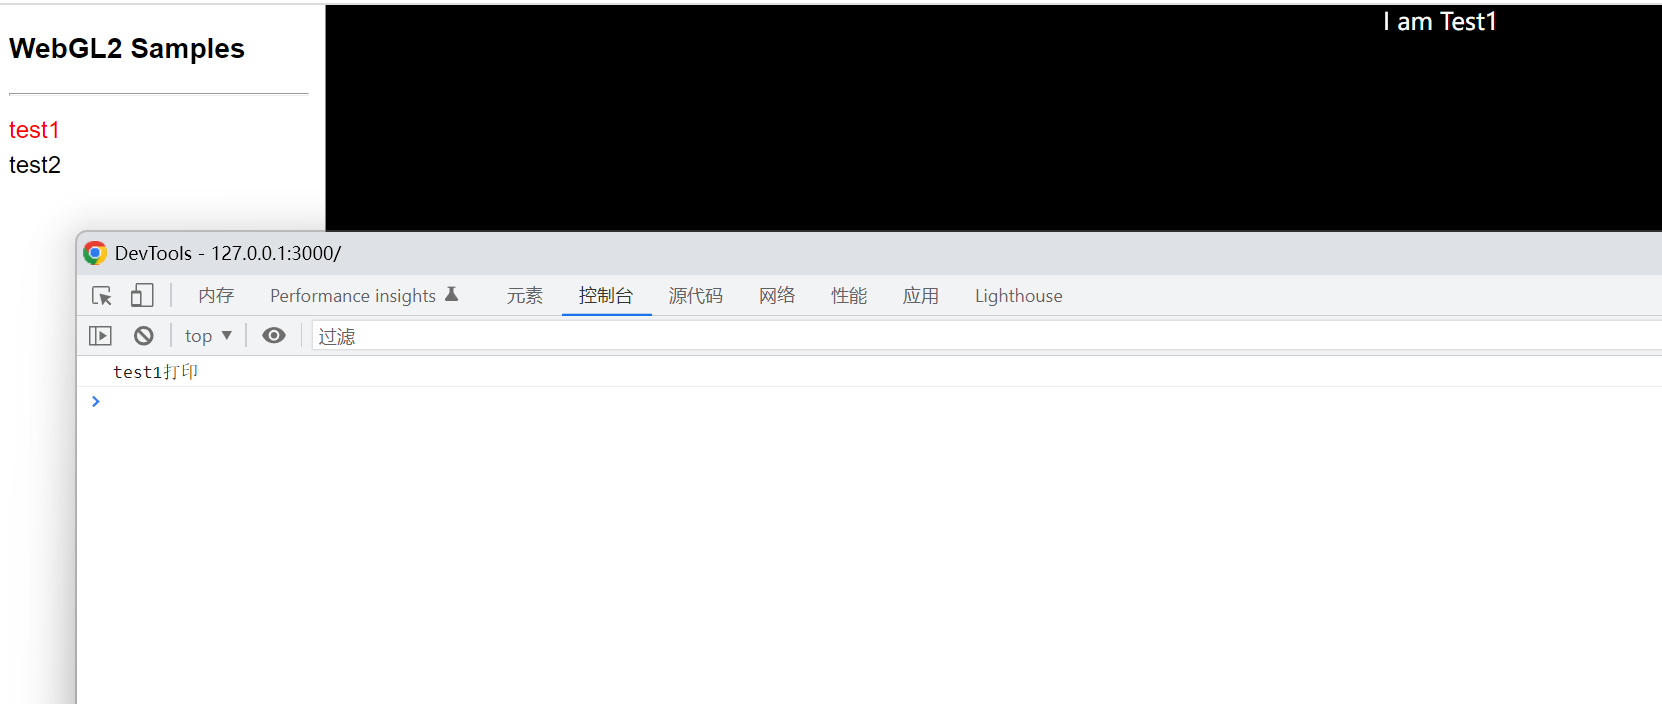
可以看到,如果 test1.html 运行的话,test1.html 调用了 test1.ts,test1.ts 的 run 方法执行了向页面中添加 I am Test1,cprint 方法调用了 c.ts 执行了再控制台打印 "test1 打印" 的内容。
test2 文件夹内容:
test2.html 文件内容:
<!--
 * @Description:
 * @Author: tianyw
 * @Date: 2022-11-11 12:50:23
 * @LastEditTime: 2023-01-25 15:44:32
 * @LastEditors: tianyw
-->
<!DOCTYPE html>
<html lang="en">

<head>
    <meta charset="UTF-8" />
    <meta name="viewport" content="width=device-width, initial-scale=1.0" />
    <title>test2</title>
    <style>
        html,
        body {
            margin: 0;
            width: 100%;
            height: 100%;
            background: #000;
            color: #fff;
            display: flex;
            text-align: center;
            flex-direction: column;
            justify-content: center;
        }

        div {
            height: 100%;
            width: 100%;
        }
    </style>
</head>

<body>
    <div id="test2"></div>
    <script type="module" src="./test2.ts"></script>

</body>

</html>
test2.ts 文件内容:
 /*
 * @Description:
 * @Author: tianyw
 * @Date: 2023-01-25 15:40:52
 * @LastEditTime: 2023-01-25 16:17:37
 * @LastEditors: tianyw
 */
function run() {
  const divEl = document.getElementById("test2") as HTMLElement;

  const childDivEl = document.createElement("div");
  childDivEl.innerHTML = "I am Test2";

  divEl.appendChild(childDivEl);
}
run();
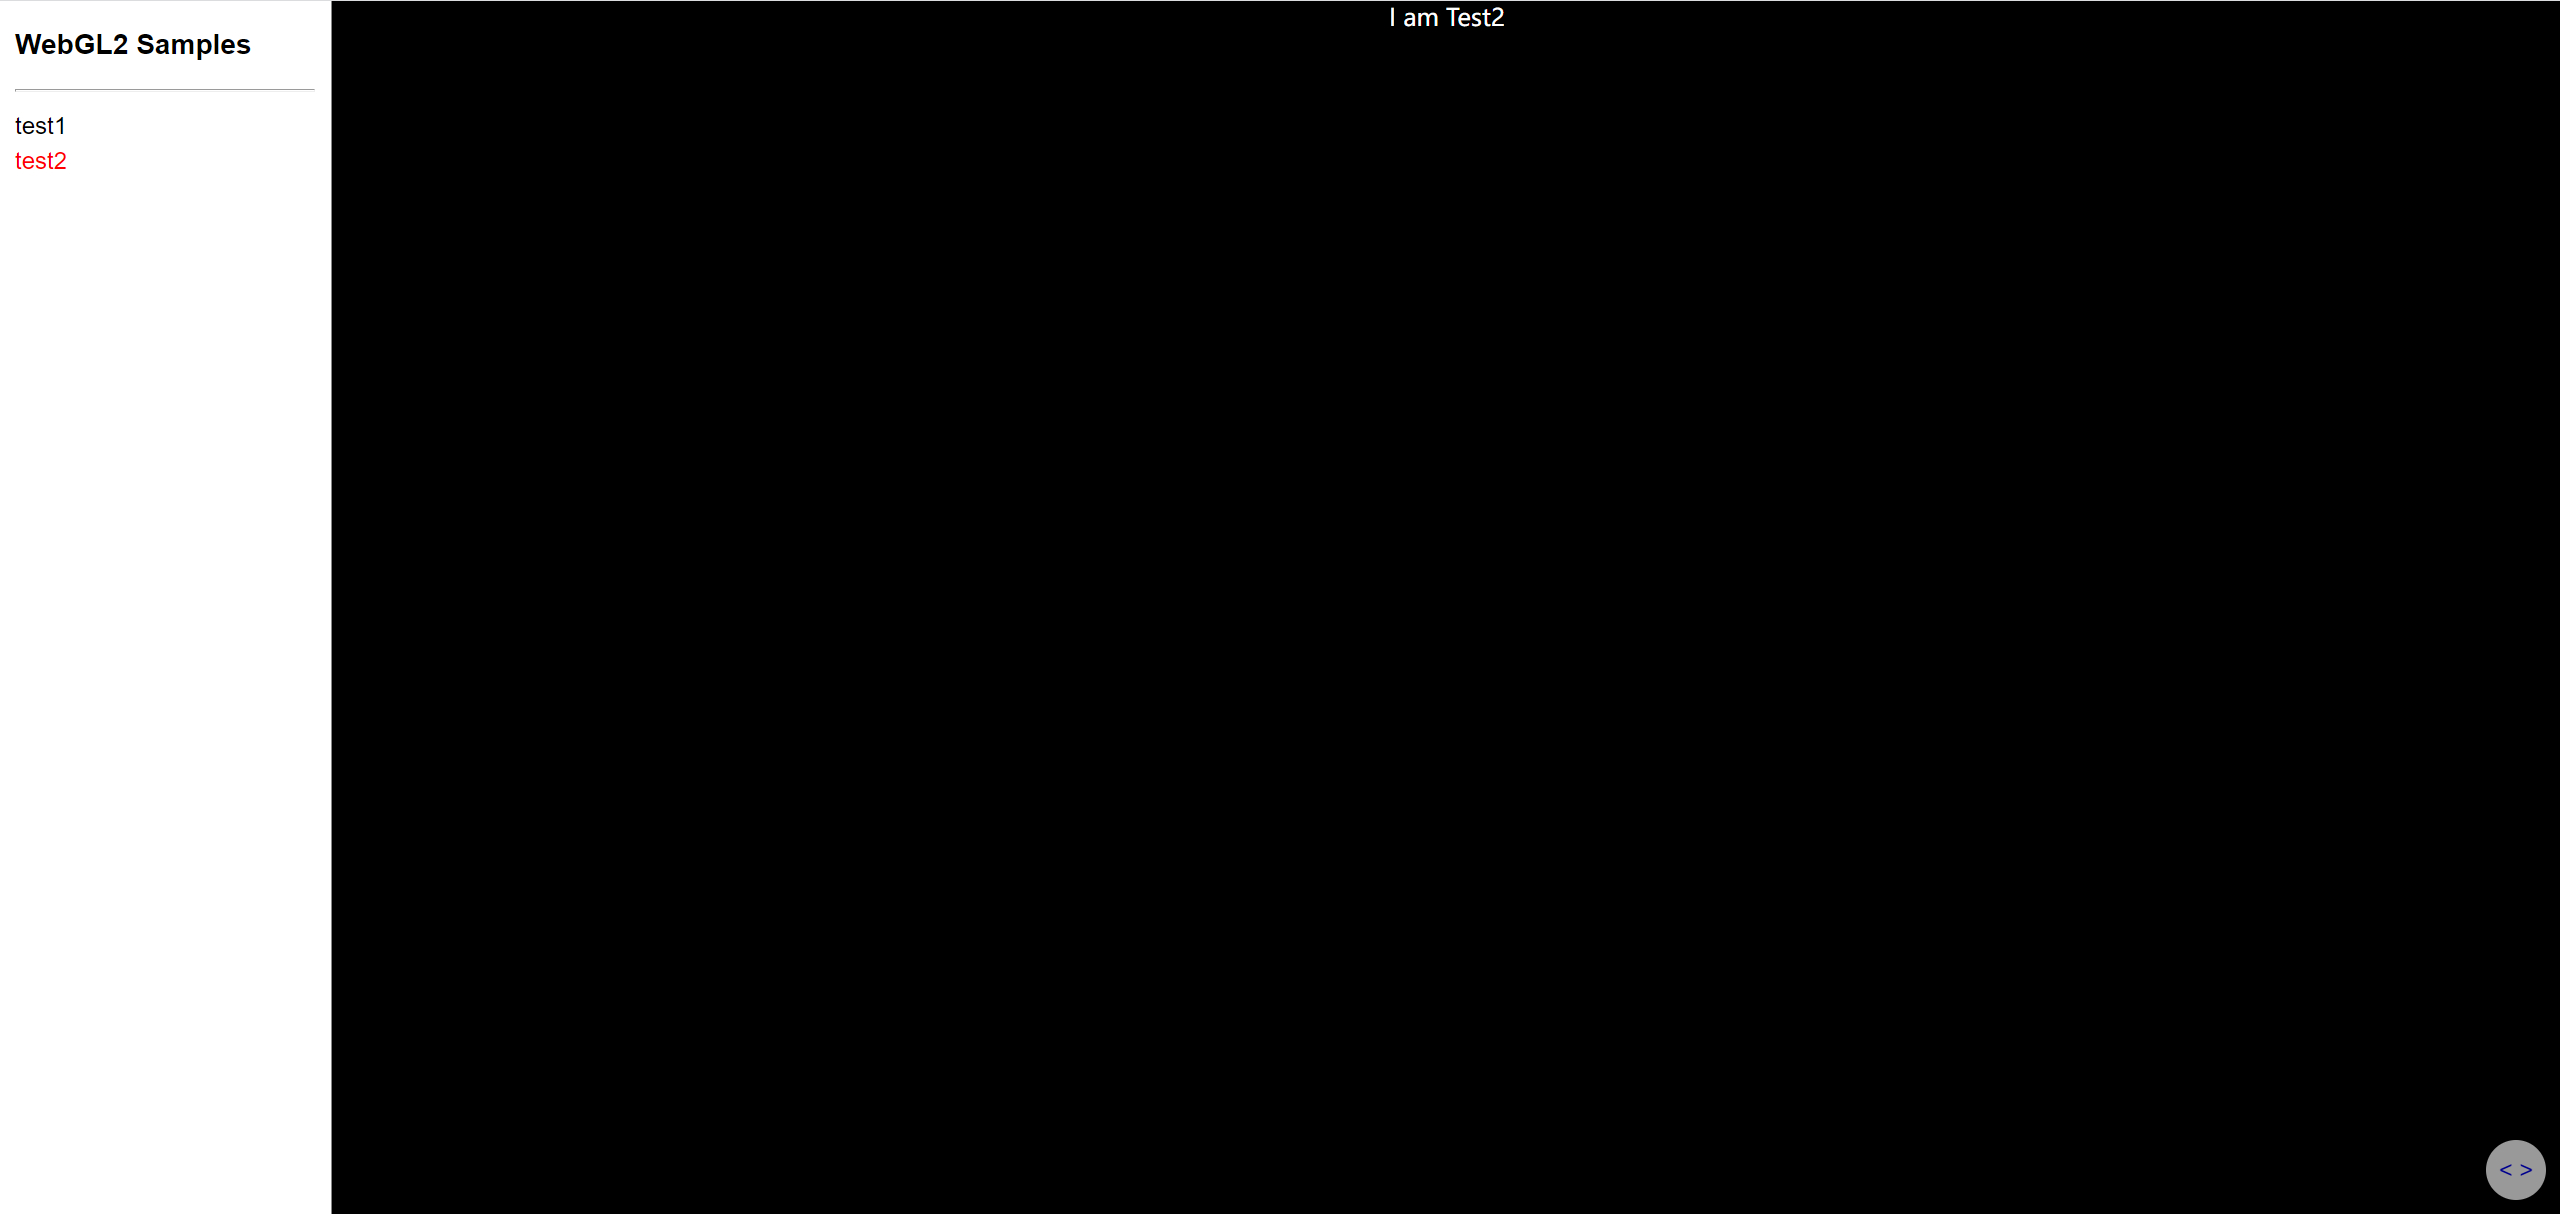
可以看到,如果 test2.html 运行的话,test2.html 调用了 test2.ts,test2.ts 的 run 方法执行了向页面中添加 I am Test2。
此时缺少一个如何统一选择运行 samples 下的各个 demo 的入口。
这时就需要 index.html 作为单页面应用的入口。
新建 index.html
index.html 的完整内容为:
<!DOCTYPE html>
<html lang="en">
<head>
<meta charset="UTF-8" />
<meta name="viewport" content="width=device-width, initial-scale=1.0" />
<title>tian Webgpu Samples</title>
<style>
html,
body {
font-family: Avenir, Helvetica, Arial, sans-serif;
-webkit-font-smoothing: antialiased;
margin: 0;
width: 100%;
height: 100%;
display: flex;
}
.menu {
width: 200px;
height: 100%;
border-right: 1px solid #888;
overflow: auto;
padding: 0 10px;
}
.menu>a {
display: block;
margin: 5px 0;
color: #045b88;
text-decoration: none;
cursor: pointer;
}
a {
margin-top: 5px;
}
a:hover {
text-decoration: underline;
color: blue;
}
a.active {
color: red;
}
iframe {
flex-grow: 1;
border: none;
}
#webgl2samplediv {
display: grid;
}
#webgl2samplediv>a {
cursor: pointer;
}
.src {
position: fixed;
right: 10px;
bottom: 10px;
height: 40px;
width: 40px;
background: #fff;
text-align: center;
font-size: 16px;
line-height: 40px;
border-radius: 50%;
border: none;
opacity: 0.6;
cursor: pointer;
text-decoration: none !important;
}
.src:hover {
opacity: 1;
}
</style>
</head>
<body>
<div class="menu">
<div>
<h3>WebGL2 Samples</h3>
<hr>
 <div id="webgl2samplediv">
                <a class="sample" target="test1">test1</a>
                <a class="sample" target="test2">test2</a>
            </div>
</div>
</div>
<iframe title="d"></iframe>
<a class="src" target="_blank">< ></a>
<script>
const iframe = document.querySelector('iframe')
const button = document.querySelector('.src')
const samples = document.querySelectorAll('.sample')
for (let sample of samples) {
sample.addEventListener('click', () => {
window.location.hash = sample.target
iframe.src = './samples/' + sample.target + "/" + sample.target + '.html'
button.href = 'https://github.com/tian666666/webgl2-tian-gis.git' + sample.target + '.ts'
const activeEle = document.querySelector('.active');
if (activeEle && activeEle.classList) {
document.querySelector('.active').classList.remove('active')
}
sample.classList.add('active')
})
}
if (window.location.hash)
document.querySelector(`[target=${window.location.hash.slice(1)}]`).click()
else if (document.querySelector('.sample.active'))
document.querySelector('.sample.active').click()
</script>
</body>
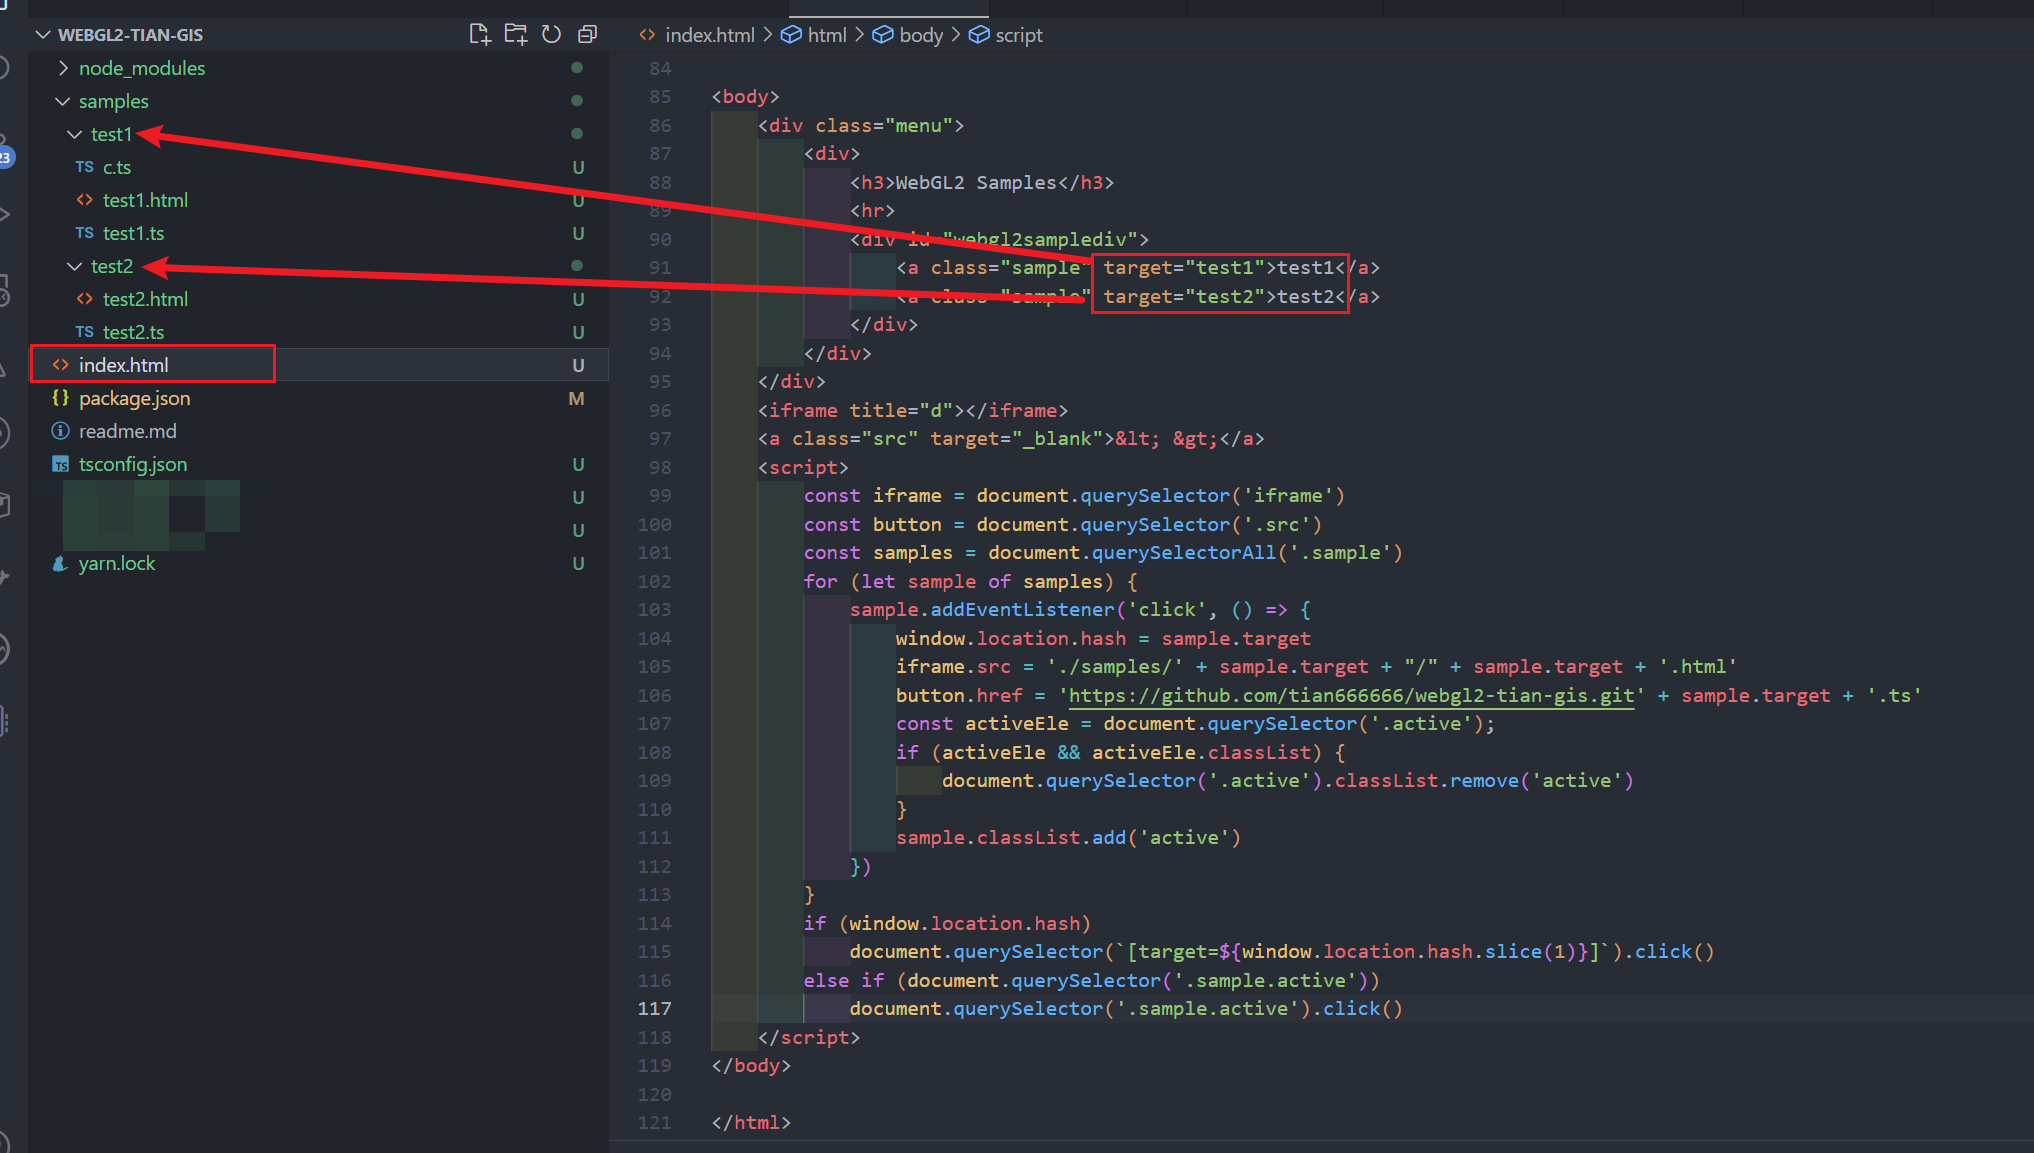
</html>可以看到,index.html 核心原理就是 在 id 为 webgl2samplediv 的 div 下手动引入 samples 文件夹下的 demo,target 为 samples 下的文件夹名。
<div id="webgl2samplediv">
<a class="sample" target="test1">test1</a>
<a class="sample" target="test2">test2</a>
</div>此时还缺少编译、运行的脚本命令,就需要配置 package.json 和 vite 的配置
配置 package.json
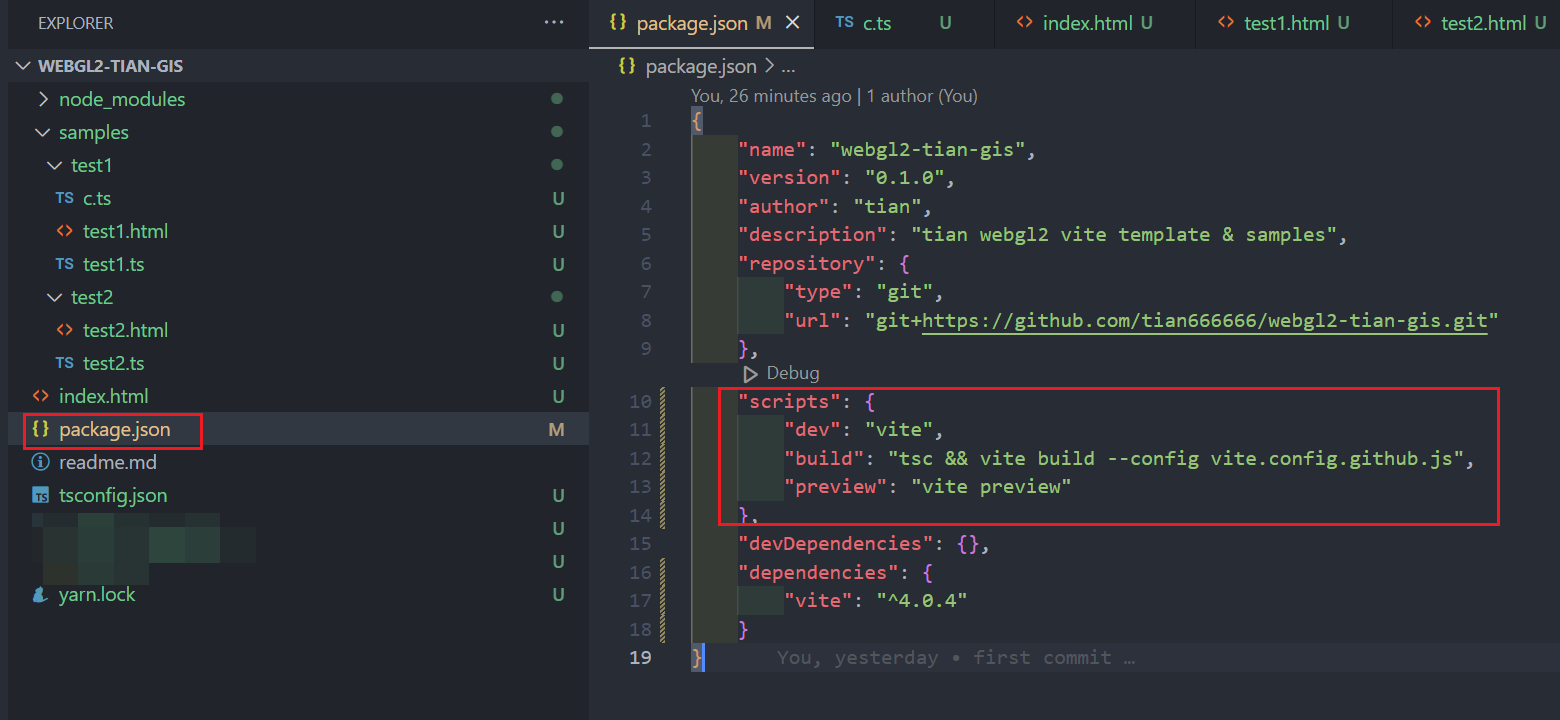
package.json 的完整内容:
{
    "name": "webgl2-tian-gis",
    "version": "0.1.0",
    "author": "tian",
    "description": "tian webgl2 vite template & samples",
    "repository": {
        "type": "git",
        "url": "git+https://github.com/tian666666/webgl2-tian-gis.git"
    },
    "scripts": {
        "dev": "vite",
        "build": "tsc && vite build --config vite.config.github.js",
        "preview": "vite preview"
    },
    "devDependencies": {},
    "dependencies": {
        "vite": "^4.0.4"
    }
}
在 package.json 中 添加 scripts 命令,build 使用了 vite.config.github.js,需要进行新建
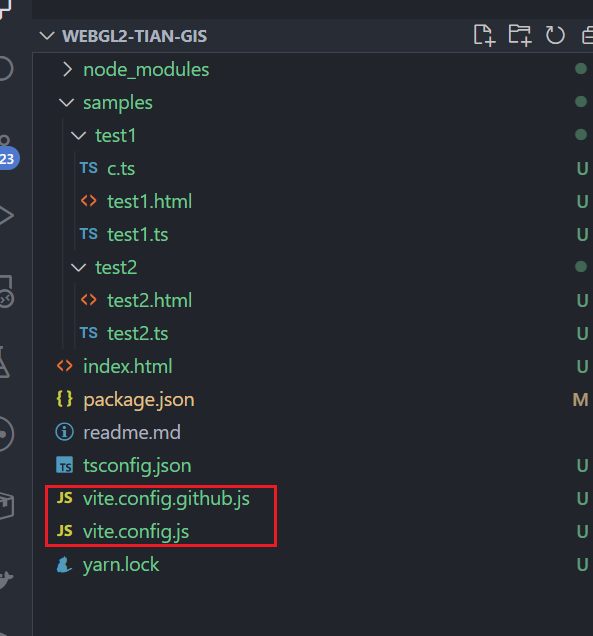
7、配置 vite
分别新建 vite.config.js 和 vite.config.github.js ,具体内容如下:
vite.config.github.js 文件内容:
 /*
 * @Description:
 * @Author: tianyw
 * @Date: 2023-01-25 15:30:26
 * @LastEditTime: 2023-01-26 17:46:39
 * @LastEditors: tianyw
 */
const { defineConfig } = require("vite");
const { resolve } = require("path");
const fs = require("fs");

const input = {
  main: resolve(__dirname, "index.html")
};
const samples = fs.readdirSync(resolve(__dirname, "samples"));
for (let file of samples) {
  const files = fs.readdirSync(resolve(__dirname, "samples/" + file));

  for (const childFile of files) {
    if (childFile.endsWith(".html")) {
      const filePath = resolve(__dirname, "samples/" + file + "/" + childFile);
      input[file] = filePath;
    }
  }
}
// 编译输出目录 输出文件夹 默认为 dist 如果想要生成为其他名称,需要在此处修改,直接修改打包后的文件夹名称会影响 html 中引用的地址导致项目无法正常运行
const outFolderName = "dist";
module.exports = defineConfig({
  base: `/${outFolderName}/`,
  build: {
    outDir: `./${outFolderName}`,
    rollupOptions: {
      input
    }
  }
});
vite.config.js 文件内容:
/*
 * @Description:
 * @Author: tianyw
 * @Date: 2023-01-25 15:30:19
 * @LastEditTime: 2023-01-25 15:50:33
 * @LastEditors: tianyw
 */
import { defineConfig } from "vite";
module.exports = defineConfig({
  server: {
    host: "localhost",
    port: 3000
  }
});
至此就可以执行 yarn dev、yarn build 等命令来运行、编译项目了。
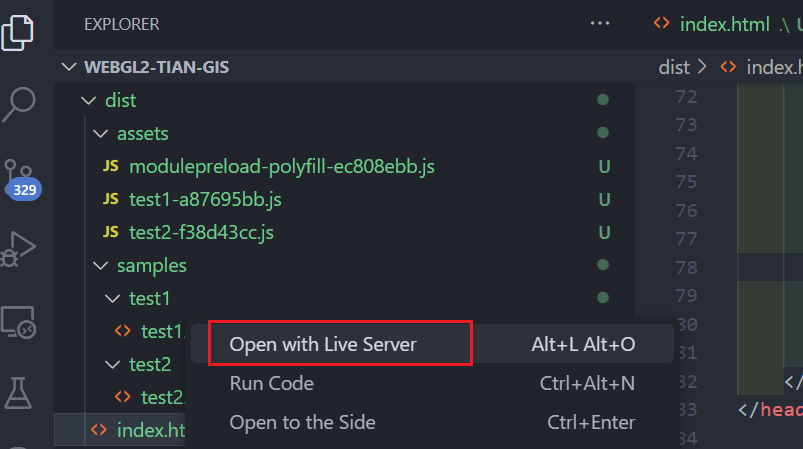
8、运行、编译结果
yarn dev 运行结果:
yarn build 结果:
打包后的项目运行 index.html 后,运行结果和 yarn dev 运行结果一致。
9、引入 LICENSE
LICENSE 内容,采用 MIT:
   <!--
 * @Description:
 * @Author: tianyw
 * @Date: 2023-01-26 18:08:47
 * @LastEditTime: 2023-01-26 18:08:52
 * @LastEditors: tianyw
-->
# Released under MIT License

Copyright (c) 2023 tian

Permission is hereby granted, free of charge, to any person obtaining a copy of this software and associated documentation files (the "Software"), to deal in the Software without restriction, including without limitation the rights to use, copy, modify, merge, publish, distribute, sublicense, and/or sell copies of the Software, and to permit persons to whom the Software is furnished to do so, subject to the following conditions:

The above copyright notice and this permission notice shall be included in all copies or substantial portions of the Software.

THE SOFTWARE IS PROVIDED "AS IS", WITHOUT WARRANTY OF ANY KIND, EXPRESS OR IMPLIED, INCLUDING BUT NOT LIMITED TO THE WARRANTIES OF MERCHANTABILITY, FITNESS FOR A PARTICULAR PURPOSE AND NONINFRINGEMENT. IN NO EVENT SHALL THE AUTHORS OR COPYRIGHT HOLDERS BE LIABLE FOR ANY CLAIM, DAMAGES OR OTHER LIABILITY, WHETHER IN AN ACTION OF CONTRACT, TORT OR OTHERWISE, ARISING FROM, OUT OF OR IN CONNECTION WITH THE SOFTWARE OR THE USE OR OTHER DEALINGS IN THE SOFTWARE.
10、引入 .gitignore
# Logs
logs
*.log
npm-debug.log*
yarn-debug.log*
yarn-error.log*
pnpm-debug.log*
lerna-debug.log*

node_modules
dist
dist-ssr
*.local
yarn-error.log
yarn.lock
package-lock.json

# Editor directories and files
.vscode/*
!.vscode/extensions.json
.idea
.DS_Store
*.suo
*.ntvs*
*.njsproj
*.sln
*.sw?
11、在 readme.md 中构建初步项目目录结构
完整内容如下:
<!--
* @Description:
* @Author: tianyw
* @Date: 2023-01-25 15:18:01
* @LastEditTime: 2023-01-26 18:15:31
* @LastEditors: tianyw
-->
# webgl2-tian-gis
## Description
a 3d gis webgl2 application
## Install and Run
Type the following in any terminal:
```bash
# Clone the repo
git clone https://github.com/tian666666/webgl2-tian-gis.git
# Go inside the folder
cd webgl2-tian-gis
# Start installing dependencies
npm install #or yarn
# Run project at localhost:3000
npm run dev #or yarn run dev
# Build project
npm run build #or yarn run build
```
## Project Layout
```bash
├─ 📂 node_modules/ # Dependencies
│ ├─ 📁
│ └─ 📁 ... # Other dependencies (TypeScript, Vite, etc.)
├─ 📂 samples/ # Sample html
│ └─ 📄 *.html # HTML entry for each demo
├─ 📄 .gitignore # Ignore certain files in git repo
├─ 📄 index.html # Entry page
├─ 📄 LICENSE # MIT
├─ 📄 logo.png # tian logo image
├─ 📄 package.json # Node package file
├─ 📄 tsconfig.json # TS configuration file
├─ 📄 vite.config.js # vite configuration file
└─ 📄 readme.md # Read Me!
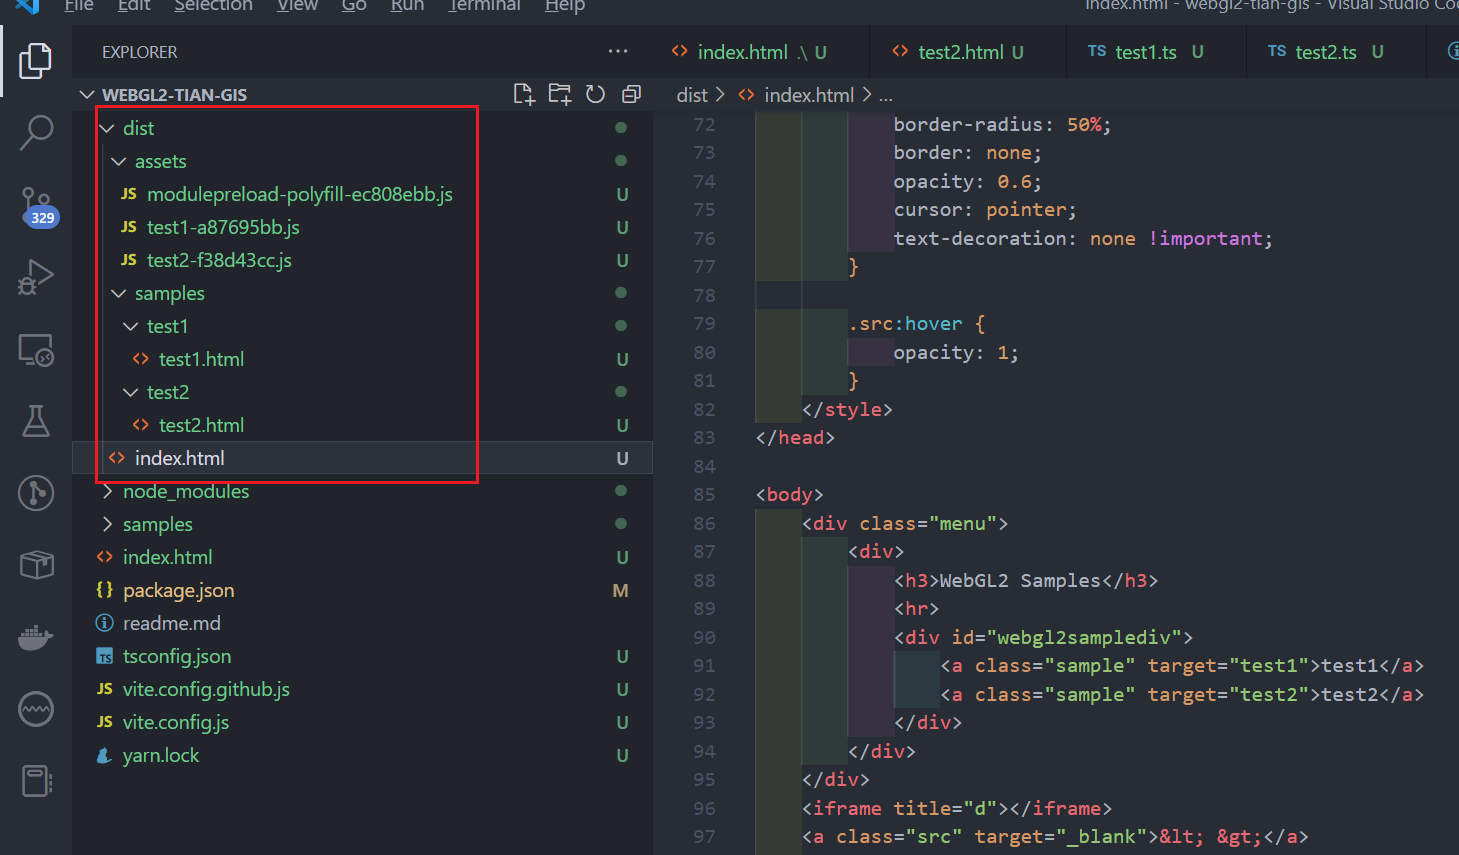
```至此项目既可以使用 ts,又通过 vite 打包,且既可以运行又可以编译了,完整的文件夹目录如下:

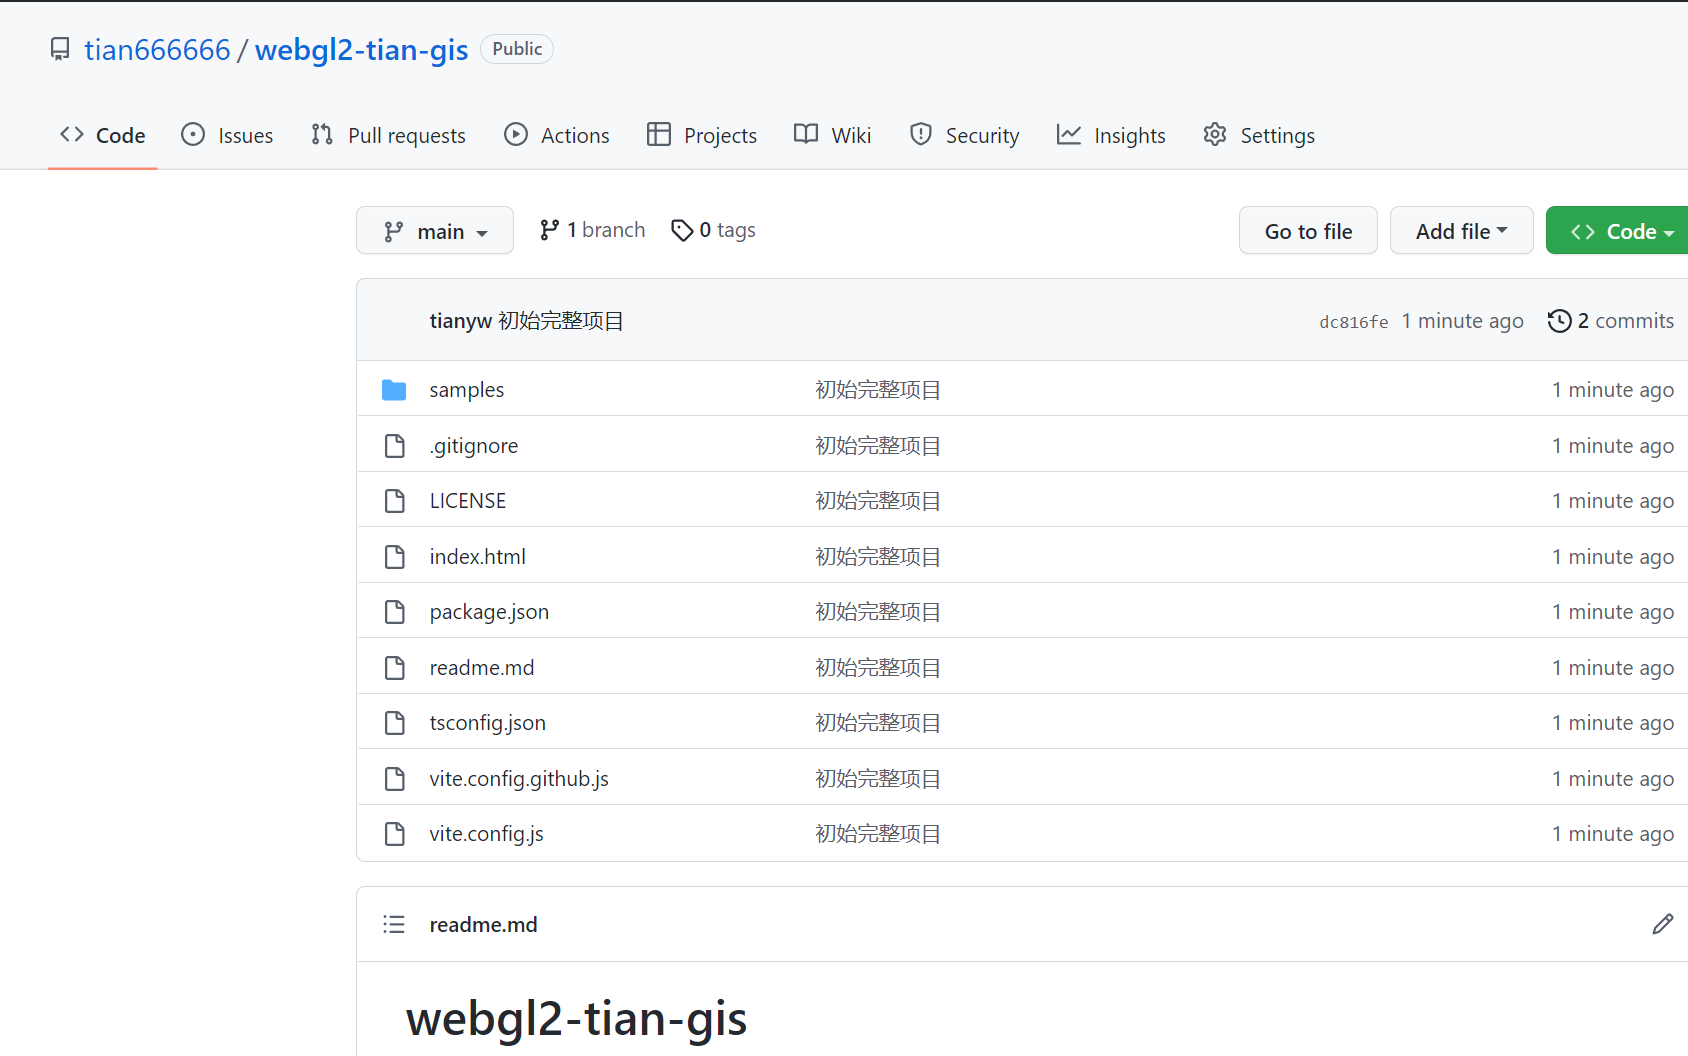
最后 提交初步完整项目代码至 github。


 585
585

 被折叠的 条评论
为什么被折叠?
被折叠的 条评论
为什么被折叠?
 到【灌水乐园】发言


