


目标
paddlehub项目链接:https://aistudio.baidu.com/aistudio/projectdetail/437104
PaddleHub DeepLabv3+模型(deeplabv3p_xception65_humanseg)实现一键抠图
实现功能
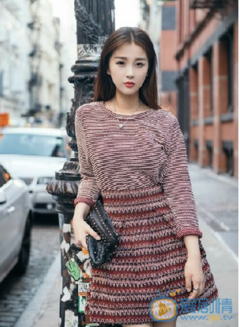
1.实现单张小姐姐图片的抠图(背景替换)
2.实现对视频的抠图(背景替换)将红昭愿的视频更换为宇宙背景
实现思路
功能1:
单张图片抠图采用paddlehub真的是一键抠图呀。
#安装1.6的paddlehub
pip install paddlehub==1.6.0 -i https://pypi.tuna.tsinghua.edu.cn/simple -t /home/aistudio/external-libraries
import paddlehub as hub
# 待预测图片
test_img_path = ["./data/yu.jpg"]
import matplotlib.pyplot as plt
import matplotlib.image as mpimg
img = mpimg.imread(test_img_path[0])
# 展示待预测图片
plt.figure(figsize=(10,10))
plt.imshow(img)
plt.axis('off')
plt.show()
待抠图的图片:
#加载paddlehua提供的人脸分割的模型
module = hub.Module(name="deeplabv3p_xception65_humanseg")

#paddlehub的所有输入必须要是一个字典格式的data,并且字典里面的内容要是一个list
input_dict = {"image": test_img_path}#传入也必须是个字典,字典的value必须是个list

# execute predict and print the result使用模型得到结果
results = module.segmentation(data=input_dict)
for result in results:
    print(result)#打印结果

# 预测结果展示
test_img_path = "./humanseg_output/yu.png"
img = mpimg.imread(test_img_path)
plt.figure(figsize=(10,10))
plt.imshow(img)
plt.axis('off')
plt.show()
抠图结果:
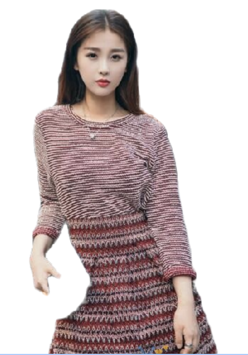
可以发现,前面的街道背景已经没有了。对于各种情况下的真人扣取都试试了一下,发现效果都挺好的。下面是模型的实现结果
模型结果对比

背景替换函数:
#图像合成函数
from PIL import Image
import numpy as np
#blend 混合
def blend_images(fore_image, base_image,savepath):
    """
    将抠出的人物图像换背景
    fore_image: 前景图片,抠出的人物图片 为png格式 会多一个通道
    base_image: 背景图片
    savepath:图片要保存的路径,图片保存的文件名和前景图片的名字一样
    """
    # 读入图片
    fore_image_dir = fore_image
    base_image = Image.open(base_image).convert('RGB')#如果是png可能多了一个A通道
    fore_image = Image.open(fore_image).resize(base_image.size) #将前图缩放背后景图一样大小
    # 图片加权合成
    scope_map = np.array(fore_image)[:,:,-1] / 255
    scope_map = scope_map[:,:,np.newaxis] #np.newaxis 为 numpy.ndarray(多维数组)增加一个轴
    scope_map = np.repeat(scope_map, repeats=3, axis=2)
    res_image = np.multiply(scope_map, np.array(fore_image)[:,:,:3]) + np.multiply((1-scope_map), np.array(base_image))
    #保存图片
    res_image = Image.fromarray(np.uint8(res_image))
    save_path = os.path.join(savepath, os.path.basename(fore_image_dir))
    res_image.save(save_path)

功能2:视频换背景
实现的思路:
因为paddlehub的模型的喂数据的问题,所有不能直接喂视频,需要传入一个字典,字典里面需要是一个list的数据。
1.先读取视频,使用opencv按帧读取转为为图片
# video 2 images
###step1
def extract_images(src_video, dst_dir):
    '''
    src_video:为目标的视频文件地址
    dst_dir:为视频图片的保存路径
    '''
    video = cv2.VideoCapture(src_video)
    count = 0
    while True:
        flag, frame = video.read()
        if not flag:
            break
        cv2.imwrite(os.path.join(dst_dir, str(count) + '.png'), frame)
        count = count + 1
    print('extracted {} frames in total.'.format(count))
2.对1中最后得到的的所有图片进行人物抠图
###step2
def manSeg(img_path,out_dir):
    # test images
    test_image_list = [os.path.join(img_path, img_name) for img_name in os.listdir(img_path)]
    # segment images!
    input_dict = {"image": test_image_list}
    module.segmentation(data=input_dict,output_dir = out_dir)
3.对2中最后得到的所有图片与背景图片进行合成
# blend images
def blend_vides(input_dir,base_image,save_dir):
    index = 0
    for img in os.listdir(input_dir):
        print('总共{}张,处理到了{}张图片'.format(len(os.listdir(input_dir)),index+1))
        fore_image = os.path.join(input_dir,img)
        blend_images(fore_image, base_image, save_dir)
4.将3中合成的所有图片合成为视频
# image2video
#将扣图和背景组合的图片从新合成为视频(
def img2video(dst_video_path,pic_path,size,frame):
    '''
    dst_video_path:合成视频的路径
    pic_path:合成的所有图片的路径
    size:图片的大小,即是视频的大小
    frame:帧率

    VideoWriter_fourcc为视频编解码器
    fourcc意为四字符代码(Four-Character Codes),顾名思义,该编码由四个字符组成,下面是VideoWriter_fourcc对象一些常用的参数,注意:字符顺序不能弄混
    cv2.VideoWriter_fourcc('I', '4', '2', '0'),该参数是YUV编码类型,文件名后缀为.avi
    cv2.VideoWriter_fourcc('P', 'I', 'M', 'I'),该参数是MPEG-1编码类型,文件名后缀为.avi
    cv2.VideoWriter_fourcc('X', 'V', 'I', 'D'),该参数是MPEG-4编码类型,文件名后缀为.avi
    cv2.VideoWriter_fourcc('T', 'H', 'E', 'O'),该参数是Ogg Vorbis,文件名后缀为.ogv
    cv2.VideoWriter_fourcc('F', 'L', 'V', '1'),该参数是Flash视频,文件名后缀为.flv
    cv2.VideoWriter_fourcc('m', 'p', '4', 'v')    文件名后缀为.mp4
    '''

    dst_video = cv2.VideoWriter(dst_video_path, cv2.VideoWriter_fourcc(*'mp4v'), frame, size, True)
    for index in range(len(os.listdir(pic_path))):
        frame = cv2.imread(os.path.join(pic_path,'{}.png'.format(index)))
        dst_video.write(frame)
    dst_video.release()
5.给4中得到的视频添加bgm
def add_audio(s_video_path,d_video_path):
    video_s = VideoFileClip(s_video_path)
    video_d = VideoFileClip(d_video_path)
    audio_o = video_s.audio
    video_dd = video_d.set_audio(audio_o)

    video_dd.write_videofile(d_video_path[0:d_video_path.rfind('/')+1]+'hong_audio.mp4')
主函数:
def change_video_bk():
    ##1.将视频按帧提取出图片image_list
    src_video = './work/video/hong-withaudio.mov'
    dst_dir = './work/video-imgs'
    checkdir(dst_dir)#如果不存在就创建,存在就清除里面内容 check1
    #function1
    extract_images(src_video, dst_dir)

    ##2.对image_list所有的图片进行抠图,然后更换背景保存图片得到processed_image_list
    out_dir = './work/video-seg_out'
    checkdir(out_dir)     #check2
    #function2.1
    manSeg(dst_dir,out_dir)

    base_image = './work/img/sea.jpg'
    save_dir = './work/video-imgs'
    checkdir(save_dir)    #check3
    #function2.2
    blend_vides(out_dir,base_image,save_dir)

    #3.将processed_image_list中的所有图片组成为video
    save_dir = './work/video-imgs'
    base_image = './work/img/sea.jpg'
    result_video_dir = './work/video-result/'
    checkdir(result_video_dir) #check4
    result_video_name = os.path.join(result_video_dir,'hong.mp4')  #最终输出的视频的名字
    size = Image.open(base_image).size
    frame_size = 25
    #function3 图片合成为视频
    img2video(result_video_name,save_dir,size,frame_size)
    #function4 给视频加上bgm
    add_audio(src_video,result_video_name)


 488
488


 被折叠的 条评论
为什么被折叠?
被折叠的 条评论
为什么被折叠?
 到【灌水乐园】发言


