0、安装各种杂七杂八
yum install –y autoconf make automake imake \
cmake gcc gcc-c++ libaio libaio-devel bzr bison expat-devel \
libtool ncurses5-devel gd-devel libjpeg-devel \
libpng-devel libxml2-devel bzip2-devel libcurl-devel
1、安装nginx
yum install pcre*
yum install openssl*
安装nginx
./configure –prefix=/usr/local/nginx-1.9.14 \
–with-http_ssl_module \
–with-http_stub_status_module –with-pcre
make
make install
2、安装软件源
安装epel、ius、zabbix软件源
zabbix-release-3.0-1.el6.noarch.rpm
epel-release-latest-6.noarch.rpm
ius-release-1.0-14.ius.centos6.noarch.rpm
安装好后运行:
yum clean all
yum repolist
ius的软件安装位置
3、安装mysql5.7(ius的源)
rpm -qa |grep mysql
rpm -e mysql-libs-5.1.73-5.el6_6.x86_64 --nodeps
yum search mysql57
yum install mysql57u* -y
mkdir /home/data
mkdir /home/data/mysql
mkdir /home/data/mysql/data
mkdir /home/data/mysql/logs
mkdir /home/data/mysql/run
groupadd mysql
useradd -g mysql -s /sbin/false mysql
chown -R mysql:mysql /home/data/mysql
vim /etc/my.cnf 【备注,rpm包安装的mysql的配置文件在/etc/my.cnf.d/目录下】
vim /etc/my.cnf.d/mysql-server.cnf 【反正都修改了,没深究是哪个】
[mysqld]
# Disabling symbolic-links is recommended to prevent assorted security risks
symbolic-links=0
user = mysql
default-storage-engine = InnoDB
#socketfile = /home/data/mysql/run/cent1.sock
#pid-file = /home/data/mysql/run/cent1.pid
port = 3306
datadir = /home/data/mysql/data
log-error = /home/data/mysql/logs/mysql.err.log
slow-query-log-file = /home/data/logs/data/mysql-slow.logchown -R mysql:mysql /home/data/mysql
service mysqld start
mysql -uroot
set password=password('pass');4、安装apr1.5.2(ius的源)
rpm -e apr-1.3.9-5.el6_2.x86_64 apr-util-1.3.9-3.el6_0.1.x86_64 httpd-tools-2.2.15-47.el6.centos.4.x86_64 --nodeps
yum install apr15u.x86_64 apr15u-devel.x86_64 apr15u-util.x86_64 apr15u-util-devel.x86_64
5、安装php5.6
tar -zxf /home/huser/packages/php-5.6.20-src.tar.gz -C /usr/local/src/
cd /usr/local/src/php-5.6.20
./configure –prefix=/usr/local/soft/php-5.6.20 \
–with-config-file-path=/usr/local/soft/php-5.6.20/etc –with-bz2 –with-curl \
–enable-ftp –enable-sockets –disable-ipv6 –with-gd \
–with-jpeg-dir=/usr/local –with-png-dir=/usr/local \
–with-freetype-dir=/usr/local –enable-gd-native-ttf \
–with-iconv-dir=/usr/local –enable-mbstring –enable-calendar \
–with-gettext –with-libxml-dir=/usr/local –with-zlib \
–with-pdo-mysql=mysqlnd –with-mysqli=mysqlnd –with-mysql=mysqlnd \
–enable-dom –enable-xml –enable-fpm –with-libdir=lib64 –enable-bcmath
make
make install
cp php.ini-production /usr/local/soft/php-5.6.20/etc/php.ini
cp /usr/local/soft/php-5.6.20/etc/{php-fpm.conf.default,php-fpm.conf}
cd /usr/local/soft/php-5.6.20
sbin/php-fpm
ln -s /usr/local/soft/php-5.6.20 /usr/local/php
6、测试nginx+php
mkdir /home/data
mkdir /home/data/nginx
mkdir /home/data/nginx/site
mkdir /home/data/nginx/logs
mkdir /home/data/nginx/site/phpinfo
vim /home/data/nginx/site/phpinfo/info.php
<?php
phpinfo();
?>chown -R zabbix:zabbix /home/data/nginx # zabbix用户是安装zabbix建的,第10步有
chmod -R 775 /home/data/nginx
vim /usr/local/nginx/conf/nginx.conf server {
listen 80;
server_name testphp;
#charset koi8-r;
access_log /home/data/nginx/logs/phpinfo.access.log main;
location / {
root /home/data/nginx/site;
index index.html index.htm;
try_files $uri $uri/ /index.php?$args;
}
#error_page 404 /404.html;
# redirect server error pages to the static page /50x.html
#
error_page 500 502 503 504 /50x.html;
location = /50x.html {
root html;
}
# proxy the PHP scripts to Apache listening on 127.0.0.1:80
#
#location ~ \.php$ {
# proxy_pass http://127.0.0.1;
#}
# pass the PHP scripts to FastCGI server listening on 127.0.0.1:9000
#
location ~ .*\.(php)?$ {
expires -1s;
try_files $uri = 404;
fastcgi_split_path_info ^(.+\.php)(/.+)$;
root /home/data/nginx/site;
fastcgi_pass 127.0.0.1:9000;
fastcgi_index index.php;
fastcgi_param SCRIPT_FILENAME $document_root$fastcgi_script_name;
include fastcgi_params;
}
# deny access to .htaccess files, if Apache's document root
# concurs with nginx's one
#
#location ~ /\.ht {
# deny all;
#}
}vim /usr/local/nginx/conf/nginx.conf
user zabbix zabbix;
vim /usr/local/php/etc/php-fpm.conf
user=zabbix
group=zabbix
service nginx restart重启php-fpm
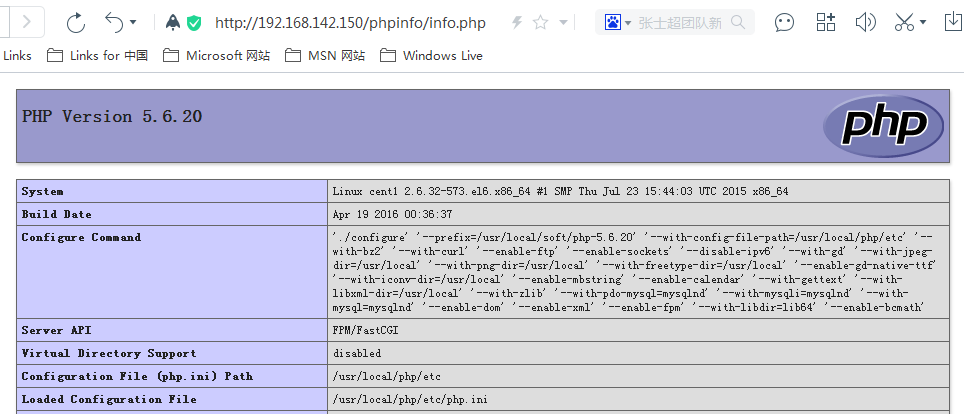
curl http://localhost/phpinfo/info.php或浏览器打开 http://192.168.142.150/phpinfo/info.php
7、配置php参数
vim /usr/local/php/etc/php.ini # zabbix硬性要求max_execution_time = 300
max_input_time = 300
memory_limit = 128M
post_max_size = 16M
upload_max_filesize = 2M
date.timezone = Asia/Shanghai
always_populate_raw_post_data = -18、安装zabbix
yum install zabbix-server-mysql zabbix-web-mysql zabbix-agent zabbix-web9、初始化zabbix数据库
https://www.zabbix.com/documentation/3.0/manual/installation/install_from_packages
https://www.zabbix.com/documentation/3.0/manual/appendix/install/db_scripts
sql语句:/usr/share/doc/zabbix-server-mysql-3.0.1/create.sql.gz
mysql
create database zabbix character set utf8 collate utf8_bin;
grant all privileges on zabbix.* to 'zabbix'@'%' identified by 'zabbixpass';
flush privileges;
shell
cd /usr/share/doc/zabbix-server-mysql-3.0.1/
zcat create.sql.gz |mysql -uroot -ppass zabbix
10、配置zabbix服务端
为了安全考虑 zabbix 只使用普通用户运行,假如你当前用户叫 ttlsa,那么你运行他,他便使用 ttlsa 身份运行。但
是如果你在 root 环境下运行 zabbix,那么 zabbix 将会主动尝试以 zabbix 身份来运行。但是如果你的系统没有名叫
zabbix 的用户【rpm或yum安装会自己创建的】:
groupadd zabbix
useradd -g zabbix -s /bin/false zabbix
vim /etc/zabbix/zabbix_server.confDBHost=localhost
DBName=zabbix
DBUser=zabbix
DBPassword=zabbixpasscd /usr/share/
cp -r zabbix /home/data/nginx/site/
chown -R zabbix:zabbix /home/data/nginx/site/zabbix
chown -R zabbix:zabbix /etc/zabbix
chown -R zabbix:zabbix /usr/share/zabbix
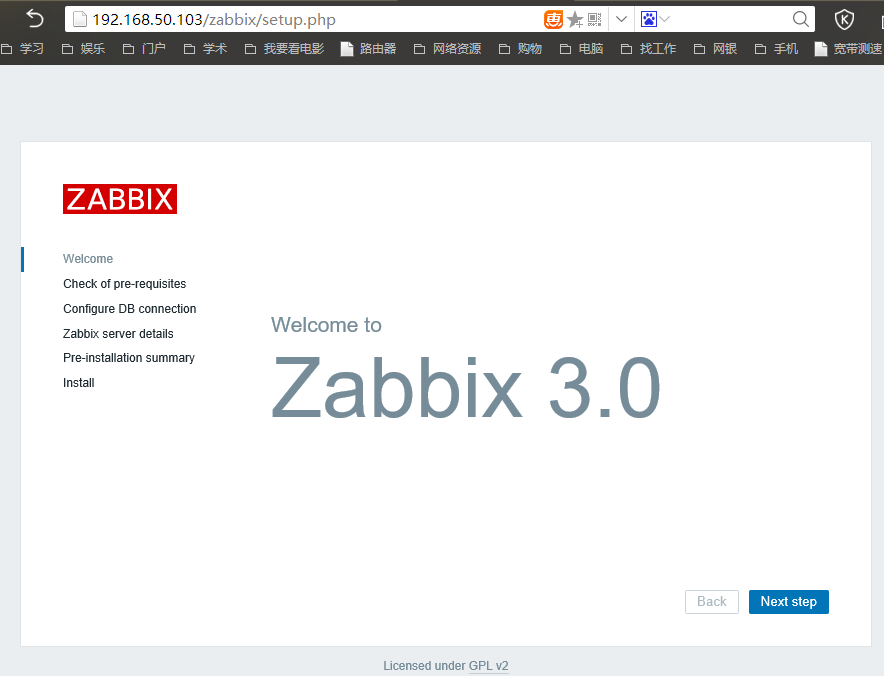
chown -R zabbix:zabbix /usr/lib/zabbix浏览器输入:http://192.168.50.103/zabbix/zabbix.php
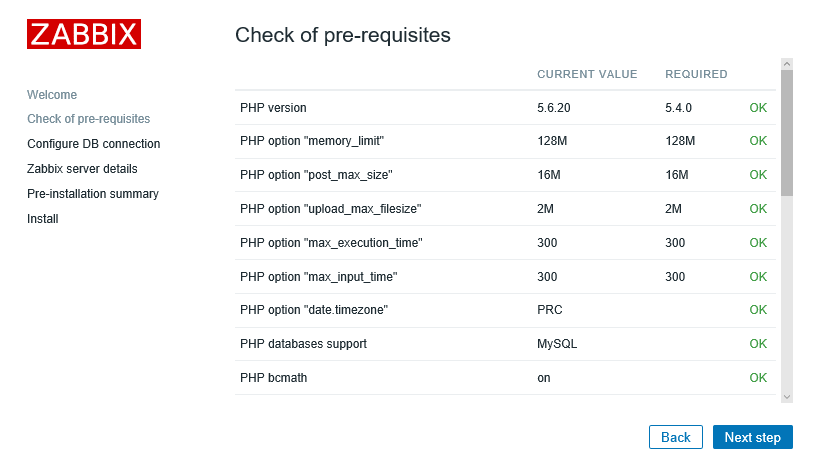
【错误】php-fpm无法加载php.ini配置文件,php.ini文件在指定的文件目录下也无法加载,导致zabbix检验php配置失败,无法进行下一步。
启动php-fpm时使用命令参数手动加载
sbin/php-fpm -c /usr/local/php/etc/然后进入http://192.168.142.150/phpinfo/info.php查看配置文件加载情况
重新进入http://192.168.142.150/zabbix/zabbix.php

进入下一步配置数据库连接
待续。。。。


 2123
2123

 被折叠的 条评论
为什么被折叠?


