


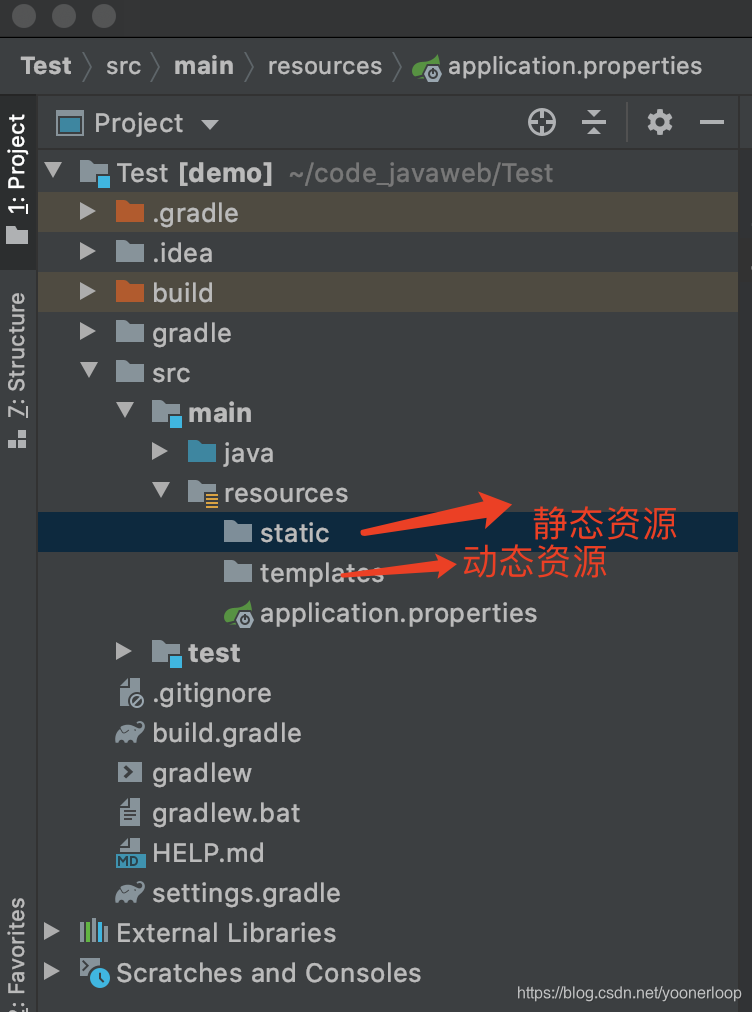
前一篇文章介绍了如何使用idea intelij创建项目和配置项目,这篇文章介绍如何访服务器的问静态资源和动态数据。 如下图,项目中static表示放置静态资源文件,templates用于放置动态资源文件。
一、访问静态资源
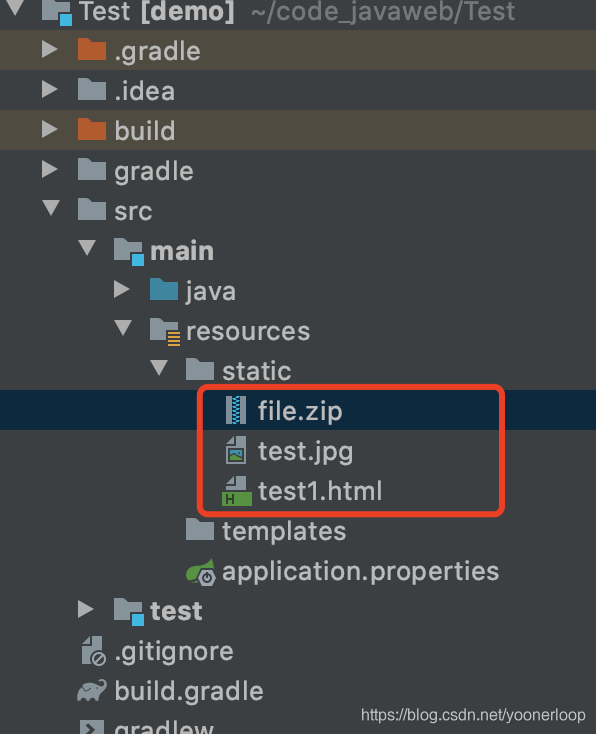
如上图,static是放置静态资源的,如下图,放置了三个文件:
然后,启动项目:
. ____ _ __ _ _
/\\ / ___'_ __ _ _(_)_ __ __ _ \ \ \ \
( ( )\___ | '_ | '_| | '_ \/ _` | \ \ \ \
\\/ ___)| |_)| | | | | || (_| | ) ) ) )
' |____| .__|_| |_|_| |_\__, | / / / /
=========|_|==============|___/=/_/_/_/
:: Spring Boot :: (v2.3.3.RELEASE)
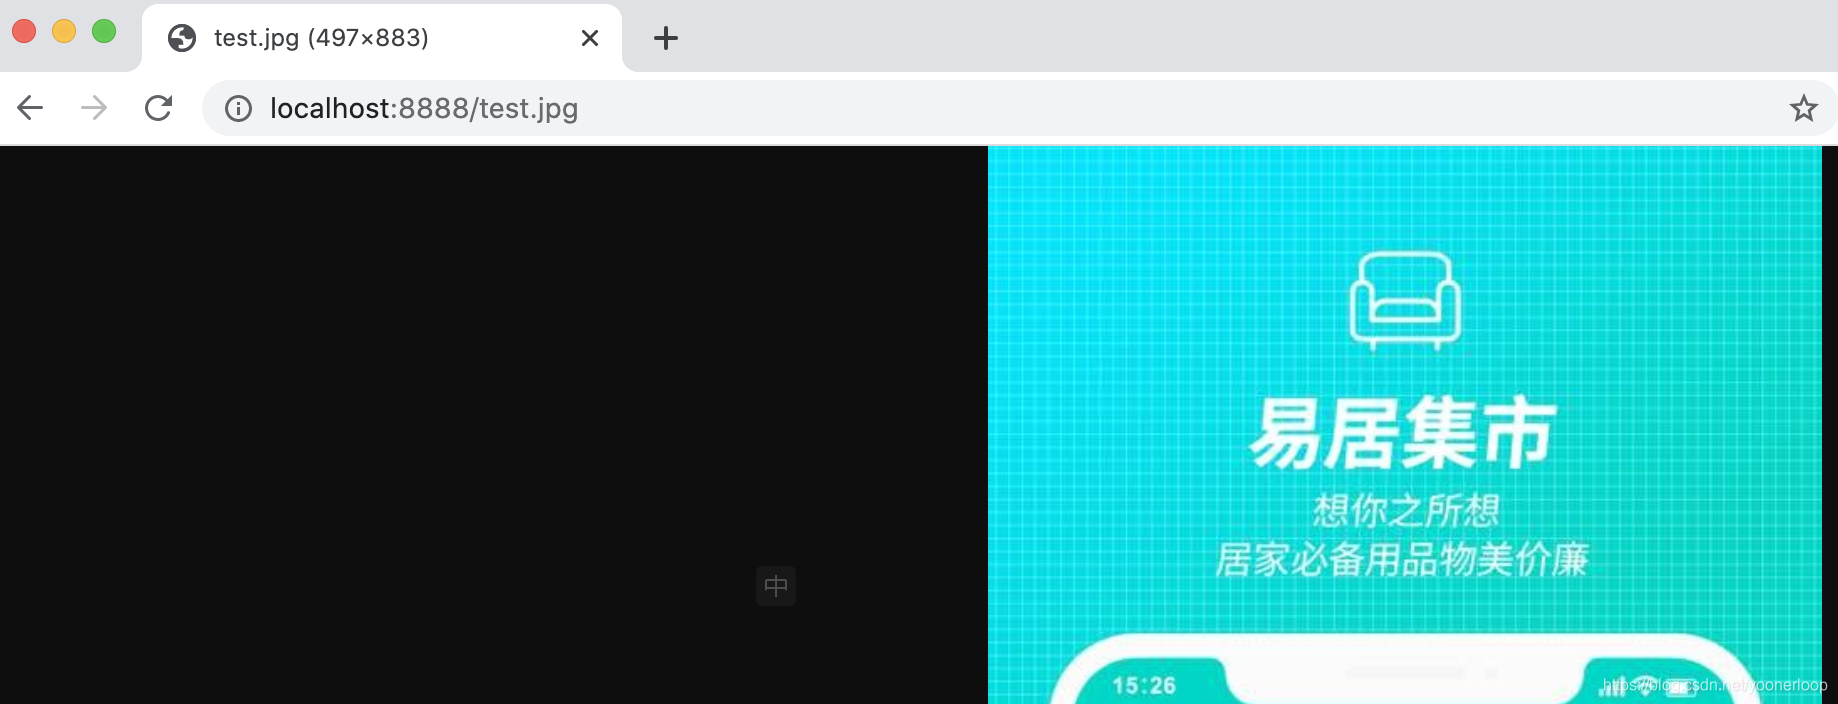
浏览器输入如下内容,就能访问到资源了
http://localhost:8888/test.jpg
二、打印helloworld
新建一个包名controller(java/com/example/demo/controller/)包下面新建HelloController.java:
@RestController()
@RequestMapping("/api")//全局目录
public class HelloController {
    /**
     * 返回helloword
     * @return
     */
    @RequestMapping("/hello")//专用目录
    public String hello() {
        return "hello JAVA";
    }
}
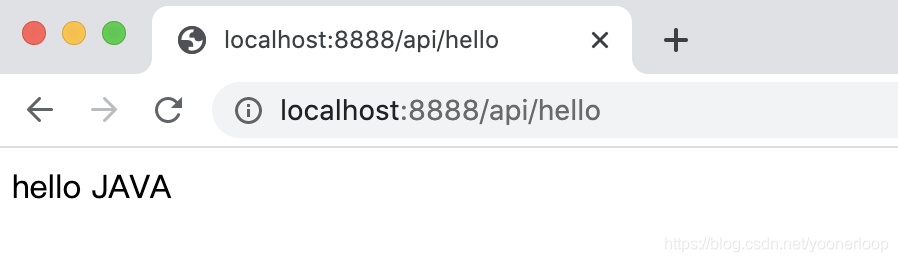
访问:http://localhost:8888/api/hello,结果如下:
@RestController:表示返回真实数据,json或者String@RequestMapping("/api"):表示该类的公共父级目录,即http://localhost:8888/api/@RequestMapping("/hello"):表示请求地址:http://localhost:8888/api/hello,默认为get请求
三、返回网页
templates用于放置动态资源文件,因此再该文件夹放置一个test1.html:
controller包下新建HtmlController.java:
@Controller //渲染页面
public class HtmlController {
/**
* 返回html
* @return
*/
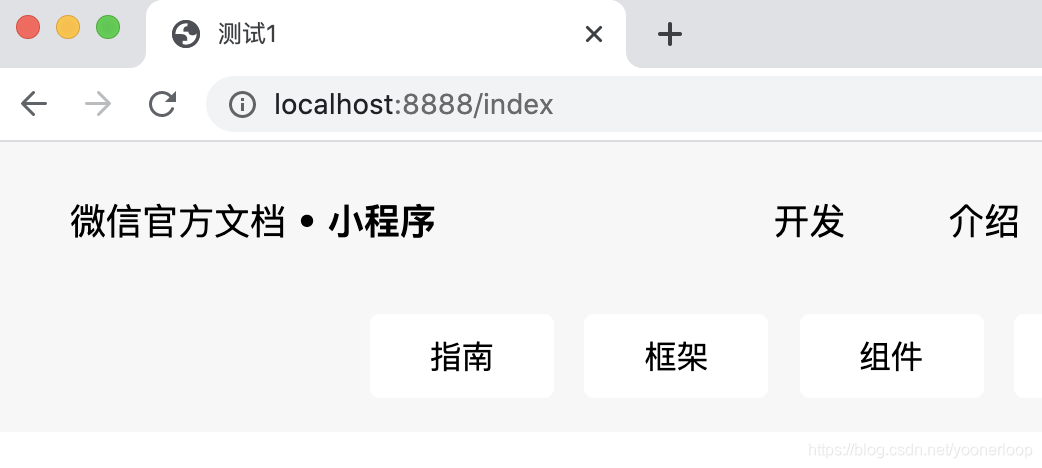
@RequestMapping("/index")
public String hello() {
return "test";
}
}访问:http://localhost:8888/index,结果如下:
@Controller:表示该请求是用于页面渲染。@RequestMapping("/index"):表示请求连接:http://localhost:8888/index,默认get请求。
四、返回json
controller包下新建JsonController.java:
@RestController
public class JsonController {
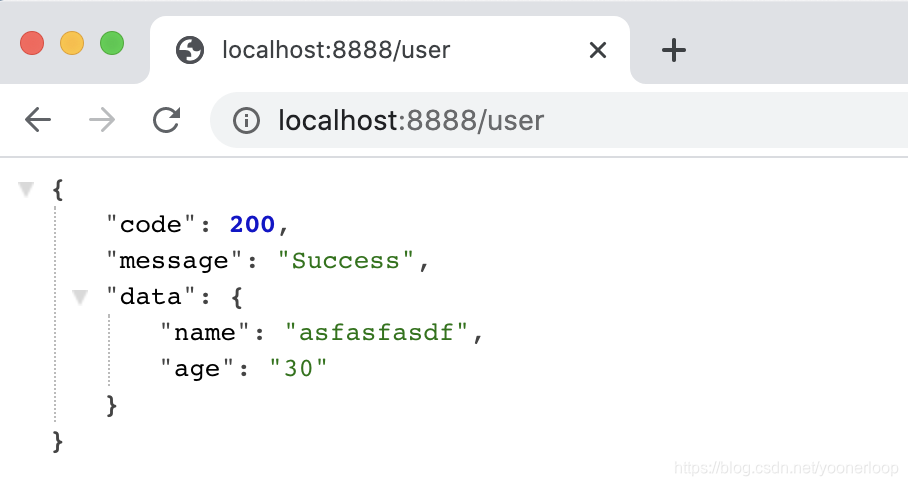
@RequestMapping(value = "/user", method= RequestMethod.GET)
public Response get() {
Response response = new Response<Map<String,String>>();
HashMap<String, String> stringStringHashMap = new HashMap<>();
stringStringHashMap.put("age","30");
stringStringHashMap.put("name","asfasfasdf");
response.setData(stringStringHashMap);
return response;
}
}public class Response<T> {
/**
* 接口响应代码
*/
private int code = 200;
/**
* 接口访问信息
*/
private String message = "Success";
private T data;
public int getCode() {
return code;
}
public void setCode(int code) {
this.code = code;
}
public String getMessage() {
return message;
}
public void setMessage(String message) {
this.message = message;
}
public T getData() {
return data;
}
public void setData(T data) {
this.data = data;
}
}
五、文件上传
1、单个文件上传
@RestController
public class UploadApi {


    @PostMapping("/uploadSingleFile")
    public String uploadSingleFile(MultipartFile uploadFile) {
        //public String uploadSingleFile(@RequestParam("uploadFile") MultipartFile uploadFile) {
        //获取文件名
        String fileName = uploadFile.getOriginalFilename();
        //获取存放的路径
        // String folder = ClassUtils.getDefaultClassLoader().getResource("").getPath() + "resources/static/upload/";
        String folder = System.getProperty("user.dir") + "/src/main/resources/static/uploadSingleFolder/";
        File folderFile = new File(folder);
        if (!folderFile.exists()) {
            folderFile.mkdirs();
        }
        try {
            //将图片保存到static文件夹里
            File file = new File(folder + fileName);
            uploadFile.transferTo(file);
            return file.getAbsolutePath();
        } catch (Exception e) {
            e.printStackTrace();
        }
        return "上传失败";
    }
}
2、多个文件上传
@RestController
public class UploadApi {

    /**
     * 多个文件上传
     */
    @PostMapping("/uploadMoreFile")
    //public String uploadMoreFile(MultipartFile[] uploadFiles) {
    public String uploadMoreFile(@RequestParam("uploadFiles") MultipartFile[] files) {
        String folder = System.getProperty("user.dir") + "/src/main/resources/static/uploadMoreFolder/";
        File folderFile = new File(folder);
        if (!folderFile.exists()) {
            folderFile.mkdirs();
        }
        StringBuilder paths = new StringBuilder();
        for (MultipartFile file : files) {
            String fileName = file.getOriginalFilename();
            try {
                File f = new File(folder + fileName);
                file.transferTo(f);
                paths.append(f.getAbsolutePath() + "\n");
            } catch (java.io.IOException e) {
                e.printStackTrace();
            }
        }
        return paths.toString();
    }
}
参数必须和html中的input参数的name名称必须保持一致,如果不一致了,则需要@RequestParam("uploadFile")映射成一致的,如果一致则可以省略@RequestParam。
3、测试页面
<!DOCTYPE html>
<html lang="en">
<head>
    <meta charset="UTF-8">
    <title>Title</title>
</head>
<body>

<p>单个文件上传:</p>
<form action="/uploadSingleFile" method="post" enctype="multipart/form-data">
    <input type="file" name="uploadFile" value="请选择文件">
    <input type="submit" value="上传">
</form>

<p>多个文件上传:</p>
<form action="/uploadMoreFile" method="post" enctype="multipart/form-data">
    <input type="file" name="uploadFiles" multiple="multiple" value="请选择文件">
    <input type="submit" value="上传">
</form>
</body>
</html>
Demo地址:https://download.csdn.net/download/yoonerloop/16740230


 4613
4613

 被折叠的 条评论
为什么被折叠?
被折叠的 条评论
为什么被折叠?
 到【灌水乐园】发言


