http://blog.csdn.net/zfpp25_/article/details/8861221
http://blog.csdn.net/zfpp25_/article/details/8861855
http://blog.csdn.net/zfpp25_/article/details/8861958
http://blog.csdn.net/zfpp25_/article/details/8862040
http://blog.csdn.net/zfpp25_/article/details/8862157
IOS6出现之后,新建一个ViewController,从NIB文件初始化,然后添加到window上。然后用5.0模拟器去执行项目,会发现app崩溃了。原因就是IOS6之后,NIB文件的选项中多了AutoLayout属性,而IOS6之前是不支持的,所以项目崩溃了,解决办法是取消AutoLayout就可以在5的模拟器上运行了。但一味的避开AutoLayout这个新特性也不是办法,所以研究了下。
AutoLayout是什么?
Before iOS6, layout was mainly by autosizing, also known as the “springs and struts” method. In iOS6, we will use AutoLayout, which will make it easier to design interfaces for various sceen sizes.
简单的理解就是为了实现屏幕中控件的布局,android开发时候,布局是件很痛苦的事情,因为,android的屏幕型号太多了。幸好IOS到目前为止比android程序员在屏幕适配上轻松许多。
为什么要使用AutoLayout?
IOS设备的尺寸会渐渐的更新,所以早点适应相对布局来完成UI界面是必要的。
如何使用AutoLayout?
下面会详细的讲解:
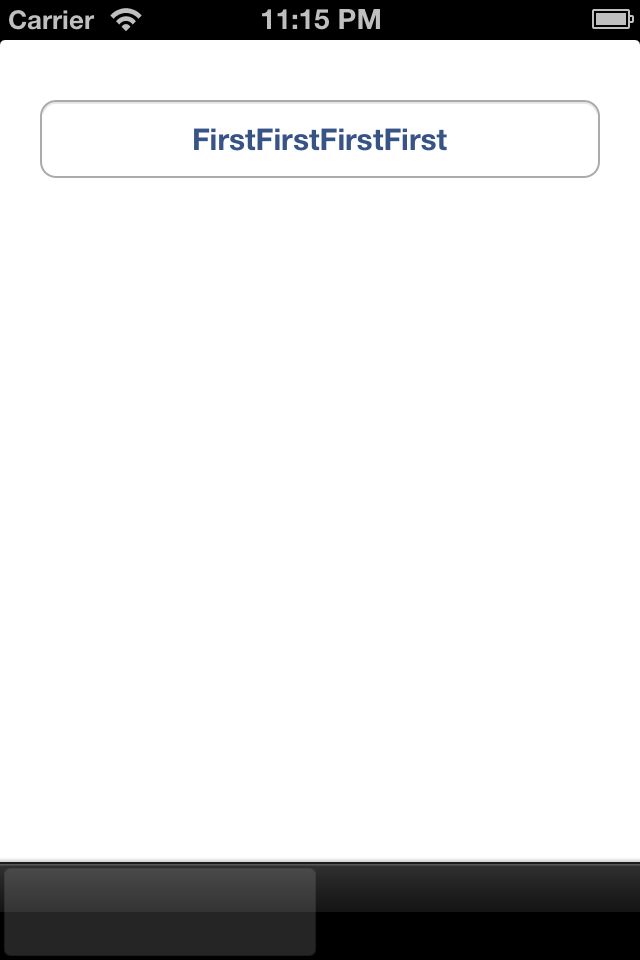
例1:我们以前创建一个按钮,按钮的frame为 CGRect(20, 30, 280, 44) 的按钮,我们会毫不犹豫的这样写:
- UIButton *firstButton = [UIButtonbuttonWithType:UIButtonTypeRoundedRect];
- [firstButtonsetTitle:@"FirstFirstFirstFirst"forState:UIControlStateNormal];
- firstButton.frame = CGRect(20, 30, 280, 49);
- [self.viewaddSubview:firstButton];
这样很简单的就实现了按钮在self.view中的的绝对布局。
下面来看看,使用AutoLayout相对布局,同样的一个按钮是怎么实现的:
- UIButton *firstButton = [UIButton buttonWithType:UIButtonTypeRoundedRect];
- [firstButtonsetTitle:@"FirstFirstFirstFirst"forState:UIControlStateNormal];
- [firstButton sizeToFit];
- firstButton.translatesAutoresizingMaskIntoConstraints =NO;
- [self.viewaddSubview:firstButton];
//开始相对布局
//首先,先对其按钮的左边和self.view左边的距离
- NSLayoutConstraint *constraint = [NSLayoutConstraint
- constraintWithItem:firstButton
- attribute:NSLayoutAttributeLeading
- relatedBy:NSLayoutRelationEqual
- toItem:self.view
- attribute:NSLayoutAttributeLeading
- multiplier:1.0f
- constant:20.f];
- [self.view addConstraint:constraint];
//然后,先对其按钮的右边和self.view右边的距离
- constraint = [NSLayoutConstraint
- constraintWithItem:firstButton
- attribute:NSLayoutAttributeTrailing
- relatedBy:NSLayoutRelationEqual
- toItem:self.view
- attribute:NSLayoutAttributeTrailing
- multiplier:1.0f
- constant:-20.f];
- [self.view addConstraint:constraint];
//然后,先对其按钮的上边和self.view上边的距离
- constraint = [NSLayoutConstraint
- constraintWithItem:firstButton
- attribute:NSLayoutAttributeTop
- relatedBy:NSLayoutRelationEqual
- toItem:self.view
- attribute:NSLayoutAttributeTop
- multiplier:1.0f
- constant:30.f];
- [self.view addConstraint:constraint];
//最后,先对其按钮的下边和self.view下边的距离
- constraint = [NSLayoutConstraint
- constraintWithItem:firstButton
- attribute:NSLayoutAttributeBottom
- relatedBy:NSLayoutRelationEqual
- toItem:self.view
- attribute:NSLayoutAttributeBottom
- multiplier:1.0f
- constant:((30 +44) - (460-44))];
- [self.view addConstraint:constraint];

同样也实现了一个按钮,但代码量实在是翻了几倍,现在可以理解android程序员的痛苦了。
那么上面相对布局的代码中,一些关键点如何理解呢?下面做简单介绍:
0、translatesAutoresizingMaskIntoConstraints:
The translatesAutoresizingMaskIntoConstraints property is set to NO, so our constraints will not conflict with the old “springs and struts” method.
1、NSLayoutConstraint类,是IOS6引入的,字面意思是“约束”、“限制”的意思,实现相对布局,就依靠这个类了;
2、怎么理解这个方法调用:
- NSLayoutConstraint *constraint = [NSLayoutConstraint
- constraintWithItem:firstButton firstButton是我们实例化的按钮
- attribute:NSLayoutAttributeLeading firstButton的左边
- relatedBy:NSLayoutRelationEqual firstButton的左边与self.view的左边的相对关系
- toItem:self.view 指定firstButton的相对的对象是self.view
- attribute:NSLayoutAttributeLeading 相对与self.view的左边(NSLayoutAttributeLeading是左边的意思)
- multiplier:1.0f (后文介绍)
- constant:20.f]; firstButton左边相对self.view左边,偏移了20.0f
- [self.view addConstraint:constraint]; 将这个约束添加到self.view上
3、其他部分代码同理,这样就不难理解了:
NSLayoutAttributeTrailing 右边
NSLayoutAttributeTop 上边
NSLayoutAttributeBottom 下边
4、这个难理解吗?constant:((30 + 44) - (460-49))];
按钮上沿坐标距selfview的上沿是30,打算让按钮的高度为44, 屏幕的总高度为460,再去掉tabBar的高度49。那按钮的下沿距离self.view的下沿的距离是多少 ?
IOS相对布局应该可以理解了,后续会继续更新~
转载请保留,原文链接:http://write.blog.csdn.net/postedit/8861221
若发现有不合适或错误之处,还请批评指正,不胜感激。


 2485
2485

 被折叠的 条评论
为什么被折叠?


