


14、Spring JDBC
Spring的JDBC模块有四个包组成:
- core:核心包,JDBC核心功能,JdbcTemplate就在此包内
- DataSource:数据源包,访问数据源的工具类,SimpleDriverDataSource 在此包
- Object:对象包,以面向对象的方式访问数据库,它允许执行查询,并将结果作为业务对象,处理数据表和业务对象之间的映射
- support:支持包,含有core和object包的支持类
14.1、配置数据库资源
在Spring中,通过JDBC驱动定义数据源是最简单的配置方式。Spring提供了三个这样的数据源类(均位于org.springframework.jdbc.datasource包中)供选择:
- org.springframework.jdbc.datasource.DriverManagerDataSource:在每个连接请求时都会返回一个新建的连接,旧的JDBC,无池化管理。基本上已被SimpleDriverDataSource取代。
- org.springframework.jdbc.datasource.SimpleDriverDataSource:与DriverManagerDataSource的工作方式类似,但是它直接使用JDBC驱动。
- org.springframework.jdbc.datasource.SingleConnectionDataSource:它的连接不会关闭,在每个连接请求时都会返回同一个的连接。(它不是严格意义上的连接池数据源,但是可以将其视为只有一个连接的连接池)
除了这些简单的数据原外,所以我们也可以选择其他的第三方连接池使用,第三方的数据库连接池其实有很多,不过大多使用:Druid(阿里的)、HikariCP(springboot目前默认的)。
14.1.1、简单数据源
先导入MySQL相关的依赖
<!-- MySQL驱动 -->
<dependency>
    <groupId>com.mysql</groupId>
    <artifactId>mysql-connector-j</artifactId>
    <version>8.0.32</version>
</dependency>

<!--  Spring jdbc 连数据库   根据spring版本选择-->
<dependency>
    <groupId>org.springframework</groupId>
    <artifactId>spring-jdbc</artifactId>
    <version>6.0.3</version>
</dependency>
<dependency>
    <groupId>org.springframework</groupId>
    <artifactId>spring-jdbc</artifactId>
    <version>5.3.21</version>
</dependency>
再在 resources 文件中创建properties文件,在此文件中编写数据库连写的一些信息

driver=com.mysql.cj.jdbc.Driver
url=jdbc:mysql://localhost:3306/库名?useUnicode=true&characterEncoding=UTF-8&useSSL=false&serverTimezone=Asia/Shanghai&allowPublicKeyRetrieval=true
username=root
password=密码
接下来在XML文件中配置 数据库连接
<?xml version="1.0" encoding="UTF-8"?>
<beans xmlns="http://www.springframework.org/schema/beans"
       xmlns:xsi="http://www.w3.org/2001/XMLSchema-instance"
       xmlns:context="http://www.springframework.org/schema/context"
       xmlns:tx="http://www.springframework.org/schema/tx"
       xsi:schemaLocation="http://www.springframework.org/schema/beans
                           http://www.springframework.org/schema/beans/spring-beans.xsd
                           http://www.springframework.org/schema/context
                           https://www.springframework.org/schema/context/spring-context.xsd
                           http://www.springframework.org/schema/tx
                           http://www.springframework.org/schema/tx/spring-tx.xsd">
    <!--导入数据文件database.properties-->
    <context:property-placeholder location="classpath:database.properties"/>

    <!--配置连接DriverManagerDataSource -->
    <bean id="dataSource1" class="org.springframework.jdbc.datasource.DriverManagerDataSource">
        <property name="driverClassName" value="${jdbc.driver}"/>
        <property name="url" value="${jdbc.url}"/>
        <property name="username" value="${jdbc.username}"/>
        <property name="password" value="${jdbc.password}"/>
    </bean>

    <!--配置连接 SimpleDriverDataSource -->
    <bean id="dataSource2" class="org.springframework.jdbc.datasource.SimpleDriverDataSource">
        <property name="driverClass" value="${jdbc.driver}"/>
        <property name="url" value="${jdbc.url}"/>
        <property name="username" value="${jdbc.username}"/>
        <property name="password" value="${jdbc.password}"/>
    </bean>

    <!--配置连接 SingleConnectionDataSource -->
    <bean id="dataSource3" class="org.springframework.jdbc.datasource.SingleConnectionDataSource">
        <property name="driverClassName" value="${jdbc.driver}"/>
        <property name="url" value="${jdbc.url}"/>
        <property name="username" value="${jdbc.username}"/>
        <property name="password" value="${jdbc.password}"/>
    </bean>
</beans>
连接数据库进行测试
@SpringJUnitConfig(locations = {"classpath:application.xml"})
public class JdbcTest {
    /**
    * DriverManagerDataSource
    */
    @Resource
    private DataSource dataSource1;
    /**
    * SimpleDriverDataSource
    */
    @Resource
    private DataSource dataSource2;

    /**
    * SingleConnectionDataSource
    */
    @Resource
    private DataSource dataSource3;

    @Test
    public void databaseTest(){
        //测试DriverManagerDataSource
        System.out.println(dataSource1);
        try (Connection connection = dataSource1.getConnection();
             PreparedStatement ps = connection.prepareStatement("SELECT  * FROM  user WHERE user_id=1");
             ResultSet rs = ps.executeQuery();
        ){
            if (rs.next()){
                User user = new User();
                user.setUserId(rs.getInt("user_id"))
                    .setUsername(rs.getString("username"))
                    .setPassword(rs.getString("password"))
                    .setDeleted(rs.getBoolean("deleted"));
                System.out.println(user);
            }
        } catch (SQLException e) {
            throw new RuntimeException(e);
        }

        //测试SimpleDriverDataSource
        System.out.println(dataSource2);
        try (Connection connection = dataSource2.getConnection();
             PreparedStatement ps = connection.prepareStatement("SELECT  * FROM  user WHERE user_id=1");
             ResultSet rs = ps.executeQuery();
        ){
            if (rs.next()){
                User user = new User();
                user.setUserId(rs.getInt("user_id"))
                        .setUsername(rs.getString("username"))
                        .setPassword(rs.getString("password"))
                        .setDeleted(rs.getBoolean("deleted"));
                System.out.println(user);
            }
        } catch (SQLException e) {
            throw new RuntimeException(e);
        }

        //测试SingleConnectionDataSource
        System.out.println(dataSource3);
        try (Connection connection = dataSource3.getConnection();
             PreparedStatement ps = connection.prepareStatement("SELECT  * FROM  user WHERE user_id=1 ");
             ResultSet rs = ps.executeQuery();
        ){
            if (rs.next()){
                User user = new User();
                user.setUserId(rs.getInt("user_id"))
                        .setUsername(rs.getString("username"))
                        .setPassword(rs.getString("password"))
                        .setDeleted(rs.getBoolean("deleted"));
                System.out.println(user);
            }
        } catch (SQLException e) {
            throw new RuntimeException(e);
        }
    }
}

14.1.2、Druid连接池
Druid是阿里开源的优秀的连接池,几乎已经成为现在使用最多的连接池之一。Druid连接池专为监控而生,内置强大的监控功能且不影响性能,它能防SQL注入,内置Logging能诊断Hack应用行为等。
使用 Druid 需要现在pom文件中添加依赖:
<!--德鲁伊连接池-->
<dependency>
    <groupId>com.alibaba</groupId>
    <artifactId>druid</artifactId>
    <version>1.2.15</version>
</dependency>
先在properties文件中配置数据资源
jdbc.driver=com.mysql.cj.jdbc.Driver
jdbc.url=jdbc:mysql://localhost:3306/库名?useUnicode=true&characterEncoding=UTF-8&useSSL=false&serverTimezone=Asia/Shanghai&allowPublicKeyRetrieval=true
jdbc.username=root
jdbc.password=密码
#初始连接数
jdbc.initialSize=5
#最小空闲连接数
jdbc.minIdle=5
#最大活动连接数
jdbc.maxActive=20
#最大等待时间
jdbc.maxWait=50000
#间隔多久进行一次检测
jdbc.timeBetweenEvictionRunsMillis=500000
#连接在池中最小生存的时间
jdbc.minEvictableIdleTimeMillis=30000
#验证数据库连接的查询语句:mysql是select 1、Oracle是select 1 from dual
jdbc.validationQuery=select 1

#testWhileIdle、testOnBorrow都是在获取连接的时候测试连接的有效性
#其中testOnBorrow优先级高,都为true时不会使用到testWhileIdle
# testWhileIdle(默认true)当从连接池中获取对象时,testOnBorrow为false,连接处于空闲状态时,则验证这条连接是否可用。
#jdbc.testWhileIdle=true
#从连接池中获取对象时,每次都会进行验证(默认false)
#jdbc.testOnBorrow=false
#归还连接时,每次都会进行验证(默认false)
#jdbc.testOnReturn=false

# 打开PSCache,并且指定每个连接上PSCache的大小
jdbc.poolPreparedStatements=true
jdbc.maxPoolPreparedStatementPerConnectionSize=20
# 配置监控统计拦截的filters,去掉后监控界面sql无法统计,'wall'用于防火墙
jdbc.filters=stat,wall,log4j
# 通过connectProperties属性来打开mergeSql功能;慢SQL记录
jdbc.connectionProperties=druid.stat.mergeSql=true;druid.stat.slowSqlMillis=5000
再在XML中配置连接池:
<?xml version="1.0" encoding="UTF-8"?>
<beans xmlns="http://www.springframework.org/schema/beans"
       xmlns:xsi="http://www.w3.org/2001/XMLSchema-instance"
       xmlns:context="http://www.springframework.org/schema/context"
       xmlns:tx="http://www.springframework.org/schema/tx"
       xsi:schemaLocation="http://www.springframework.org/schema/beans
            http://www.springframework.org/schema/beans/spring-beans.xsd
            http://www.springframework.org/schema/context
            https://www.springframework.org/schema/context/spring-context.xsd
            http://www.springframework.org/schema/tx
            http://www.springframework.org/schema/tx/spring-tx.xsd">

    <!-- 导入数据文件database.properties-->
    <context:property-placeholder location="classpath:database.properties"/>

    <!-- 配置druid 连接池 -->
    <bean id="dataSource" class="com.alibaba.druid.pool.DruidDataSource" destroy-method="close">
        <property name="driverClassName" value="${jdbc.driver}"/>
        <property name="url" value="${jdbc.url}"/>
        <property name="username" value="${jdbc.username}"/>
        <property name="password" value="${jdbc.password}"/>
        <!--初始连接数-->
        <property name="initialSize" value="${jdbc.initialSize}"/>
        <!--最小空闲连接数-->
        <property name="minIdle" value="${jdbc.minIdle}"/>
        <!--最大活动连接数-->
        <property name="maxActive" value="${jdbc.maxActive}"/>
        <!--最大等待时间-->
        <property name="maxWait" value="${jdbc.maxWait}"/>
        <!--间隔多久进行一次检测,检测需要关闭的空闲连接 -->
        <property name="timeBetweenEvictionRunsMillis" value="${jdbc.timeBetweenEvictionRunsMillis}"/>
        <!--一个连接在池中最小生存的时间-->
        <property name="minEvictableIdleTimeMillis" value="${jdbc.minEvictableIdleTimeMillis}"/>
        <!--验证数据库连接的查询语句:mysql是select 1、Oracle是select 1 from dual-->
        <property name="validationQuery" value="${jdbc.validationQuery}"/>
    </bean>


</beans>
连接数据库进行测试
@Resource
private DataSource druidDataSource;
@Test
public void druidTest(){
try (Connection connection = druidDataSource.getConnection();
PreparedStatement ps = connection.prepareStatement("SELECT * FROM user WHERE WHERE user_id=1");
ResultSet rs = ps.executeQuery();
){
if (rs.next()){
User user = new User();
user.setUserId(rs.getInt("user_id"))
.setUsername(rs.getString("username"))
.setPassword(rs.getString("password"))
.setDeleted(rs.getBoolean("deleted"));
System.out.println(user);
}
} catch (SQLException e) {
throw new RuntimeException(e);
}
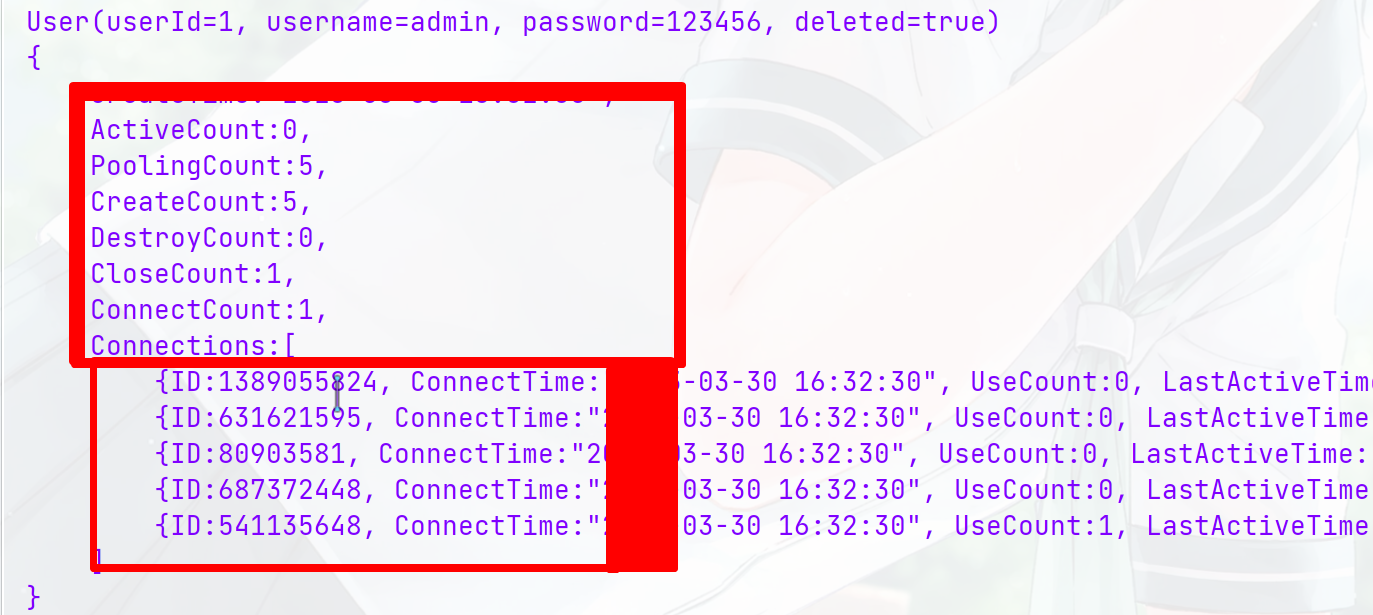
System.out.println(druidDataSource);
}
14.2、JdbcTemplate
在web编程中,传统的JDBC每次执行SQL时每次都需要获取:Connection、PreparedStatement、ResultSet 这些数据库资源,然后就需要大量的try、catch、finally语句捕捉异常、关闭数据库资源。既便是专门使用一个类设置成单例进行封装,它依然是很繁琐的。
在spring 中提供了JdbcTemplate模板来解决这个问题,它是比较经典的jdbc实现方式之一,同时也是Spring 在jdbc方便最底层的方法,SimpleJdbcInsert,SimpleJdbcCall 等底层都是用了JdbcTemplate。
JdbcTemplate是 org.springframework.jdbc.core 中的类,用来处理数据库资源的创建和释放, JdbcTemplate类主要包含下面这些功能:
- 执行SQL查询语句
- 执行更新语句和存储过程调用
- 对 ResultSet 执行迭代并提取返回的参数值。
- 捕获JDBC异常并进行处理
我们发现这些功能都是我们在写 JCBC时每条sql语句都会涉及到的内容,而JdbcTemplate把这些提取出来进行封装,我们只需要在XML中配置好,就可直接提供sql语句执行了。
<bean id="jdbcTemplate" class="org.springframework.jdbc.core.JdbcTemplate">
    <!--将之前配置好的连接池加载进来 -->
    <property name="dataSource" ref="druidDataSource"/>
</bean>
获取JdbcTemplate对象就可以直接使用,它内部的常用的方法
-
query():重载了大量 query方法来进行数据的查询操作,返回的是List,内部是自定义的Bean
-
List query(String sql, PreparedStatementSetter pss, RowMapper rowMapper):根据sql语句创建PreparedStatementSetter 对象。通过RowMapper 将结果返回到list中
-
List query(String sql, Object[] args, RowMapper rowMapper):使用Object[] 的值注入sql语句,利用RowMapper 返回数据
-
List query(String sql, RowMapper rowMapper, Object… args)
jdbcTemplate.query(sql, new BeanPropertyRowMapper<>(数据表对应的类.class),参数....);
-
-
queryForObject(String sql, RowMapper rowMapper, Object… args)():只能查询一行数据库记录,RowMapper自动封装,返回任意对象
jdbcTemplate.queryForObject(sql, new BeanPropertyRowMapper<>(数据表对应的类.class),参数....); -
queryForList():可以返回多行数据的结果,返回的是List数据
-
update():此方法用来进行修改、新增、删除操作
- int update(String sql)
- int update(String sql,Object… args)
-
int[] batchUpdate(String sql, List<Object[]> batchArgs, final int[] argTypes) :批量执行新增、更新、删除等语句
sql:需要执行的 SQL 语句;argTypes:需要注入的 SQL 参数的 JDBC 类型;batchArgs:表示需要传入到 SQL 语句的参数。
-
execute():可以执行任意 SQL,一般用于执行 DDL 语句;
@SpringJUnitConfig(locations = {"classpath:application.xml"})
public class JDBCTest {
@Resource
private JdbcTemplate jdbcTemplate;
@Test
public void select(){
Integer[] id = {1};
String sql = "select * from classes where c_id =?";
//Classes classes =jdbcTemplate1.query(sql, new BeanPropertyRowMapper<>(Classes.class),id);
Classes classes = jdbcTemplate.queryForObject(sql,id,(ResultSet rs,int rowNum)->{
Classes classes1 = new Classes();
classes1.setcId(rs.getInt("c_id"));
classes1.setClassesName(rs.getString("classes_name"));
classes1.setDeleted(rs.getBoolean("is_deleted"));
return classes1;
});
if(classes!=null){
System.out.println(classes.getClassesName());
}
}
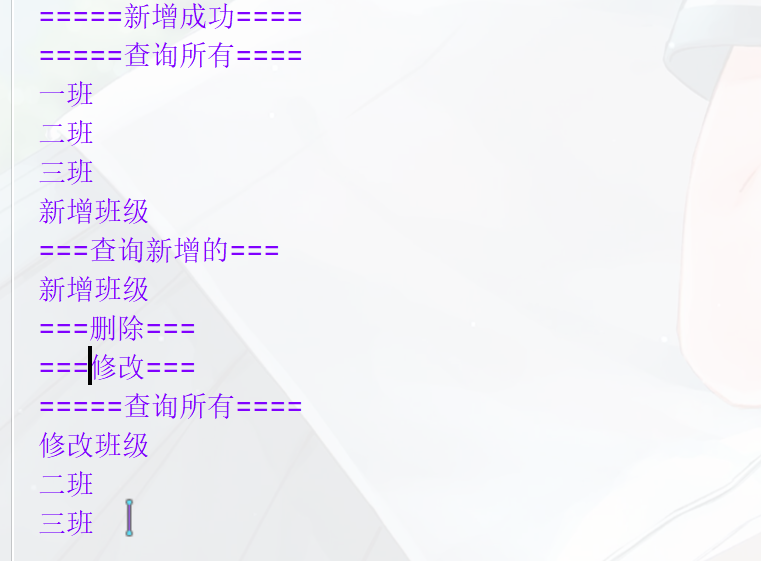
@Test
public void selectAll(){
String sql = "select * from classes";
List<Classes> list = jdbcTemplate.query(sql, new BeanPropertyRowMapper<>(Classes.class));
list.forEach(c -> System.out.println(c.getClassesName()));
}
@Test
public void insert(){
String classesName = "新增班级";
String sql = "insert into classes(classes_name) values(?)";
jdbcTemplate.update(sql, classesName);
}
@Test
public void delete(){
int id = 1;
String sql = "delete from classes where c_id=?";
jdbcTemplate.update(sql,id);
}
@Test
public void update(){
String newName = "修改班级";
int id = 1;
String sql = "UPDATE classes SET classes_name='?' WHERE classes.c_id = ?";
jdbcTemplate.update(sql,newName,id);
}
}


 1551
1551


 被折叠的 条评论
为什么被折叠?
被折叠的 条评论
为什么被折叠?
 到【灌水乐园】发言


