


预处理操作
所有节点(master和node)都执行
| 主机名 | IP |
|---|---|
| kube-master | 192.168.71.60 |
| kube-node1 | 192.168.71.61 |
| kube-node2 | 192.168.71.62 |
关闭防火墙
systemctl stop firewalld
systemctl disable firewalld
iptables -F
关闭selinux
sed -i 's/SELINUX=.*enforcing/SELINUX=disabled/' /etc/selinux/config
关闭交换分区
swapoff -a
vim /etc/fstab   将swap所在行注释
#/dev/mapper/centos_test-swap swap                    swap    defaults        0 0
设置主机名,添加hosts解析
hostnamectl set-hostname kube-master
hostnamectl set-hostname kube-node1
hostnamectl set-hostname kube-node2

cat >> /etc/hosts << EOF
192.168.71.60 kube-master
192.168.71.61 kube-node1
192.168.71.62 kube-node2
EOF
开启ipv6流量转发
cat > /etc/sysctl.d/k8s.conf << EOF
net.ipv4.ip_forward = 1
net.bridge.bridge-nf-call-ip6tables = 1
net.bridge.bridge-nf-call-iptables = 1
EOF

 sysctl -p
echo "1" >/proc/sys/net/bridge/bridge-nf-call-iptables
时区与时间同步
vim /etc/chrony.conf
server ntp.aliyun.com iburst
#server 0.centos.pool.ntp.org iburst
#server 1.centos.pool.ntp.org iburst
#server 2.centos.pool.ntp.org iburst
#server 3.centos.pool.ntp.org iburst
重启chronyd时间服务
systemctl restart chronyd
配置开机自启
systemctl enable chronyd
配置阿里云YUM源
 rm -f /etc/yum.repos.d/*

下载镜像源
wget -O /etc/yum.repos.d/CentOS-Base.repo https://mirrors.aliyun.com/repo/Centos-7.repo

清理缓存
yum clean all

创建缓存
yum makecache

中间可能会报错,一些源不可用,可以从Centos-7.repo中删除,像下边这两行,删除之后,在清理缓存,创建缓存即可
        http://mirrors.aliyuncs.com/centos/$releasever/os/$basearch/
        http://mirrors.cloud.aliyuncs.com/centos/$releasever/os/$basearch/
配置EPEL源
wget -O /etc/yum.repos.d/epel.repo http://mirrors.aliyun.com/repo/epel-7.repo

yum makecache
安装docker
安装依赖
yum install -y yum-utils device-mapper-persistent-data lvm2
配置docker源
yum-config-manager --add-repo https://mirrors.aliyun.com/docker-ce/linux/centos/docker-ce.repo

yum makecache
安装指定版本docker
 yum list docker-ce --showduplicate |sort -r
 yum install docker-ce-19.03.9-3.el7 -y
启动docker
systemctl start docker
systemctl enable docker
查看docker版本,是否安装成功
docker --version
Docker version 19.03.13, build 4484c46d9d
添加镜像加速文件
默认从官方镜像仓库拉取镜像,拉取速度较慢,在这里配置国内镜像仓库
vim /etc/docker/daemon.json
{
"registry-mirrors": ["https://reg-mirror.qiniu.com"]
}
重启docker
systemctl restart docker
拉取hello-world镜像
docker pull hello-world
启动容器,看到下边内容即成功
 docker run hello-world

Hello from Docker!
This message shows that your installation appears to be working correctly.

To generate this message, Docker took the following steps:
 1. The Docker client contacted the Docker daemon.
 2. The Docker daemon pulled the "hello-world" image from the Docker Hub.
    (amd64)
 3. The Docker daemon created a new container from that image which runs the
    executable that produces the output you are currently reading.
 4. The Docker daemon streamed that output to the Docker client, which sent it
    to your terminal.

To try something more ambitious, you can run an Ubuntu container with:
 $ docker run -it ubuntu bash

Share images, automate workflows, and more with a free Docker ID:
 https://hub.docker.com/

For more examples and ideas, visit:
 https://docs.docker.com/get-started/
kubernetes
配置kubernetes服务Yum源
cat <<EOF > /etc/yum.repos.d/kubernetes.repo
[kubernetes]
name=Kubernetes
baseurl=https://mirrors.aliyun.com/kubernetes/yum/repos/kubernetes-el7-x86_64/
enabled=1
gpgcheck=1
repo_gpgcheck=1
gpgkey=https://mirrors.aliyun.com/kubernetes/yum/doc/yum-key.gpg https://mirrors.aliyun.com/kubernetes/yum/doc/rpm-package-key.gpg
EOF
yum makecache
安装kubelet kubeadm kubectl,先不启动kubelet
yum install -y kubelet kubeadm kubectl
systemctl enable kubelet && systemctl start kubelet
master节点生成预处理文件
kubeadm config print init-defaults > kubeadm-init.yaml
修改预处理文件
apiVersion: kubeadm.k8s.io/v1beta2
bootstrapTokens:
- groups:
  - system:bootstrappers:kubeadm:default-node-token
  token: abcdef.0123456789abcdef
  ttl: 24h0m0s
  usages:
  - signing
  - authentication
kind: InitConfiguration
localAPIEndpoint:
  advertiseAddress: 192.168.71.60  #master节点IP地址
  bindPort: 6443
nodeRegistration:
  criSocket: /var/run/dockershim.sock
  name: kube-master
  taints:
  - effect: NoSchedule
    key: node-role.kubernetes.io/master
---
apiServer:
  timeoutForControlPlane: 4m0s
apiVersion: kubeadm.k8s.io/v1beta2
certificatesDir: /etc/kubernetes/pki
clusterName: kubernetes
controllerManager: {}
dns:
  type: CoreDNS
etcd:
  local:
    dataDir: /var/lib/etcd
imageRepository: registry.cn-hangzhou.aliyuncs.com/google_containers  #配置阿里云镜像源
kind: ClusterConfiguration
kubernetesVersion: v1.19.0  #kubenetes版本号
networking:
  dnsDomain: cluster.local
  serviceSubnet: 10.96.0.0/12  #默认即可
  podSubnet: 10.245.0.0/16  #添加pod网段
scheduler: {}
提前拉取镜像,如果直接采用kubeadm init来初始化,中间会有系统自动拉取镜像的这一步骤,这是比较慢的,这里建议分开来做,先拉取镜像
kubeadm config images pull --config kubeadm-init.yaml
初始化
kubeadm init --config kubeadm-init.yaml
创建文件
mkdir -p $HOME/.kube
cp -i /etc/kubernetes/admin.conf $HOME/.kube/config
chown $(id -u):$(id -g) $HOME/.kube/config
查看集群节点
[root@kube-master ~]# kubectl get node
NAME          STATUS     ROLES    AGE   VERSION
kube-master   NotReady   master   33m   v1.19.2
node节点加入集群
kubeadm join 192.168.71.60:6443 --token abcdef.0123456789abcdef \
    --discovery-token-ca-cert-hash sha256:d1d57b39e4da309096bca4784faf10d2b3ee7d9410ac83456e51a8b80e78b12d
状态为NotReady,即集群不可用,是因为需要安装网络插件,这里使用fannel插件
更换falnel镜像源
curl -o kube-flannel.yml   https://raw.githubusercontent.com/coreos/flannel/master/Documentation/kube-flannel.yml

[root@kube-master ~]#  sed -i 's/quay.io/quay.mirrors.ustc.edu.cn/g' kube-flannel.yml

[root@kube-master ~]# kubectl apply -f kube-flannel.yml

查看kube-flannel的pod是否运行正常
```shell
 kubectl get pod -n kube-system | grep kube-flannel
kube-flannel-ds-4j8gj                 1/1     Running   0          2m49s
kube-flannel-ds-m7tbc                 1/1     Running   0          2m49s
kube-flannel-ds-xbkqp                 1/1     Running   0          2m49s
查看节点是否可用
[root@kube-master ~]# kubectl get nodes
NAME          STATUS   ROLES    AGE   VERSION
kube-master   Ready    master   23h   v1.19.2
kube-node1    Ready    <none>   22h   v1.19.2
kube-node2    Ready    <none>   22h   v1.19.2
测试kubenetes集群
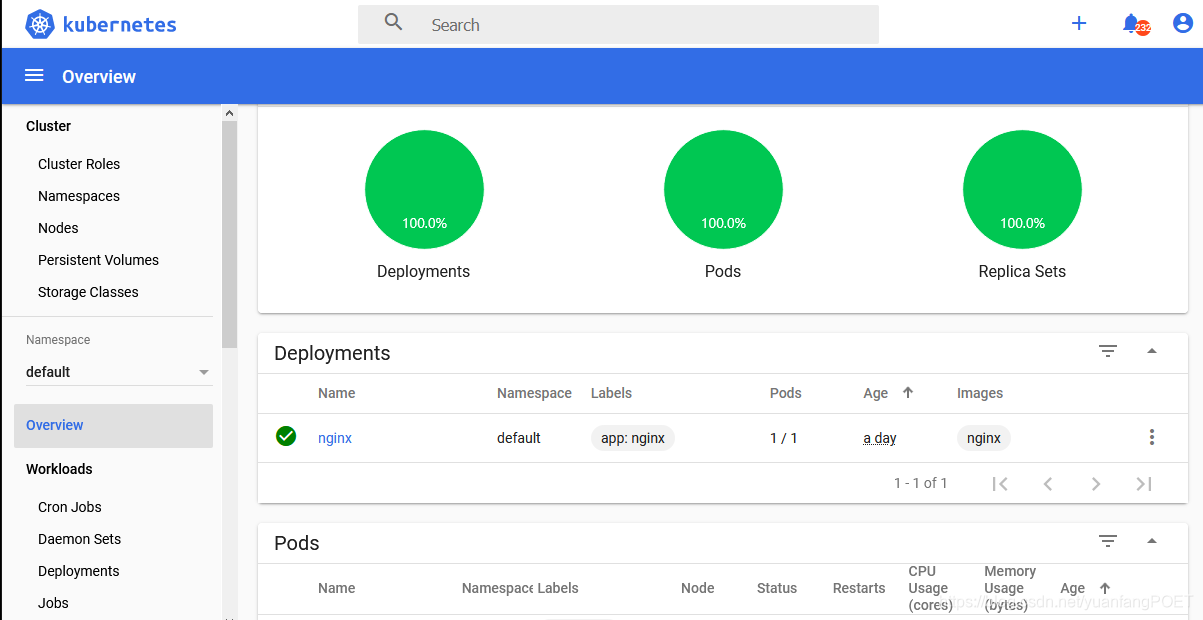
[root@kube-master ~]# kubectl create deployment nginx --image=nginx
deployment.apps/nginx created
暴露端口
[root@kube-master ~]# kubectl expose deployment nginx --port=80 --type=NodePort
service/nginx exposed
 kubectl get pod,svc -o wide
NAME                         READY   STATUS              RESTARTS   AGE   IP       NODE         NOMINATED NODE   READINESS GATES
pod/nginx-6799fc88d8-dt6f2   0/1     ContainerCreating   0          27s   <none>   kube-node2   <none>           <none>

NAME                 TYPE        CLUSTER-IP       EXTERNAL-IP   PORT(S)        AGE   SELECTOR
service/kubernetes   ClusterIP   10.96.0.1        <none>        443/TCP        14h   <none>
service/nginx        NodePort    10.108.195.168   <none>        80:32343/TCP   10s   app=nginx
访问nginx

安装dashboard
下载dashboard配置文件
curl -o recommended.yaml https://raw.githubusercontent.com/kubernetes/dashboard/v2.0.0-beta4/aio/deploy/recommended.yaml
可能会下载失败
curl -o recommended.yaml   https://raw.githubusercontent.com/kubernetes/dashboard/v2.0.0-beta4/aio/deploy/recommended.yaml
  % Total    % Received % Xferd  Average Speed   Time    Time     Time  Current
                                 Dload  Upload   Total   Spent    Left  Speed
  0     0    0     0    0     0      0      0 --:--:--  0:00:15 --:--:--     0curl: (7) Failed connect to raw.githubusercontent.com:443; Connection refused
修改hosts解决
echo "199.232.28.133 raw.githubusercontent.com" >> /etc/hosts
修改配置文件
kind: Service
apiVersion: v1
metadata:
  labels:
    k8s-app: kubernetes-dashboard
  name: kubernetes-dashboard
  namespace: kubernetes-dashboard
spec:
  type: NodePort
  ports:
    - port: 443
      targetPort: 8443
      nodePort: 30065
  selector:
    k8s-app: kubernetes-dashboard
运行此文件
kubectl apply -f recommended.yaml
kubectl get pod,svc -n kubernetes-dashboard -o wide
NAME                                             READY   STATUS    RESTARTS   AGE   IP           NODE          NOMINATED NODE   READINESS GATES
pod/dashboard-metrics-scraper-7b9b99d599-2zc8c   1/1     Running   0          29s   10.245.0.2   kube-master   <none>           <none>
pod/kubernetes-dashboard-6d4799d74-grr2h         1/1     Running   0          29s   10.245.1.3   kube-node1    <none>           <none>

NAME                                TYPE        CLUSTER-IP     EXTERNAL-IP   PORT(S)         AGE   SELECTOR
service/dashboard-metrics-scraper   ClusterIP   10.105.8.238   <none>        8000/TCP        29s   k8s-app=dashboard-metrics-scraper
service/kubernetes-dashboard        NodePort    10.101.26.35   <none>        443:30065/TCP   29s   k8s-app=kubernetes-dashboard
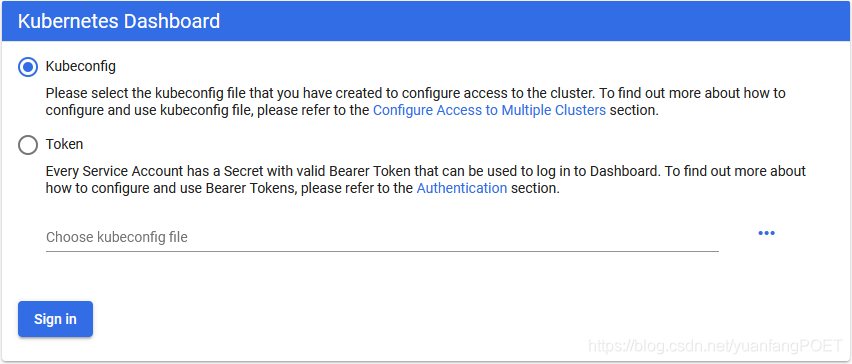
获取token
kubectl describe secrets -n kube-system $(kubectl -n kube-system get secret | awk '/dashboard-admin/{print $1}')
Data
====
ca.crt:     1066 bytes
namespace:  11 bytes
token:      eyJhbGciOiJSUzI1NiIsImtpZCI6Ii1uRDhoMWVKWl9hWWxUWXdPNGNVMlVaV1Z2ZVhGWXhzRm1YYzhzLTVWMEkifQ.eyJpc3MiOiJrdWJlcm5ldGVzL3NlcnZpY2VhY2NvdW50Iiwia3ViZXJuZXRlcy5pby9zZXJ2aWNlYWNjb3VudC9uYW1lc3BhY2UiOiJrdWJlLXN5c3RlbSIsImt1YmVybmV0ZXMuaW8vc2VydmljZWFjY291bnQvc2VjcmV0Lm5hbWUiOiJ0dGwtY29udHJvbGxlci10b2tlbi1mNm1tYyIsImt1YmVybmV0ZXMuaW8vc2VydmljZWFjY291bnQvc2VydmljZS1hY2NvdW50Lm5hbWUiOiJ0dGwtY29udHJvbGxlciIsImt1YmVybmV0ZXMuaW8vc2VydmljZWFjY291bnQvc2VydmljZS1hY2NvdW50LnVpZCI6IjRjMWYzNTQzLTczZjctNDE2Ny05MGI1LTk5MjBlMTYxZGJkOSIsInN1YiI6InN5c3RlbTpzZXJ2aWNlYWNjb3VudDprdWJlLXN5c3RlbTp0dGwtY29udHJvbGxlciJ9.I-NkhkeNZxunZBlnD1eZbhqWfgFfxB2s6gG7p3jdaNUNd84olZfRHssxbD_TH-7lwAkHPSS62M-G_YRpjkb-KuMTsgWgn-IoMy0AWaXwfXdyVeJmyjcrfSmFVdhwOf6xIUpYZ0sHrfWQlyyDNmaBzx3x-I91uiqnqh6D0bwtWacuuoLLpI8ZGsm72PyVQVCQ9ljwD9t767Oaq9_vzGcJLzO6_BYASKGGhK_Y4of_dTz5RX9TQK41nlYfb5oggyjO0KhYLQFiUYg1MZaAG57QxM49hi7eYkfHfX2Y4FqSOhiJZyR1IqEMRIFCcZWS0jC2GWKdur9-puLm9EgQwwiQFg
登进去后不能查看集群信息,因为还没有绑定集群角色
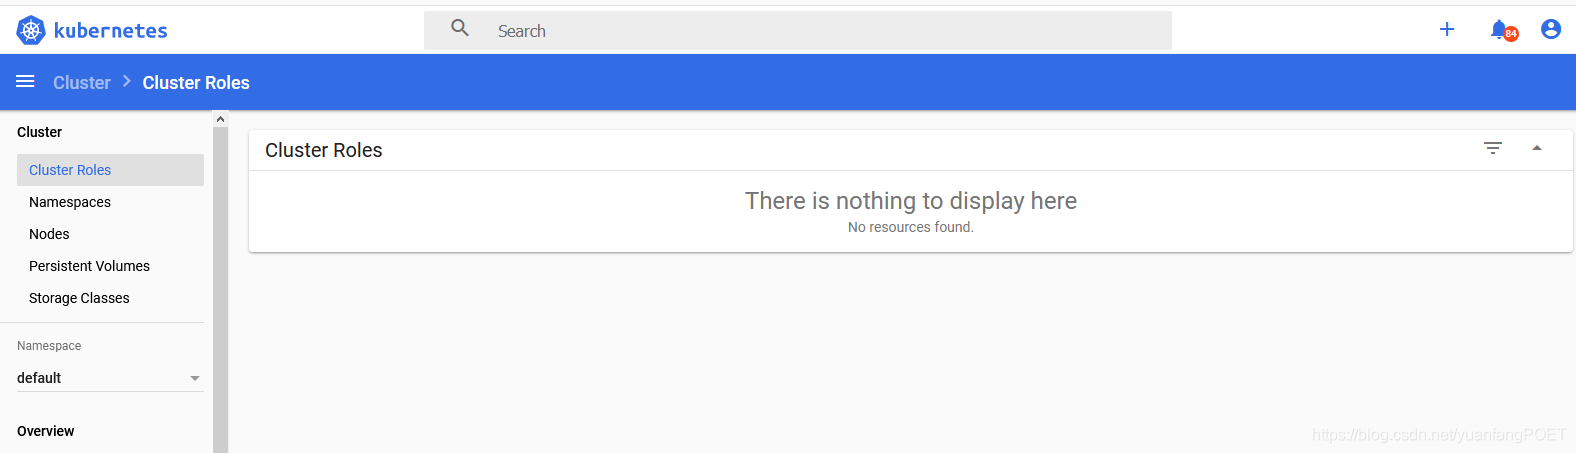
cluster-admin管理员角色绑定
[root@kube-master ~]# kubectl create serviceaccount dashboard-admin -n kube-system
[root@kube-master ~]# kubectl create clusterrolebinding dashboard-admin --clusterrole=cluster-admin --serviceaccount=kube-system:dashboard-admin
[root@kube-master ~]# kubectl describe secrets -n kube-system $(kubectl -n kube-system get secret | awk '/dashboard-admin/{print $1}')
再使用输出的token登陆dashboard即可。


 3133
3133


 被折叠的 条评论
为什么被折叠?
被折叠的 条评论
为什么被折叠?
 到【灌水乐园】发言


