


前言:
待办事项的创建无非就是实现增删改查,可以根据TableView自带的editing来实现更改顺序和滑动删除,创建button的点击事件来更改是否打勾的状态,通过正反向传值、设置代理来实现更改label内容和添加待办事项。
目录
最终效果图
视频效果
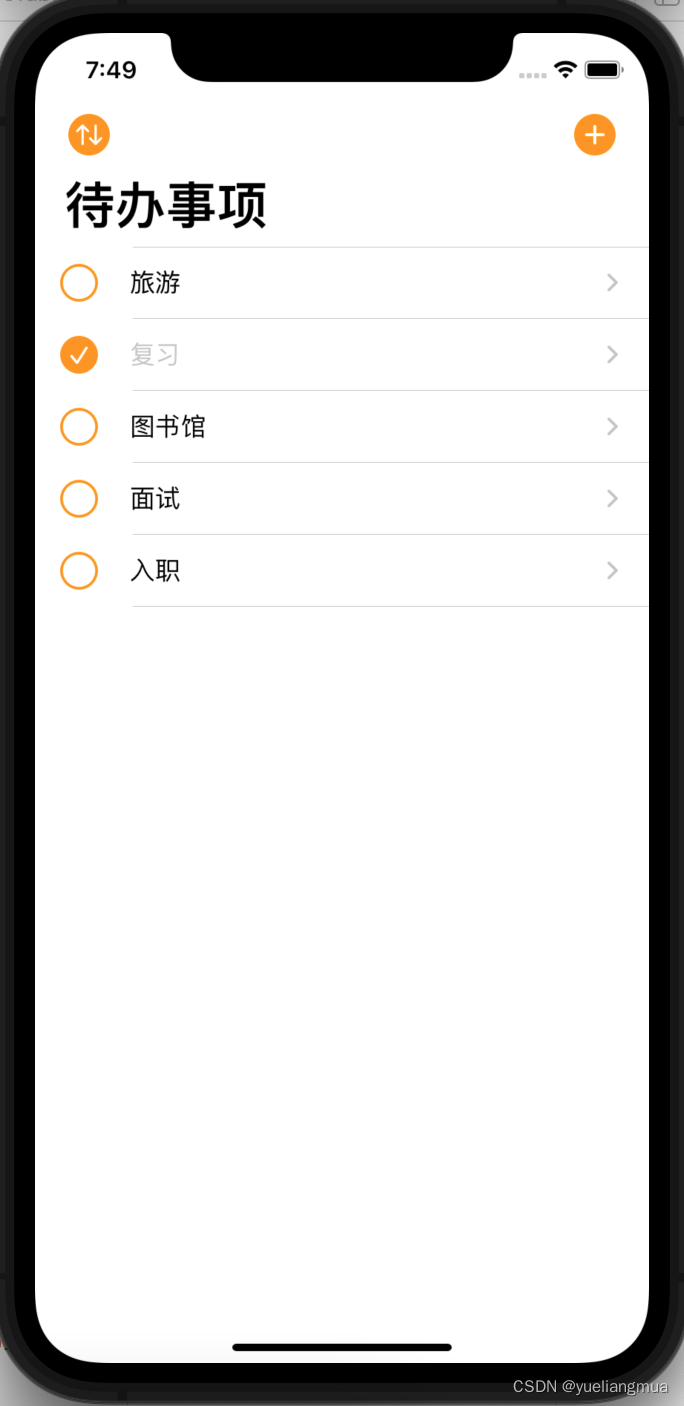
待办事项效果图
创建TableView
待办事项的设计通常使用tableVIew会让页面更加友好操作方便,我通常在mainstory里搭建所需页面。如下图所示。
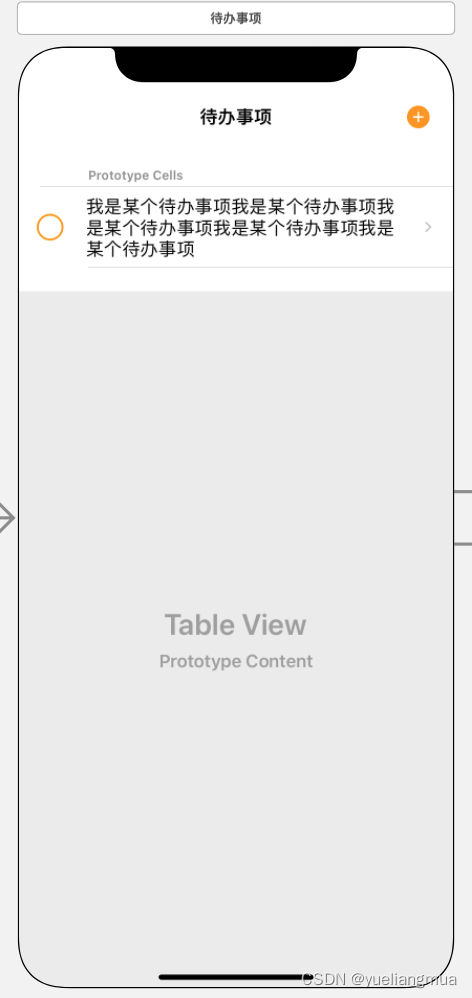
先拉一个UITableView进来,再给里面拉一个TableViewCell进行操作。接着就是在cell里面添加构成元素了,根据图片很容易可以发现共含两个元素,一个就是可供点击的button,另一个就是展示内容的label,于是我们先添加一个占位符。
常量constant代码
import Foundation
import UIKit

let kTodoTableVCID = "TodoTableVCID"
let kTodoCellID = "TodoCellID"
let kAddTodoID = "AddTodoID"
let kEditTodoID = "EditTodoID"

func pointIcon(_ iconName: String, _ pointSize: CGFloat = 22) -> UIImage?{
    let config = UIImage.SymbolConfiguration(pointSize:  pointSize)
    return UIImage(systemName:  iconName, withConfiguration:  config)
}
连接mainstory和代码
将刚刚所设计的UI连接上TodosTableView的swift文件。根据MVC模式,单独创建一个swift文件储存模版元素。
import Foundation

//class Todo{
//    var name = ""
//    var checked = ""
//}

struct Todo {
    var name: String
    var checked: Bool
}
在TodosTableVC.swift文件中用数组存储cell中的初始内容。
var todos = [
        Todo(name: "旅游", checked: false),
        Todo(name: "复习", checked: false),
        Todo(name: "图书馆", checked: false),
        Todo(name: "面试", checked: false),
        Todo(name: "入职", checked: false)
    ]

//row用于后续使用
var row = 0
将TableView放入navigation中,实现界面的出栈入栈
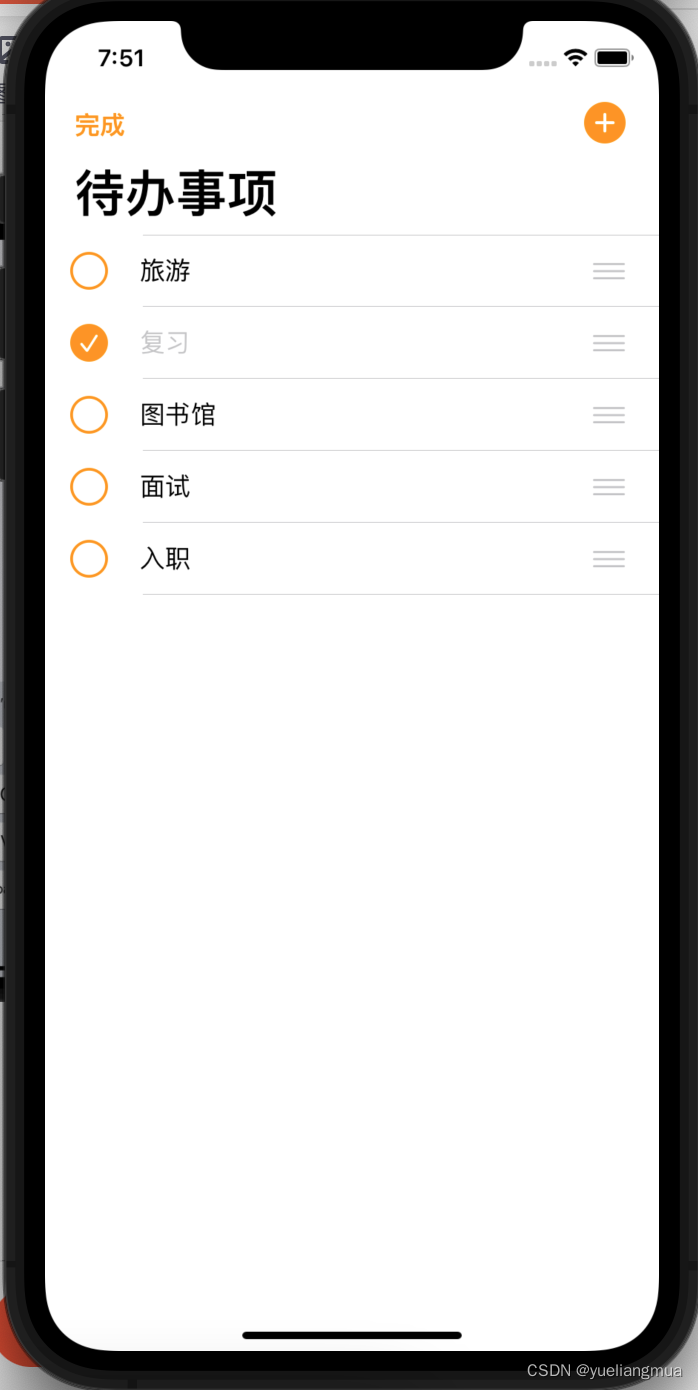
设置NavigationItem的内容,用UIControllerView自带的edititem实现编辑按钮。
override func viewDidLoad() {
        super.viewDidLoad()


        // Uncomment the following line to preserve selection between presentations
        // self.clearsSelectionOnViewWillAppear = false

        // Uncomment the following line to display an Edit button in the navigation bar for this view controller.
        editButtonItem.title = nil
        editButtonItem.image = pointIcon("arrow.up.arrow.down.circle.fill")

         navigationItem.leftBarButtonItem = editButtonItem

        navigationItem.rightBarButtonItem?.image = pointIcon("plus.circle.fill", 22)
    }

   override func setEditing(_ editing: Bool, animated: Bool) {
        super.setEditing(editing, animated: animated)
        if isEditing{
            editButtonItem.image = nil
            editButtonItem.title = "完成"
        }else{
            editButtonItem.title = nil
            editButtonItem.image = pointIcon("arrow.up.arrow.down.circle.fill")
        }
    }
在prepar方法中设置页面跳转时的参数传递
 override func prepare(for segue: UIStoryboardSegue, sender: Any?) {
        if segue.identifier == kAddTodoID{
            let vc = segue.destination as! TodoTableVC
            vc.delegate = self
        }else if segue.identifier == kEditTodoID{
            let vc = segue.destination as! TodoTableVC
            vc.delegate = self
            let cell = sender as! TodoCell
            //cell-->indexpath
            //tableView.indexPath(for: cell)
            //indexpath-->cell
            //tableView.cellForRow(at: indexPath) as! TodoCell
            row = tableView.indexPath(for: cell)!.row
            vc.name = todos[row].name
        }
    }
设置TodosTableVC的delegate
设置点击时的背景颜色只显示瞬间的灰色,在选中时就设置取消选中。
override func tableView(_ tableView: UITableView, didSelectRowAt indexPath: IndexPath) {
        tableView.deselectRow(at: indexPath, animated: true)
//        let vc = storyboard?.instantiateViewController(withIdentifier: kTodoTableVCID) as! TodoTableVC//在storyboar上找制作好的vc
//        navigationController?.pushViewController(vc, animated: true)
    }
设置编辑模式,在isEditing状态可以排序但取消删除并且取消锁进,非isEditing状态可以进行滑动删除。
 override func tableView(_ tableView: UITableView, editingStyleForRowAt indexPath: IndexPath) -> UITableViewCell.EditingStyle {
        if !isEditing{
            return .delete
        }else{
        return .none
    }
    }

    override func tableView(_ tableView: UITableView, shouldIndentWhileEditingRowAt indexPath: IndexPath) -> Bool {
        return false
    }
TodoTableVCDelegate用于反向传值,实现新增待办事项和修改已有待办事项
extension TodosTableVC: TodoTableVCDelegate{
    func didAdd(name: String) {

        todos.append(Todo(name: name, checked: false))

        tableView.insertRows(at: [IndexPath(row: todos.count - 1, section: 0)], with: .automatic)
//        tableView.reloadData()
    }
    func didEdit(name: String) {
        todos[row].name = name
        let indexPath = IndexPath(row: 0, section: 0)
        let cell = tableView.cellForRow(at: indexPath) as! TodoCell
        cell.todoLabel.text = name
        tableView.reloadData()
    }
}
完整代码如下
import UIKit

extension TodosTableVC{

    override func tableView(_ tableView: UITableView, didSelectRowAt indexPath: IndexPath) {
        tableView.deselectRow(at: indexPath, animated: true)
//        let vc = storyboard?.instantiateViewController(withIdentifier: kTodoTableVCID) as! TodoTableVC//在storyboar上找制作好的vc
//        navigationController?.pushViewController(vc, animated: true)
    }

//    override func tableView(_ tableView: UITableView, titleForDeleteConfirmationButtonForRowAt indexPath: IndexPath) -> String? {
//        return "点击以删除"
//    }

    override func tableView(_ tableView: UITableView, editingStyleForRowAt indexPath: IndexPath) -> UITableViewCell.EditingStyle {
        if !isEditing{
            return .delete
        }else{
        return .none
    }
    }

    override func tableView(_ tableView: UITableView, shouldIndentWhileEditingRowAt indexPath: IndexPath) -> Bool {
        return false
    }
}

extension TodosTableVC: TodoTableVCDelegate{
    func didAdd(name: String) {

        todos.append(Todo(name: name, checked: false))

        tableView.insertRows(at: [IndexPath(row: todos.count - 1, section: 0)], with: .automatic)
//        tableView.reloadData()
    }
    func didEdit(name: String) {
        todos[row].name = name
        let indexPath = IndexPath(row: 0, section: 0)
        let cell = tableView.cellForRow(at: indexPath) as! TodoCell
        cell.todoLabel.text = name
        tableView.reloadData()
    }
}
设置TodosTableVC的dataSource
默认返回一个section和todos数据个cell
override func tableView(_ tableView: UITableView, numberOfRowsInSection section: Int) -> Int {
        // #warning Incomplete implementation, return the number of rows
        return todos.count
    }
cell的复用方法中设置选中时图标的变化和字体颜色
override func tableView(_ tableView: UITableView, cellForRowAt indexPath: IndexPath) -> UITableViewCell {
        let cell = tableView.dequeueReusableCell(withIdentifier: kTodoCellID, for: indexPath) as! TodoCell
        let checkBoxBtn = cell.checkBoxBtn!
        let todoLabel = cell.todoLabel!
        let initSelected = todos[indexPath.row].checked
//        var contentConfiguration = cell.defaultContentConfiguration()
//        contentConfiguration.text = "昵称"
//        contentConfiguration.secondaryText = "个性签名"
//        contentConfiguration.image = UIImage(systemName: "star")
//        cell.contentConfiguration = contentConfiguration
        // Configure the cell...


        checkBoxBtn.isSelected = initSelected
        todoLabel.text = todos[indexPath.row].name
        todoLabel.textColor = initSelected ? .tertiaryLabel : .label

        //改
//        checkBoxBtn.addAction(UIAction(handler: { action in
//            self.todos[indexPath.row].checked.toggle()
//            let checked = self.todos[indexPath.row].checked
//            checkBoxBtn.isSelected = checked
//            todoLabel.textColor = checked ? .tertiaryLabel : .label
//        }), for: .touchUpInside)
        checkBoxBtn.tag = indexPath.row

        checkBoxBtn.addTarget(self, action: #selector(toggleCheck), for: .touchUpInside)


        return cell
    }

    @objc func toggleCheck(checkBoxBtn: UIButton){
      //  改
        let row = checkBoxBtn.tag
            self.todos[row].checked.toggle()
            let checked = self.todos[row].checked
            checkBoxBtn.isSelected = checked
        let cell = tableView.cellForRow(at: IndexPath(row: row, section: 0)) as! TodoCell
        cell.todoLabel.textColor = checked ? .tertiaryLabel : .label
    }
设置移动时的数据变化
    override func tableView(_ tableView: UITableView, moveRowAt fromIndexPath: IndexPath, to: IndexPath) {

        let todoToRemove = todos[fromIndexPath.row]
        todos.remove(at: fromIndexPath.row)
        todos.insert(todoToRemove, at: to.row)

        tableView.reloadData()
    }
完整代码如下
import UIKit

extension TodosTableVC{
    override func tableView(_ tableView: UITableView, numberOfRowsInSection section: Int) -> Int {
        // #warning Incomplete implementation, return the number of rows
        return todos.count
    }


    override func tableView(_ tableView: UITableView, cellForRowAt indexPath: IndexPath) -> UITableViewCell {
        let cell = tableView.dequeueReusableCell(withIdentifier: kTodoCellID, for: indexPath) as! TodoCell
        let checkBoxBtn = cell.checkBoxBtn!
        let todoLabel = cell.todoLabel!
        let initSelected = todos[indexPath.row].checked
//        var contentConfiguration = cell.defaultContentConfiguration()
//        contentConfiguration.text = "昵称"
//        contentConfiguration.secondaryText = "个性签名"
//        contentConfiguration.image = UIImage(systemName: "star")
//        cell.contentConfiguration = contentConfiguration
        // Configure the cell...


        checkBoxBtn.isSelected = initSelected
        todoLabel.text = todos[indexPath.row].name
        todoLabel.textColor = initSelected ? .tertiaryLabel : .label

        //改
//        checkBoxBtn.addAction(UIAction(handler: { action in
//            self.todos[indexPath.row].checked.toggle()
//            let checked = self.todos[indexPath.row].checked
//            checkBoxBtn.isSelected = checked
//            todoLabel.textColor = checked ? .tertiaryLabel : .label
//        }), for: .touchUpInside)
        checkBoxBtn.tag = indexPath.row

        checkBoxBtn.addTarget(self, action: #selector(toggleCheck), for: .touchUpInside)


        return cell
    }

    @objc func toggleCheck(checkBoxBtn: UIButton){
      //  改
        let row = checkBoxBtn.tag
            self.todos[row].checked.toggle()
            let checked = self.todos[row].checked
            checkBoxBtn.isSelected = checked
        let cell = tableView.cellForRow(at: IndexPath(row: row, section: 0)) as! TodoCell
        cell.todoLabel.textColor = checked ? .tertiaryLabel : .label
    }

    // Override to support editing the table view.删
    override func tableView(_ tableView: UITableView, commit editingStyle: UITableViewCell.EditingStyle, forRowAt indexPath: IndexPath) {
        if editingStyle == .delete {
            // Delete the row from the data source
            todos.remove(at: indexPath.row)
//            tableView.deleteRows(at: [indexPath], with: .fade)
            tableView.reloadData()
        } else if editingStyle == .insert {
            // Create a new instance of the appropriate class, insert it into the array, and add a new row to the table view
        }
    }

    override func tableView(_ tableView: UITableView, moveRowAt fromIndexPath: IndexPath, to: IndexPath) {

        let todoToRemove = todos[fromIndexPath.row]
        todos.remove(at: fromIndexPath.row)
        todos.insert(todoToRemove, at: to.row)

        tableView.reloadData()
    }
}
TodoCell的设置
import UIKit

class TodoCell: UITableViewCell {

    @IBOutlet weak var todoLabel: UILabel!
    @IBOutlet weak var checkBoxBtn: UIButton!


    override func awakeFromNib() {
        super.awakeFromNib()
        // Initialization code
        checkBoxBtn.setImage(UIImage(systemName: "checkmark.circle.fill"), for: .selected)
        checkBoxBtn.setImage(UIImage(systemName: "circle"), for: .normal)

    }

    override func setSelected(_ selected: Bool, animated: Bool) {
        super.setSelected(selected, animated: animated)

        // Configure the view for the selected state
    }

}
cell中含todoLabel和checkBoxBtn,设置checkBoxBtn选中和未选中时的图标,setSelected设置选中标签时的背景。
创建第二个TableView,TodoTableView
搭建页面连接代码
设置didAdd和didEdit的协议
protocol TodoTableVCDelegate{
func didAdd(name: String)
func didEdit(name: String)
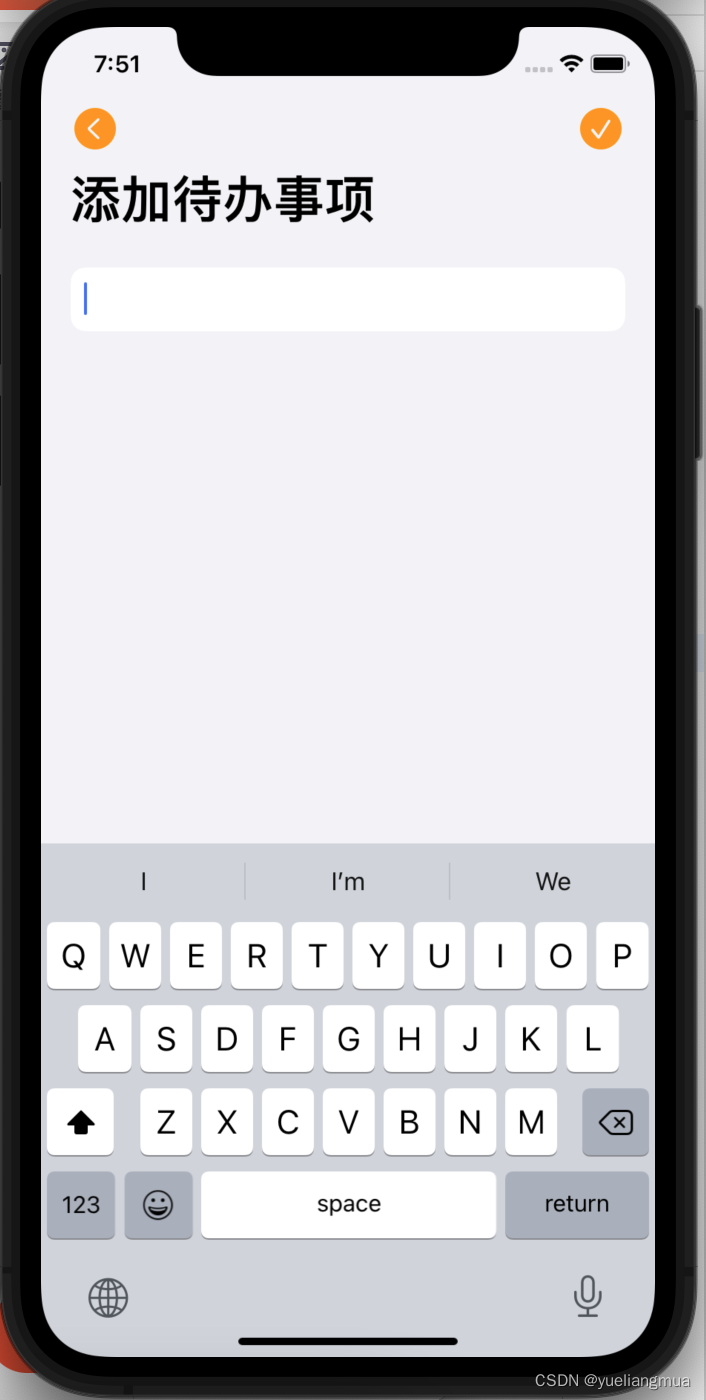
}通过textView输入框内容是否为空判断是增还是改
@IBAction func done(_ sender: Any) {
        navigationController?.popViewController(animated: true)
        if !todoTextView.text.trimmingCharacters(in: .whitespacesAndNewlines).isEmpty{
            if name != nil{
                delegate?.didEdit(name: todoTextView.text)
            }else{
                delegate?.didAdd(name: todoTextView.text)
            }
        }
    }
点击返回按钮和完成按钮页面出栈
@IBAction func back(_ sender: Any) {
navigationController?.popViewController(animated: true)
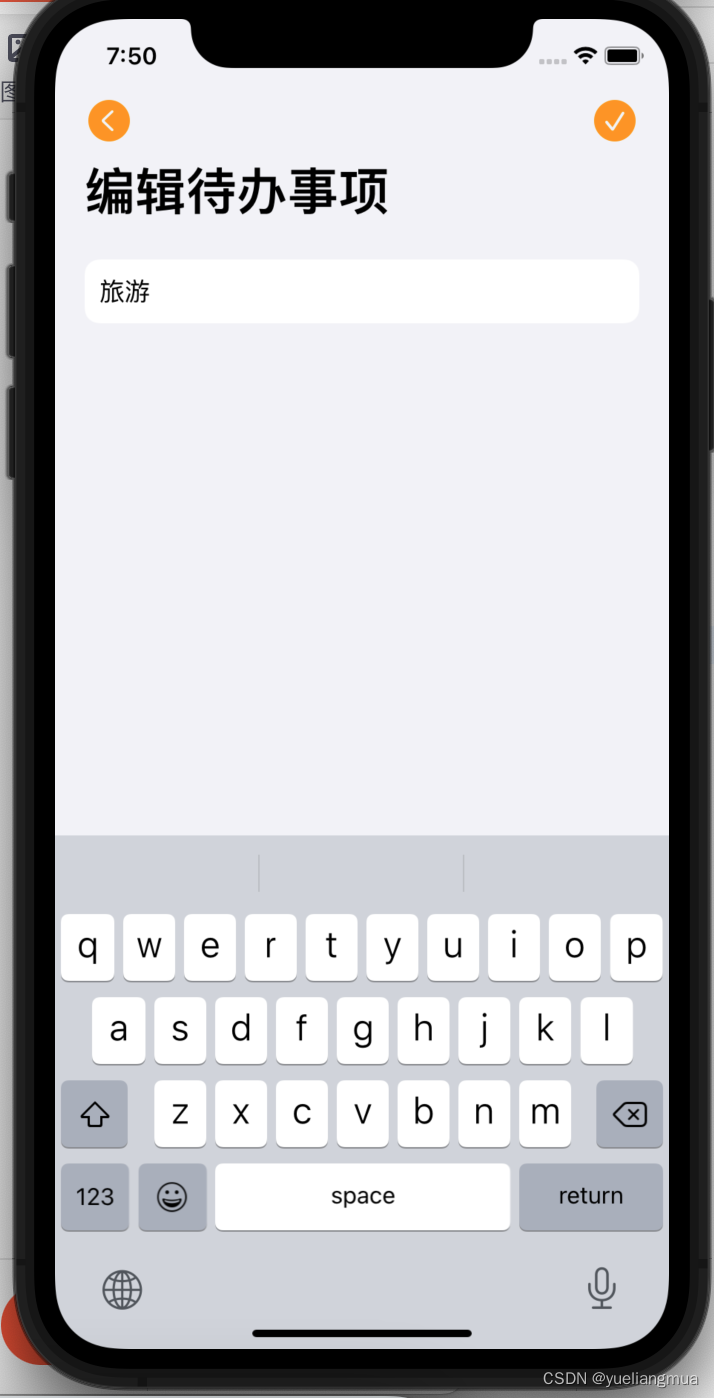
}设置顶部返回和完成图标
override func viewDidLoad() {
        super.viewDidLoad()

        todoTextView.becomeFirstResponder()
        todoTextView.delegate = self

        todoTextView.text = name

        if name != nil{
            navigationItem.title = "编辑待办事项"
        }

        navigationItem.leftBarButtonItem?.image = pointIcon("chevron.backward.circle.fill")
        navigationItem.rightBarButtonItem?.image = pointIcon("checkmark.circle.fill")
    }
设置textview的实时换行,遵循textViewdelegat协议,实现实时检测换行方法
extension TodoTableVC: UITextViewDelegate{
    func textViewDidChange(_ textView: UITextView) {
//        tableView.beginUpdates()
//        tableView.endUpdates()
        tableView.performBatchUpdates { }
    }
}
布局刷新。
以上实现仅在内存中,如若关闭app再次打开数据无法保持上次打开的最终状态,所以需要储存到本地,上面功能全部搞懂可以尝试选择做下列两种储存操作。
本地储存待办事项
利用UserDefault在系统沙盒存储内容,通过JSON编码和解码实现数据的持久存储,每次打开应用进行的操作都会保存下来至本地。
1.找到沙盒路径
print(NSHomeDirectory())用command+空格复制路径找到文件夹,打开Library文件夹,再打开Preferences文件夹,打开里面的plist文件,可以看到储存的内容,点击Type可以看到储存的基础类型。

由于是自己定义的Todo类型,所以无法存进plist文件,需转data类型,用json编码,但是Todo类型必须遵从编码和解码的协议。
2.编码储存
func saveData(){
        //本地存储
        do{
          let data = try JSONEncoder().encode(todos)
            UserDefaults.standard.set(data, forKey: kTodosKey)//由于是Todo类型所以无法存进plist文件,需转data类型,用json编码
        }catch{
            print("编码错误")
        }
    }
key为自己定义的
在待办事项的添加修改删除功能中调用储存函数编码储存,在ViewDidLoad()开头调用解码函数解码读取内容。
if let data = UserDefaults.standard.data(forKey: kTodosKey){
            if let todos = try? JSONDecoder().decode([Todo].self, from: data){
                self.todos = todos
            }else{
                print("解码失败")
            }
        }//取数据
CoreData储存待办事项
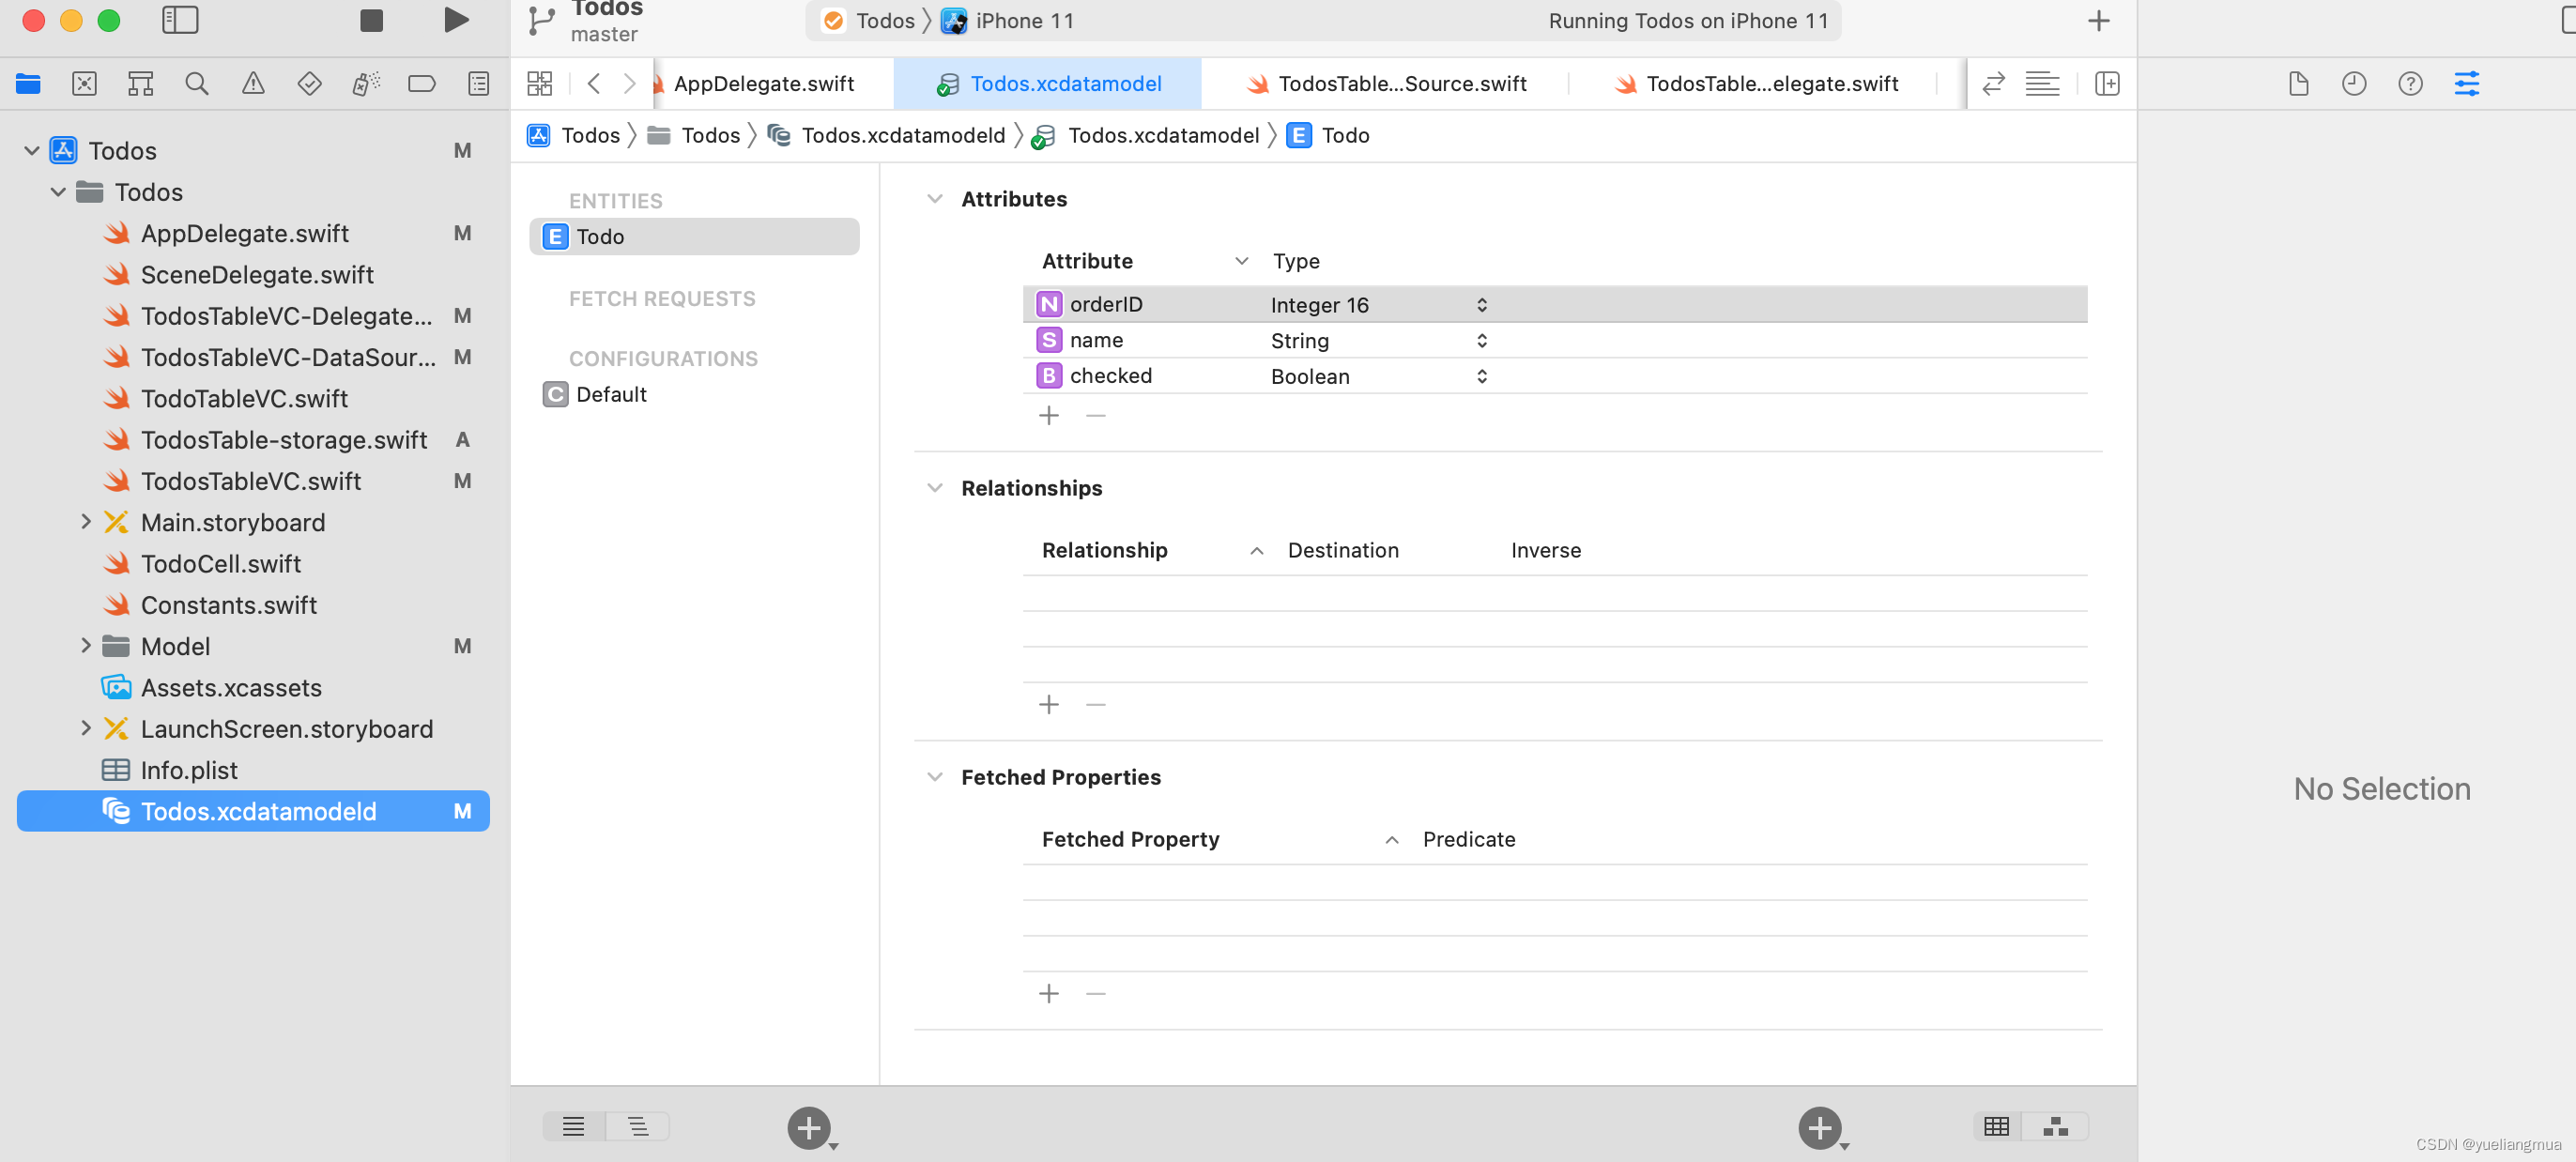
创建项目时勾选CoreData,系统会自动在AppDelegate生成代码,并生成一个xcdatamodeld文件,没有勾选也没关系,新建一个勾选了CoreData的项目,将生成的代码复制过来并自己新建xcdatamodeld文件。
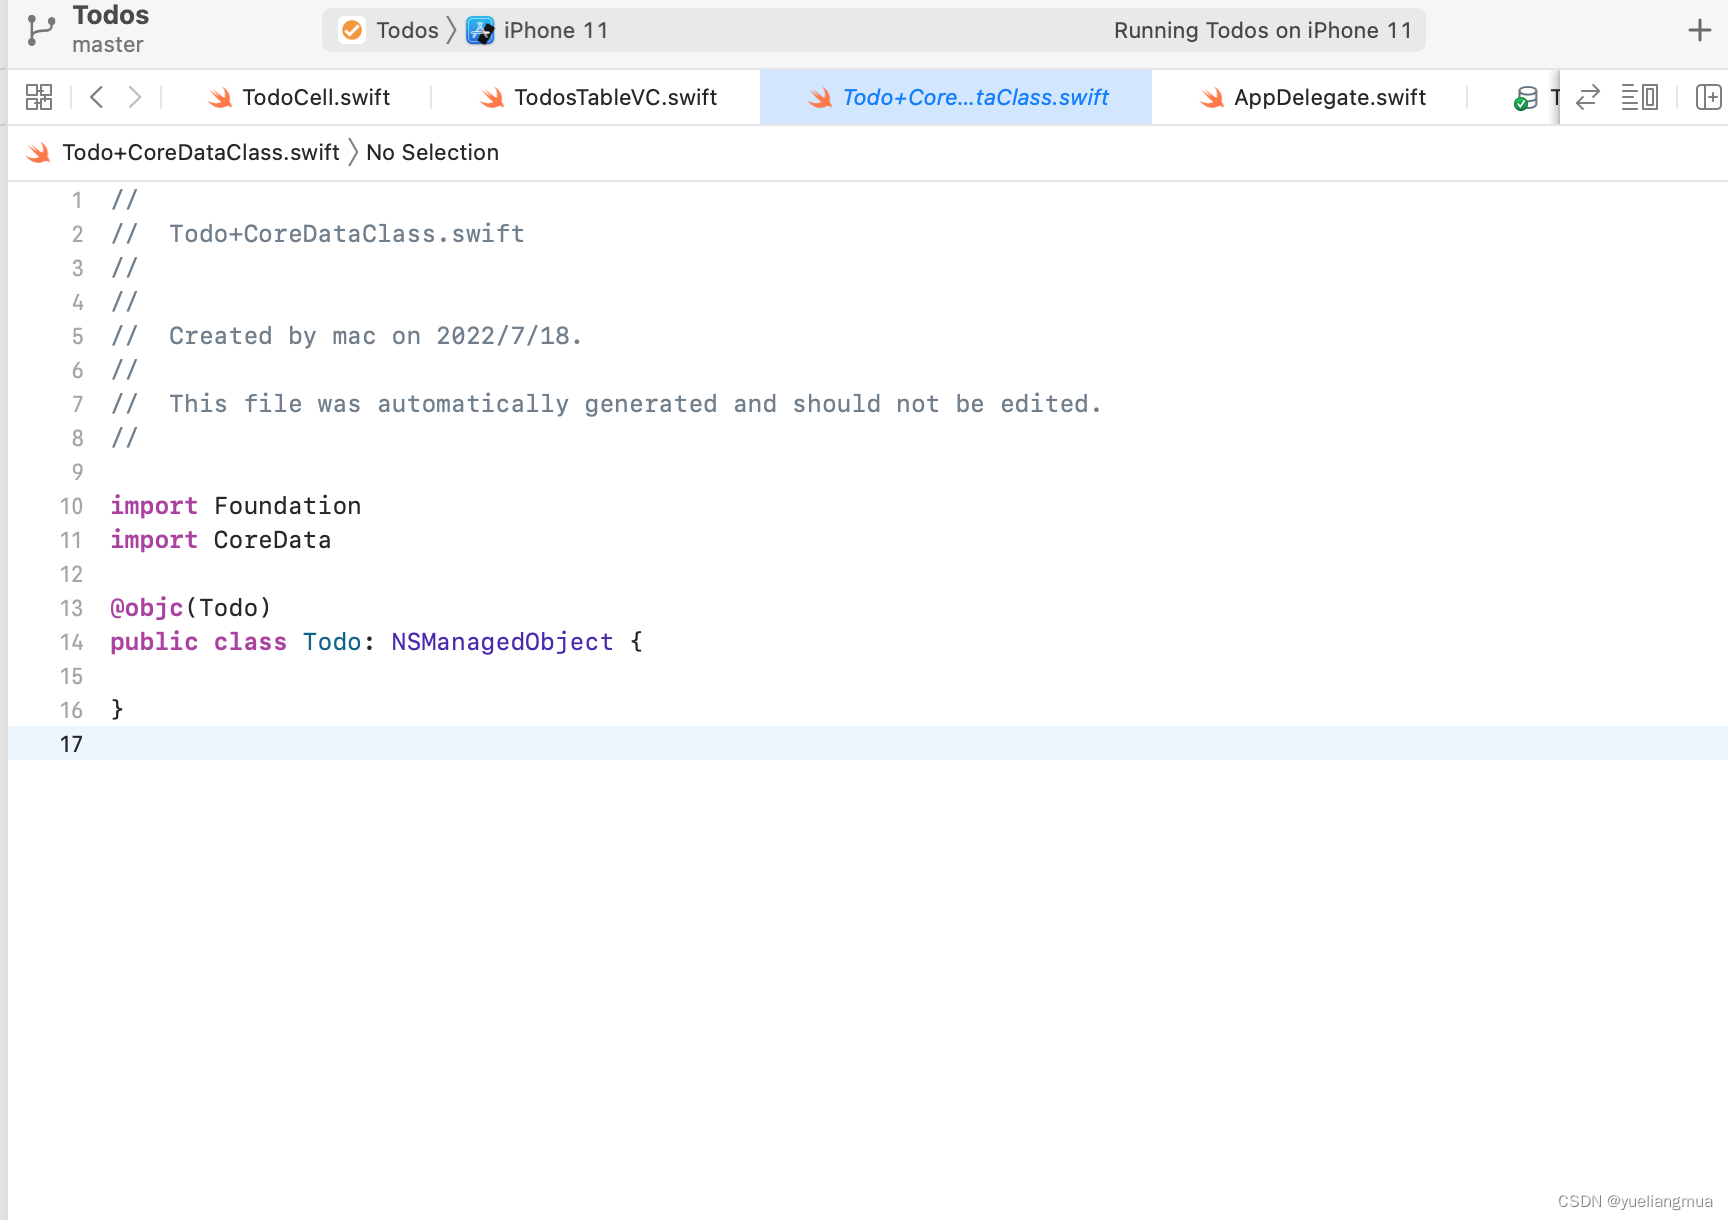
在xcdatamodeld文件中新建ENTITIES代替原来的Todo结构体,并添加两个Attribute元素并选择类型,可在右侧功能面板自行设置默认值,系统底层会生成一个class。
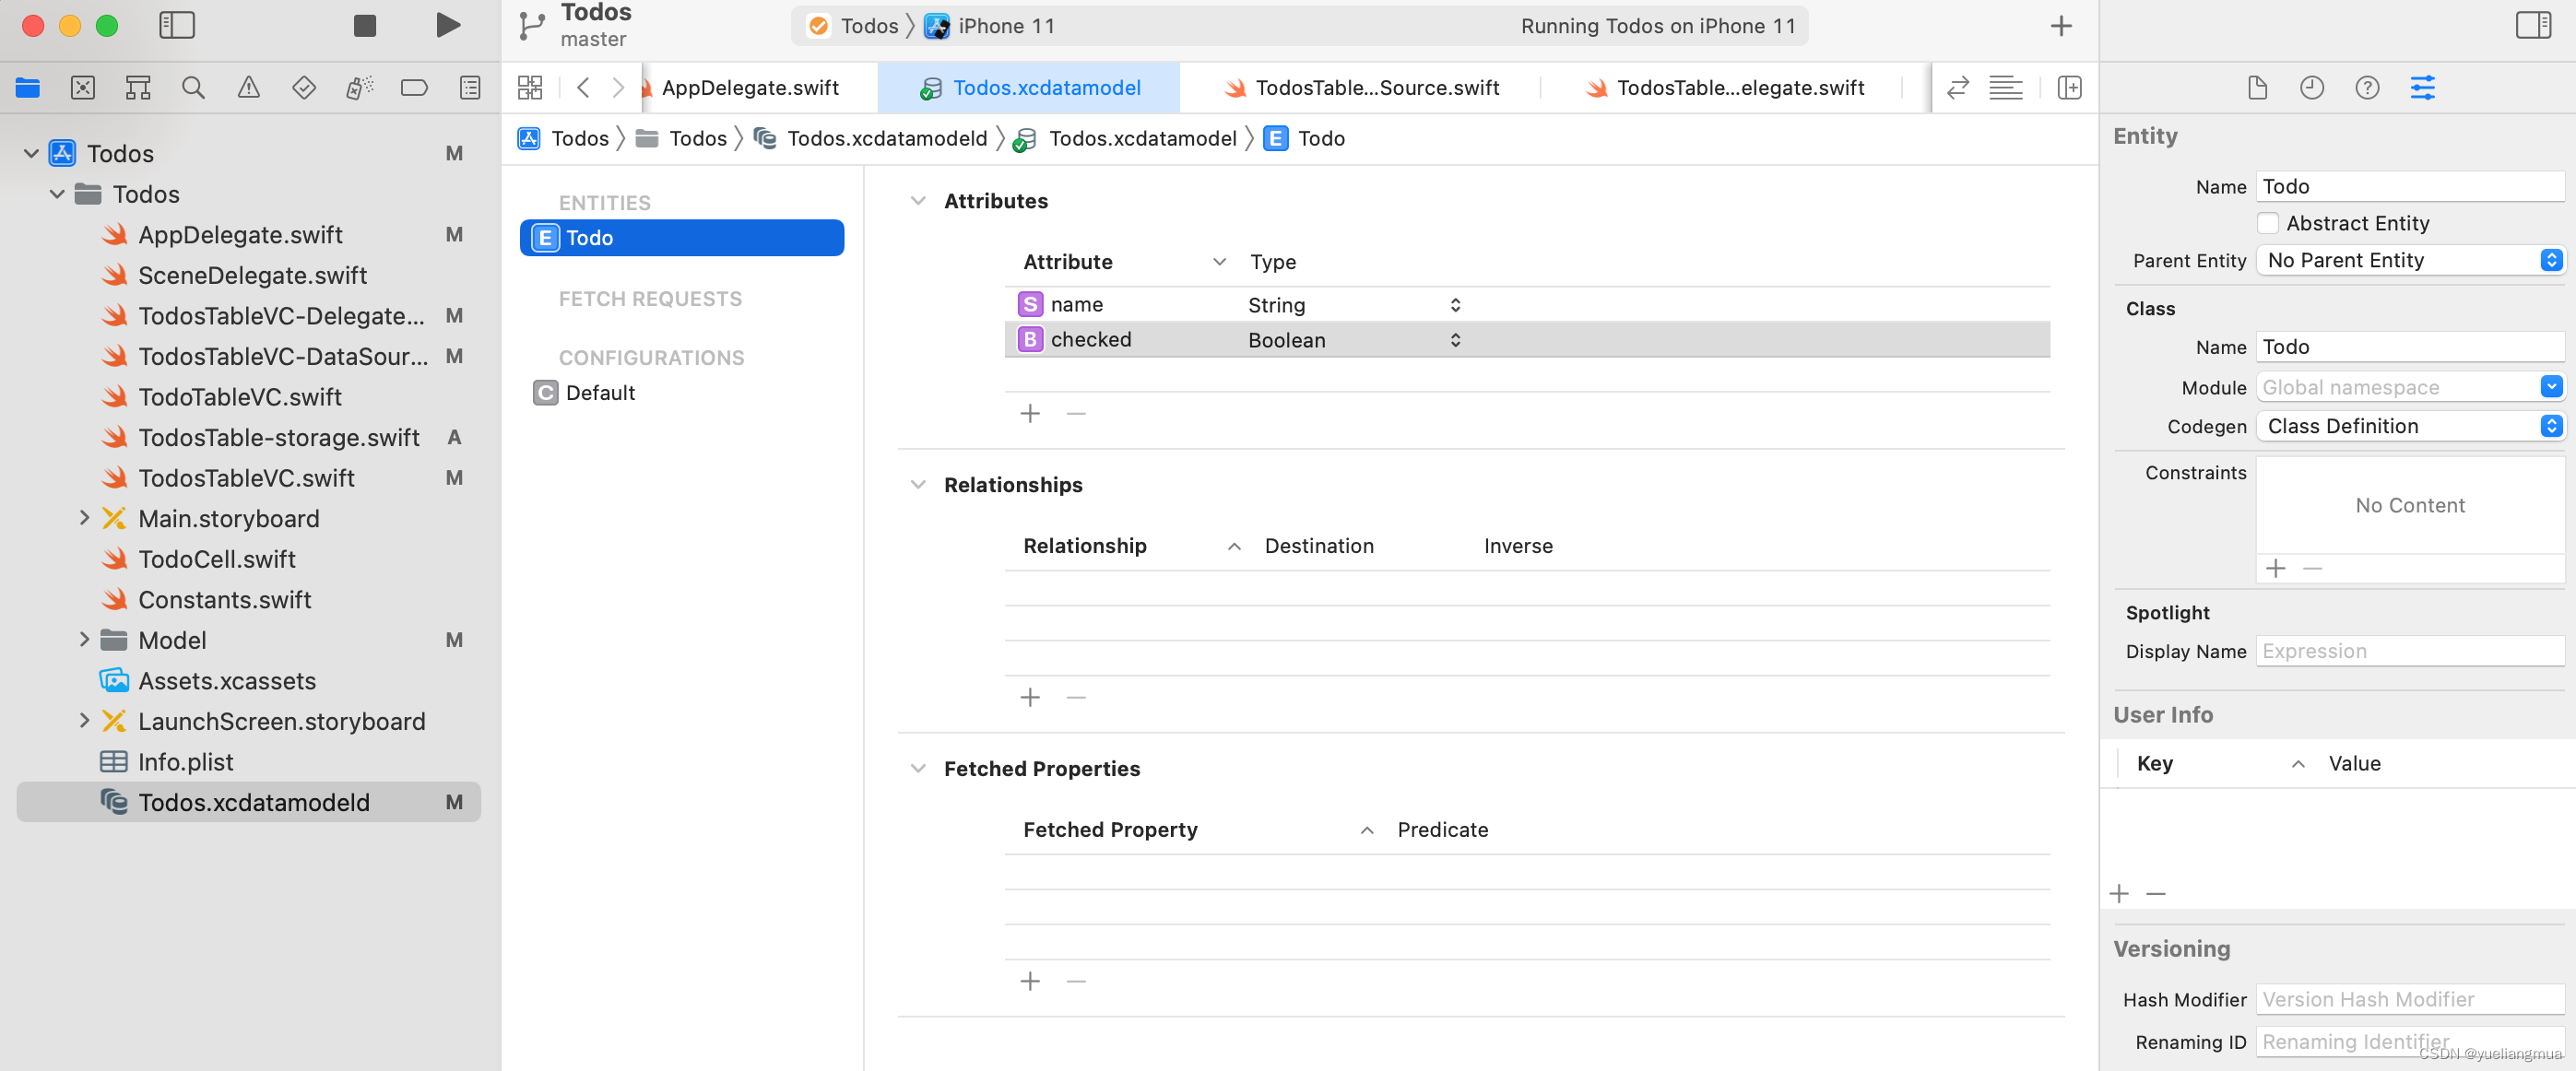
在AppDelegate中可以看到生成的持久化容器persistentContainer和SaveContext方法用于判断数据是否发生改变和储存数据。
再次通过沙盒地址打开Application Support文件可以看到sqlite数据库文件,打开Todos.sqlite文件(建议用DB Browser for SQLite应用打开)
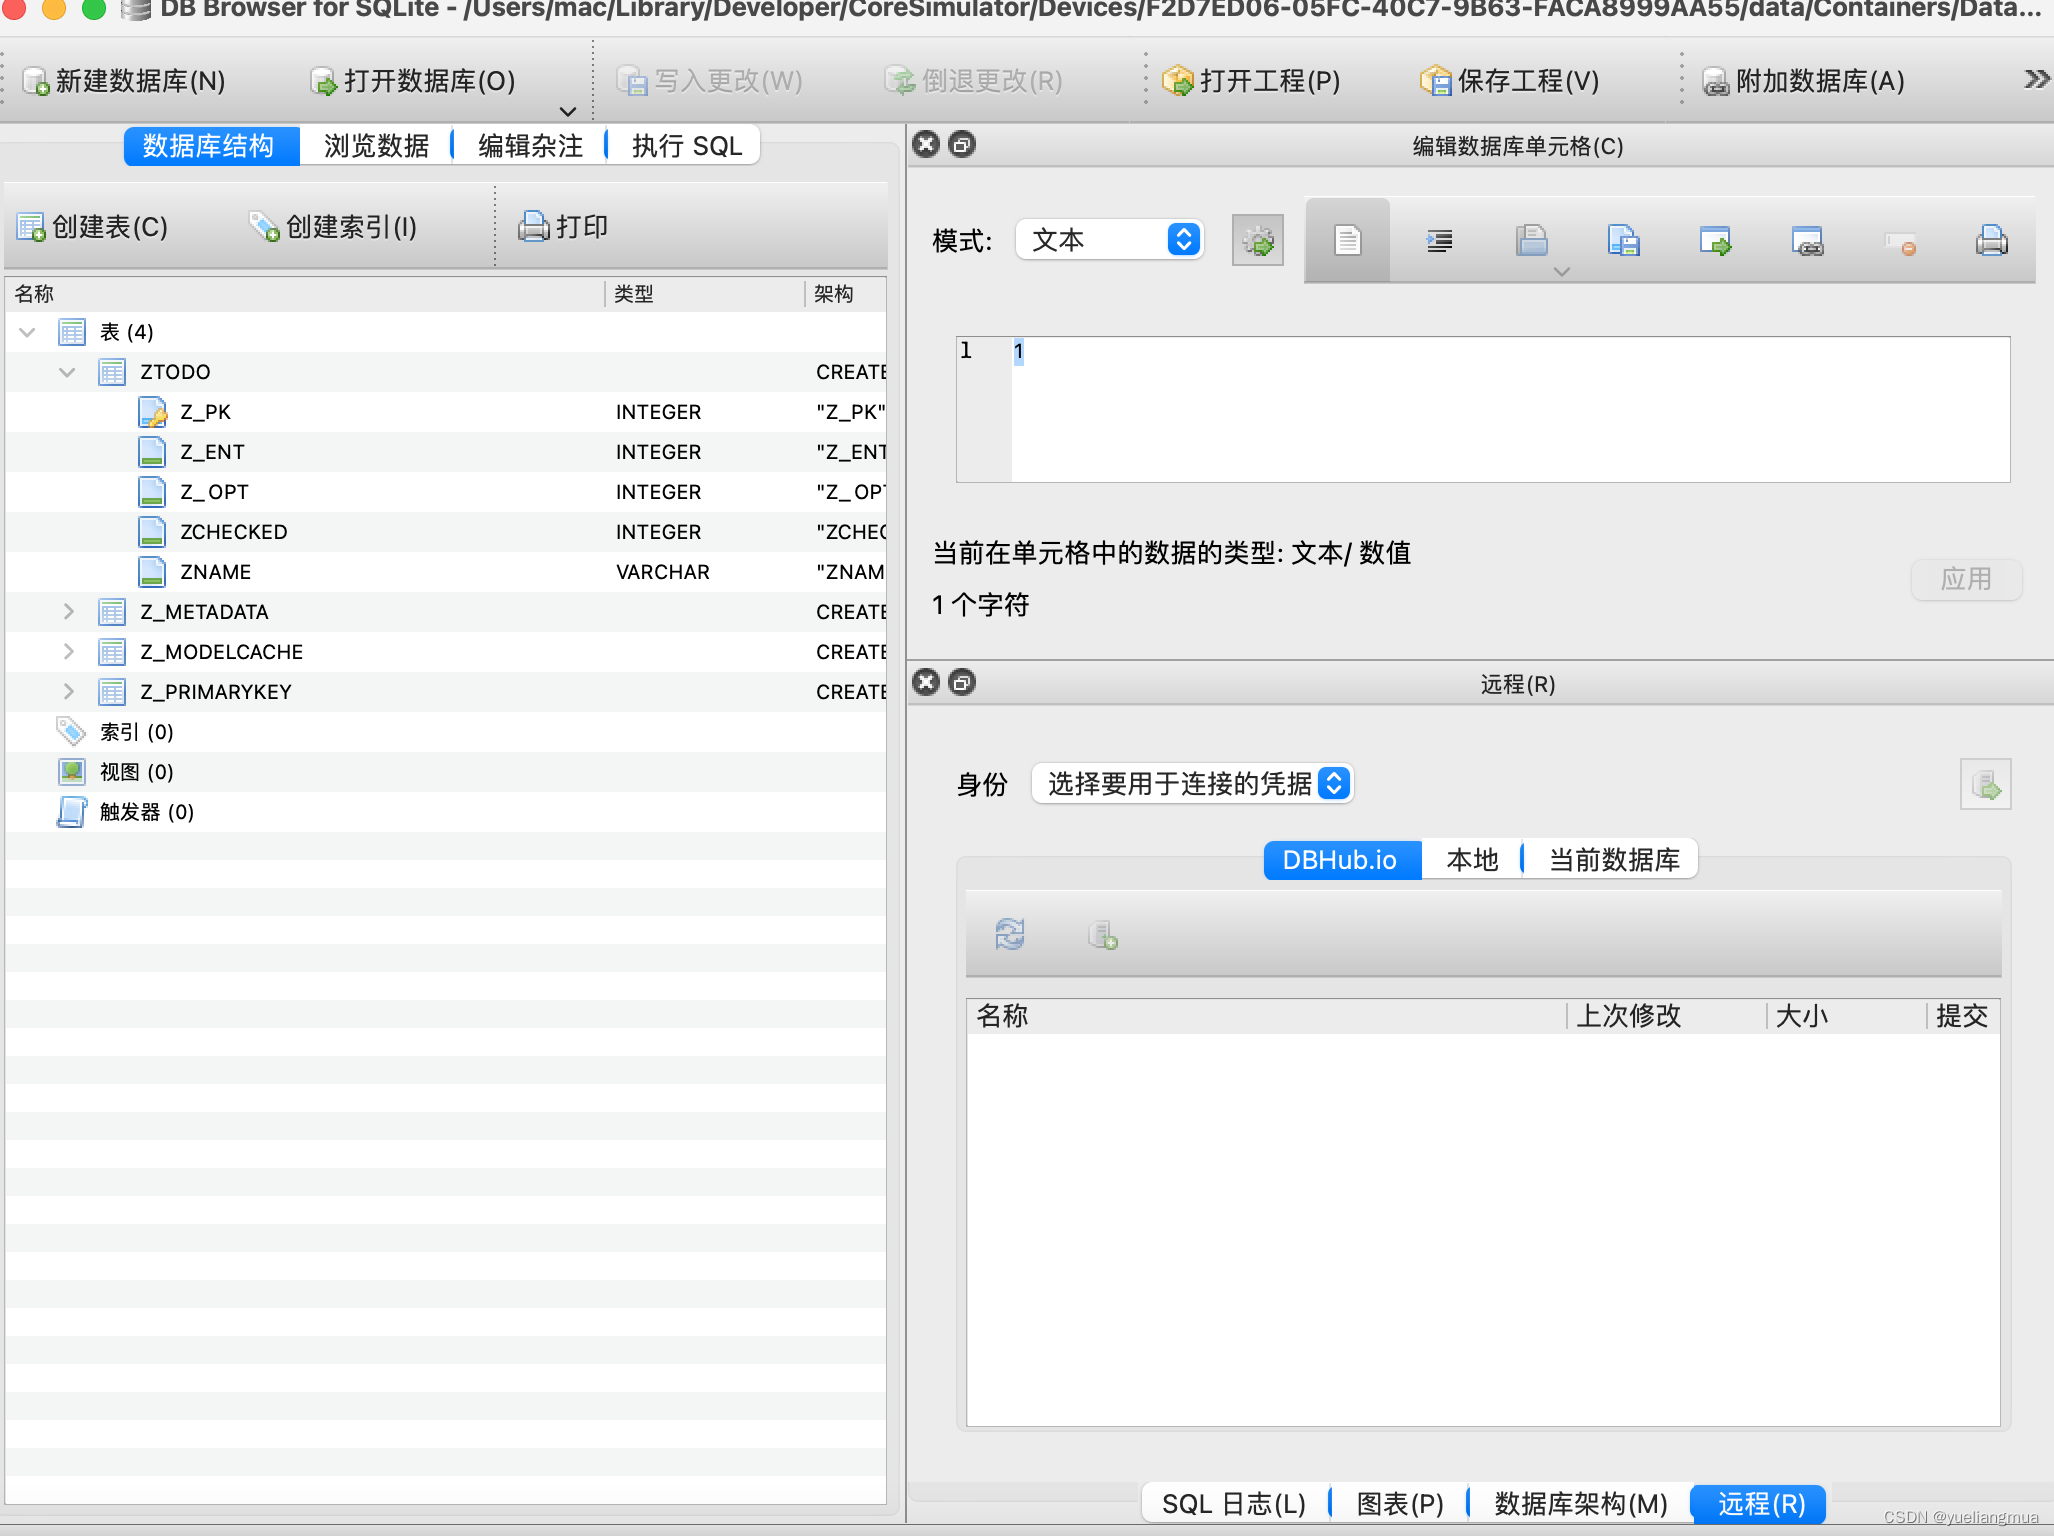
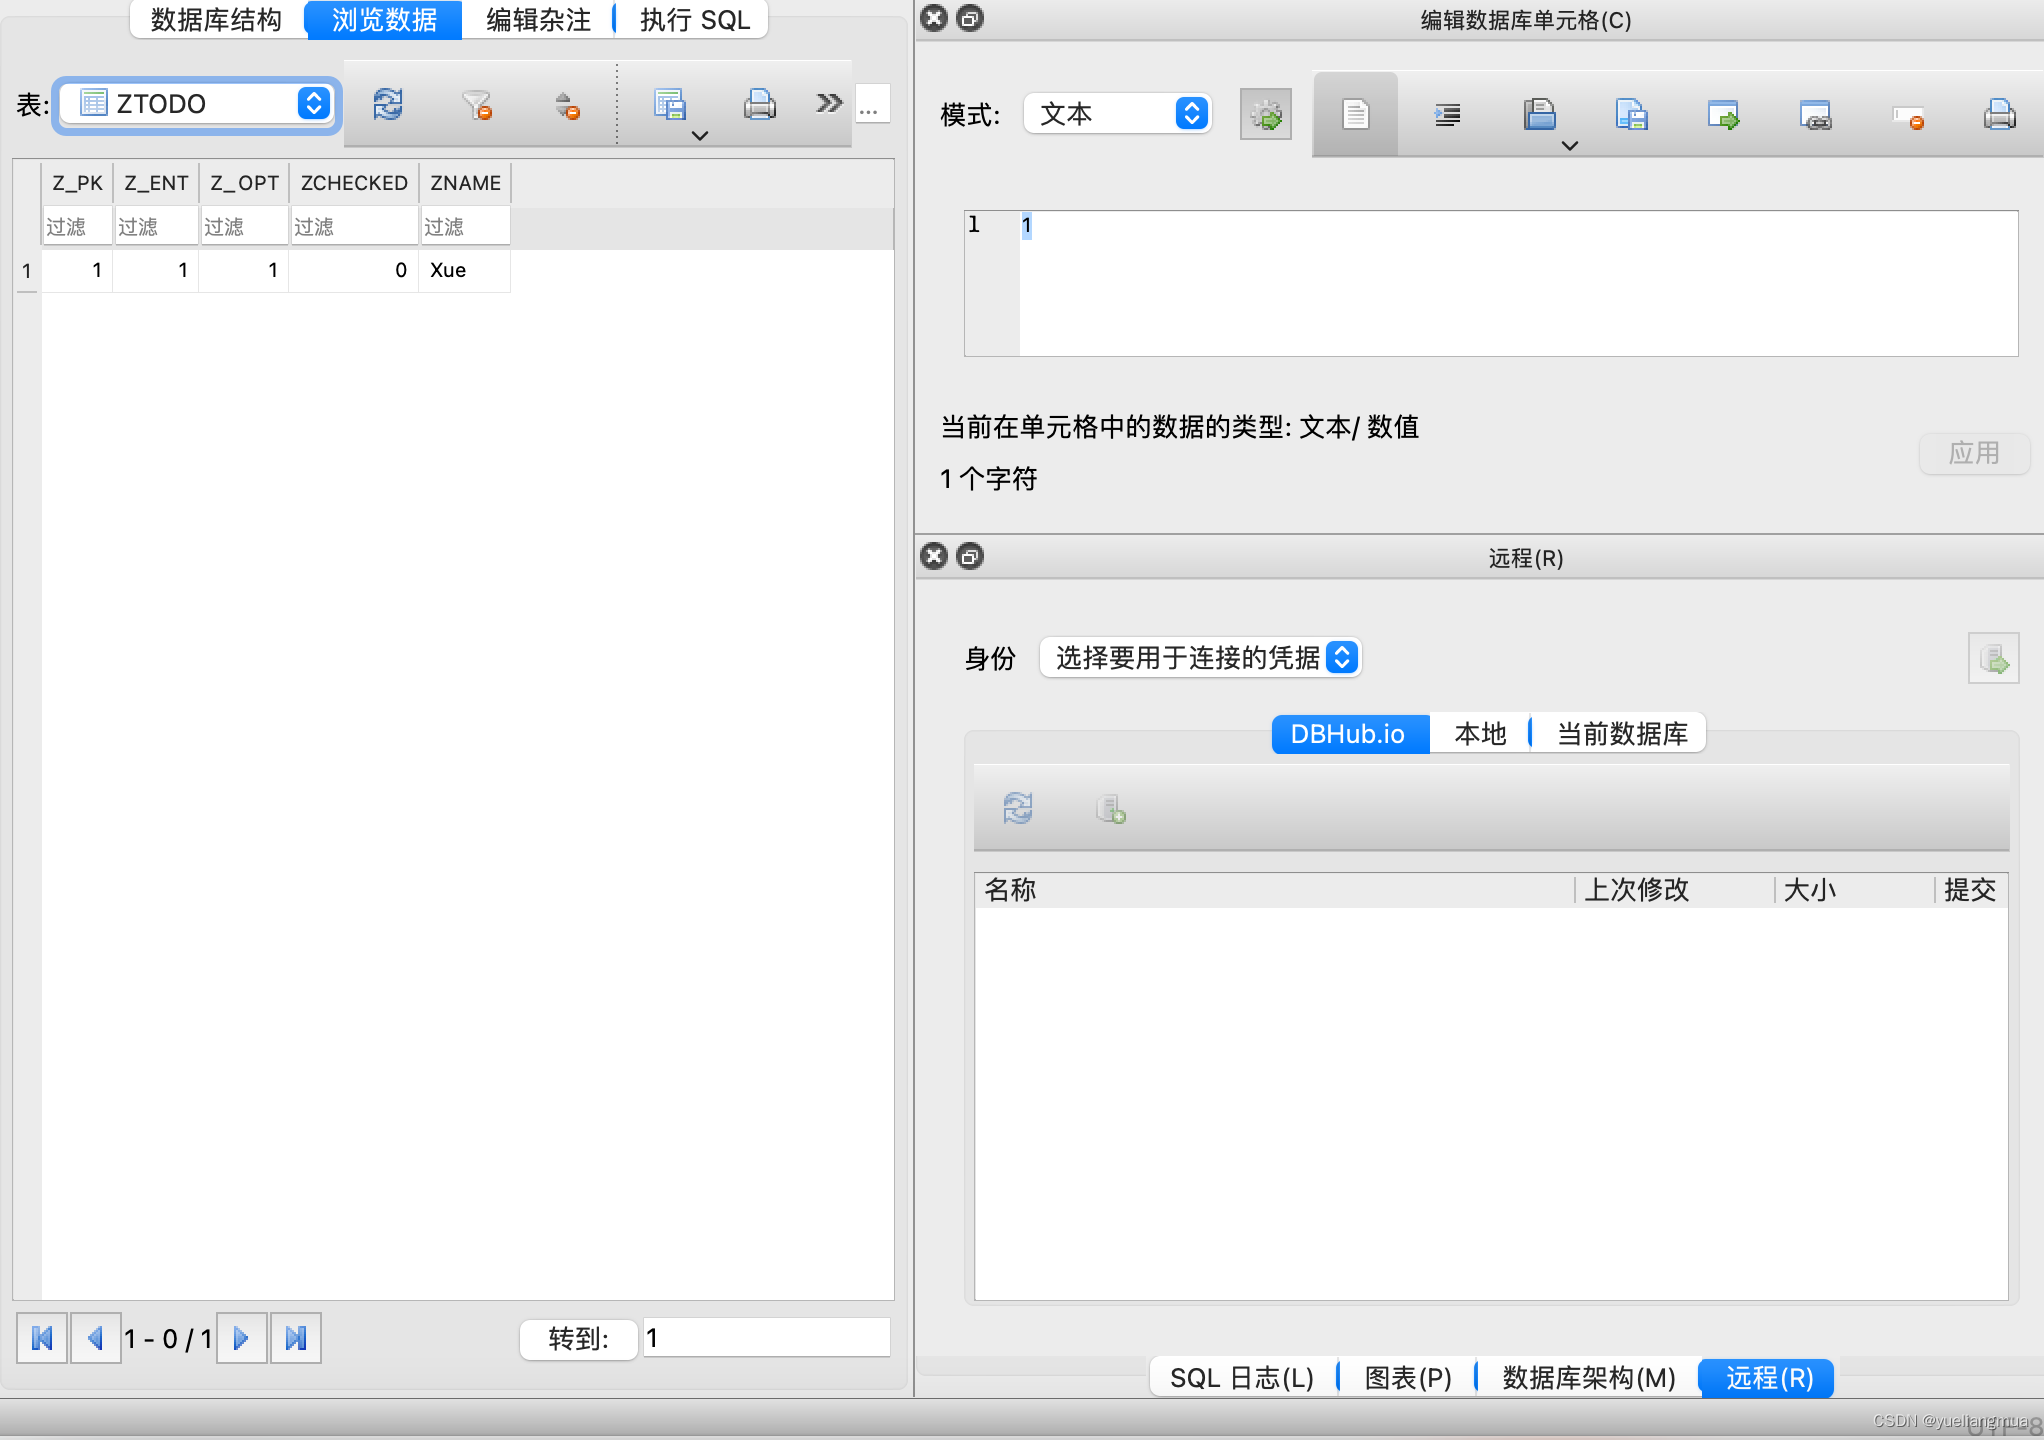
可以看到数据库结构和保存的数据
1.实例化空容器,添加待办事项并储存
let context = (UIApplication.shared.delegate as! AppDelegate).persistentContainer.viewContext//得到appDelegat对象获取容器内容
        let todo = Todo(context: context)//实例化空的容器
        todo.name = name
        todos.append(todo)

        (UIApplication.shared.delegate as! AppDelegate).saveContext()//判断数据是否改变并保存

        tableView.insertRows(at: [IndexPath(row: todos.count - 1, section: 0)], with: .automatic)
2.删除待办事项并储存
先删除本地数据,再删除内存数据,因为本地是通过内存去删除,例如数据[1,2,3]如果先删除内存第1个那么内存中会变为[2,3]而本地根据现在内存中的第1个
override func tableView(_ tableView: UITableView, commit editingStyle: UITableViewCell.EditingStyle, forRowAt indexPath: IndexPath) {
        if editingStyle == .delete {
            // Delete the row from the data source
            context.delete(todos[indexPath.row])//先删除本地,再删除内存,本地通过内存找到
            todos.remove(at: indexPath.row)
            appDelegate.saveContext()
//            tableView.deleteRows(at: [indexPath], with: .fade)
            //saveData()
            tableView.reloadData()
        } else if editingStyle == .insert {
            // Create a new instance of the appropriate class, insert it into the array, and add a new row to the table view
        }
    }
3.固定用法取出数据
if let todos = try? context.fetch(Todo.fetchRequest()){
            self.todos = todos
        }else{
            print("从SQLite里面取数据失败")
        }//固定用法取数据
因为context不止在新增待办事项中应用,所以可以提出来当作全局变量
4.修改删除待办事项中调用函数进行保存
appDelegate.saveContext()5.排序
存入数据库的属性经过排序后是无序的,所以需要在ENTITY追加一个表示序号的属性(数据库迁移)
todos[indexPath.row].orderID = Int16(indexPath.row)
        appDelegate.saveContext()
取数据时赋予排序规则
let request = Todo.fetchRequest()
        request.sortDescriptors = [NSSortDescriptor(key: kOrderID, ascending: true)]

        if let todos = try? context.fetch(Todo.fetchRequest()){
            self.todos = todos
        }else{
            print("从SQLite里面取数据失败")
        }//固定用法取数据


 3221
3221


 被折叠的 条评论
为什么被折叠?
被折叠的 条评论
为什么被折叠?
 到【灌水乐园】发言


