


一、前言
创建一个微服务的流程,和之前单机使用spring MVC时基本相似,重点在于不同层级之间pom的依赖配置。
二、创建一个微服务
1、修改pom
接上篇,修改父级项目zhufeng-cloud的pom.xml文件,新增springcloud相关依赖
<?xml version="1.0" encoding="UTF-8"?>
<project xmlns="http://maven.apache.org/POM/4.0.0"
         xmlns:xsi="http://www.w3.org/2001/XMLSchema-instance"
         xsi:schemaLocation="http://maven.apache.org/POM/4.0.0 http://maven.apache.org/xsd/maven-4.0.0.xsd">
    <modelVersion>4.0.0</modelVersion>

    <parent>
        <groupId>org.springframework.boot</groupId>
        <artifactId>spring-boot-starter-parent</artifactId>
        <version>2.3.7.RELEASE</version>
    </parent>

    <groupId>com.zhufeng</groupId>
    <artifactId>zhufeng-cloud</artifactId>
    <packaging>pom</packaging>
    <version>1.0-SNAPSHOT</version>
    <modules>
        <module>zhufeng-web</module>
    </modules>

    <properties>
        <maven.compiler.source>8</maven.compiler.source>
        <maven.compiler.target>8</maven.compiler.target>
        <project.build.sourceEncoding>UTF-8</project.build.sourceEncoding>
        <project.reporting.outputEncoding>UTF-8</project.reporting.outputEncoding>

        <fastjson.version>2.0.7</fastjson.version>

        <spring-cloud.version>Hoxton.SR12</spring-cloud.version>
        <spring-cloud-alibaba.version>2.2.7.RELEASE</spring-cloud-alibaba.version>

    </properties>
    <dependencies>
        <dependency>
            <groupId>org.springframework.boot</groupId>
            <artifactId>spring-boot-starter-web</artifactId>
        </dependency>

        <dependency>
            <groupId>com.alibaba</groupId>
            <artifactId>fastjson</artifactId>
            <version>${fastjson.version}</version>
        </dependency>

        <!--配置文件处理器 -->
        <dependency>
            <groupId>org.springframework.boot</groupId>
            <artifactId>spring-boot-configuration-processor</artifactId>
            <optional>true</optional>
        </dependency>

        <!--Lombok -->
        <dependency>
            <groupId>org.projectlombok</groupId>
            <artifactId>lombok</artifactId>
            <scope>provided</scope>
        </dependency>
        <!--测试依赖 -->
        <dependency>
            <groupId>org.springframework.boot</groupId>
            <artifactId>spring-boot-starter-test</artifactId>
            <scope>test</scope>
        </dependency>
    </dependencies>

    <!--依赖库管理-->
    <dependencyManagement>
        <dependencies>

            <!-- spring cloud 依赖 -->
            <dependency>
                <groupId>org.springframework.cloud</groupId>
                <artifactId>spring-cloud-dependencies</artifactId>
                <version>${spring-cloud.version}</version>
                <type>pom</type>
                <scope>import</scope>
            </dependency>
            <!-- spring cloud alibaba 依赖 -->
            <dependency>
                <groupId>com.alibaba.cloud</groupId>
                <artifactId>spring-cloud-alibaba-dependencies</artifactId>
                <version>${spring-cloud-alibaba.version}</version>
                <type>pom</type>
                <scope>import</scope>
            </dependency>

        </dependencies>
    </dependencyManagement>

</project>
pom.xml文件中主要引入了springboot、springcloud、springcloud alibaba
2、创建包路径
在zhufeng-web-user模块中创建包路径
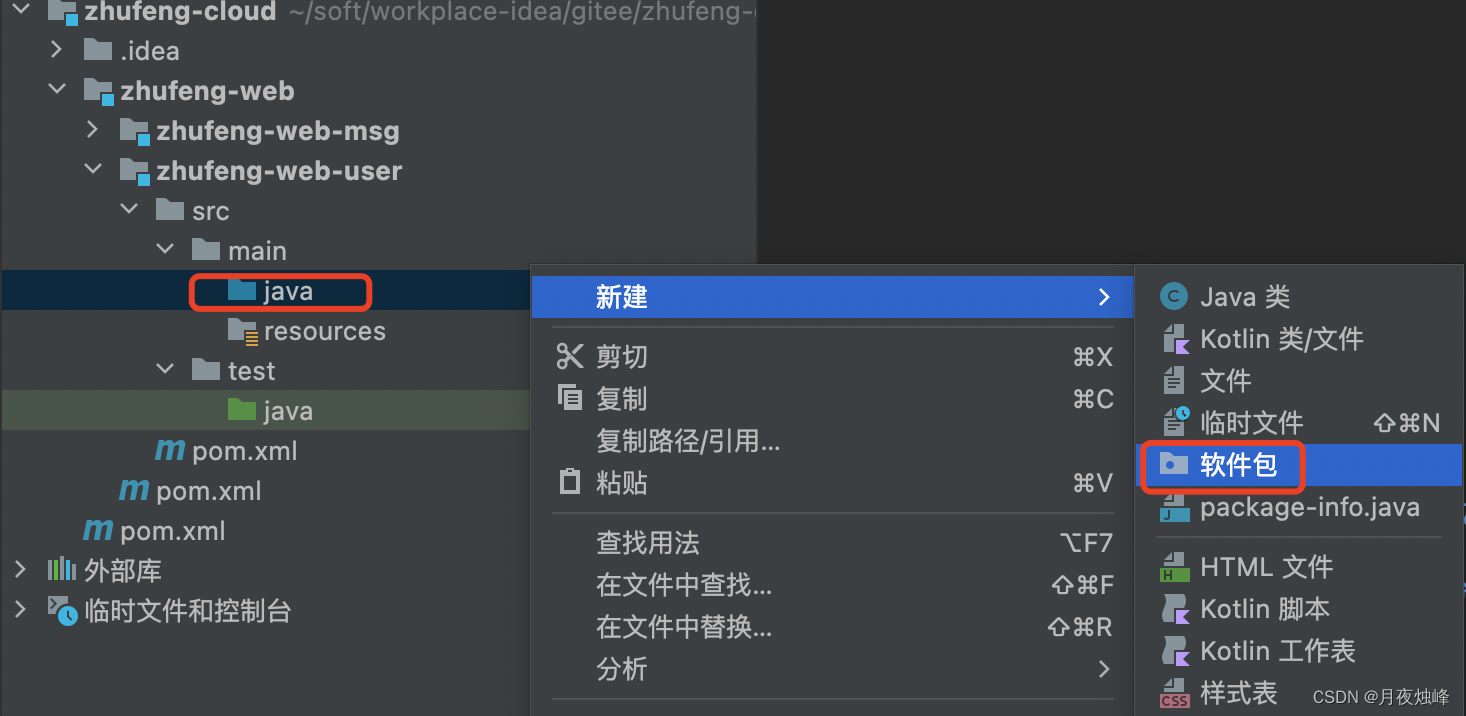
因为后续我们创建的微服务模块较多,为避免导包冲突,所以各个模块之间的包路径能够区分 ,最好可以根据包路径能够清楚识别来自哪个模块。
比如在zhufeng-web-user模块创建包路径名称为com.zhufeng.web,或者更明确可以为com.zhufeng.web.user

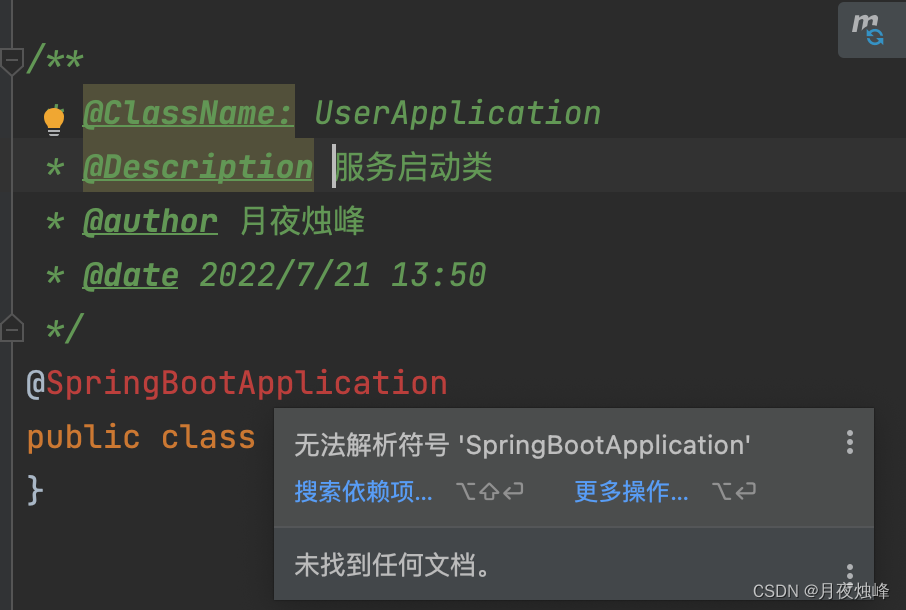
2、创建启动类
package com.zhufeng.web;

import org.springframework.boot.SpringApplication;
import org.springframework.boot.autoconfigure.SpringBootApplication;

/**
 * @ClassName: UserApplication
 * @Description 服务启动类
 * @author 月夜烛峰
 * @date 2022/7/21 13:50
 */
@SpringBootApplication
public class UserApplication {
    public static void main(String[] args) {
        SpringApplication.run(UserApplication.class, args);
    }
}
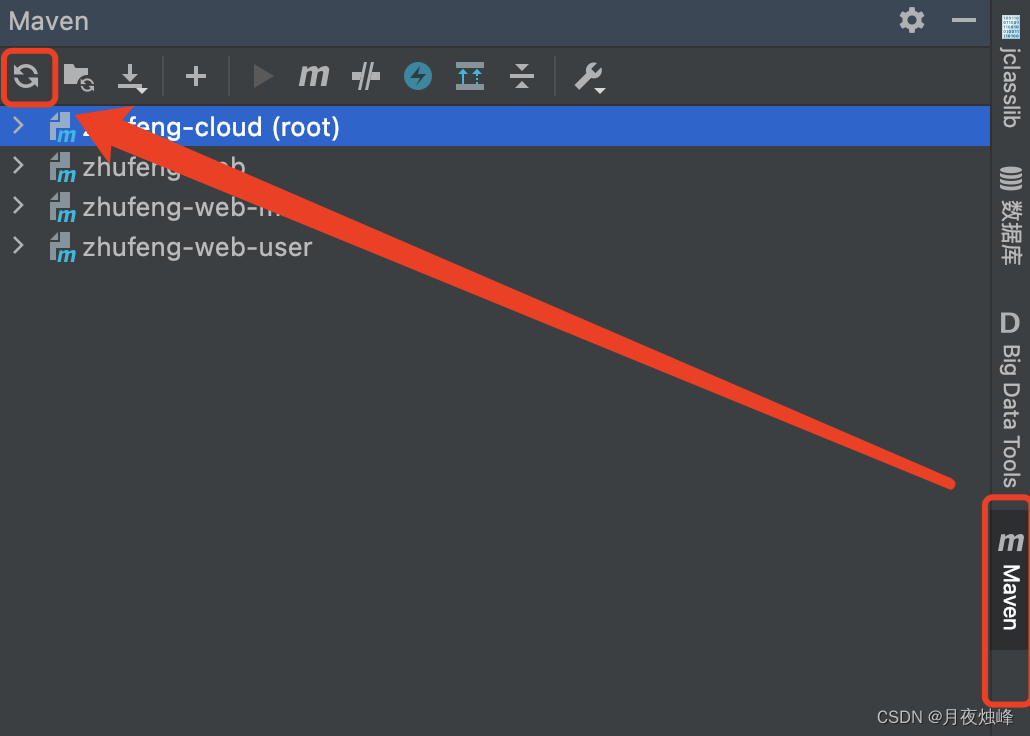
有时候会因为maven的问题,导致创建启动类时倒包包错,找不到依赖:
选中IDEA右侧侧边栏中的maven页签,点击刷新,重新加载依赖,如下图
3、创建controller
package com.zhufeng.web.controller;

import org.springframework.web.bind.annotation.RequestMapping;
import org.springframework.web.bind.annotation.ResponseBody;
import org.springframework.web.bind.annotation.RestController;

import static org.springframework.web.bind.annotation.RequestMethod.GET;

/**
 * @ClassName: UserController
 * @Description UserController演示
 * @author 月夜烛峰
 * @date 2022/7/21 14:01
 */
@RestController
@RequestMapping("user")
public class UserController {

    @RequestMapping(value = "demo", method = GET)
    @ResponseBody
    public String demo() {
        return "hello , 烛峰";
    }

}
简答说一下:
使用类上使用RestController,会把返回值渲染到浏览器,不需要指定页面;
方法体RequestMapping中指定method为Get,那么只能接收get请求
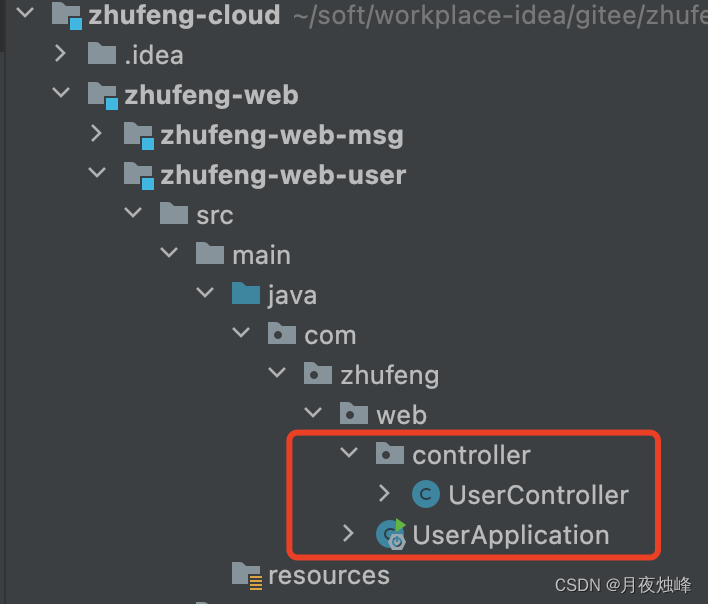
代码目录结构如下:
4、启动微服务
在UserApplication中右键运行
. ____ _ __ _ _
/\\ / ___'_ __ _ _(_)_ __ __ _ \ \ \ \
( ( )\___ | '_ | '_| | '_ \/ _` | \ \ \ \
\\/ ___)| |_)| | | | | || (_| | ) ) ) )
' |____| .__|_| |_|_| |_\__, | / / / /
=========|_|==============|___/=/_/_/_/
:: Spring Boot :: (v2.3.7.RELEASE)
2022-07-21 14:03:59.375 INFO 268 --- [ main] com.zhufeng.web.UserApplication : Starting UserApplication on MacBook-Pro-zhufeng.local with PID 268 (/Users/zhufeng/soft/workplace-idea/gitee/zhufeng-cloud/zhufeng-web/zhufeng-web-user/target/classes started by zhufeng in /Users/zhufeng/soft/workplace-idea/gitee/zhufeng-cloud)
2022-07-21 14:03:59.377 INFO 268 --- [ main] com.zhufeng.web.UserApplication : No active profile set, falling back to default profiles: default
2022-07-21 14:03:59.782 INFO 268 --- [ main] o.s.b.w.embedded.tomcat.TomcatWebServer : Tomcat initialized with port(s): 8080 (http)
2022-07-21 14:03:59.786 INFO 268 --- [ main] o.apache.catalina.core.StandardService : Starting service [Tomcat]
2022-07-21 14:03:59.786 INFO 268 --- [ main] org.apache.catalina.core.StandardEngine : Starting Servlet engine: [Apache Tomcat/9.0.41]
2022-07-21 14:03:59.818 INFO 268 --- [ main] o.a.c.c.C.[Tomcat].[localhost].[/] : Initializing Spring embedded WebApplicationContext
2022-07-21 14:03:59.819 INFO 268 --- [ main] w.s.c.ServletWebServerApplicationContext : Root WebApplicationContext: initialization completed in 419 ms
2022-07-21 14:03:59.897 INFO 268 --- [ main] o.s.s.concurrent.ThreadPoolTaskExecutor : Initializing ExecutorService 'applicationTaskExecutor'
2022-07-21 14:03:59.969 INFO 268 --- [ main] o.s.b.w.embedded.tomcat.TomcatWebServer : Tomcat started on port(s): 8080 (http) with context path ''
2022-07-21 14:03:59.974 INFO 268 --- [ main] com.zhufeng.web.UserApplication : Started UserApplication in 0.752 seconds (JVM running for 0.964)
2022-07-21 14:04:32.966 INFO 268 --- [nio-8080-exec-1] o.apache.tomcat.util.http.parser.Cookie : A cookie header was received [1655876826] that contained an invalid cookie. That cookie will be ignored.
Note: further occurrences of this error will be logged at DEBUG level.
2022-07-21 14:04:32.969 INFO 268 --- [nio-8080-exec-1] o.a.c.c.C.[Tomcat].[localhost].[/] : Initializing Spring DispatcherServlet 'dispatcherServlet'
2022-07-21 14:04:32.969 INFO 268 --- [nio-8080-exec-1] o.s.web.servlet.DispatcherServlet : Initializing Servlet 'dispatcherServlet'
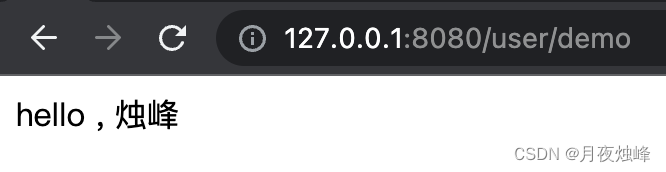
2022-07-21 14:04:32.972 INFO 268 --- [nio-8080-exec-1] o.s.web.servlet.DispatcherServlet : Completed initialization in 3 ms启动日志正常,在浏览器输入访问地址,127.0.0.1:8080/user/demo (默认端口为8080)


 597
597


 被折叠的 条评论
为什么被折叠?
被折叠的 条评论
为什么被折叠?
 到【灌水乐园】发言


