


SpringMVC框架是优化web的框架,其主要功能时实现 :模型-视图-控制器 分层,让各层代码各司其职。
下面举个小例子:
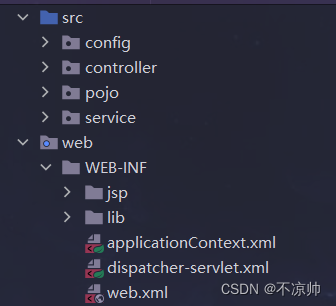

1.配置web.xml
<?xml version="1.0" encoding="UTF-8"?>
<web-app xmlns:xsi="http://www.w3.org/2001/XMLSchema-instance"
         xmlns="http://xmlns.jcp.org/xml/ns/javaee"
         xsi:schemaLocation="http://xmlns.jcp.org/xml/ns/javaee http://xmlns.jcp.org/xml/ns/javaee/web-app_4_0.xsd"
         id="WebApp_ID" version="4.0">

    <!--配置Spring MVC DispatcherServlet 前端控制器 -->
    <servlet>
        <servlet-name>springmvc</servlet-name>
        <servlet-class>org.springframework.web.servlet.DispatcherServlet</servlet-class>
        <init-param>
            <param-name>contextConfigLocation</param-name>
            <!-- classpath是指到src目录查找配置文件 -->
            <param-value>classpath:config/springmvc.xml</param-value>
        </init-param>
        <load-on-startup>1</load-on-startup>
    </servlet>
    <servlet-mapping>
        <servlet-name>springmvc</servlet-name>
        <url-pattern>/</url-pattern>
    </servlet-mapping>

    <!-- 避免中文乱码 -->
    <filter>
        <filter-name>characterEncodingFilter</filter-name>
        <filter-class>org.springframework.web.filter.CharacterEncodingFilter</filter-class>
        <init-param>
            <param-name>encoding</param-name>
            <param-value>UTF-8</param-value>
        </init-param>
        <init-param>
            <param-name>forceEncoding</param-name>
            <param-value>true</param-value>
        </init-param>
    </filter>
    <filter-mapping>
        <filter-name>characterEncodingFilter</filter-name>
        <url-pattern>/*</url-pattern>
    </filter-mapping>
</web-app>
2.在config包创建配置文件springmvc.xml
<?xml version="1.0" encoding="UTF-8"?>
<beans xmlns="http://www.springframework.org/schema/beans"
    xmlns:xsi="http://www.w3.org/2001/XMLSchema-instance"
    xmlns:context="http://www.springframework.org/schema/context"
    xsi:schemaLocation="
    	http://www.springframework.org/schema/beans
    	http://www.springframework.org/schema/beans/spring-beans.xsd
        http://www.springframework.org/schema/context
        http://www.springframework.org/schema/context/spring-context.xsd">
    <!-- 使用扫描机制,扫描控制器类 -->
    <context:component-scan base-package="controller"/>
    <context:component-scan base-package="service"/>
  	<!-- 配置视图解析器 -->
  	<bean class="org.springframework.web.servlet.view.InternalResourceViewResolver"
            id="internalResourceViewResolver">
       <!-- 前缀 -->
       <property name="prefix" value="/WEB-INF/jsp/" />
       <!-- 后缀 -->
       <property name="suffix" value=".jsp" />
  	</bean>
</beans>
3.在视图层jsp文件中创建userAdd.jsp和userList.jsp
<%@ page language="java" contentType="text/html; charset=UTF-8" pageEncoding="UTF-8"%>
<%@ taglib prefix="form" uri="http://www.springframework.org/tags/form" %>
<%
String path = request.getContextPath();
String basePath = request.getScheme()+"://"+request.getServerName()+":"+request.getServerPort()+path+"/";
%>
<!DOCTYPE html>
<html>
<head>
<base href="<%=basePath%>">
<meta charset="UTF-8">
<title>信息输入页面</title>
</head>
<body>
<form:form modelAttribute="user"  method="post" action="user/save">
    <fieldset>
        <legend>添加一个用户</legend>
        <p>
            <label>用户名:</label>
            <form:input path="userName"/>   <%--输入框--%>
        </p>
        <p>
            <label>爱好:</label>
            <form:checkboxes items="${hobbys}"  path="hobby" />   <%--复选框(获取属性值)--%>
        </p>
        <p>
            <label>朋友:</label>
            <form:checkbox path="friends" value="张三"/>张三
            <form:checkbox path="friends" value="李四"/>李四
            <form:checkbox path="friends" value="王五"/>王五
            <form:checkbox path="friends" value="赵六"/>赵六
        </p>
        <p>
            <label>职业:</label>
            <form:select path="carrer">
                 <label>请选择职业</label>
                <form:options items="${carrers}"/>  <%--选项列表--%>
            </form:select>
        </p>
        <p>
            <label>户籍:</label>
            <form:select path="houseRegister">
                <label>请选择户籍</label>
                <form:options items="${houseRegisters }"/>
            </form:select>
        </p>
        <p>
            <label>个人描述:</label>
            <form:textarea path="remark" rows="5"/>  <%--文本域--%>
        </p>
        <p id="buttons">
            <input id="reset" type="reset">
            <input id="submit" type="submit" value="添加">
        </p>
    </fieldset>
</form:form>
</body>
</html>
<%@ page language="java" contentType="text/html; charset=UTF-8" pageEncoding="UTF-8"%>
<%@ taglib uri="http://java.sun.com/jsp/jstl/core" prefix="c" %>
<%
String path = request.getContextPath();
String basePath = request.getScheme()+"://"+request.getServerName()+":"+request.getServerPort()+path+"/";
%>
<!DOCTYPE html>
<html>
<head>
<base href="<%=basePath%>">
<meta charset="UTF-8">
<title>信息显示页面</title>
</head>
<body>
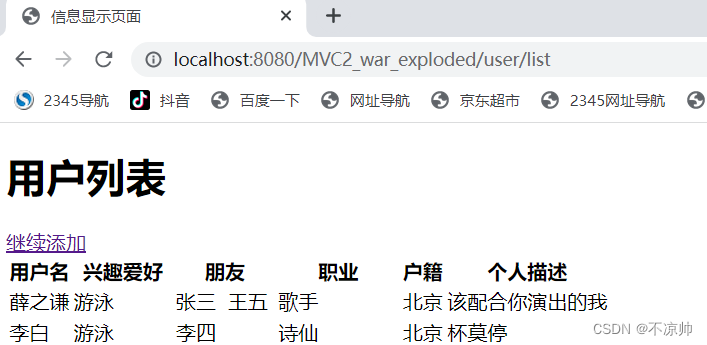
<h1>用户列表</h1>
<a href="<c:url value="user/input"/>">继续添加</a>
<table>
<tr>
<th>用户名</th>
<th>兴趣爱好</th>
<th>朋友</th>
<th>职业</th>
<th>户籍</th>
<th>个人描述</th>
</tr>
<!-- JSTL标签,请参考本书的相关内容 -->
<c:forEach items="${users}" var="user">
<tr>
<td>${user.userName }</td>
<td>
<c:forEach items="${user.hobby }" var="hobby">
${hobby }
</c:forEach>
</td>
<td>
<c:forEach items="${user.friends }" var="friend">
${friend }
</c:forEach>
</td>
<td>${user.carrer }</td>
<td>${user.houseRegister }</td>
<td>${user.remark }</td>
</tr>
</c:forEach>
</table>
</body>
</html>4.模型持久层pojo创建User类
package pojo;       //持久层(MVC的模型)
public class User {
	private String userName;
	private String[] hobby;//兴趣爱好
	private String[] friends;//朋友
	private String carrer;
	private String houseRegister;
	private String remark;
	public String getUserName() {
		return userName;
	}
	public void setUserName(String userName) {
		this.userName = userName;
	}
	public String[] getHobby() {
		return hobby;
	}
	public void setHobby(String[] hobby) {
		this.hobby = hobby;
	}
	public String[] getFriends() {
		return friends;
	}
	public void setFriends(String[] friends) {
		this.friends = friends;
	}
	public String getCarrer() {
		return carrer;
	}
	public void setCarrer(String carrer) {
		this.carrer = carrer;
	}
	public String getHouseRegister() {
		return houseRegister;
	}
	public void setHouseRegister(String houseRegister) {
		this.houseRegister = houseRegister;
	}
	public String getRemark() {
		return remark;
	}
	public void setRemark(String remark) {
		this.remark = remark;
	}
}
5.控制层controller包创建UserController类
package controller;
import java.util.HashMap;
import java.util.List;
import org.springframework.beans.factory.annotation.Autowired;
import org.springframework.stereotype.Controller;
import org.springframework.ui.Model;
import org.springframework.web.bind.annotation.ModelAttribute;
import org.springframework.web.bind.annotation.RequestMapping;
import pojo.User;
import service.UserService;
@Controller   //控制层
@RequestMapping("/user")
public class UserController {
	@Autowired
	private UserService userService;
	@RequestMapping("/input")
	public String inputUser(Model model) {
		HashMap<String, String> hobbys = new HashMap<String, String>();
		hobbys.put("篮球", "篮球");
		hobbys.put("乒乓球", "乒乓球");
		hobbys.put("电玩", "电玩");
		hobbys.put("游泳", "游泳");
		model.addAttribute("user", new User());
		model.addAttribute("hobbys", hobbys);
		model.addAttribute("carrers", new String[] { "歌手", "诗仙", "大自然搬运工", "IT民工", "其它" });
		model.addAttribute("houseRegisters", new String[] { "北京", "上海", "广州", "深圳", "其它" });
		return "userAdd";
	}
	@RequestMapping("/save")
	public String addUser(@ModelAttribute User user, Model model) {
		if (userService.addUser(user)) {
			return "redirect:/user/list";
		} else {
			HashMap<String, String> hobbys = new HashMap<String, String>();
			hobbys.put("篮球", "篮球");
			hobbys.put("乒乓球", "乒乓球");
			hobbys.put("电玩", "电玩");
			hobbys.put("游泳", "游泳");
			model.addAttribute("hobbys", hobbys);
			model.addAttribute("carrers", new String[] { "歌手", "诗仙", "大自然搬运工", "IT民工", "其它" });
			model.addAttribute("houseRegisters", new String[] { "北京", "上海", "广州", "深圳", "其它" });
			return "userAdd";
		}
	}
	@RequestMapping("/list")
	public String listUsers(Model model) {
		List<User> users = userService.getUsers();
		model.addAttribute("users", users);
		return "userList";
	}
}
6.在业务处理层service包添加接口UserService和实现接口的UserServiceImpl类
package service;
import java.util.ArrayList;
import pojo.User;
public interface UserService {
	boolean addUser(User u);
	ArrayList<User> getUsers();
}
package service;
import java.util.ArrayList;
import org.springframework.stereotype.Service;
import pojo.User;
@Service    //业务层处理
public class UserServiceImpl implements UserService{
	//使用静态集合变量users模拟数据库
	private static ArrayList<User> users = new ArrayList<User>();
	@Override
	public boolean addUser(User u) {
		if(!"IT民工".equals(u.getCarrer())){ //不允许添加IT民工
			users.add(u);
			return true;
		}
		return false;
	}
	@Override
	public ArrayList<User> getUsers() {
		return users;
	}
}
7.通过:http://localhost:8080/工件名/user/inpu 运行


 1180
1180


 被折叠的 条评论
为什么被折叠?
被折叠的 条评论
为什么被折叠?
 到【灌水乐园】发言


