


上一篇文章中,我们是使用了别人做好的镜像来使用docker。
更多的镜像可以到https://hub.docker.com/查找
这篇文章,我们将自己来制作镜像。
自己制作镜像非常简单,只需要自己写一个Dockerfile,build之后就能得到一个镜像。
下面的例子,参考官网
1.新建文件夹test
>mkdir test
>cd test
==注:该文件夹下最好不要放置其他与制作镜像无关的文件,因为docker在build阶段会扫描当前文件夹下的所有文件,会影响到制作效率。==*
2.新建Dockerfile
> vim Dockerfile
注:文件名必须为Dockerfile
写入以下内容
Use an official Python runtime as a parent image
FROM python:2.7-slim
Set the working directory to /app
WORKDIR /app
Copy the current directory contents into the container at /app
COPY . /app
# Install any needed packages specified in requirements.txt
RUN pip install --trusted-host pypi.python.org -r requirements.txt

# Make port 80 available to the world outside this container
EXPOSE 80

# Define environment variable
ENV NAME World

# Run app.py when the container launches
CMD ["python", "app.py"]
3.新建app.py和requirements.txt
app.py写入
from flask import Flask
from redis import Redis, RedisError
import os
import socket

# Connect to Redis
redis = Redis(host="redis", db=0, socket_connect_timeout=2, socket_timeout=2)

app = Flask(__name__)

@app.route("/")
def hello():
    try:
        visits = redis.incr("counter")
    except RedisError:
        visits = "<i>cannot connect to Redis, counter disabled</i>"

    html = "<h3>Hello {name}!</h3>" \
           "<b>Hostname:</b> {hostname}<br/>" \
           "<b>Visits:</b> {visits}"
    return html.format(name=os.getenv("NAME", "world"), hostname=socket.gethostname(), visits=visits)

if __name__ == "__main__":
    app.run(host='0.0.0.0', port=80)
requirements.txt写入
Flask
Redis
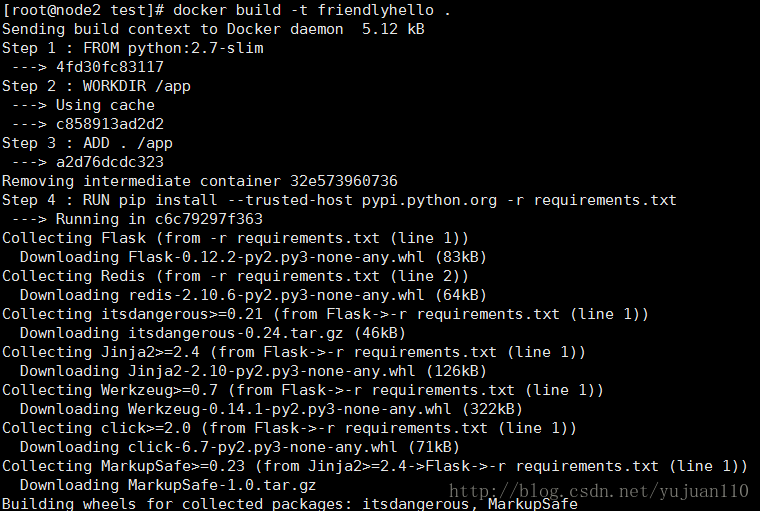
4.build这个镜像
>docker build -t friendlyhello .
friendlyhello为镜像名字,可以自己随意取。
命令行最后的”."表示当前目录
docker images
可以查看到我们刚刚制作好的镜像

5.运行这个应用
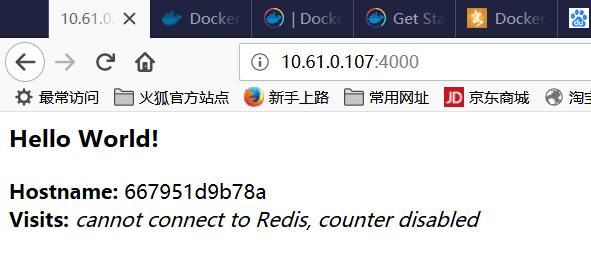
> docker run --name friendlyhello_test -p 4000:80 friendlyhello

打开浏览器(宿主机上的端口是4000)
我们再试试让应用在后台运行
这里需要换个名字,并且4000端口被占用,所以端口也需要改变
> docker run --name friendlyhello_test2 -p 4001:80 -d friendlyhello
这里把容器名字设置成了 friendlyhello_test2
-d设置为后台运行
注意如果你是在windows上运行的docker ,那么应该使用docker machine ip,而不是本地ip,使用docker-machine ip可查看ip
>docker ps #查看容器,可以看到正在运行的friendlyhello_test2
可能遇到的问题
1.代理设置
如果你的网络设置了代理服务器,那么在dockerfile里添加以下配置
# Set proxy server, replace host:port with values for your servers
ENV http_proxy host:port
ENV https_proxy host:port
2.DNS设置
DNS设置错误,可能会导致pip命令无法正常工作,可以修改Docker daemon的配置
vim /etc/docker/daemon.json
添加如下配置
{
  "dns": ["your_dns_address", "8.8.8.8"]
}
第一个是你的DNS服务器,第二个是谷歌的DNS服务器。如果第一个无法正常工作,会使用第二个。
保存这个配置文件后,需要重启docker服务。
sudo systemctl restart docker
这一篇文章只是用了一个简单的例子来制作镜像。下一篇文章会更加详细地介绍Dockerfile的各项参数。
上传镜像
相关的命令List
docker build -t friendlyhello .  # Create image using this directory's Dockerfile
docker run -p 4000:80 friendlyhello  # Run "friendlyname" mapping port 4000 to 80
docker run -d -p 4000:80 friendlyhello         # Same thing, but in detached mode
docker container ls                                # List all running containers
docker container ls -a             # List all containers, even those not running
docker container stop <hash>           # Gracefully stop the specified container
docker container kill <hash>         # Force shutdown of the specified container
docker container rm <hash>        # Remove specified container from this machine
docker container rm $(docker container ls -a -q)         # Remove all containers
docker image ls -a                             # List all images on this machine
docker image rm <image id>            # Remove specified image from this machine
docker image rm $(docker image ls -a -q)   # Remove all images from this machine
docker login             # Log in this CLI session using your Docker credentials
docker tag <image> username/repository:tag  # Tag <image> for upload to registry
docker push username/repository:tag            # Upload tagged image to registry
docker run username/repository:tag                   # Run image from a registry


 9525
9525


 被折叠的 条评论
为什么被折叠?
被折叠的 条评论
为什么被折叠?
 到【灌水乐园】发言


