


简单的封装一个快速创建UILabel和UITextField的LTView类
LTView.h和LTView.m文件
#import <UIKit/UIKit.h>

@interface LTView : UIView<UITextFieldDelegate>
//因为要再类的外部获取输入框的内容,修改label的标题,所以我们可以吧这两部分作为属性写在.h这样在外部可以直接进行修改和设置
@property(nonatomic,retain)UILabel *myLabel;
@property(nonatomic,retain)UITextField *myTextField;

@end
#import "LTView.h"
@implementation LTView
//重写默认的初始化方法
- (instancetype)initWithFrame:(CGRect)frame
{
self = [super initWithFrame:frame];
if (self) {
//模块化
[self createView];
}
return self;
}
- (void)createView
{
//创建两个子视图,label和textField;
self.myLabel = [[UILabel alloc] initWithFrame:CGRectMake(20, 20, 100, 40)];
self.myLabel.backgroundColor = [UIColor yellowColor];
[self addSubview:self.myLabel];
[_myLabel release];
self.myTextField = [[UITextField alloc] initWithFrame:CGRectMake(150, 20, 100, 40)];
_myTextField.borderStyle = UITextBorderStyleRoundedRect;
// _myTextField.layer.cornerRadius = 8;
// self.myTextField.backgroundColor = [UIColor cyanColor];
[self addSubview:self.myTextField];
//设置代理人
_myTextField.delegate = self;
[_myTextField release];
}
- (void)dealloc
{
[_myLabel release];
[_myTextField release];
[super dealloc];
}
-(BOOL)textFieldShouldReturn:(UITextField *)textField
{
[textField resignFirstResponder];
return YES;
}
@end
AppDelegate.m文件
//创建一个LTView的对象
    LTView *view = [[LTView alloc] initWithFrame:CGRectMake(0, 0, self.window.frame.size.width, self.window.frame.size.height)];
    [self.window addSubview:view];
    view.myLabel.tag = 10;
    view.myLabel.layer.borderWidth = 1;
    view.myLabel.text = @"账号";
    [view release];

    LTView *aview = [[LTView alloc] initWithFrame:CGRectMake(0, 60, self.window.frame.size.width, self.window.frame.size.height-60)];
    [self.window addSubview:aview];
    aview.myLabel.backgroundColor = [UIColor greenColor];
    aview.myLabel.text = @"密码";
    [aview release];
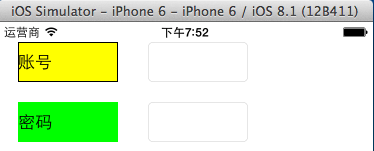
效果如下图所示:


 被折叠的 条评论
为什么被折叠?
被折叠的 条评论
为什么被折叠?
 到【灌水乐园】发言


