


 本文详细介绍了如何在Vue项目中创建一个动态车牌输入组件,包括v-model双向绑定、Element UI键盘抽屉的使用、状态管理与计算属性的应用。通过实例演示了如何通过组件与父组件通信以及组件内的交互逻辑。
创建新的vue文件 粘贴进去,随即在项目中进行引入,直接使用 v-model 进行接收即可
1、
首先是输入框部分这里面用到的所有变量及方法都会讲到
<div class="car-box">
      <span :class="`car-input ${chooseClass(index)}`" @click="handleCar(index)" v-for="(item, index) in value" :key="index">{{ item }}</span>
      <span v-if="!isNewEnergy" @click="newEnergy" class="car-input car-new"></span>
</div>
2、
然后是下方的键盘,在这里我用到了elementui的 Drawer 抽屉 组件
<el-drawer :visible.sync="show" direction="btt" :before-close="handleClose" :show-close="false" :withHeader="false">
      <div class="car-group">
        <div class="car-row" v-for="(item, index) in keys" :key="index">
          <span @click="handleKey(item2)" class="car-cell" v-for="(item2, index2) in item" :key="index2">
            {{ item2 }}
          </span>
        </div>
      </div>
    </el-drawer>
3、代码讲解
实现在组件外面使用的时候用 v-model 来双向绑定值(只写了如何从里面往外传,并未写从外往里传的方法,因为项目并不需要往里传所以没有写,相信各位应该都知道该怎么写)
  model: {
    prop: 'value2',
    event: "change"
  },
  watch: {
    value() {
      let newStr = this.value.join()
      this.$emit('change', newStr)
    }
  },
然后是计算属性,通过一个变量来让用户看到自己所输入的位置,通过keys计算属性来控制输入法里面要展示的内容
computed: {
    chooseClass() {
      return function (index) {
        if (this.show) {
          if (index == this.index) {
            return 'choose-class'
          }
          else {
            return ''
          }
        } else {
          return ''
        }

      }
    },
    keys() {
      let flag = this.index
      if (flag == 0) {
        return this.keyJC
      }
      else if (flag == 6) {
        return this.lastKey
      }
      else {
        return this.normalkey
      }
    }
  },
下面的代码就是本插件所用到的变量,相对来说所用到的变量还是比较少的
data() {
return {
value: ['鲁', 'C', '', '', '', '', ''], // 车牌值
value2: '',
show: false,
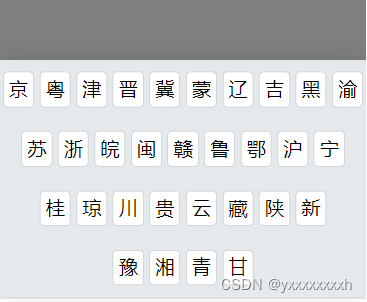
// 各省的简称
keyJC: [
['京', '粤', '津', '晋', '冀', '蒙', '辽', '吉', '黑', '渝'],
['苏', '浙', '皖', '闽', '赣', '鲁', '鄂', '沪', '宁'],
['桂', '琼', '川', '贵', '云', '藏', '陕', '新'],
['豫', '湘', '青', '甘']
],
// 一般正常的键盘
normalkey: [
['1', '2', '3', '4', '5', '6', '7', '8', '9', '0'],
['Q', 'W', 'E', 'R', 'T', 'Y', 'U', 'I', 'O', 'P'],
['A', 'S', 'D', 'F', 'G', 'H', 'J', 'K', 'L',],
['Z', 'X', 'C', 'V', 'B', 'N', 'M',],
],
// 油车最后一位键盘
lastKey: [
['1', '2', '3', '4', '5', '6', '7', '8', '9', '0'],
['Q', 'W', 'E', 'R', 'T', 'Y', 'U', 'I', 'O', 'P'],
['A', 'S', 'D', 'F', 'G', 'H', 'J', 'K', 'L', '警'],
['Z', 'X', 'C', 'V', 'B', 'N', 'M', '学',],
],
index: 0, // 被选中的车牌位置
isNewEnergy: false
}
},下面所展示的就是代码中所用到的几个方法了
  methods: {
    // 点击车牌号码
    handleCar(index) {
      this.index = index
      this.show = true
    },
    // 点击键盘内容
    handleKey(key) {
      this.value[this.index] = key
      this.value = [...this.value]
      if (this.isNewEnergy) {
        if (this.index < 7) {
          this.index++
        } else {
          this.show = false
        }
      }
      else {
        if (this.index < 6) {
          this.index++
        } else {
          this.show = false
        }
      }
    },
    // 点击新能源
    newEnergy() {
      this.isNewEnergy = !this.isNewEnergy
      this.value[7] = ''
      this.index = 7
      this.show = true
    }
  }
然后就是样式的内容了
<style lang="less" scoped>
.car-box {
  display: flex;
}

.car-input {
  display: inline-block;
  position: relative;
  border: 1px solid #CCC;
  width: 25px;
  text-align: center;
  margin-right: 5px;
  height: 40px;
  line-height: 40px;
  border-radius: 5px;
}

.car-input:nth-child(2):after {
  display: inline-block;
  position: absolute;
  top: 50%;
  left: 100% + 20px;
  transform: translateY(-50%);
  height: 8px;
  width: 8px;
  border-radius: 4px;
  background-color: #00FF00;
  content: '',
}
.car-input:nth-child(2) {
  margin-right: 16px;
}

.choose-class {
  border: 2px solid #52cb9a !important;
}

.car-new {
  background: url(../../../assets/images/newCar.png) no-repeat center;
  background-size: contain;
}

.car-group {
  display: flex;
  flex-direction: column;
  justify-content: space-around;
  height: 100%;
  background-color: #e3e9ec;
}

.car-row {
  display: flex;
  justify-content: center;

}

.car-cell {
  margin: 0 3px;
  width: 33px;
  text-align: center;
  border-radius: 5px;
  border: 1px solid #CCC;
  font-size: 20px;
  background-color: #FFF;
}
</style>
代码中所用到的小图片(需要自取)

使用方法:
<template>
    <yCarKeyWord v-model="form.plateNumber"/>
</template>
<script>
import yCarKeyWord from '@/components/yCarKeyWord/yCarKeyWord'
export default {
    components: {
        yCarKeyWord
    },
    data() {
        return {
            form: {}
        }
    }
}
<script>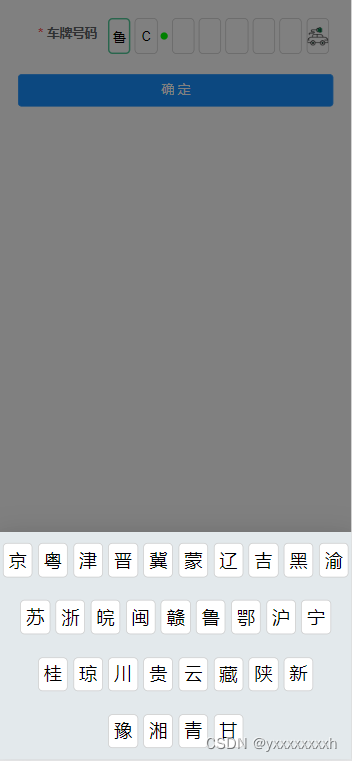
当然,代码中还是有很多不足的地方(比如没有添加删除按钮,嘎嘎嘎),还望各位大佬指正 哈


 3669
3669

 被折叠的 条评论
为什么被折叠?
被折叠的 条评论
为什么被折叠?
 到【灌水乐园】发言


