


启动节点有两种方式:
(1). Getting Started with Docker
(2). Getting Started with the Binary File
本文使用第二种方式:Getting Started with the Binary File
Setting Up a Node
Getting Started with the Binary File
一、clone Moonbeam 代码仓库
git clone -b tutorial-v7 https://github.com/PureStake/moonbeam
cd moonbeam
二、安装Substrate及其必备先决条件(包括rust)
curl https://getsubstrate.io -sSf | bash -s -- --fast
三、构建节点
cargo build --release
初始构建需要一段时间,大约需要30分钟,具体取决于不同的硬件。
四、在开发者模式下运行节点
./target/release/moonbeam --dev
Connecting Polkadot JS Apps to a Local Moonbeam Node
提供的两种RPC endpoints:
- HTTP: http://127.0.0.1:9933
- WS: ws://127.0.0.1:9944
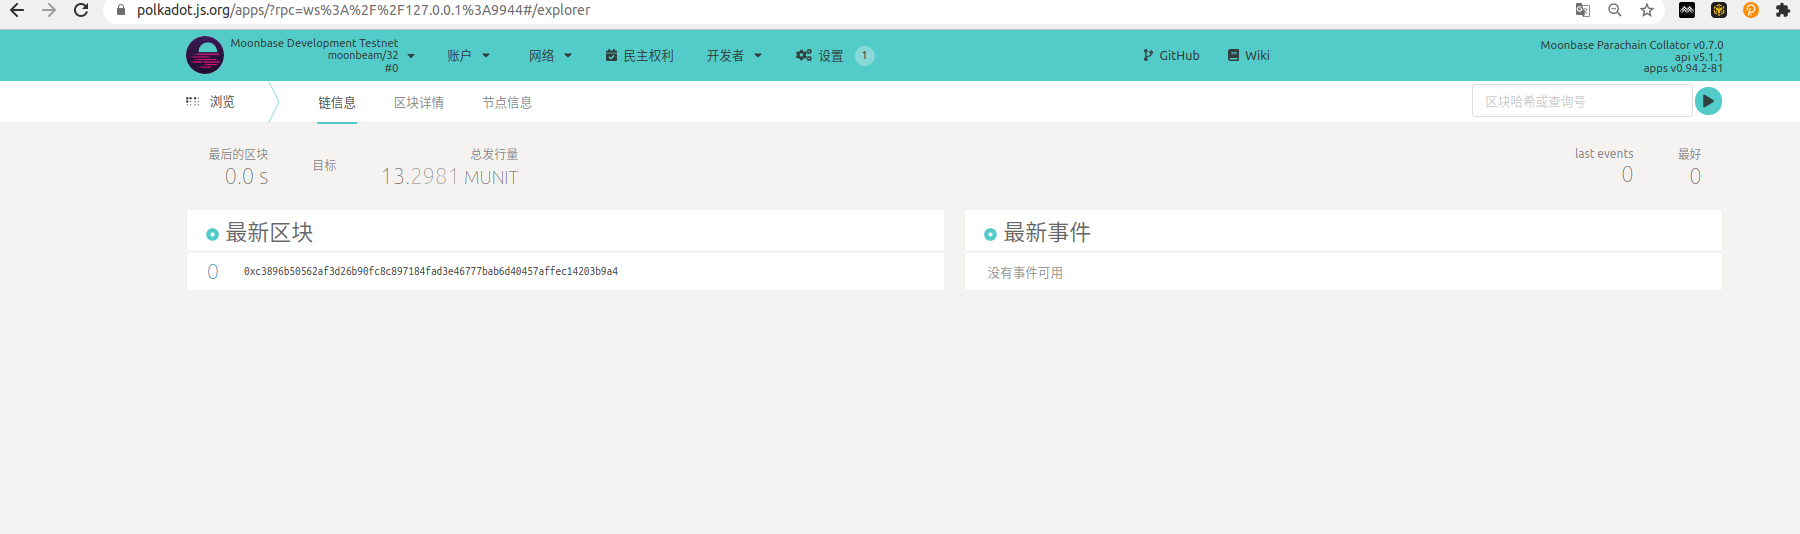
通过Polkadot JS Apps连接到节点:https://polkadot.js.org/apps/#/explorer
点击左上角打开目录,再点击Development子目录,选择“Local Node” 选项,设置为:ws://127.0.0.1:9944,点击上面的Switch选项,成功连接到本地的独立Moonbeam节点。
连接成功之后,可以查看独立Moonbeam节点的生产区块的情况。
Querying Account State
随着Moonbase Alpha v3的发布,Moonbeam可支持在单一账户的模式下运行,该模式为以太坊样式的H160,并且已被Polkadot JS Apps支持。要检查地址的余额,只需在“帐户”选项卡中导入帐户即可。你可以在统一帐户部分找到更多信息。
不过,你也可以利用Moonbeam完整的以太坊RPC功能,使用 MetaMask 同样可以查询账户的余额。除此之外,你还可以利用其他的开发工具,如Remix和Truffle 等等。
Using MetaMask
Using Remix
Using Truffle
Send a Transaction
Deploy a Contract
相关内容:
https://github.com/PureStake/moonbeam
https://docs.moonbeam.network/getting-started/local-node/setting-up-a-node/


 6714
6714


 被折叠的 条评论
为什么被折叠?
被折叠的 条评论
为什么被折叠?
 到【灌水乐园】发言


