


本篇博客将把Flutter所有UI控件的使用方法写出,我学习Flutter是通过Flutter官网来学习的,不需要科学上网,比如这这个网址说的就是Flutter的UI控件的使用方法 https://flutter.io/widgets/widgetindex/
1.基础控件
首先说一下最基础的控件有哪些,基础使用方法
文字显示
new Text('Hello World', style: new TextStyle(fontSize: 32.0))图片显示
new Image.asset('images/myPic.jpg', fit: BoxFit.cover)关于本地图片资源使用这里我需要说一下,首先在项目最顶部创建一个images文件夹放入一张图片lake.jpeg,然后在pubspec.yaml添加几行代码,表示引用images文件夹下的lake.jpeg图片,因为我把注释都删除了,所以代码看起来不多,但是原本的注释非常多,建议大家多看看注释
name: flutter_app
description: A new Flutter application.

dependencies:
  flutter:
    sdk: flutter
  cupertino_icons: ^0.1.2

dev_dependencies:
  flutter_test:
    sdk: flutter

  assets:
     - images/lake.jpeg
图标显示,就是使用系统里的图标图片
new Icon(Icons.star, color: Colors.red[500])这些基础控件的一些属性,大家就Command&鼠标左键点击Text类看看源码
好,我们把它们在APP里显示出来
修改main.dart文件,其中可以看得出来有两个顶层控件,一个appBar代表标题栏,一个body继承ListView代表主体内容
这个ListView默认是竖直方向的,和我们平常用的ListView很像,我们只需要把一些基础控件的对象放入其中,他会自动摆放的
class MyApp extends StatelessWidget {
  @override
  Widget build(BuildContext context) {

    return new MaterialApp(
      title: 'Flutter base UI Widget',
      home: new Scaffold(
        appBar: new AppBar(
          title: new Text('Flutter base UI Widget'),
        ),
        body: new ListView(
          children: <Widget>[
            //add code
            new Text('Hello World', style: new TextStyle(fontSize: 32.0)),
            new Image.asset('images/lake.jpeg', width: 200.0,height: 200.0, fit: BoxFit.cover),
            new Icon(Icons.star, color: Colors.red[500])


          ],
        ),
      ),
    );
  }
  }
安装看效果,很好,一切正常
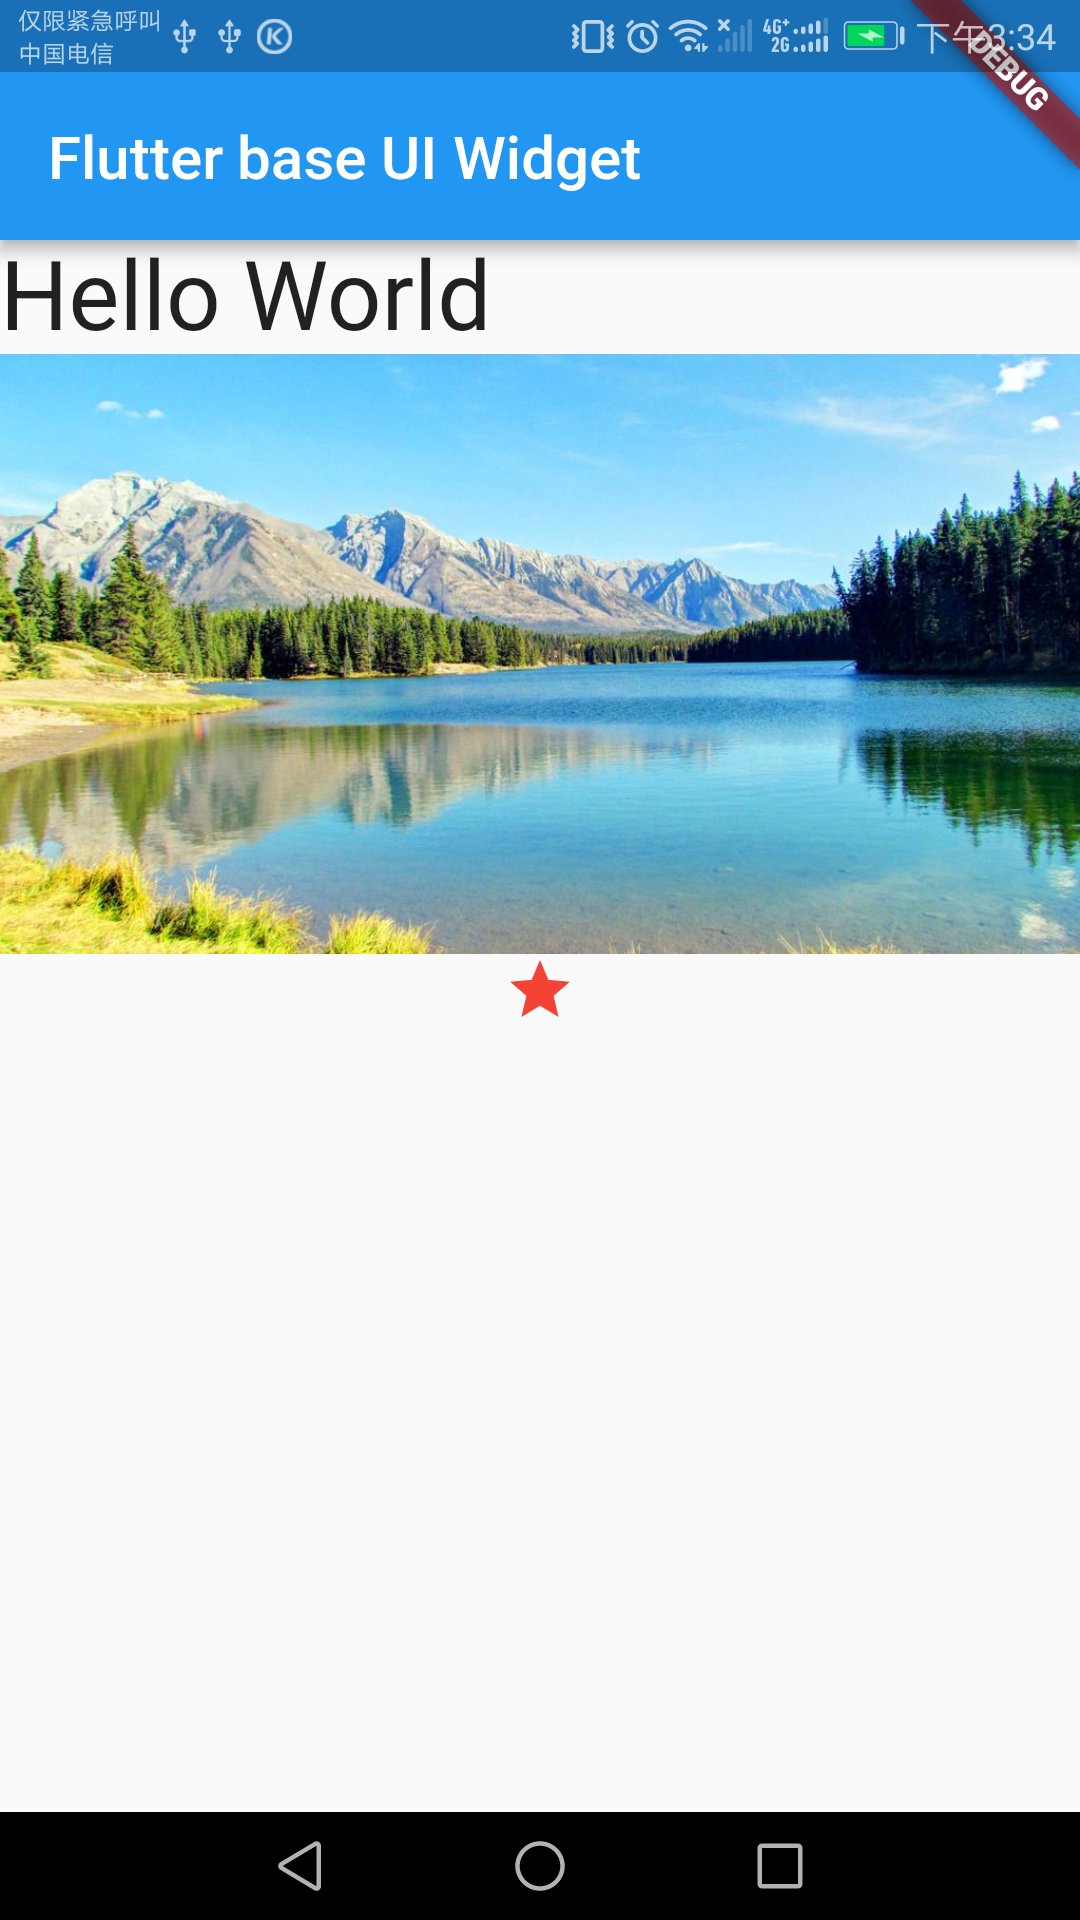
如果我们只显示Text,并且放在屏幕中央,那就修改body这段代码,就可以完成最经典的Hello World例子
      body: new Center(
        child: new Text('Hello World', style: new TextStyle(fontSize: 32.0)),
      ),
2.Column、Row
Row指的是横向的一排,Column指的是竖直的一列,之前说过ListView,Row类似子控件排放方向是横向的ListView,Column则是子控件排放方向是竖直的ListView
比如下图就是一个Row完成的,一个Row包含了三个子控件,第一个子控件是Column,其他是Icon、Text,而这个Column又放入了两个Text

代码如下(Container只是一个容器,类似ViewGroup,他没有控制子控件的能够,所以需要通过Row和Column来控制子控件的排放)
class MyApp extends StatelessWidget {
  @override
  Widget build(BuildContext context) {

    Widget titleSection = new Container(
      padding: const EdgeInsets.all(32.0),
      child: new Row(
        children: [
          new Expanded(
            child: new Column(
              crossAxisAlignment: CrossAxisAlignment.start,
              children: [
                new Container(
                  padding: const EdgeInsets.only(bottom: 8.0),
                  child: new Text(
                    'Oeschinen Lake Campground',
                    style: new TextStyle(
                      fontWeight: FontWeight.bold,
                    ),
                  ),
                ),
                new Text(
                  'Kandersteg, Switzerland',
                  style: new TextStyle(
                    color: Colors.grey[500],
                  ),
                ),
              ],
            ),
          ),
          new Icon(
            Icons.star,
            color: Colors.red[500],
          ),
          new Text('41'),
        ],
      ),
    );

    return new MaterialApp(
      title: 'Flutter base UI Widget',
      home: new Scaffold(
        appBar: new AppBar(
          title: new Text('Flutter base UI Widget'),
        ),
        body: new ListView(
          children: <Widget>[
            //add code
            titleSection


          ],
        ),
      ),
    );
  }
  }
然后这个Row和Column有mainAxisAlignment、crossAxisAlignment和flex属性
对于Row,mainAxisAlignment是横向,crossAxisAlignment是竖直方向,对于Column则相反,而flex则类似weight,在Row、Column里的子控件这个flex属性默认为1,通过这个flex来计算子控件在mainAxisAlignment方向占有的长度
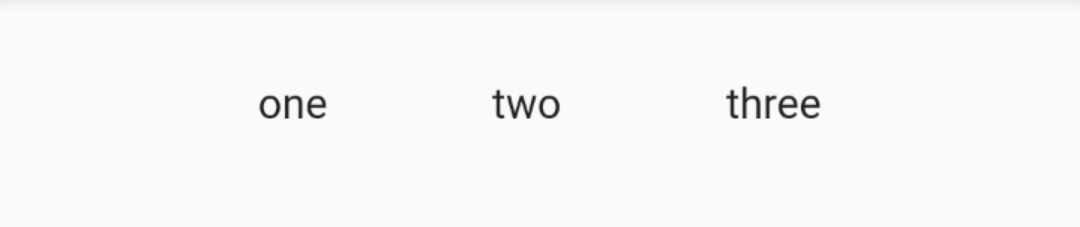
我修改titleSection的代码
    Widget titleSection = new Container(
      padding: const EdgeInsets.all(32.0),
      child: new Row(
        children: [
          new Text('one'),
          new Text('two'),
          new Text('three')
        ],
      ),
    );
显示如下:

如果我加上一行代码
    Widget titleSection = new Container(
      padding: const EdgeInsets.all(32.0),
      child: new Row(
        mainAxisAlignment: MainAxisAlignment.spaceEvenly,
        children: [
          new Text('one'),
          new Text('two'),
          new Text('three')
        ],
      ),
    );
效果,看得出来这个几个Text平均占用了宽度,如果是Column则是平均占用了高度,如果mainAxisAlignment设置为center,则是三个Text居中并且紧贴在一起
如果我添加flex属性
    Widget titleSection = new Container(
      padding: const EdgeInsets.all(32.0),
      child: new Row(

        children: [
          new Expanded(
             // flex:1,
              child: new Text('one')),
          new Expanded(
            flex: 2,
              child: new Text('two')),
          new Expanded(
             // flex:1,
              child: new Text('three'))
        ],
      ),
    );
这下子我们能够看得出来中间的子控件占有了屏幕一半的宽度

然后MainAxisSize.min这个属性能够是的子控件之间尽量贴在一起
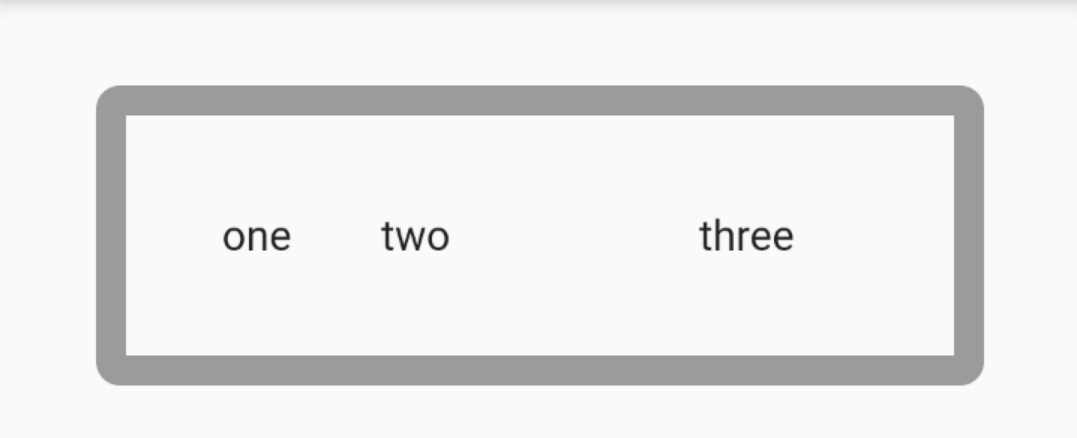
3.Container
之前虽然使用了Container,但是好像没有看出来有啥作用,但是人家还是有一点作用的比如加边框

我试试
    Widget titleSection = new Container(
      decoration: new BoxDecoration(
        border: new Border.all(width: 10.0, color: Colors.black38),
        borderRadius:
        const BorderRadius.all(const Radius.circular(8.0)),

      ),
      margin: const EdgeInsets.all(32.0),
      padding: const EdgeInsets.all(32.0),
      child: new Row(

        children: [
          new Expanded(

             // flex:1,
              child: new Text('one')),
          new Expanded(
            flex: 2,
              child: new Text('two')),
          new Expanded(
             // flex:1,
              child: new Text('three'))
        ],
      ),
    );
效果如下
4.GridView
表格布局,maxCrossAxisExtent指的是交叉方向的最大长度(GridView的主方向是竖直,交叉方向就是横向),padding和之前的Container一样,mainAxisSpacing和crossAxisSpacing指的是主方向和交叉方向,子控件之间的间距,children属性则是设置子控件(List<Widget>类型)
Widget buildGrid() {
  return new GridView.extent(
      maxCrossAxisExtent: 150.0,
      padding: const EdgeInsets.all(4.0),
      mainAxisSpacing: 4.0,
      crossAxisSpacing: 4.0,
      children: _buildGridTileList(30));
}
完整代码贴出
class MyApp extends StatelessWidget {
  @override
  Widget build(BuildContext context) {
    return new MaterialApp(
      title: 'Flutter Demo',
      theme: new ThemeData(
        primarySwatch: Colors.blue,
      ),
      home: new MyHomePage(title: 'Flutter Demo Home Page'),
    );
  }
}

class MyHomePage extends StatefulWidget {
  MyHomePage({Key key, this.title}) : super(key: key);

  final String title;

  @override
  _MyHomePageState createState() => new _MyHomePageState();
}

// The images are saved with names pic1.jpg, pic2.jpg...pic30.jpg.
// The List.generate constructor allows an easy way to create
// a list when objects have a predictable naming pattern.
List<Container> _buildGridTileList(int count) {
  List<Container> containers = new List<Container>.generate(
      count,
          (int index) =>
      new Container(child: new Image.asset('images/lake.jpeg',width: 100.0,height: 100.0, fit: BoxFit.cover)));
  return containers;
}

Widget buildGrid() {
  return new GridView.extent(
      maxCrossAxisExtent: 150.0,
      padding: const EdgeInsets.all(4.0),
      mainAxisSpacing: 4.0,
      crossAxisSpacing: 4.0,
      children: _buildGridTileList(30));
}

class _MyHomePageState extends State<MyHomePage> {
  @override
  Widget build(BuildContext context) {
    return new Scaffold(
      appBar: new AppBar(
        title: new Text(widget.title),
      ),
      body: new Center(
        child: buildGrid(),
      ),
    );
  }
}
效果如下

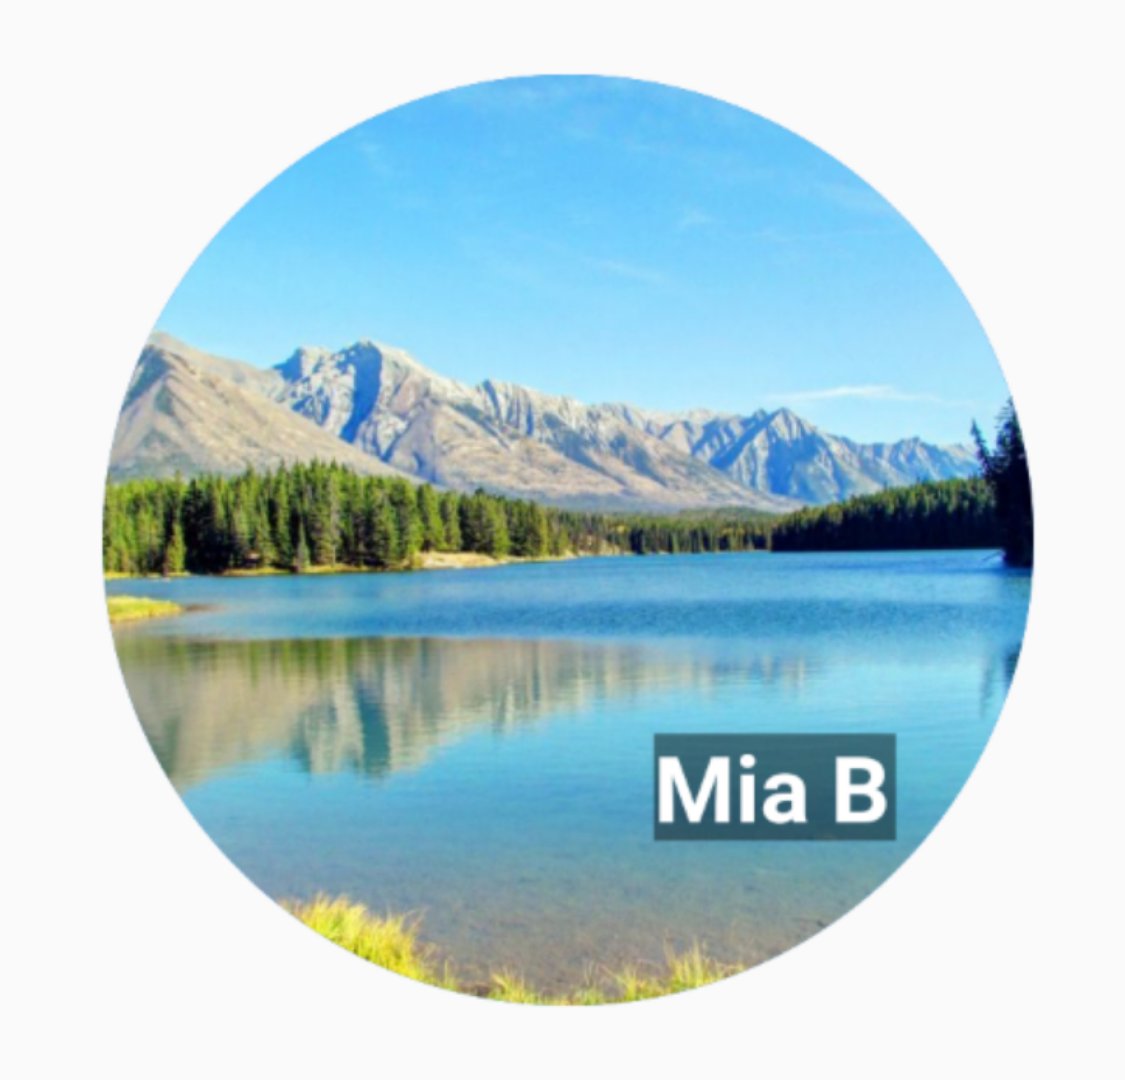
5.Stack
就是FrameLayout,帧布局,以左上角为起始点,按照子控件的先后顺序,直接覆盖上去,后来居上
CircleAvatar就是圆形控件,放入图片就能形成圆形图片。BoxDecoration就是设置当前Container的content背景颜色。
    var stack = new Stack(
      alignment: const Alignment(0.6, 0.6),
      children: [
        new CircleAvatar(
          backgroundImage: new AssetImage('images/lake.jpeg'),
          radius: 100.0,
        ),
        new Container(
          decoration: new BoxDecoration(
            color: Colors.black45,
          ),
          child: new Text(
            'Mia B',
            style: new TextStyle(
              fontSize: 20.0,
              fontWeight: FontWeight.bold,
              color: Colors.white,
            ),
          ),
        ),
      ],
    );
效果如下
6.Card
CardView不多bb,elevation:阴影大小
    var card = new SizedBox(
      height: 95.0,
      child: new Card(
        margin: const EdgeInsets.all(10.0),
        elevation: 10.0,
        child: new Column(
          children: [
            new ListTile(
              title: new Text('1625 Main Street',
                  style: new TextStyle(fontWeight: FontWeight.w500)),
              subtitle: new Text('My City, CA 99984'),
              leading: new Icon(
                Icons.restaurant_menu,
                color: Colors.blue[500],
              ),
            )
          ],
        ),
      ),
    );
效果
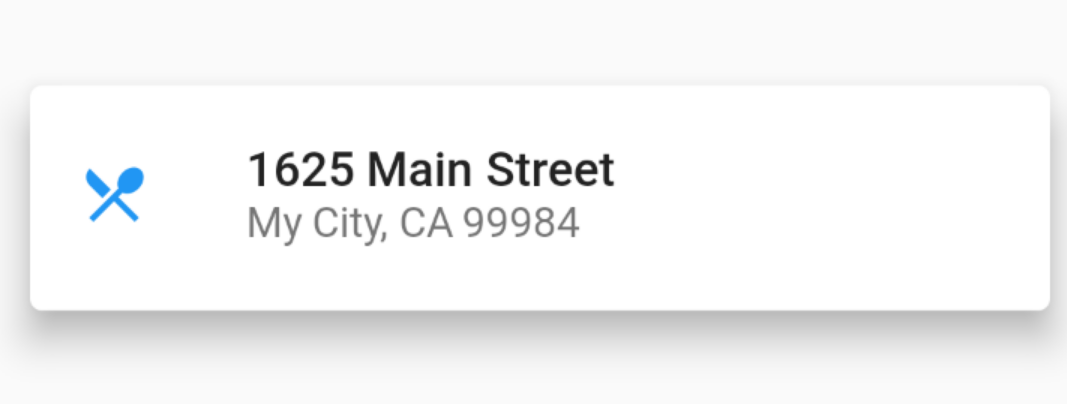
其中主体是ListTitle,ListTitle是一个特殊的Row,但是能过最多放入三排文字,并且可以放入图片
7.未完待续
因为还有不少的控件的使用我没有贴出,所以就有了这个标题,怎么说呢,我算是抛砖引玉,希望大家能够更好的灵活使用Flutter自带的控件


 1389
1389

 被折叠的 条评论
为什么被折叠?
被折叠的 条评论
为什么被折叠?
 到【灌水乐园】发言


