


查看本机IP地址
ifconfig -a
root@ubuntu:/home/evan# ifconfig -a
ens33: flags=4163<UP,BROADCAST,RUNNING,MULTICAST> mtu 1500
inet 192.168.174.131 netmask 255.255.255.0 broadcast 192.168.174.255
inet6 fe80::c1fc:f141:c57:72d7 prefixlen 64 scopeid 0x20<link>
ether 00:0c:29:6e:e3:8c txqueuelen 1000 (Ethernet)
RX packets 99254 bytes 130317392 (130.3 MB)
RX errors 0 dropped 0 overruns 0 frame 0
TX packets 49411 bytes 3000198 (3.0 MB)
TX errors 0 dropped 0 overruns 0 carrier 0 collisions 0
添加一个用户,并设置相应的访问权限
root@ubuntu:/home/evan# rabbitmqctl add_user root root
Creating user "root"
root@ubuntu:/home/evan# rabbitmqctl set_permissions -p / root '.*' '.*' '.*'
Setting permissions for user "root" in vhost "/"
设置root用户为管理员角色:
root@ubuntu:/home/evan# rabbitmqctl set_user_tags root administrator
Setting tags for user "root" to [administrator]
添加图形管理费工具
root@ubuntu:/opt/rabbitmq# cd sbin/
root@ubuntu:/opt/rabbitmq/sbin# rabbitmq-plugins enable rabbitmq_management
The following plugins have been enabled:
amqp_client
cowlib
cowboy
rabbitmq_web_dispatch
rabbitmq_management_agent
rabbitmq_management
图形处理工具浏览器默认地址

测试代码:
新建Spring项目


porm.xml文件配置如下:
<?xml version="1.0" encoding="UTF-8"?>
<project xmlns="http://maven.apache.org/POM/4.0.0" xmlns:xsi="http://www.w3.org/2001/XMLSchema-instance"
         xsi:schemaLocation="http://maven.apache.org/POM/4.0.0 https://maven.apache.org/xsd/maven-4.0.0.xsd">
    <modelVersion>4.0.0</modelVersion>
    <parent>
        <groupId>org.springframework.boot</groupId>
        <!-- 这个特殊的依赖包含了应用运行需要的所有信息,它包含了Spring Boot应用所必须的类似于Spring FrameWork(spring-core)、
        Spring Test(spring-test)等基础依赖的依赖描述。你只需要使用这个parent pom就能完成所有的依赖描述添加工作。-->
        <artifactId>spring-boot-starter-parent</artifactId>
        <version>2.2.0.RELEASE</version>
        <relativePath/> <!-- lookup parent from repository -->
    </parent>
    <groupId>com.ant</groupId>
    <artifactId>rabbitmq</artifactId>
    <version>0.0.1-SNAPSHOT</version>
    <name>rabbitmq</name>
    <description>Demo project for RabbitMQ</description>

    <properties>
        <java.version>1.8</java.version>
    </properties>

    <dependencies>
        <dependency>
            <groupId>org.springframework.boot</groupId>
            <!-- 添加这个依赖之后就可以创建一个web应用程序。starter poms部分可以引入所有需要在实际项目中使用的依赖。
           spring-boot-starter-web依赖包含所有的spring-core, spring-web, spring-webmvc,嵌入的Tomcat server和其他web应用相关的库。 -->
            <artifactId>spring-boot-starter-web</artifactId>
        </dependency>
        <dependency>
            <!--添加RabbitMQ Java客户端版本4.2.1-->
            <groupId>com.rabbitmq</groupId>
            <artifactId>amqp-client</artifactId>
            <version>4.2.1</version>
        </dependency>
        <dependency>
            <groupId>org.springframework.boot</groupId>
            <artifactId>spring-boot-starter-test</artifactId>
            <scope>test</scope>
            <exclusions>
                <exclusion>
                    <groupId>org.junit.vintage</groupId>
                    <artifactId>junit-vintage-engine</artifactId>
                </exclusion>
            </exclusions>
        </dependency>
    </dependencies>

    <build>
        <plugins>
            <plugin>
                <groupId>org.springframework.boot</groupId>
                <artifactId>spring-boot-maven-plugin</artifactId>
            </plugin>
        </plugins>
    </build>

</project>
消息生产者:
package com.ant.rabbitmq.helloworld;

import com.rabbitmq.client.Channel;
import com.rabbitmq.client.Connection;
import com.rabbitmq.client.ConnectionFactory;

public class HelloWorldProduct {
    public static void main(String[] args) throws Exception {
        //1 创建一个ConnectionFactory, 并进行配置
        ConnectionFactory connectionFactory = new ConnectionFactory();
        //服务器的IP地址
        connectionFactory.setHost("192.168.174.131");
        //端口
        connectionFactory.setPort(5672);
        //指定HOST
        connectionFactory.setVirtualHost("/");
        //登录名
        connectionFactory.setUsername("root");
        //密码
        connectionFactory.setPassword("root");
        //2 通过连接工厂创建连接
        Connection connection = connectionFactory.newConnection();
        //3 通过connection创建一个Channel
        Channel channel = connection.createChannel();
        //4 通过Channel发送数据
        for(int i=0; i < 5; i++){
            String msg = "Hello RabbitMQ!"+":"+i;
            /**
             * 1 exchange
             * 2 routingKey
             * 3 传递AMQP.BasicProperties属性信息
             * 4 消息
             */
            channel.basicPublish("", "test001", null, msg.getBytes());
        }

        //5 记得要关闭相关的连接
        channel.close();
        connection.close();
    }
}
消息消费者:
package com.ant.rabbitmq.helloworld;

import com.rabbitmq.client.*;

import java.io.IOException;
import java.util.concurrent.TimeUnit;

public class HelloWorldConsumer {

    public static void main(String[] args)  throws Exception{
        //1 创建一个ConnectionFactory, 并进行配置
        ConnectionFactory connectionFactory = new ConnectionFactory();
        connectionFactory.setHost("192.168.174.131");
        connectionFactory.setPort(5672);
        connectionFactory.setVirtualHost("/");
        connectionFactory.setUsername("root");
        connectionFactory.setPassword("root");
        //2 通过连接工厂创建连接
        Connection connection = connectionFactory.newConnection();
        //3 通过connection创建一个Channel
        Channel channel = connection.createChannel();
        //4 声明(创建)一个队列
        String queueName = "test001";
        channel.basicQos(64);
        channel.queueDeclare(queueName, true, false, false, null);
        //5 创建消费者
        Consumer consumer = new DefaultConsumer(channel){
            @Override
            public void handleDelivery(String consumerTag, Envelope envelope, AMQP.BasicProperties properties, byte[] body)
                    throws IOException {
                String msg = new String(body, "UTF-8");
                System.out.println("消费端:" + msg);
            }
        };
        //6 订阅消息
        channel.basicConsume(queueName, true, consumer);

        TimeUnit.SECONDS.sleep(5);
        channel.close();
        connection.close();
    }
}
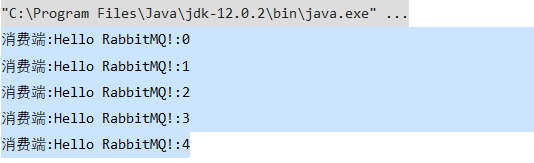
分别运行程序结果如下:
queueDeclare:
队列声明queueDeclare的参数:第一个参数表示队列名称、第二个参数为是否持久化(true表示是,队列将在服务器重启时生存)、第三个参数为是否是独占队列(创建者可以使用的私有队列,断开后自动删除)、第四个参数为当所有消费者客户端连接断开时是否自动删除队列、第五个参数为队列的其他参数
basicConsume:
关于basicConsume的第二个参数autoAck: 应答模式,true:自动应答,即消费者获取到消息,该消息就会从队列中删除掉,false:手动应答,当从队列中取出消息后,需要程序员手动调用方法应答,如果没有应答,该消息还会再放进队列中,就会出现该消息一直没有被消费掉的现象
代码地址:
https://github.com/evan-zang/RabbitMQ


 285
285


 被折叠的 条评论
为什么被折叠?
被折叠的 条评论
为什么被折叠?
 到【灌水乐园】发言


