


1 Get请求数据
项目地址:https://github.com/Snowstorm0/learn-get-post
1.1 Controller
文件名MyController,内容为:
@RestController
@RequestMapping("/homepage")
public class MyController {
    @Autowired
    MyService myService;

    @GetMapping("/learnGet")
    public String learnGet(){
        return myService.learnGet();
    }
}
1.2 Service
文件名MyService,内容为:
@Service
@EnableScheduling
public class MyService {
    public String learnGet(){
        Long timeLong = System.currentTimeMillis();
        SimpleDateFormat timeFormat = new SimpleDateFormat("yyyy-MM-dd HH:mm:ss"); //设置格式
        String timeString = timeFormat.format(timeLong);
        return timeString;
    }
}
1.3 Application
在application.properties配置:
# 设置端口号
server.port=8888
1.4 Postman
配置Get,地址为: http://localhost:8888/homepage/returnTime 。
即可获得当前时间戳。

2 Post接收数据
项目地址:https://github.com/Snowstorm0/learn-get-post
2.1 Controller
文件名MyController,内容为:
@RestController
@RequestMapping("/homepage")
public class MyController {
    @Autowired
    MyService myService;
    @PostMapping("/postReceive")
    public Map<String, Object> postReceive(@RequestParam("number") int number, @RequestParam("name") String name) {
        return myService.postReceive(number, name);
    }
    @PostMapping("/postReceiveByMap")
    public Map<String, Object> postReceiveByMap(@RequestParam Map<String, Object> map) {
        System.out.println("map:" + map + "\n");
        return myService.postReceiveByMap(map);
    }
}
2.2 Service
文件名MyService,内容为:
@Service
@EnableScheduling
public class MyService {
    public Map<String, Object> postReceive(int number, String name){
        Map<String, Object> res = new HashMap<>();
        res.put("number", number);
        res.put("name", name);
        return res;
    }
    public Map<String, Object> postReceiveByMap(Map<String, Object> map){
        int number = map.get("number") == null ? 0 : Integer.parseInt((String) map.get("number"));
        String name = map.get("name") == null ? "" : (String)map.get("name");
        Map<String, Object> res = new HashMap<>();
        res.put("number", number);
        res.put("name", name);
        System.out.println("map:" + map + "\n");
        System.out.println("res:" + res + "\n");
        return res;
    }
2.3 Application
在application.properties配置:
# 设置端口号
server.port=8888
2.4 Postman
配置Get,地址为: http://localhost:8888/homepage/returnTime 。
即可获得输出。

3 Post发送数据
项目地址:https://github.com/Snowstorm0/learn-post-send
需要注意,RestTemplate在postForObject时,用MultiValueMap,不可使用HashMap。
3.1 Controller
文件名MyController,内容为:
@RestController
@RequestMapping("/homepage")
public class MyController {

    @Autowired
    MyService myService;

    @PostMapping("/postSend")
    public Map<String, Object> postSend() {
        return myService.postSend();
    }
}
3.2 Service
文件名MyService,内容为:
@Service
@EnableScheduling
public class MyService {
    @Resource
    private RestTemplate restTemplate;
    String URL = "http://localhost:8888/homepage/postReceiveByMap";

    public Map<String, Object> postSend(){
        Map<String, Object> sendData = new HashMap<>();
        sendData.put("number", 3);
        sendData.put("name", "张三");
        ResponseEntity<ResponseResult> responseData = restTemplate.postForEntity(URL, sendData, ResponseResult.class);
        Map<String, Object> returnData = new HashMap<>();
        returnData.put("StatusCode:", responseData.getStatusCode());
        returnData.put("Body:", responseData.getBody());
        return returnData;
    }
}
3.3 ResponseResult
public class ResponseResult {

    private int number;
    private String name;

    public ResponseResult(){
    }

    public int getNumber() {
        return number;
    }
    public void setNumber(int number) {
        this.number = number;
    }
    public String getName() {
        return name;
    }
    public void setName(String name) {
        this.name = name;
    }

    @Override
    public String toString() {
        return "ResponseResult [number=" + number + ",name=" + name + "]";
    }
}
3.4 Config
@Configuration
public class Config {
    @Bean
    public RestTemplate restTemplate(RestTemplateBuilder builder){
        return builder.build();
    }
}
3.5 Application
在application.properties配置:
# 设置端口号
server.port=8889
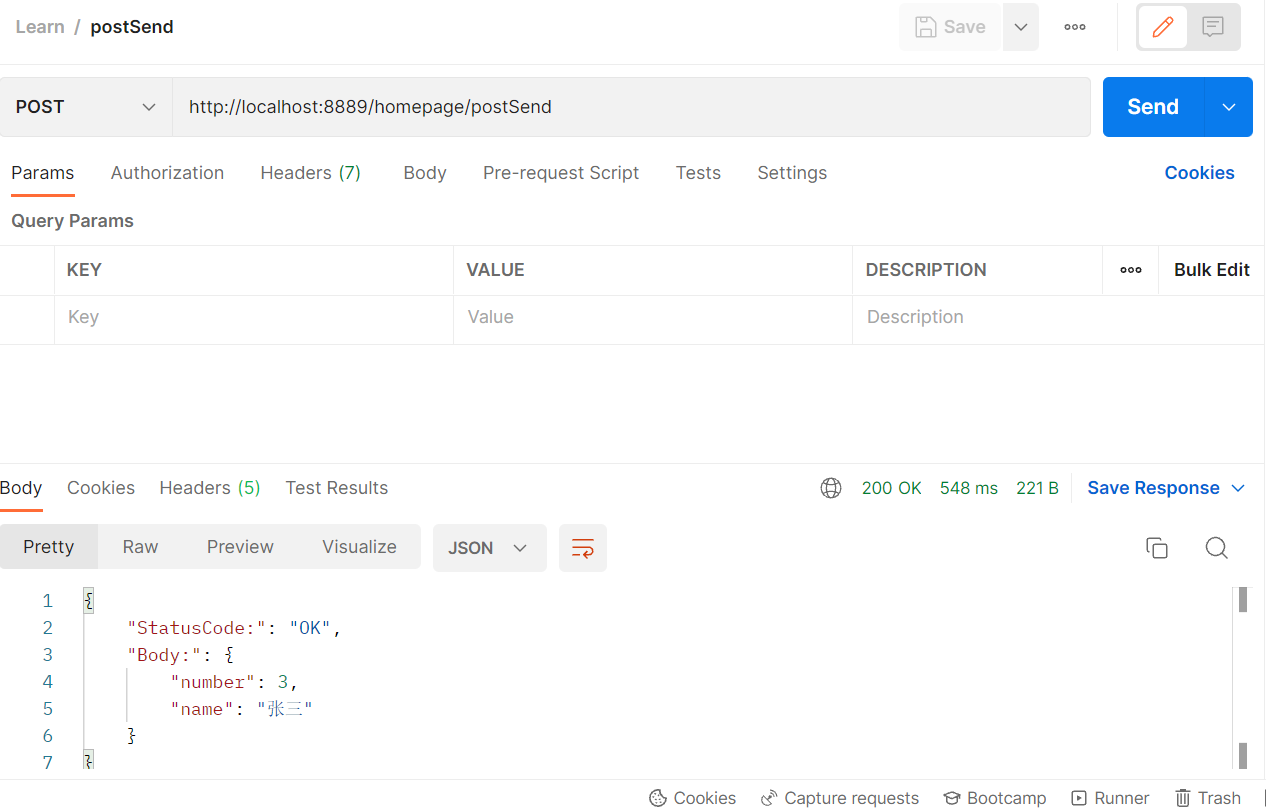
3.6 Postman
配置Post,地址为: http://localhost:8889/homepage/postSend
即可获得输出。
学习更多编程知识,请关注我的公众号:


 613
613


 被折叠的 条评论
为什么被折叠?
被折叠的 条评论
为什么被折叠?
 到【灌水乐园】发言


