


前几天接到一个新的需求,原始需求是要求获取到自己app的通知开关状态,以便能在app内给用户提醒,告知用户通知开关关闭,来挽回部门关闭通知的用户:
1、查阅资料
有问题找度娘,找到了这个帖子
https://segmentfault.com/q/1010000002508523
然后顺藤摸瓜找到了这个帖子
http://stackoverflow.com/questions/11649151/android-4-1-how-to-check-notifications-are-disabled-for-the-application
大致意思就是系统不想让你获取这个开关的状态,但是我们可以使用发射来获取这个值。
2、编码测试
直接使用大神代码片段,发现是反射了AppOpsManager这个类里面的checkOpNoThrow方法,
private static boolean up43(Context context) {
        AppOpsManager mAppOps = (AppOpsManager) context.getSystemService(Context.APP_OPS_SERVICE);

        ApplicationInfo appInfo = context.getApplicationInfo();

        String pkg = context.getApplicationContext().getPackageName();

        int uid = appInfo.uid;

        Class appOpsClass = null; /* Context.APP_OPS_MANAGER */

        try {

            appOpsClass = Class.forName(AppOpsManager.class.getName());

            Method checkOpNoThrowMethod = appOpsClass.getMethod(CHECK_OP_NO_THROW, Integer.TYPE, Integer.TYPE, String.class);

            Field opPostNotificationValue = appOpsClass.getDeclaredField(OP_POST_NOTIFICATION);
            int value = (int) opPostNotificationValue.get(Integer.class);

            boolean boo = ((int) checkOpNoThrowMethod.invoke(mAppOps, value, uid, pkg) == AppOpsManager.MODE_ALLOWED);
            return boo;

        } catch (ClassNotFoundException e) {
            e.printStackTrace();
        } catch (NoSuchMethodException e) {
            e.printStackTrace();
        } catch (NoSuchFieldException e) {
            e.printStackTrace();
        } catch (InvocationTargetException e) {
            e.printStackTrace();
        } catch (IllegalAccessException e) {
            e.printStackTrace();
        } catch (Exception e) {
            e.printStackTrace();
        }
        return false;
    }
尝试运行是可以获取到的。
但是我们查阅官方文档可以发现,AppOpsManager这个类是api19以上才添加的,也就是说android4.3以下这个方法就失效了,代码测试下
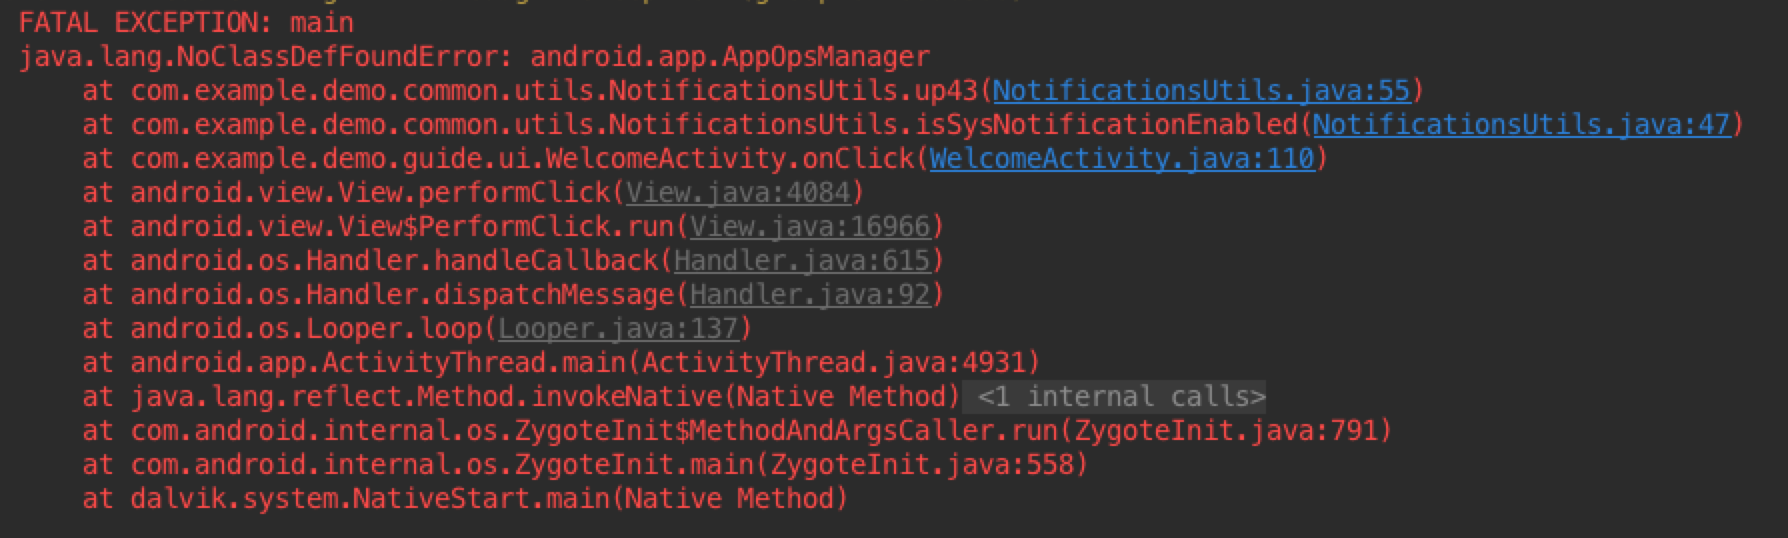
果然…..是获取不到的
那么4.3以下怎么办呢,这边先说下结果吧,4.3以下是获取不到。尝试过程如下:
首先我们下下来setting源码,打开到手机到app的应用详情页,然后adb一把
adb shell dumpsys activity | grep mFocus会发现栈顶是om.android.settings/.applications.InstalledAppDetails
好,那我们到setting里面找到InstalledAppDetails这个类,看代码会发现还是挺好理解的,看到这方法:
private void initNotificationButton() {
        INotificationManager nm = INotificationManager.Stub.asInterface(
                ServiceManager.getService(Context.NOTIFICATION_SERVICE));
        boolean enabled = true; // default on
        try {
            enabled = nm.areNotificationsEnabledForPackage(mAppEntry.info.packageName);
        } catch (android.os.RemoteException ex) {
            // this does not bode well
        }
        mNotificationSwitch.setChecked(enabled);
        if (isThisASystemPackage()) {
            mNotificationSwitch.setEnabled(false);
        } else {
            mNotificationSwitch.setEnabled(true);
            mNotificationSwitch.setOnCheckedChangeListener(this);
        }
    }
应用详情里面的 ‘显示通知’ 按钮是由initNotificationButton这个方法来处理的,在这里我们可以看到,最终代码是nm.areNotificationsEnabledForPackage(mAppEntry.info.packageName) 这句话,那么重点来了,着重的看下INotificationManager这个类里面的areNotificationsEnabledForPackage这个方法,下面以这个nm为突破口,看到了INotificationManager,
既然这些是Notification的开关,那么NotificationManger肯定就会有应用,那我们就去看看NotificationManager:
    /** @hide */
    static public INotificationManager getService()
    {
        if (sService != null) {
            return sService;
        }
        IBinder b = ServiceManager.getService("notification");
        sService = INotificationManager.Stub.asInterface(b);
        return sService;
    }
果然NotificationManager里面有这么个方法,看下这个IBinder的b对象,是获取的系统的notification的service,对比setting源码看下
Context源码如下
   /**
     * Use with {@link #getSystemService} to retrieve a
     * {@link android.app.NotificationManager} for informing the user of
     * background events.
     *
     * @see #getSystemService
     * @see android.app.NotificationManager
     */
    public static final String NOTIFICATION_SERVICE = "notification";
InstalledAppDetails.java源码如下
INotificationManager nm = INotificationManager.Stub.asInterface(
                ServiceManager.getService(Context.NOTIFICATION_SERVICE));
好了,代码看到这里就发现 NotificationManager里面getService获取的nm对象跟InstalledAppDetails里的nm是获取的同一个实例,那么方法就来了。
思考一下,这边分两个步骤来得到我们想到的值
- 1、反射NotificationManager的getService()方法得到INotificationManager对象
- 2、反射INotificationManager的areNotificationsEnabledForPackage()方法得到状态值
通过上面的两步我们就能获取到最终的状态值了。
废话不多说,上代码:
    /**
      *4.3以下
      */
    public static boolean low43() {

        boolean boo = true;
        Context context = DemoApp.getInstance();

        NotificationManager nm = (NotificationManager)
        context.getSystemService(android.content.Context.NOTIFICATION_SERVICE);

        String pkg = context.getApplicationContext().getPackageName();

        try {
            Class NotificationManagerClass;
            // step1
            NotificationManagerClass = Class.forName(NotificationManager.class.getName());

            Method getServiceMethod = NotificationManagerClass.getMethod("getService");
            Logs.LOGD(TAG, "getServiceMethod: " + getServiceMethod);
            Object obj_inm = getServiceMethod.invoke(nm);
            Logs.LOGD(TAG, "obj_inm: " + obj_inm);

            // step2
            Class INotificationManagerClass;
            INotificationManagerClass = Class.forName("android.app.INotificationManager");

             // 多余步骤,看看nm里面有哪些方法,打出来看看
            Method[] list = INotificationManagerClass.getMethods();
            for (int i = 0; i < list.length; i++) {
                Logs.LOGD(TAG, i + ": " + list[i].toString());
            }

            Method areNotificationsEnabledForPackage_Method = INotificationManagerClass.getMethod("areNotificationsEnabledForPackage", String.class);
            Logs.LOGD(TAG, "areNotificationsEnabledForPackage_Method: " + areNotificationsEnabledForPackage_Method);
            boo = (boolean) areNotificationsEnabledForPackage_Method.invoke(obj_inm, pkg);
            Logs.LOGD(TAG, "low43_invoke boo: " + boo);

        } catch (Exception e) {
            e.printStackTrace();
        }


//        NotificationManagerCompat notificationManagerCompat = NotificationManagerCompat.from(DemoApp.getInstance());
//        boolean boo = notificationManagerCompat.areNotificationsEnabled();
        Logs.LOGD(TAG, "low43: " + boo);
        return boo;
    }
(方法命名欠妥当)迫不及待的跑一把看看,最终会发现:
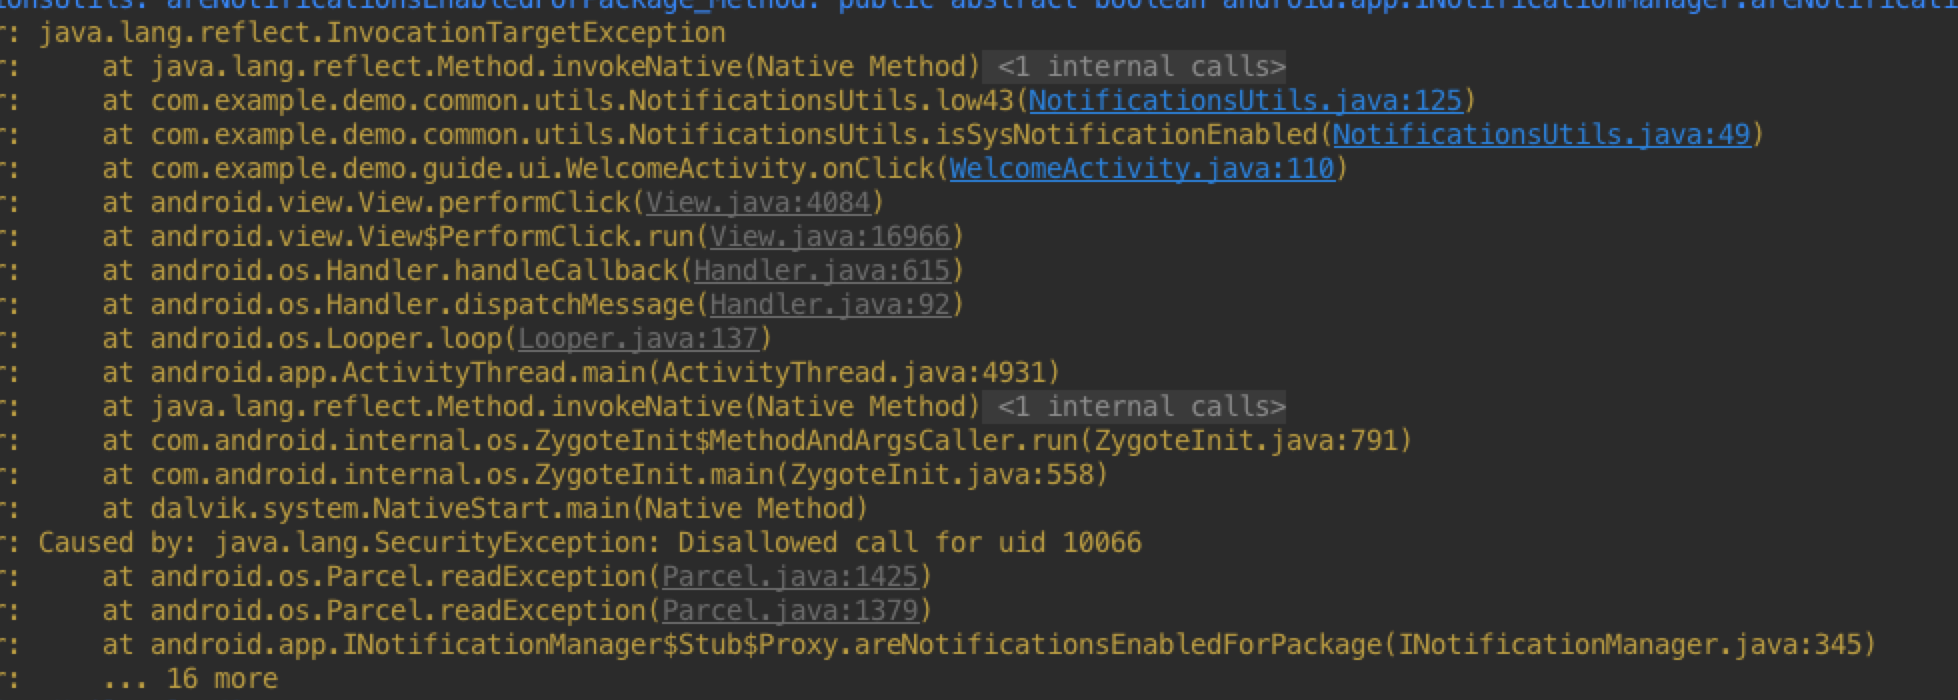
为什么会这样呢?
INotificaitonManager源码是没有看到了,不过从NotificationManagerService入手可以发现 INotificationManager.Stub第一个binder实例,查看代码发现
        /**
         * Use this when you just want to know if notifications are OK for this package.
         */
        @Override
        public boolean areNotificationsEnabledForPackage(String pkg, int uid) {
            checkCallerIsSystem();
            return (mAppOps.checkOpNoThrow(AppOpsManager.OP_POST_NOTIFICATION, uid, pkg)
                    == AppOpsManager.MODE_ALLOWED);
        }
重点在这个方法 checkCallerIsSystem():
    private static void checkCallerIsSystem() {
        if (isCallerSystem()) {
            return;
        }
        throw new SecurityException("Disallowed call for uid " + Binder.getCallingUid());
    }

    private static boolean isCallerSystem() {
        return isUidSystem(Binder.getCallingUid());
    }

    private static boolean isUidSystem(int uid) {
        final int appid = UserHandle.getAppId(uid);
        return (appid == Process.SYSTEM_UID || appid == Process.PHONE_UID || uid == 0);
    }
看到这里相信大家都能看明白了,人家就是不想让非系统级的app用,就是这么任性。
到此一次探索就结束了。后面再有有意思的东西再跟大家分享。如文中有什么错误,希望大家指正~


 723
723

 被折叠的 条评论
为什么被折叠?
被折叠的 条评论
为什么被折叠?
 到【灌水乐园】发言


