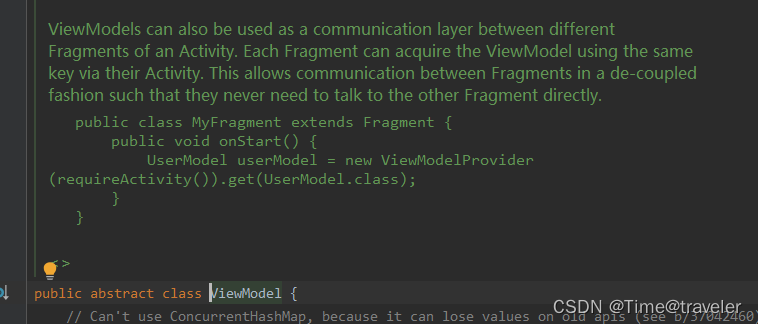
ViewModel是Jetpack框架集合中不可或缺的重要库之一,替我们管理着项目框架中的数据,相当于一个LiveData的数据总管一样。
它将视图与数据分离,对数据进行管理,当应用横竖屏切换时,不再需要考虑数据的存储与恢复。
ViewModel的源码分析主要分为两步:对象的创建和销毁。
一,ViewModel的创建过程
1,先创建一个ViewModel的类如下
class HomeViewModel : ViewModel() {

    private val _text = MutableLiveData<String>().apply {
        value = "This is home Fragment"
    }
    val text: LiveData<String> = _text
}
2,创建ViewModel对象
val homeViewModel = ViewModelProvider(this).get(HomeViewModel::class.java)
这是官方指定的一种创建方式,见源码

接下来就开始正在进入源码分析环节。
ViewModel对象的创建时,先创建了一个ViewModelProvider对象,并传入了当前上下文,然后再调用了它的get函数,传入了ViewModel的类
3,进入ViewModelProvider的构造函数,源码如下:
    /**
     * Creates {@code ViewModelProvider}. This will create {@code ViewModels}
     * and retain them in a store of the given {@code ViewModelStoreOwner}.
     * <p>
     * This method will use the
     * {@link HasDefaultViewModelProviderFactory#getDefaultViewModelProviderFactory() default factory}
     * if the owner implements {@link HasDefaultViewModelProviderFactory}. Otherwise, a
     * {@link NewInstanceFactory} will be used.
     */
    public ViewModelProvider(@NonNull ViewModelStoreOwner owner) {
        this(owner.getViewModelStore(), owner instanceof HasDefaultViewModelProviderFactory
                ? ((HasDefaultViewModelProviderFactory) owner).getDefaultViewModelProviderFactory()
                : NewInstanceFactory.getInstance());
    }
根据源码可知,构造函数中传入了一个ViewModelStoreOwner对象,我们进入ViewModelStoreOwner文件,发现它是一个接口,如下:
public interface ViewModelStoreOwner {
    /**
     * Returns owned {@link ViewModelStore}
     *
     * @return a {@code ViewModelStore}
     */
    @NonNull
    ViewModelStore getViewModelStore();
}
既然创建时是在Activity中传入的this,那Activity肯定是实现了ViewModelStoreOwner接口,并实现了getViewModelStore函数。
4,进入ComponentActivity中,可以看到它实现了ViewModelStoreOwner接口
public class ComponentActivity extends androidx.core.app.ComponentActivity implements
        ContextAware,
        LifecycleOwner,
        //核心接口
        ViewModelStoreOwner,
      	//ViewModel的创建工厂接口
        HasDefaultViewModelProviderFactory,
        SavedStateRegistryOwner,
        OnBackPressedDispatcherOwner,
        ActivityResultRegistryOwner,
        ActivityResultCaller {

	......
}
在第三步中创建ViewModelProvider对象时会调用owner.getViewModelStore()函数,并判断owner 是否是 HasDefaultViewModelProviderFactory类型的。
5,进入getViewModelStore函数
它调用的是ComponentActivity的getViewModelStore中,发现它直接创建了一个ViewModelStore对象并返回
//此处省略若干行
...............
          @NonNull
    @Override
    public ViewModelStore getViewModelStore() {
        if (getApplication() == null) {
            throw new IllegalStateException("Your activity is not yet attached to the "
                    + "Application instance. You can't request ViewModel before onCreate call.");
        }
        ensureViewModelStore();
        return mViewModelStore;
    }

    @SuppressWarnings("WeakerAccess") /* synthetic access */
    void ensureViewModelStore() {
        if (mViewModelStore == null) {
        	//防止重复创建
            NonConfigurationInstances nc =
                    (NonConfigurationInstances) getLastNonConfigurationInstance();
            if (nc != null) {
                // Restore the ViewModelStore from NonConfigurationInstances
                mViewModelStore = nc.viewModelStore;
            }
            if (mViewModelStore == null) {
                mViewModelStore = new ViewModelStore();
            }
        }
    }
6,进入getDefaultViewModelProviderFactory函数,它创建了一个SavedStateViewModelFactory类型的对象并返回
    @NonNull
    @Override
    public ViewModelProvider.Factory getDefaultViewModelProviderFactory() {
        if (getApplication() == null) {
            throw new IllegalStateException("Your activity is not yet attached to the "
                    + "Application instance. You can't request ViewModel before onCreate call.");
        }
        if (mDefaultFactory == null) {
            mDefaultFactory = new SavedStateViewModelFactory(
                    getApplication(),
                    this,
                    getIntent() != null ? getIntent().getExtras() : null);
        }
        return mDefaultFactory;
    }
7,ViewModelProvider的构造函数结束了,接下来就看一下get函数
   private static final String DEFAULT_KEY =
            "androidx.lifecycle.ViewModelProvider.DefaultKey";
    @NonNull
    @MainThread
    public <T extends ViewModel> T get(@NonNull Class<T> modelClass) {
        String canonicalName = modelClass.getCanonicalName();
        if (canonicalName == null) {
            throw new IllegalArgumentException("Local and anonymous classes can not be ViewModels");
        }
        //使用了默认的一个字符串加上类名拼接出一个key
        return get(DEFAULT_KEY + ":" + canonicalName, modelClass);
    }

  @NonNull
    @MainThread
    public <T extends ViewModel> T get(@NonNull String key, @NonNull Class<T> modelClass) {
    	//从ViewModelStore中的HashMap中获取,防止重复创建
        ViewModel viewModel = mViewModelStore.get(key);

        if (modelClass.isInstance(viewModel)) {
        	//根据ViewModelProvider的构造函数可知,此处的mFactory是SavedStateViewModelFactory类型的(OnRequeryFactory是SavedStateViewModelFactory的父类)
            if (mFactory instanceof OnRequeryFactory) {
                ((OnRequeryFactory) mFactory).onRequery(viewModel);
            }
            return (T) viewModel;
        } else {
            //noinspection StatementWithEmptyBody
            if (viewModel != null) {
                // TODO: log a warning.
            }
        }

        //SavedStateViewModelFactory继承KeyedFactory接口
        if (mFactory instanceof KeyedFactory) {
            viewModel = ((KeyedFactory) mFactory).create(key, modelClass);
        } else {
            viewModel = mFactory.create(modelClass);
        }
        //创建一个ViewModel对象,根据拼接的key存入ViewModelStore中的HashMap中
        mViewModelStore.put(key, viewModel);
        return (T) viewModel;
    }
8,进入SavedStateViewModelFactory中的可知它继承自KeyedFactory,而KeyedFactory又继承了OnRequeryFactory,
public final class SavedStateViewModelFactory extends ViewModelProvider.KeyedFactory {
}
 abstract static class KeyedFactory extends OnRequeryFactory implements Factory {
}
查看create函数发现它是通过反射的方式创建了一个ViewModel对象。
  @NonNull
    @Override
    public <T extends ViewModel> T create(@NonNull String key, @NonNull Class<T> modelClass) {
        boolean isAndroidViewModel = AndroidViewModel.class.isAssignableFrom(modelClass);
        Constructor<T> constructor;
        if (isAndroidViewModel && mApplication != null) {
            constructor = findMatchingConstructor(modelClass, ANDROID_VIEWMODEL_SIGNATURE);
        } else {
            constructor = findMatchingConstructor(modelClass, VIEWMODEL_SIGNATURE);
        }
        // doesn't need SavedStateHandle
        if (constructor == null) {
            return mFactory.create(modelClass);
        }

        SavedStateHandleController controller = SavedStateHandleController.create(
                mSavedStateRegistry, mLifecycle, key, mDefaultArgs);
        try {
            T viewmodel;
            if (isAndroidViewModel && mApplication != null) {
                viewmodel = constructor.newInstance(mApplication, controller.getHandle());
            } else {
                viewmodel = constructor.newInstance(controller.getHandle());
            }
            viewmodel.setTagIfAbsent(TAG_SAVED_STATE_HANDLE_CONTROLLER, controller);
            return viewmodel;
        } catch (IllegalAccessException e) {
            throw new RuntimeException("Failed to access " + modelClass, e);
        } catch (InstantiationException e) {
            throw new RuntimeException("A " + modelClass + " cannot be instantiated.", e);
        } catch (InvocationTargetException e) {
            throw new RuntimeException("An exception happened in constructor of "
                    + modelClass, e.getCause());
        }
    }
到此ViewModel的创建就完成了,接下来看一下ViewModelStore,它的代码很简单就这么几十行,内部创建了一个HashMap,以ViewModelProvider中拼接的字符串key,保存我们创建的ViewModel对象。
public class ViewModelStore {

    private final HashMap<String, ViewModel> mMap = new HashMap<>();

    final void put(String key, ViewModel viewModel) {
        ViewModel oldViewModel = mMap.put(key, viewModel);
        if (oldViewModel != null) {
            oldViewModel.onCleared();
        }
    }

    final ViewModel get(String key) {
        return mMap.get(key);
    }

    Set<String> keys() {
        return new HashSet<>(mMap.keySet());
    }

    /**
     *  Clears internal storage and notifies ViewModels that they are no longer used.
     */
    public final void clear() {
        for (ViewModel vm : mMap.values()) {
            vm.clear();
        }
        mMap.clear();
    }
}
二,ViewModel的销毁
根据ViewModel的创建过程可知,ViewModel对象销毁是和ViewModelStore息息相关,而ViewModelStore的创建是在ComponentActivity中,所以销毁也必定在这里面,在ComponentActivity中的构造函数中,通过lifecycle监听页面的销毁。
     this.getLifecycle().addObserver(new LifecycleEventObserver() {
                public void onStateChanged(@NonNull LifecycleOwner source, @NonNull Event event) {
                    if (event == Event.ON_DESTROY) {
                        ComponentActivity.this.mContextAwareHelper.clearAvailableContext();
                        //判断Activity是否非正常销毁
                        if (!ComponentActivity.this.isChangingConfigurations()) {
                            //回收ViewModel,并触发onCleared
                            ComponentActivity.this.getViewModelStore().clear();
                        }
                    }
                }
            });
isChangingConfigurations 函数就是判断是否因屏幕旋转导致触发的生命周期,这也就是为什么屏幕旋转后ViewModel中LiveData保存的值不会丢失。
总结
ViewModel的创建使用了工厂模式,创建完成后存入到ViewModelStore(ViewModelStore对象的创建是在Activity中)中的HashMap,Key是通过ViewModel的类名+默认的字符串,Value则是当前存入的ViewModel对象,当Activity/Fragment正常销毁时,会调用ViewModelStore中的Clear函数遍历删除HashMap中存入的ViewModel对象,然后触发onCleared函数。


 420
420


 被折叠的 条评论
为什么被折叠?


