


建立插件开发基本环境
 1. 下载Notepad++插件的最新发行版本;
 2. 解压文件后,打开使用Visual Studio软件打开NppPluginTemplate.vcproj文件;
 3. 在PluginDefinition.h文件中定义插件名称;
 4. 在PluginDefinition.h文件中定义插件命令数;
 5. 在PluginDefinition.cpp中客制化插件命令名称和相关的函数名;
 6. 定义相关函数
如何实现代码
开发者可根据PluginDefinition.handPluginDefinition.cpp的注释填充代码:
//-- STEP 1. DEFINE YOUR PLUGIN NAME --//
定义插件名称
//-- STEP 2. DEFINE YOUR PLUGIN COMMAND NUMBER --//
定义插件命令数
//-- STEP 3. CUSTOMIZE YOUR PLUGIN COMMANDS --//
客制化插件命令
//-- STEP 4. DEFINE YOUR ASSOCIATED FUNCTIONS --//
定义相关函数
开发复杂插件命令需要了解Notepad++插件系统的知识,如果遇到技术方面的问题,请登录插件开发论坛。
实例说明
下面的文字援引自官方文档:
A good sample illustrates better the whole picture than a detailed documentation.
PluginDefinition.h文件说明
说明
在该文件中需要改动三处:
- 定义插件名称
const TCHAR NPP_PLUGIN_NAME[] = TEXT("Dummy"); //此处定义插件名称,具体请参考下面的图片说明 - 定义插件命令数量
const int nbFunc = 3; //此处用于说明该插件共有三个命令 - 插件命令声明
	//
	// Your plugin command functions
	//
	void hello();
	void helloDlg();
	void dummy();		//在官方模板的基础上添加自定义命令dummy
源代码
#ifndef PLUGINDEFINITION_H
#define PLUGINDEFINITION_H

//
// All difinitions of plugin interface
//
#include "PluginInterface.h"

//-------------------------------------//
//-- STEP 1. DEFINE YOUR PLUGIN NAME --//
//-------------------------------------//
// Here define your plugin name
//
const TCHAR NPP_PLUGIN_NAME[] = TEXT("Dummy");	//此处定义插件名称,具体请参考下面的图片说明

//-----------------------------------------------//
//-- STEP 2. DEFINE YOUR PLUGIN COMMAND NUMBER --//
//-----------------------------------------------//
//
// Here define the number of your plugin commands
//
const int nbFunc = 3;	//此处用于说明该插件共有三个命令


//
// Initialization of your plugin data
// It will be called while plugin loading
//
void pluginInit(HANDLE hModule);

//
// Cleaning of your plugin
// It will be called while plugin unloading
//
void pluginCleanUp();

//
//Initialization of your plugin commands
//
void commandMenuInit();

//
//Clean up your plugin commands allocation (if any)
//
void commandMenuCleanUp();

//
// Function which sets your command
//
bool setCommand(size_t index, TCHAR *cmdName, PFUNCPLUGINCMD pFunc, ShortcutKey *sk = NULL, bool check0nInit = false);


//
// Your plugin command functions
//
void hello();
void helloDlg();
void dummy();		//在官方模板的基础上添加自定义命令dummy
#endif //PLUGINDEFINITION_H
PluginDefinition.cpp文件说明
说明
在该文件中需要改动两处:
- 将插件命令与插件菜单绑定
    setCommand(0, TEXT("Hello Notepad++"), hello, NULL, false);
    setCommand(1, TEXT("Hello (with dialog)"), helloDlg, NULL, false);
	setCommand(2, TEXT("Hello Dummy"), dummy, NULL, false);	//该命令的作用类似于将插件命令与插件菜单进行绑定
从上述代码可以看出,自定义插件命令dummy与插件dummy的第三个菜单项(Hello Dummy)进行绑定(即用户单击插件菜单时,执行对应的插件命令)
- 实现
PluginDefinition.h中声明的插件命令
	//实现自定义插件命令
	void dummy()
	{
		::MessageBox(NULL, TEXT("Hello, Dummy!"), TEXT("Notepad++ Plugin Template"), MB_OK);
	}
源代码
#include "PluginDefinition.h"
#include "menuCmdID.h"

//
// The plugin data that Notepad++ needs
//
FuncItem funcItem[nbFunc];

//
// The data of Notepad++ that you can use in your plugin commands
//
NppData nppData;

//
// Initialize your plugin data here
// It will be called while plugin loading
void pluginInit(HANDLE /*hModule*/)
{
}

//
// Here you can do the clean up, save the parameters (if any) for the next session
//
void pluginCleanUp()
{
}

//
// Initialization of your plugin commands
// You should fill your plugins commands here
void commandMenuInit()
{

    //--------------------------------------------//
    //-- STEP 3. CUSTOMIZE YOUR PLUGIN COMMANDS --//
    //--------------------------------------------//
    // with function :
    // setCommand(int index,                      // zero based number to indicate the order of command
    //            TCHAR *commandName,             // the command name that you want to see in plugin menu
    //            PFUNCPLUGINCMD functionPointer, // the symbol of function (function pointer) associated with this command. The body should be defined below. See Step 4.
    //            ShortcutKey *shortcut,          // optional. Define a shortcut to trigger this command
    //            bool check0nInit                // optional. Make this menu item be checked visually
    //            );
    setCommand(0, TEXT("Hello Notepad++"), hello, NULL, false);
    setCommand(1, TEXT("Hello (with dialog)"), helloDlg, NULL, false);
	setCommand(2, TEXT("Hello Sugon"), sugon, NULL, false);	//添加自定义命令
}

//
// Here you can do the clean up (especially for the shortcut)
//
void commandMenuCleanUp()
{
	// Don't forget to deallocate your shortcut here
}

//
// This function help you to initialize your plugin commands
//
bool setCommand(size_t index, TCHAR *cmdName, PFUNCPLUGINCMD pFunc, ShortcutKey *sk, bool check0nInit)
{
    if (index >= nbFunc)
        return false;

    if (!pFunc)
        return false;

    lstrcpy(funcItem[index]._itemName, cmdName);
    funcItem[index]._pFunc = pFunc;
    funcItem[index]._init2Check = check0nInit;
    funcItem[index]._pShKey = sk;

    return true;
}

//----------------------------------------------//
//-- STEP 4. DEFINE YOUR ASSOCIATED FUNCTIONS --//
//----------------------------------------------//
void hello()
{
    // Open a new document
    ::SendMessage(nppData._nppHandle, NPPM_MENUCOMMAND, 0, IDM_FILE_NEW);

    // Get the current scintilla
    int which = -1;
    ::SendMessage(nppData._nppHandle, NPPM_GETCURRENTSCINTILLA, 0, (LPARAM)&which);
    if (which == -1)
        return;
    HWND curScintilla = (which == 0)?nppData._scintillaMainHandle:nppData._scintillaSecondHandle;

    // Say hello now :
    // Scintilla control has no Unicode mode, so we use (char *) here
    ::SendMessage(curScintilla, SCI_SETTEXT, 0, (LPARAM)"Hello, Notepad++!");
}

void helloDlg()
{
    ::MessageBox(NULL, TEXT("Hello, Notepad++!"), TEXT("Notepad++ Plugin Template"), MB_OK);
}

//实现自定义插件命令
void sugon()
{
	::MessageBox(NULL, TEXT("Hello, Sugon!"), TEXT("Notepad++ Plugin Template"), MB_OK);
}
验证
代码编译
需要根据软件版本和主机选择生成32位和64位。

在点击编译后,如下图生成输出日志,提示生成成功,同时有红框的提示(经验证,红框报的问题不影响功能,忽略)

添加自定义插件到Notepad++目录下
- 在
Notepad+++的安装目录(C:\Program Files\Notepad++\plugins)下创建自定义插件的文件夹Dummy;

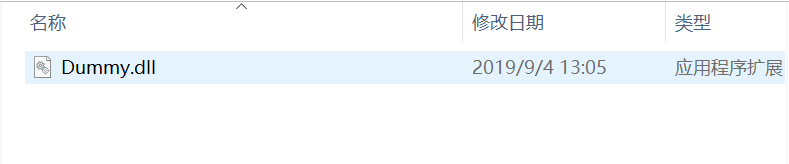
- 将生成的
NppPluginTemplate.dll的名称改为插件名称dummy.dll,拷贝文件到1中建立的dummy文件夹下面。(非必要步骤,名称可不改,但是该名称必须与第1步中的文件夹名称相同;如果不相同,插件无法正常加载);
- 打开
Notepad++软件,验证插件功能
 从上图可以看出:插件已经正确加载,且自定义插件命令正如代码的要求位于从上至下第三个位置。
 - 执行自定义插件命令


 2615
2615


 被折叠的 条评论
为什么被折叠?
被折叠的 条评论
为什么被折叠?
 到【灌水乐园】发言


