


昨天讲了单选按钮,今天说下复选框CheckBox,它的主要功能是完成复选框的操作,当用户输入信息时,可以一次性选择多个内容,例如你喜欢吃什么水果,结果可能是多种,这个时候就可以用复选框来实现逻辑。此类的定义如下(http://developer.android.com/reference/android/widget/CheckBox.html):
发现和昨天radiobutton差不多了,所以今天后半部分自定义好看的CheckBox会和昨天差不多。同样下个例子来看下用法:
运行效果:
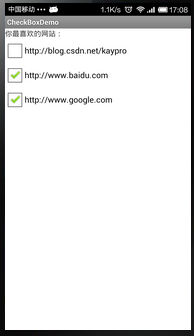
main.xml:
<LinearLayout xmlns:android="http://schemas.android.com/apk/res/android"
    xmlns:tools="http://schemas.android.com/tools"
    android:id="@+id/LinearLayout1"
    android:layout_width="match_parent"
    android:layout_height="match_parent"
    android:orientation="vertical" >

    <TextView
        android:id="@+id/info"
        android:layout_width="fill_parent"
        android:layout_height="wrap_content"
        android:text="你最喜欢的网站:" />

    <CheckBox
        android:id="@+id/one"
        android:layout_width="fill_parent"
        android:layout_height="wrap_content"
        android:text="http://blog.csdn.net/kaypro" />

    <CheckBox
        android:id="@+id/two"
        android:layout_width="fill_parent"
        android:layout_height="wrap_content"
        android:checked="true"
        android:text="http://www.baidu.com" />

    <CheckBox
        android:id="@+id/three"
        android:layout_width="fill_parent"
        android:layout_height="wrap_content"
        android:checked="true"
        android:text="http://www.google.com" />

</LinearLayout>
里面的属性昨天都已经说过了,忘记的可以回去看看,下面开始自定义checkbox。同样,首先准备两张图片
 check_down.png和
 check_normal.png。
同样新建selector文件,check_selector.xml:
<?xml version="1.0" encoding="utf-8"?>
<selector xmlns:android="http://schemas.android.com/apk/res/android" >
    <item android:state_checked="false"
          android:state_enabled="true"
          android:drawable="@drawable/check_normal" />
    <item android:state_checked="true"
          android:state_enabled="true"
          android:drawable="@drawable/check_down" />
</selector>
昨天讲到对于重复代码的最好新建个style便于维护,今天就采用这种方式,在res->values文件夹下面的styles中添加如下代码:
<style name="CheckBox">
 	    <item name="android:button">@drawable/check_selector</item>
</style>
<LinearLayout xmlns:android="http://schemas.android.com/apk/res/android"
    xmlns:tools="http://schemas.android.com/tools"
    android:id="@+id/LinearLayout1"
    android:layout_width="match_parent"
    android:layout_height="match_parent"
    android:orientation="vertical" >

    <TextView
        android:id="@+id/info"
        android:layout_width="fill_parent"
        android:layout_height="wrap_content"
        android:text="你最喜欢的网站:" />

    <CheckBox
        android:id="@+id/one"
        style="@style/CheckBox"
        android:layout_width="fill_parent"
        android:layout_height="wrap_content"
        android:text="http://blog.csdn.net/kaypro" />

    <CheckBox
        android:id="@+id/two"
        style="@style/CheckBox"
        android:layout_width="fill_parent"
        android:layout_height="wrap_content"
        android:checked="true"
        android:text="http://www.baidu.com" />

    <CheckBox
        android:id="@+id/three"
        style="@style/CheckBox"
        android:layout_width="fill_parent"
        android:layout_height="wrap_content"
        android:checked="true"
        android:text="http://www.google.com" />

</LinearLayout>
运行效果如下:
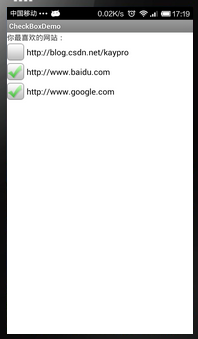
总的来说和radiobutton自定义的时候一样,今天就说到这里了。


 941
941

 被折叠的 条评论
为什么被折叠?
被折叠的 条评论
为什么被折叠?
 到【灌水乐园】发言


