


1、下载boost库
从http://www.boost.org上下载到目前最新的boost库,快速传送门:boost_1_53_0.zip,当然你也可以从http://sourceforge.net/projects/boost/files/boost-jam/这里得到源代码,快速传送门:boost_1_53_0.zip(98.1 MB)
我使用了后者
2、得到源代码之后,使用vs2012的cl.exe编译
进入到源代码目录中
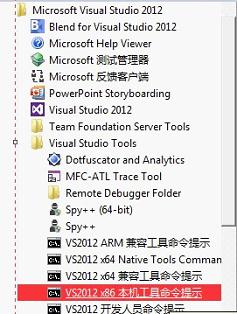
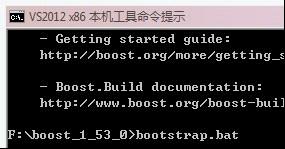
3、建立编译工具bjam.exe----需要执行bootstrap.bat
4、指定编译命令
指定msvc版本11.0对应的是vs2012,--stagedir是指定编译后存放的目录
bjam stage --toolset=msvc-11.0 --without-graph --without-graph_parallel --without-math --without-mpi --without-python --without-serialization --without-wave --stagedir="F:\boost\boost_1_53_0\bin\vc11" link=static runtime-link=shared runtime-link=static threading=multi debug release
稍微等一会,库就编译好了……
5、开始使用boost
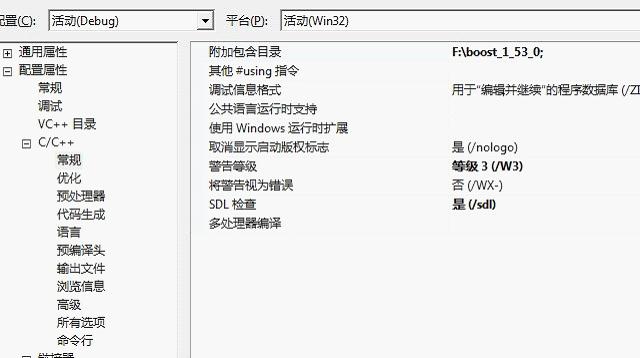
首先需要设定文件包含目录:
我的boost库解压在F盘下
设定库目录:
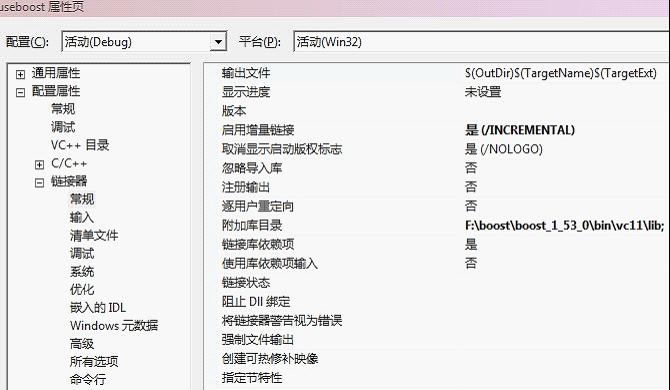
“F:\boost\boost_1_53_0\”是我编译的出来lib的目录
然后建立我们的第一个boost项目,代码如下:
#include "stdafx.h"
#include "boost/thread.hpp"
#include "iostream"
using namespace std;
void mythread()
{
cout << " hello,thread! " << endl;
}
int _tmain(int argc, _TCHAR* argv[])
{
boost::function<void()> f(mythread);
boost::thread t(f);
t.join();
cout << " thread is over! " << endl;
return 0;
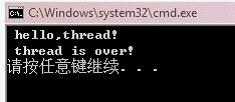
}6.这是输出:


 850
850

 被折叠的 条评论
为什么被折叠?
被折叠的 条评论
为什么被折叠?
 到【灌水乐园】发言


